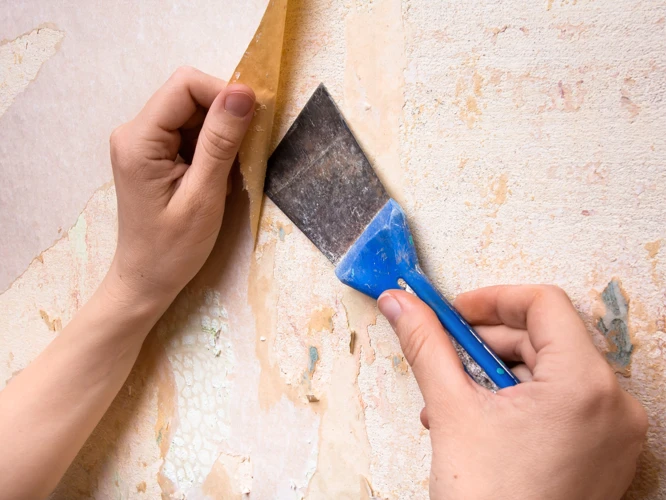
Have you ever tried to remove masking tape only to find that the glue has dried onto your surface? It can be frustrating to say the least. But before you start to panic, know that removing dried masking tape glue is not an impossible task. With the right tools and techniques, you can easily get rid of the stubborn adhesive without causing any damage. In this comprehensive guide, we will take you through the step-by-step process of removing dried masking tape glue from a variety of surfaces. Whether you’re working on a DIY project or trying to clean up after a painting job, this guide will provide you with all the information you need to tackle the task successfully. So, let’s get started!
Step 1: Gather Your Materials
Before you start removing dried masking tape glue, it’s important to gather all the necessary materials and take some safety precautions. Proper preparation will ensure that you’re able to successfully remove the glue without damaging the underlying surface. In this step, we’ll go over what materials you’ll need and some safety tips to keep in mind. And if you’re interested in learning more about removing other types of glue, such as super glue or polyurethane glue, be sure to check out our articles on polyurethane glue removal and super glue removal.
Materials Needed
When gearing up to remove dried masking tape glue, it’s important to have the right tools at your disposal. Here is a list of materials that can come in handy for this task:
| Materials | Purpose |
| Clean, dry cloths | To wipe down the surface and remove glue residue |
| Oil (vegetable or olive oil) | To break down the adhesive and loosen the glue |
| Rubbing alcohol | To dissolve the glue and clean the surface |
| Vinegar | To soften the glue |
| Commercial adhesive removers (ex. Goo Gone) | To effectively and quickly remove glue |
| Sandpaper or razor blade | To physically remove the glue |
It’s important to take safety precautions when using these materials, such as wearing gloves and working in a well-ventilated area. Additionally, it’s wise to conduct a patch test on an inconspicuous area of the surface to ensure that the material won’t cause damage. In case you need to remove other types of glue, you can check out our guides on how to cure LOCA glue, how to get super glue out of black clothes, how to remove super glue haze from plastic, how to remove Gorilla Wood Glue, how to remove Gorilla Glue from car paint, what removes duct tape glue, how to get glitter glue out of carpet, and how to remove glue on metal.
Safety Precautions
When removing dried masking tape glue, it’s important to take certain safety precautions to avoid any harm or damage. Here are some tips to keep in mind before starting the removal process:
- Wear protective gear: Always wear gloves to protect your skin from harsh chemicals or hot temperatures. If you’re using sandpaper or a razor blade, wear safety glasses to protect your eyes.
- Ventilate the area: If you’re working indoors, make sure the room is well-ventilated to avoid the buildup of fumes from chemicals or smoke from heat sources.
- Read and follow instructions: Whether you’re using a commercial product or a homemade cleaning solution, make sure to read and follow the instructions carefully. This will help ensure that you use the product safely and effectively.
- Keep children and pets away: The products and tools used to remove masking tape glue can be harmful if ingested or touched by children or pets. Keep them away from the work area until you’re done.
- Work gradually: Don’t rush the process. Take your time and work methodically to avoid accidentally damaging the surface or hurting yourself.
- Dispose of materials safely: Once you’re done, dispose of any waste materials, such as used sandpaper or chemical-soaked rags, in a safe and appropriate manner.
By following these safety precautions, you can minimize any risks associated with removing dried masking tape glue and get the job done safely and effectively.
Step 2: Test Your Surface
Before diving into the removal process, it’s important to test the surface of the material to ensure that it won’t be damaged during the removal process. This step is crucial to avoid any further damage or costly repairs. Testing the surface will also determine if the removal product or technique is suitable for the specific surface you are trying to clean. Follow the simple yet important steps below to proceed with caution.
Patch Test for Surface Damage
Before attempting to remove the dried masking tape glue, it’s essential to check whether it will cause any damage to the surface. A patch test for surface damage is an important pre-removal step.
Here are the steps to conduct a patch test for surface damage:
- Select an inconspicuous area of the surface – Choose a spot that is not easily visible.
- Cut a small piece of masking tape – Cut a quarter-sized piece of masking tape and place it onto the surface. Press down firmly.
- Wait at least 15 minutes – Let the tape sit on the surface for at least 15 minutes.
- Peel off the tape slowly – Carefully remove the tape and examine the surface for any damage.
If the tape has caused any damage to the surface, it’s best to avoid using removal techniques that may worsen the damage. Instead, seek the help of a professional to avoid any further harm.
However, if the surface is in good condition, proceed with the patch test for product suitability to ensure that the removal technique chosen does not cause any damage to the surface or fail to remove the glue.
Patch Test for Product Suitability
Before tackling the dried masking tape glue on your surface, it is important to make sure that the product you plan on using is suitable for the surface. This will help avoid further damage to the material. You can do this by performing a patch test for product suitability.
The table below outlines the steps for conducting a patch test for product suitability:
| Step | Action |
|---|---|
| 1 | Select a small, inconspicuous area on the surface. |
| 2 | Apply a small amount of the removal product to the area using a cotton swab or a soft cloth. |
| 3 | Wait for the recommended amount of time for the product to take effect. |
| 4 | Use a soft, clean cloth to wipe away the product. |
| 5 | Examine the area for any signs of damage or discoloration. |
| 6 | If there is no damage or discoloration, it is safe to proceed with the removal process. If there is damage or discoloration, try a different product or technique, or seek professional help. |
It is important to follow the instructions of the product you plan on using, as different products have different recommended wait times. Additionally, it is important to use a soft, clean cloth to avoid any further damage to the surface. By performing this simple patch test, you can rest assured that the product you plan on using is safe and effective on the surface.
Step 3: Choose Your Removal Technique
Now that you’ve gathered your materials and tested the surface, it’s time to choose the best removal technique for your dried masking tape glue. There are several methods to choose from, each with its own benefits and drawbacks. It’s important to select the right technique based on the type of surface you’re working with and the severity of the adhesive residue. In this step, we’ll explore the different options available to you and provide guidance on which technique will work best for your particular situation. So, put on your thinking cap and get ready to select the optimal removal technique.
Technique 1: Heat and Oil
One effective technique for removing dried masking tape glue is using heat and oil. This method involves softening the glue with heat and then using oil to break it down. Here are the steps to follow:
- Turn up the Heat: Use a handheld hair dryer or a heat gun to apply heat to the area with the tape residue. Keep the nozzle about two inches away from the surface and move it around to prevent overheating. You want to make the glue soft and pliable, but not melt it completely.
- Add Oil: Once the glue is softened, apply a generous amount of oil to the area. You can use any type of oil, such as vegetable oil, olive oil, or coconut oil. The oil will help to break down the glue and make it easier to remove.
- Let the Oil Soak In: Allow the oil to soak into the glue for at least 10-15 minutes. This will give the oil enough time to penetrate the glue and make it easier to remove.
- Scrub the Area: Use a soft-bristled brush or a cloth to scrub the area in a circular motion. The glue should start to come off in small flakes and bits. Keep adding more oil as needed to keep the area lubricated.
- Clean the Surface: Once the glue is removed, wipe the surface clean with a clean cloth and some warm, soapy water. You may need to repeat the process several times to remove all the residue.
With this technique, it’s important to be cautious with the heat so as not to damage the surface. You can also use a plastic scraper to gently remove any remaining glue, being careful not to scratch the surface. This method is particularly useful for removing masking tape residue from glass, metal, and plastic surfaces.
Technique 2: Rubbing Alcohol
Rubbing alcohol is a very effective method for removing dried masking tape glue. It is especially useful for surfaces that might be damaged by heat, as this technique does not require any heat application. Here are the steps to follow when using rubbing alcohol to remove dried masking tape glue:
- Step 1: Gather your materials. You will need rubbing alcohol, cotton swabs, and a scraper (such as an old credit card or plastic spatula).
- Step 2: Apply the rubbing alcohol. Dip a cotton swab into the rubbing alcohol and apply it to the glue residue. Let it sit for a few minutes to allow the alcohol to dissolve the glue.
- Step 3: Scrape off the residue. Using a scraper, gently scrape off the glue residue. Be careful not to damage the surface underneath.
- Step 4: Repeat as necessary. Depending on how much glue there is, you may need to repeat this process several times to completely remove the residue.
Rubbing alcohol is a great choice for removing dried masking tape glue because it is affordable, readily available, and effective. However, it is important to note that rubbing alcohol can sometimes damage certain surfaces, such as painted or varnished surfaces. Before using rubbing alcohol, it is a good idea to do a patch test in an inconspicuous area to make sure it won’t damage the surface you are working on.
It’s also important to note that rubbing alcohol should only be used in a well-ventilated area. The fumes can be toxic if inhaled in large quantities. Additionally, you should avoid getting rubbing alcohol on your skin or in your eyes. If you do get it on your skin, wash it off with soap and water. If you get it in your eyes, rinse them thoroughly with water and seek medical attention if necessary.
Using rubbing alcohol can be an effective and affordable way to remove dried masking tape glue from a variety of surfaces. Just be sure to use it safely and carefully, and always test it in an inconspicuous area first.
Technique 3: Vinegar
Vinegar is a versatile household item that can also be effective in removing dried masking tape glue. It contains acetic acid which helps to dissolve sticky substances. Here is a table outlining the steps for using vinegar as a removal technique:
| Materials Needed: | – White vinegar | – Cotton balls or swabs | – Plastic scraper or putty knife |
| Step 1: | Apply vinegar to a cotton ball or swab. |  |
|
| Step 2: | Place the cotton ball or swab onto the adhesive and let it sit for a few minutes. | ||
| Step 3: | Gently scrape off the adhesive with a plastic scraper or putty knife. | ||
| Safety Precautions: Always wear gloves and work in a well-ventilated area when using vinegar. | |||
It’s important to note that vinegar may not work for all surfaces, and it’s always recommended to perform a patch test before attempting to remove the adhesive. If the vinegar isn’t effective, consider trying another removal technique.
Technique 4: Commercial Products
When it comes to removing dried masking tape glue, commercial products can be incredibly effective. These products are specially designed to break down and dissolve adhesives, making them an excellent option for removing stubborn residue. Here are some top commercial products to try:
- Goo Gone: This popular adhesive remover can be used on a variety of surfaces and is particularly effective on stickers and tape residue.
- WD-40: Most people are familiar with this versatile spray lubricant, but it can also be used to remove adhesive residue. Just spray a little onto the affected area and let it sit for a few minutes before wiping away.
- Goof Off: This heavy-duty remover is designed for tough jobs, and can be used on a range of surfaces, including fiberglass and finished wood.
- Krud Kutter: This powerful cleaner is ideal for removing tough adhesives, as well as grease and grime.
- 3M Adhesive Remover: This specially formulated remover is designed to remove adhesive residue without damaging the surface underneath.
When using commercial products, it’s important to follow the manufacturer’s instructions carefully. In most cases, you’ll need to apply the product to the affected area, let it sit for a few minutes to penetrate the adhesive, and then wipe or scrape away the residue. Be sure to wear gloves and work in a well-ventilated area, as some products can be harsh or emit strong fumes. Additionally, some commercial products may be too harsh for certain surfaces, so always test in an inconspicuous area first to avoid any potential damage.
Technique 5: Homemade Solutions
For those who prefer using natural or homemade solutions, there are a few effective options for removing dried masking tape glue. Check out the table below for detailed recipes and instructions.
| Homemade Solution | Ingredients | Instructions |
|---|---|---|
| Vinegar and Baking Soda | – White vinegar – Baking soda |
1. Apply vinegar to the affected area 2. Sprinkle baking soda on top of the vinegar 3. Allow the mixture to sit for a few minutes 4. Use a soft cloth to scrub away the glue residue 5. Rinse the area with clean water and dry |
| Citrus and Olive Oil | – Citrus essential oil – Olive oil |
1. Combine equal parts citrus oil and olive oil 2. Dip a cloth in the mixture and apply to the glue stain 3. Allow the solution to soak in for a few minutes 4. Use a scraper or credit card to gently remove the glue 5. Wipe away any residue with a clean cloth |
| Nail Polish Remover | – Nail polish remover – Cotton ball or swab |
1. Apply nail polish remover to a cotton ball or swab 2. Gently rub the glue residue until it starts to loosen 3. Continue to rub until the glue is removed 4. Wipe away any excess nail polish remover with a clean cloth Note: Nail polish remover may damage certain surfaces, so be sure to perform a patch test and use caution when using this method. |
Tip: Always perform a patch test on an inconspicuous area and wear gloves when using any of these solutions to avoid skin irritation. Also, make sure to properly dispose of any materials used in the removal process. With a little bit of patience and experimentation, you should be able to find the perfect solution for removing dried masking tape glue from your surfaces!
Technique 6: Sandpaper or Razor Blade
When it comes to removing dried masking tape glue, sometimes the best option is to physically scrape it off using sandpaper or a razor blade. This technique requires a bit of caution, as there is potential to damage the underlying surface if done improperly. However, with careful attention and a gentle touch, this method can be effective.
Materials Needed:
- Sandpaper (medium grit)
- Razor blade or scraper tool
- Paper towels
- Clean cloth
Safety Precautions:
- Wear gloves to protect your hands from injury
- Work in a well-ventilated area to avoid inhaling dust or debris
Step-by-Step Instructions:
- Start by using the razor blade or scraper tool to gently scrape away any large chunks of dried glue. Work in a back-and-forth motion, taking care not to scrape too hard or press too firmly on the surface.
- Once you’ve removed as much glue as possible with the scraper, use the sandpaper to gently sand away any remaining residue. Again, take care to use light pressure and avoid sanding too hard, as this could scratch or damage the surface.
- As you sand, periodically clean the surface with a paper towel to remove any dust or debris that has accumulated.
- Once you’ve removed all of the glue residue, wipe down the surface with a clean cloth to remove any remaining dust or debris.
Advantages:
- Inexpensive method as materials used are widely available
- Effective in removing thick, stubborn glue residue
Disadvantages:
- Requires physical effort and patience
- Potential to scratch or damage surface if done improperly
Tips:
- If using a razor blade, make sure to keep the blade at a low angle to avoid gouging the surface.
- Use a lighter grit sandpaper to start and gradually use a higher grit to avoid damaging the surface.
While sandpaper or a razor blade may not be the most glamorous option for removing dried masking tape glue, it can be an effective solution for certain surfaces with patience and care. As always, proceed with caution and follow all necessary safety precautions to avoid injury or damage.
Step 4: Apply the Removal Technique
Now that you have gathered your materials, tested your surface, and chosen the best removal technique for your dried masking tape glue, it’s time to put your plan into action. Applying the removal technique can be a delicate process, as it requires patience and precision to avoid damaging the surface further. This step is crucial to ensure that the glue is removed completely and effectively, leaving your surface looking clean and smooth. In this section, we will guide you through the process, providing you with step-by-step instructions for each technique. Get ready to roll up your sleeves and let’s get started!
Step-by-Step Instructions for Each Technique
Regardless of the technique you choose to remove dried masking tape glue, each one will require a specific set of steps to follow. Here are the step-by-step instructions for each of the six techniques mentioned in this guide:
Technique 1: Heat and Oil
1. Heat up a small amount of cooking oil in a microwave-safe bowl for 10-15 seconds.
2. Apply the warm oil to the glue residue with a cloth or paper towel, then let it sit for a few minutes.
3. Once the glue has loosened, use a plastic scraper or old credit card to gently lift it off the surface.
4. If there is any residual glue left over, repeat the process until it is completely removed.
5. Finally, clean the area with soap and warm water to remove any remaining oil.
Technique 2: Rubbing Alcohol
1. Soak a cloth or cotton ball in rubbing alcohol.
2. Apply the alcohol-soaked cloth or cotton ball to the glue residue and let it sit for a few minutes.
3. Use a plastic scraper or old credit card to gently lift the glue off the surface.
4. If there is any residual glue left over, repeat the process until it is completely removed.
5. Finally, clean the area with soap and warm water to remove any remaining alcohol.
Technique 3: Vinegar
1. Mix equal parts of white vinegar and warm water in a bowl.
2. Apply the vinegar mixture to the glue residue with a cloth or sponge.
3. Let it sit for 15-20 minutes.
4. Use a plastic scraper or old credit card to gently lift the glue off the surface.
5. If there is any residual glue left over, repeat the process until it is completely removed.
6. Finally, clean the area with soap and warm water to remove any remaining vinegar.
Technique 4: Commercial Products
1. Read and follow the instructions on the commercial removal product.
2. Apply the product to the glue residue and let it sit for the recommended amount of time.
3. Use a plastic scraper or old credit card to gently lift the glue off the surface.
4. If there is any residual glue left over, repeat the process until it is completely removed.
5. Finally, clean the area with soap and warm water to remove any remaining product.
Technique 5: Homemade Solutions
1. Mixed together a 1:1 solution of baking soda and coconut oil, or baking soda and vegetable oil, forming a paste.
2. Apply the homemade mixture to the glue residue and let it sit for a few minutes.
3. Use a plastic scraper or old credit card to gently lift the glue off the surface.
4. If there is any residual glue left over, repeat the process until it is completely removed.
5. Finally, clean the area with soap and warm water to remove any remaining mixture.
Technique 6: Sandpaper or Razor Blade
1. Gently sand the glue residue with very fine sandpaper until the glue is removed.
2. Alternatively, use a razor blade to carefully scrape the glue off the surface.
3. Finish by cleaning the area with soap and warm water.
Remember to follow all safety precautions when handling materials and use caution when scraping surfaces with a razor blade. All techniques require patience and attention to detail to ensure you remove the glue residue completely and avoid damaging the surface.
Step 5: Clean and Finish
Once you have successfully removed the dried masking tape glue, it’s important to clean up any remaining residue and restore the surface to its original state. This step may seem insignificant, but it can make a big difference in the overall appearance of the surface. In this final step of the process, we’ll discuss how to properly clean the surface and finish the job with a professional touch. Let’s dive into the details.
Cleaning Up Residue and Product
Once you successfully removed the dried masking tape glue, there might still be some residue and product left on the surface. Using a few simple steps, you can get rid of any leftover glue or solution.
Step 1: Get a clean cloth or paper towel and dampen it with warm water. Gently wipe the surface to remove any remaining product that hasn’t dried yet.
Step 2: If there is still some glue residue left, use a scraper or your fingernails to loosen it from the surface. Be careful not to scratch or damage the surface.
Step 3: Mix equal parts of water and rubbing alcohol in a spray bottle. Shake well and spray the solution onto the area with residue. Let it sit for 5-10 minutes.
Step 4: Use a clean cloth to wipe away the residue. If there are still some stubborn spots, repeat the spraying process and wait another 5-10 minutes.
Step 5: Once all the residue is removed, clean the surface with warm, soapy water and rinse thoroughly. Dry with a fresh cloth.
Step 6: If necessary, apply a small amount of furniture polish or mineral oil to restore any damaged finish.
By following these steps, you can clean up any remaining masking tape glue residue and have your surface looking as good as new in no time.
Restoring the Surface
After successfully removing the dried masking tape glue, it’s important to restore the surface to its previous condition. Below is a table with common surfaces and recommended methods for restoring them:
| Surface Type | Recommended Method |
|---|---|
| Wood | Use fine-grit sandpaper to gently remove any remaining residue, then clean with a wood cleaner and apply a polish or wax to restore shine. |
| Glass | Use a glass cleaner and a lint-free cloth to remove any remaining residue. Polish with a microfiber cloth for a streak-free finish. |
| Metal | Use a metal cleaner and a soft cloth to remove any remaining residue. Apply a coat of wax or oil to prevent rust or corrosion. |
| Plastic | Use a plastic cleaner and a soft cloth to remove any remaining residue. Apply a coat of polish or wax to restore shine and protect against future damage. |
It’s important to note that some surfaces may require specialized restoration techniques. Always follow manufacturer recommendations and exercise caution when using any product or method on a surface. With proper care and attention, you can return your surfaces to their original condition and enjoy a clean and polished home or workspace.
Conclusion
As we wrap up this comprehensive guide on how to remove dried masking tape glue, it’s important to note that there are several effective techniques to choose from. With a little bit of patience and the right materials, you can remove even the most stubborn residue from a variety of surfaces. Remember, safety should always come first, so take necessary precautions before beginning any removal process. Keep in mind these tips and tricks for success to avoid any mishaps during your project. Now, let’s delve into the final details on how to clean and restore your surface after removing the residue.
Tips and Tricks for Success
Here are some tips and tricks that can help you successfully remove dried masking tape glue:
| Tip 1: | Avoid using sharp tools like razor blades or sandpaper on delicate surfaces to prevent further damage. |
| Tip 2: | Always start with the mildest technique first before moving on to stronger ones to prevent damaging the surface. |
| Tip 3: | Use a heat gun or hair dryer on a low setting for Technique 1 to avoid burning or discoloring the surface. |
| Tip 4: | For Technique 2, use a lint-free cloth or cotton swab to prevent leaving fibers behind on the surface. |
| Tip 5: | When using vinegar for Technique 3, try a small inconspicuous area first to see if it affects the surface color or finish. |
| Tip 6: | For Technique 4, make sure you follow the manufacturer’s instructions on the label and wear protective gloves if necessary. |
| Tip 7: | When creating a homemade solution for Technique 5, always test it on a small area before applying it to the entire surface. |
| Tip 8: | After removing the glue, clean the surface with a mild soap and water solution to remove any residue from the removal product. |
| Tip 9: | If the surface has been damaged by the removal process, use a touch-up paint or finish to restore it to its original state. |
By following these tips and tricks, you can effectively remove dried masking tape glue without causing further damage to the surface. Always exercise caution and use the appropriate techniques and products for your specific surface type.
Final Thoughts
As a final reminder, removing dried masking tape glue can sometimes be a tricky task. However, with the right tools and techniques, you can get the job done effectively and efficiently. Here are some key takeaways to keep in mind:
| Be patient: | Removing glue residue can take some time, especially if it’s been stuck on a surface for a while. Take your time and be patient with the process. Rushing can cause damage to the surface or result in incomplete glue removal. |
| Safety first: | Always use proper safety gear when handling potentially harmful products like solvents or heat sources. This includes gloves, safety goggles, and face masks if necessary. Also, make sure to work in a well-ventilated area to minimize inhalation of fumes. |
| Test before you act: | Before using any removal technique, always test a small, inconspicuous area first to ensure that it won’t damage the surface. Additionally, test the product or solution on a small portion of the glue to make sure it won’t cause any adverse reactions. |
| Keep it clean: | Once you remove the glue, be sure to clean the area thoroughly with soap and water to remove any leftover product or residue. This will help ensure that the surface is completely clean and ready for use. |
| Consider prevention: | Rather than dealing with the hassle of removing dried masking tape glue, prevent it from happening in the first place. Use painter’s tape or other types of tape designed specifically for your surface to avoid sticking and residue buildup. |
By following these tips and tricks, you can successfully remove dried masking tape glue from a variety of surfaces. Remember, patience and caution are key, and always take proper safety precautions to avoid harm to yourself or your belongings.
Frequently Asked Questions
What is masking tape glue?
Masking tape glue is the adhesive residue left behind after removing masking tape, which is commonly used for painting and other DIY projects.
Can masking tape glue damage surfaces?
Yes, if left for too long, masking tape glue can damage surfaces such as paint, wood, and plastic. It’s important to remove it promptly and carefully.
What are some safety precautions to take when removing dried masking tape glue?
It’s important to wear gloves to protect your skin and avoid inhaling chemical fumes. Also, make sure the area is well-ventilated and keep any flammable materials away from heat sources.
How do I know which removal technique to use?
It depends on the surface and the type of masking tape glue. Test each technique on a small, inconspicuous area first to avoid causing damage.
Can household items be used to remove masking tape glue?
Yes, household items such as vinegar, baking soda, and vegetable oil can be used as effective removal agents.
What if the masking tape glue is extremely stubborn?
If the glue is extremely stubborn, you may need to use a commercial product specifically designed for removing adhesive residue.
Is sandpaper or a razor blade a safe technique for removing masking tape glue?
Sandpaper and razor blades should only be used as a last resort and with extreme caution. They can easily damage surfaces and can be dangerous if not used properly.
How can I prevent masking tape glue from sticking in the first place?
Avoid leaving masking tape on surfaces for extended periods of time, and remove it slowly and carefully at a 45-degree angle.
Can I clean dried masking tape glue from fabric?
Yes, rubbing alcohol and vinegar can be used to remove masking tape glue from fabric. However, always test on an inconspicuous area first.
What are some tips for successfully removing masking tape glue?
Be patient and take your time, follow the instructions carefully, and use the least aggressive technique possible for the type of surface and glue.