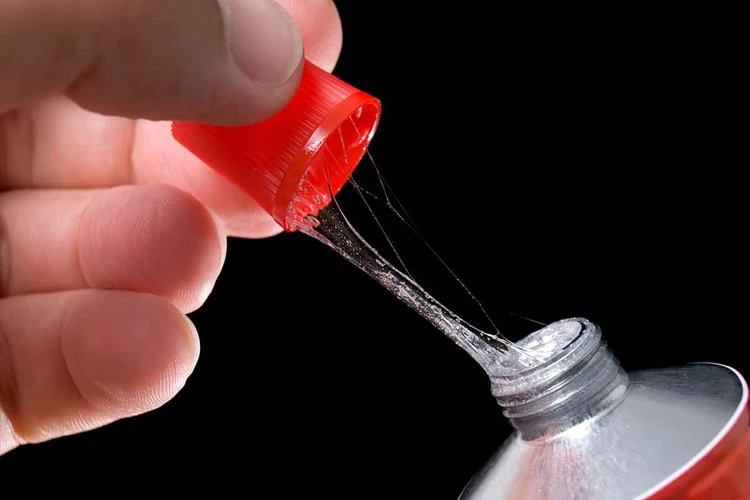
Have you ever been in the middle of a project and found that you can’t open your tacky glue? It can be frustrating when you are ready to create and your supplies won’t cooperate. You might be tempted to force the lid open with brute strength, but that could lead to a dangerous situation. Fear not! In this article, we will provide you with a step-by-step guide on how to open tacky glue safely and effectively, along with alternative methods. You will also learn tips and tricks to prevent stuck tacky glue lids from happening in the future. Let’s get started!
Why Won’t My Tacky Glue Open?
Have you ever had trouble opening a bottle of tacky glue, no matter how hard you twist and turn the lid? It can be frustrating and even dangerous to force it open. In this section, we will explore the reasons why tacky glue lids can be difficult to open, and the potential hazards of using force. Understanding the cause of this common problem will help you successfully open your tacky glue bottles without damaging them or hurting yourself.
The Common Problem with Tacky Glue Lids
It is a common problem to have a stuck lid on a bottle of tacky glue. The glue can dry and harden around the lid, causing it to stick tightly to the bottle. This can be frustrating, especially when you need the glue for a project. Using excessive force to open the bottle can cause the lid to break, which will make it impossible to seal the bottle properly, and can be dangerous, as pieces of the lid can end up in the glue. Strong chemicals shouldn’t be used to dissolve the glue either, as they can damage the bottle.
As a result, it is essential to use a safe and effective method to open the bottle without damaging it or the glue inside. There are several methods available that require simple tools and a little patience. These methods are designed to loosen the grip of the dried tacky glue around the lid, making it easy to open it.
Before you start, ensure that you have a few essential tools at your disposal. You will need a towel, a bowl of warm water, rubber bands, pliers, and a hairdryer. These tools will help you get a better grip on the bottle and the lid, twist it open without using too much force and, most importantly, keep your fingers safe.
TIP: If you accidentally spill tacky glue on your skin while trying to open it, there are safe methods to remove it. Check out our article on how to remove sticky glue from your skin here.
The Dangers of Forcing a Tacky Glue Lid Open
When you encounter a stuck tacky glue lid, your first instinct may be to use brute force to open it. However, this can be dangerous and lead to negative consequences. Forcing a tacky glue lid open can result in the glue bottle exploding, causing injury and damage to surrounding objects.
The pressure created by trying to forcefully open a tacky glue lid can cause the glue to shoot out of the bottle unexpectedly, leading to a range of potential accidents. Additionally, the sudden release of pressure from inside the bottle can send debris flying in all directions, creating a potential hazard.
It is important to note that using sharp objects such as a knife or scissors to open a tacky glue lid can also lead to injury. If the blade slips while trying to pry the lid off, it can cause harm to your hands or body.
It is better to follow a safe and effective method for opening a tacky glue bottle without causing injury to yourself or others. If the lid is still difficult to open, try following one of the alternative methods or seek help from others. Remember, safety should always be a top priority.
***
Internal link: How to Remove Super Glue from Ceramic Sink
Tools You Will Need to Open Tacky Glue
When attempting to open a stubborn Tacky Glue lid, it’s important to have the right tools on hand to avoid damaging the glue bottle or hurting yourself. Here are the essential tools you’ll need to open Tacky Glue safely and effectively:
1. Rubber Band: This simple household item can provide the extra grip needed to twist off a stuck Tacky Glue lid. Wrap a rubber band around the lid and twist it to release the seal.
2. Towel: A towel can be used to provide extra grip and prevent the Tacky Glue bottle from slipping as you attempt to open it. The towel can be wrapped around the lid or the entire bottle to provide a better grip and additional padding.
3. Pliers: If all else fails, pliers can be used to twist off a stubborn Tacky Glue lid. Use the pliers to grip the lip of the lid and twist it off in a counterclockwise direction.
4. Warm Water: Warm water can be used to loosen a Tacky Glue lid that is stuck. Allow the bottle to sit in a bowl of warm water for a few minutes to help soften the glue and loosen the lid.
5. Bowl: If you plan on using warm water to loosen the lid, you’ll need a bowl to pour the water into. Choose a bowl that is large enough to hold the Tacky Glue bottle and deep enough to allow the bottle to be submerged in water.
Remember to always use caution when attempting to open Tacky Glue. It’s important to avoid using excessive force or tools that may damage the bottle or cause injury. If you find that the Tacky Glue is still impossible to open, consider using an alternative method or seeking help from a professional. And please, do not try to smoke, eat or sniff glue to get high. It can cause serious health damage and addictions.
A Step-by-Step Guide to Opening Tacky Glue
Are you tired of struggling to open your tacky glue? Don’t worry, we have got you covered! With this step-by-step guide, opening your tacky glue will be a breeze. No need to force the lid open and risk damaging it, follow these simple instructions using tools you probably already have at home. Before you know it, you’ll be using your tacky glue for all your crafts and DIY projects! But what if you accidentally get glue on your fingers? Check out our article on how to remove super glue from fingers for helpful tips.
Step 1: Place the Tacky Glue Bottle Upside Down
One of the first steps in opening tacky glue is to place the bottle upside down. This positioning allows the glue to move towards the lid, which may help loosen any dried glue that may be causing the lid to get stuck. Placing the tacky glue bottle upside down can also help ensure that any water or heat applied to the lid will reach the point where the lid connects to the bottle, which can further assist in loosening the seal.
To properly place the tacky glue bottle upside down, follow these steps:
| Step 1 | Make sure the cap and nozzle are tightly closed and secure. |
| Step 2 | Find a flat, stable surface to place the bottle on, such as a table or countertop. |
| Step 3 | Gently turn the tacky glue bottle over so that the cap is facing downwards and the body of the bottle is facing upwards. |
| Step 4 | Ensure the bottle is stable and will not tip over. You may want to prop the bottle against a stable object to prevent it from rolling. |
By placing the tacky glue bottle upside down, you are setting yourself up for success in opening the bottle. Make sure to follow the steps carefully and do not rush the process. In the next step, we will discuss tapping the bottom of the tacky glue bottle to help loosen the glue and allow for easier opening.
Step 2: Tap the Bottom of the Tacky Glue Bottle
When the glue lid is really stuck, sometimes giving the bottle a tap is enough to break the seal. Step 2: Take the tacky glue bottle and turn it upside down. Using your palm or a soft mallet, tap the bottom of the bottle a few times. This tapping motion can help to loosen any glue that may have dried and get it moving towards the lid. Be careful not to hit the bottle too hard as this can cause the glue to spill out, making a mess. Tapping the bottle is a simple trick that might just be enough to open the lid of your tacky glue bottle. If it doesn’t work, move on to the next step.
It’s important to take a deep breath and not rush this process. If you’re in a hurry and try to force the glue lid open, you may end up damaging the bottle or causing the glue to spill out on your hands and clothes. Keep calm and follow each step carefully.
Remember, it’s always better to try gentle methods first before resorting to more extreme measures like heating or cooling the glue. If you’re feeling overwhelmed, take a break and come back to the task with a fresh mind. And whatever you do, don’t smoke glue or eat glue as these are incredibly dangerous and can cause serious harm to your health. Stick to safe methods of opening glue bottles.
Step 3: Use Warm Water to Loosen the Lid
Step 3: When tapping and gripping methods don’t work, you may need to use warm water to loosen the lid of your tacky glue. Run the cap of the glue bottle under warm water for a few minutes. It’s essential to avoid getting water in the glue. The heat causes the plastic lid to expand, and the glue may start running. After running it under warm water, try twisting the cap again. If it refuses to budge, wrap a rubber band around it for extra grip. If you still cannot open it, try the next step.
Alternative: A bowl of warm water also works. Dip the cap in the water for around a minute, then try to unscrew it. The cap should come off quickly.
Caution: Be extremely careful when using warm water to loosen the lid of your tacky glue. If you accidentally spill water in the glue, it will ruin it.
Using hot water instead of warm water can melt the glue, and the plastic bottle can deform. Hot water can also release fumes that are toxic, and you’ll be inhaling them if you’re near the steam. Avoid using hot water to open your tacky glue lid.
If you find yourself in a situation where the glue bottle constantly gets stuck, try storing it upside down in a jar filled with rice. Rice is an excellent desiccant, which means it eliminates moisture. It should solve the problem and prevent your cap from adhering to the bottle’s neck.
Remember that these are general tips for opening a tacky glue bottle. Do not attempt to smoke glue, eat glue, or any other dangerous activity related to glue. In case of accidental ingestion or inhalation of glue, seek medical attention immediately. If you need to remove glue, we have an article on /how-to-remove-glue-from/ that can help you.
Step 4: Use a Rubber Band for Extra Grip
When trying to open a tacky glue bottle, sometimes the lid can be stubborn and refuse to budge. If this happens, try using a rubber band for extra grip. Place the rubber band around the lid, making sure it is tight and secure. This will provide more friction and make it easier to turn the lid.
But what if the rubber band isn’t enough? Don’t worry, there are other methods you can try. One option is to use pliers to apply extra force, as described in step 6. Alternatively, you can wrap a towel around the lid as an extra layer of protection for your hands, which is explained in step 5.
Using a rubber band is a quick and easy solution to try when opening tacky glue. Plus, it’s a household item that you likely already have on hand. So, next time the tacky glue lid won’t open, grab a rubber band and give it a try before moving on to other methods.
Step 5: Wrap a Towel Around the Tacky Glue Lid
Step 5: Wrap a Towel Around the Tacky Glue Lid
If the warm water and rubber band methods haven’t worked yet, it’s time to add a little more muscle to the equation. Wrapping a towel around the lid gives you an added level of grip, which can help you get the lid off with a little less effort.
To do this, simply wrap a towel around the lid of the tacky glue bottle. Make sure the towel is thick enough to give you a good grip on the lid. You don’t want to use a thin towel or cloth that might slip, as this could cause you to lose your grip and potentially break the bottle.
Once the towel is securely wrapped around the lid, hold the bottle securely with one hand and use the towel-covered hand to twist the lid counterclockwise. The added grip from the towel should make it easier to get the lid moving so you can open the bottle.
If for some reason this step doesn’t work, don’t force it. It’s better to try alternative methods before resorting to anything extreme. You don’t want to risk damaging the bottle or the glue inside.
If you’re still having difficulty with opening the tacky glue bottle, consider trying the alternative methods outlined in the article. For those who are looking for alternative uses for glue, please remember that misuse of glue can be dangerous and is not advised. If you’re looking for information on how to smoke or eat glue, these activities are not safe and can result in serious health problems. Stick to using glue for its intended purpose and follow the steps outlined in this guide to open a stubborn tacky glue lid.
Step 6: Use Pliers for Extra Help
Step 6: Sometimes, no matter how much you’ve tried, you just can’t get the lid of your tacky glue to budge. This is where pliers come in handy. Use a pair of pliers to grip the lid of the glue bottle firmly. Then, twist the pliers in a counter-clockwise direction to loosen the lid. However, be careful not to squeeze the bottle too hard, as this could cause the glue to come out and make a mess. Using pliers should be a last resort, so if you are still struggling to open the bottle after trying all the other steps, then it’s time to bring out the pliers.
Note: Be sure to clean the pliers thoroughly with warm water and soap after use. You don’t want any glue residue on them, as that can create a sticky mess the next time you use them. Also, dispose of any glue that may have spilled during the plier process properly. Do not smoke glue or eat glue under any circumstances, as it can be extremely dangerous for your health. If by any chance, you come in contact with glue and need to remove it from your skin or any other surface, please refer to the appropriate guidelines. For example, if you need to remove bumper sticker glue, visit our article on how to remove bumper sticker glue.
Step 7: Store Your Tacky Glue Correctly
It’s important to store your tacky glue correctly in order to prevent it from drying out or becoming unusable. Here are some tips on how to store your tacky glue properly:
- Store in a cool, dry place: Tacky glue should be kept in a place where the temperature is consistent and there’s no direct sunlight. Extreme cold or heat can damage the glue’s consistency and effectiveness.
- Keep the cap tight: Make sure to seal the bottle tightly after each use. Leaving the bottle open or loosely capped can cause the glue to dry out and become unusable.
- Store upright: Tacky glue should be stored upright to prevent it from leaking or spilling.
- Avoid moisture: Moisture can also affect the consistency of tacky glue and cause it to lose its effectiveness over time. Keep it away from any damp areas in your home
- Label the bottle: It’s important to label your bottle with the date you opened it in order to keep track of its shelf life. Most tacky glues can last for up to two years if stored correctly.
Follow these simple steps to ensure that your tacky glue remains usable and effective for all your crafting needs. Don’t forget to check the label or manufacturer’s instructions for specific storage recommendations as they may vary by brand.
Alternative Methods for Opening Tacky Glue
If you’re still struggling with opening your tacky glue bottle after attempting the aforementioned method, don’t fret; there are other ways to open it. Here are some alternative methods you can try that may help you get your stubborn glue bottle open. And don’t worry, we promise none of them involve smoking glue or eating glue in any way.
Method 1: Use a Bowl of Warm Water
Using warm water is a simple and effective method for opening a stuck Tacky Glue lid. This method works by expanding the plastic material of the lid, allowing it to turn more easily. Here is a step-by-step guide for using a bowl of warm water to open a Tacky Glue lid:
| Step 1: | Fill a bowl with warm, not hot, water. |
| Step 2: | Place the Tacky Glue bottle, cap side down, in the bowl of warm water. |
| Step 3: | Let the bottle sit for 3 to 5 minutes, allowing the warm water to loosen the glue and soften the plastic cap. |
| Step 4: | Remove the bottle from the warm water. |
| Step 5: | Gently twist the cap to see if it will open. If it doesn’t, repeat the process again or try one of the alternative methods listed in this article. |
It’s important to note that the water should be warm, not hot. Hot water can damage the glue inside the bottle and affect its adhesion properties. Additionally, make sure the cap is screwed on tightly to prevent water from seeping into the bottle.
Using this method can help you avoid the dangers of forcing a Tacky Glue lid open, as discussed earlier in the article. It’s a simple and effective solution that can save you time and frustration.
Remember, if you’re having trouble opening your Tacky Glue bottle, there are other methods you can try such as using a hairdryer or freezer. By following these simple tips, you can avoid a sticky situation and get back to crafting in no time.
Internal link: If you’re looking for tips on how to remove paper glue, check out our article “How to Get Paper Glue Off Your Skin, Clothes, and Carpet.”
Method 2: Use a Hairdryer to Warm the Glue
Method 2: Use a Hairdryer to Warm the Glue
Another alternative method for opening a stuck tacky glue lid is to use a hairdryer. The heat from the hairdryer can help to loosen the glue and make it easier to unscrew the lid. This method is especially useful if the glue is dried around the rim of the bottle.
To use a hairdryer to loosen tacky glue, follow these steps:
| Step | Action |
|---|---|
| Step 1 | Plug in a hairdryer and set it to the highest temperature |
| Step 2 | Aim the hairdryer at the stuck lid for about 20-30 seconds |
| Step 3 | Try to unscrew the lid while it is still warm |
| Step 4 | If the lid is still stuck, repeat steps 2 and 3 until it loosens |
It’s important to note that you should never hold the hairdryer too close to the glue bottle or use it for too long, as this could cause the glue to melt and become unusable.
Tip: If the glue has spilled on any surface, you may need to know what gets super glue off metal or how to remove tile glue from wood floor, depending on the affected surface.
Using a hairdryer is a quick and easy solution for opening stuck tacky glue lids, but it may not work for everyone. If you are still not able to remove the lid, there are other alternative methods you can try.
Method 3: Use a Freezer to Cool the Glue
If the warm water and hairdryer method do not work, then you can try using the freezer to cool the tacky glue. Here’s how to do it:
- Step 1: Take the tacky glue bottle and place it in a sealable plastic bag, making sure it is tightly closed.
- Step 2: Put the sealed plastic bag with the tacky glue bottle inside the freezer.
- Step 3: Leave the tacky glue bottle in the freezer for about an hour.
- Step 4: After an hour, remove the sealed plastic bag with the tacky glue bottle from the freezer.
- Step 5: Open the plastic bag and remove the tacky glue bottle.
- Step 6: Try opening the tacky glue bottle again. The cooling process should have caused the glue to contract, making it easier to open the lid.
Using the freezer to cool the tacky glue is a great idea if the glue has become too hot or if it has been exposed to too much humidity, causing it to become runny or stringy. The cooling process also helps to prevent the glue from drying out quickly, which can be especially beneficial if you live in a hot and humid area. However, it’s essential to ensure that the lid is tightly sealed before putting it in the freezer. This method may take a bit longer than the other methods, but with patience, you should be able to successfully open your tacky glue bottle without damaging it.
Tips and Tricks for Preventing Stuck Tacky Glue Lids
Are you tired of struggling to open your tacky glue bottle every time you need to use it? Are you frustrated with the idea of having to buy a new bottle or lid every time it gets stuck? Fear not, because we have some tips and tricks to prevent your tacky glue lids from getting stuck in the first place! By implementing these preventative measures, you can save yourself time, money, and the frustration of dealing with a stubborn tacky glue lid. Let’s dive into some simple and effective solutions for preventing stuck tacky glue lids.
Tip 1: Clean the Rim of the Tacky Glue Bottle After Use
When using tacky glue, it’s important to clean the rim of the bottle after each use to prevent glue from hardening and causing the lid to become stuck. This is especially important if you plan on storing the glue for an extended period of time.
Why is it important to clean the rim of the tacky glue bottle after use?
Glue can easily drip down the side of the bottle and onto the rim, causing it to become sticky and eventually harden. If the rim is not cleaned after each use, the glue can build up and cause the lid to become stuck. This can make it difficult or impossible to open the bottle the next time you need to use it.
How do you clean the rim of the tacky glue bottle?
Cleaning the rim of the bottle is a simple process that only takes a few seconds. Once you’re finished using the tacky glue, take a damp cloth or paper towel and wipe around the rim of the bottle. Make sure to remove any excess glue that may have dripped down the side of the bottle. Allow the bottle to dry completely before replacing the lid.
What are the benefits of cleaning the rim of the tacky glue bottle?
By cleaning the rim of the tacky glue bottle after each use, you’ll help prevent glue from hardening and causing the lid to become stuck. This will save you time and frustration the next time you need to use the glue. Additionally, by keeping the bottle clean, you’ll be able to see how much glue you have left and determine when it’s time to purchase more.
So, to keep your tacky glue bottle in good condition and prevent the lid from becoming stuck, make sure to clean the rim after each use. It’s a simple step that can save you time and frustration in the long run.
Tip 2: Store Tacky Glue Bottles Upright
When it comes to storing tacky glue, it is important to keep the bottles in an upright position. Storing the bottles upside down or on their side can cause the glue to leak out of the lid and create a sticky mess. By keeping the bottles upright, you can prevent any residue from accumulating in the lid and causing it to stick shut.
To ensure that your tacky glue bottles remain upright, consider designating a specific spot in your craft room or workspace for them. You can also use a storage container specifically designed for craft supplies and keep the bottles in an upright position within the container. This will not only help keep them organized, but it also prevents them from getting knocked around and potentially becoming damaged.
Another benefit of storing tacky glue bottles upright is that it allows the glue to settle to the bottom of the bottle when not in use. This prevents air bubbles from forming in the glue which can make it more difficult to get a smooth and consistent application. So, by keeping the bottles in an upright position, you are not only keeping them organized but also ensuring that your glue is always ready to use and work its magic.
In addition to storing the bottles upright, it’s also important to make sure that the caps are tightened securely after each use. This helps to prevent air from getting into the bottle and causing the glue to dry out and form a hard layer over the top. Just remember not to overtighten the caps, as this can sometimes cause them to become stuck shut. By storing your tacky glue bottles properly, you will extend the life of your glue and have it readily available whenever you need it.
Tip 3: Replace Tacky Glue Lids When Necessary
Over time, tacky glue lids can become worn out, making it difficult to open or close the bottle. When this happens, it’s important to replace the lid in order to avoid having to struggle with opening the glue every time you use it. Here are some key points to keep in mind when replacing tacky glue lids:
| Tip | Details |
|---|---|
| Check the lid for damage or wear | Before replacing a tacky glue lid, inspect it carefully for any signs of damage or wear. If the threads on the lid are worn or misshapen, the lid may not fit properly and could cause the glue to dry out or leak. |
| Buy a replacement lid | If you need to replace a tacky glue lid, you can usually find a replacement at your local craft store or online. Make sure to check the size and shape of the lid, as different brands or sizes of tacky glue may have different types of lids. |
| Properly dispose of the old lid | Once you’ve replaced the old tacky glue lid, make sure to dispose of it properly. If the lid is made of plastic, you can usually recycle it. If it’s made of metal, you may need to dispose of it in your regular trash. |
By following these guidelines, you can ensure that your tacky glue bottle remains in good working condition and is easy to open and close whenever you need it. Don’t hesitate to replace a worn or damaged lid, as it can save you time and frustration in the long run.
Tip 4: Use Tacky Glue Regularly to Prevent Drying Out
It is recommended to use tacky glue regularly to prevent it from drying out. When the glue is not used for a prolonged period, it can dry up in the bottle, making it difficult to open. Using the glue on a regular basis will also help ensure that the glue’s consistency remains intact.
Here are some tips to help use tacky glue regularly:
- Plan your projects beforehand: Before starting any project, gather all the materials required and determine how much glue will be needed. This will help you use the glue before it dries out.
- Use a consistent amount of glue: Try to use the same amount of glue each time. This will help ensure that each project has the same level of adhesion, and it will also help you estimate how much glue you need for future projects.
- Store glue in a convenient location: Keep your glue in a place where it is easily accessible. This will encourage you to use it more frequently and reduce the chances of it drying out because it is forgotten in a cupboard.
- Clean the nozzle after each use: Use a damp cloth or paper towel to wipe away any excess glue on the nozzle after each use. This will prevent the nozzle from getting clogged and ensure that the next time you open the glue, it flows smoothly.
- Replace the cap tightly: After each use, ensure that you replace the cap tightly on the glue bottle, preventing air from getting in and drying out the glue inside.
By using tacky glue regularly and taking a few simple steps to maintain its quality, you can avoid experiencing difficulties when opening it. Incorporate these tips into your crafting routine, and you will find that you use your tacky glue more efficiently and that your projects come out even better.
Tip 5: Keep Tacky Glue in a Temperate Environment
One of the most important tips for preventing your tacky glue lid from sticking shut is to keep it in a temperate environment. Extreme temperatures can cause the glue to thicken or dry out, making it harder to open the bottle. Here are some temperature-related factors to consider when storing tacky glue:
| Factor | Recommendation |
|---|---|
| Temperature range | Store tacky glue in a location that stays between 50 and 77 degrees Fahrenheit. This will help prevent the glue from becoming too thick or drying out. |
| Humidity | Avoid storing tacky glue in a humid location, as this can also affect the consistency of the glue. |
| Sun exposure | Don’t leave tacky glue in direct sunlight, as this can cause the glue to dry out and become less effective. Store the glue in a dark, cool location. |
By following these recommendations, you can help ensure that your tacky glue stays in good condition and is easy to open when you need it. Remember that proper storage techniques can extend the life of your tacky glue, saving you money and hassle in the long run.
Conclusion
After following the step-by-step guide and trying out the alternative methods mentioned above, you should now be able to open your tacky glue bottle with ease. However, it’s important to remember that prevention is key to avoiding a stuck lid in the first place. By practicing good habits such as cleaning the rim of the bottle after use and storing it correctly, you can save yourself the frustration of dealing with a stuck lid.
When dealing with tacky glue, it’s crucial to prioritize safety. Never force a stuck lid open, as this can result in injury and damage to the bottle. Instead, try the alternative methods mentioned in this article or reach out to the manufacturer for assistance.
At the end of the day, tacky glue is a versatile and effective adhesive that is essential for any crafting or DIY project. With the right tools and techniques, opening a stuck lid can be a breeze. So don’t let a stubborn lid ruin your crafting experience, and remember to store your tacky glue correctly to prevent any future issues.
Frequently Asked Questions
1. Why won’t my tacky glue bottle open?
Tacky glue bottles can be difficult to open because the glue can dry out and cause the lid to stick. This is especially common if the glue bottle has not been stored properly or has been left open for extended periods of time.
2. Is it safe to force open a tacky glue lid?
No, it is not safe to force open a tacky glue lid. This can cause the bottle to rupture or the lid to break, which can be dangerous and messy.
3. What tools do I need to open tacky glue?
You will need warm water, a rubber band, pliers, and a towel to open tacky glue. These tools will help loosen the lid and provide extra grip to open the bottle.
4. How do I store tacky glue to prevent stuck lids?
You should store tacky glue bottles upright in a temperate environment to prevent stuck lids. Avoid storing tacky glue in hot or cold temperatures or away from sunlight.
5. What should I do if my tacky glue lid is still stuck after following the step-by-step guide?
If your tacky glue lid is still stuck after following the step-by-step guide, try the alternative methods for opening tacky glue or contact the manufacturer for assistance.
6. Can I use pliers to open any type of glue bottle?
No, pliers should only be used to open tacky glue bottles. Using pliers on other types of glue bottles can damage the lid or cause the glue to spill.
7. How often should I use tacky glue to prevent it from drying out?
You should use tacky glue regularly to prevent it from drying out. Using it at least once a week can help keep the glue fresh and prevent the lid from sticking.
8. Can I use cold water to loosen a tacky glue lid?
Cold water is not recommended for loosening a tacky glue lid. Warm water is more effective at loosening the glue and can prevent damage to the bottle or lid.
9. Should I replace a tacky glue lid if it is stuck?
Yes, you should replace a tacky glue lid if it is stuck or damaged. Using a damaged lid can cause the glue to dry out or spill.
10. Can I store tacky glue bottles upside down to prevent stuck lids?
No, you should not store tacky glue bottles upside down to prevent stuck lids. This can cause the glue to drip and make the lid even harder to open.