Have you ever struggled with opening a tube of KDS Nail Glue? This seemingly simple task can quickly turn into a frustrating experience if not done correctly. However, fear not – we are here to guide you through the process step-by-step. In this article, we will provide you with a detailed guide on how to open KDS Nail Glue, including tips on preparing for the process, the actual steps to opening the glue, and tips for using it effectively. So, if you’ve been struggling to open that tube of KDS Nail Glue, read on!
Why Use KDS Nail Glue?
Are you tired of constantly dealing with nails that chip and break? There’s nothing worse than leaving the house with a fresh manicure, only to find one of your nails has completely come off before the day is over. Fortunately, KDS nail glue can be the solution you’ve been looking for. KDS Nail Glue is a strong adhesive that holds your nails in place for a longer time than regular nail glue, making it a popular choice among nail enthusiasts. In this article, we’ll explore the benefits of KDS Nail Glue, as well as how to open and use the glue effectively. If you’re looking for tips on how to get a lasting manicure without damaging your natural nails, you’ll want to keep reading. If you’re interested in more information about how to glue on nails, check out our guide to nail glue.
What Is KDS Nail Glue?
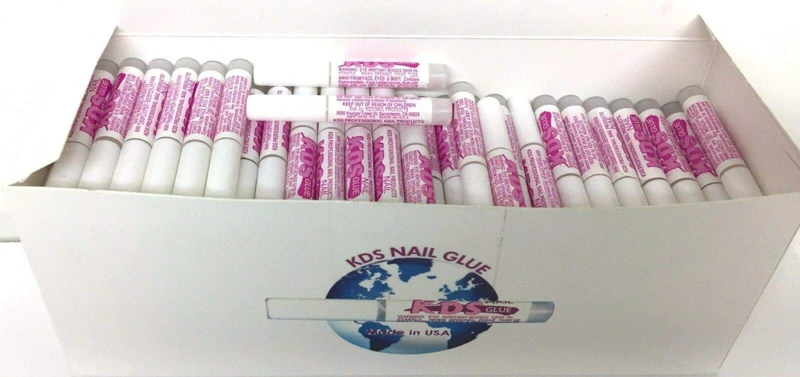
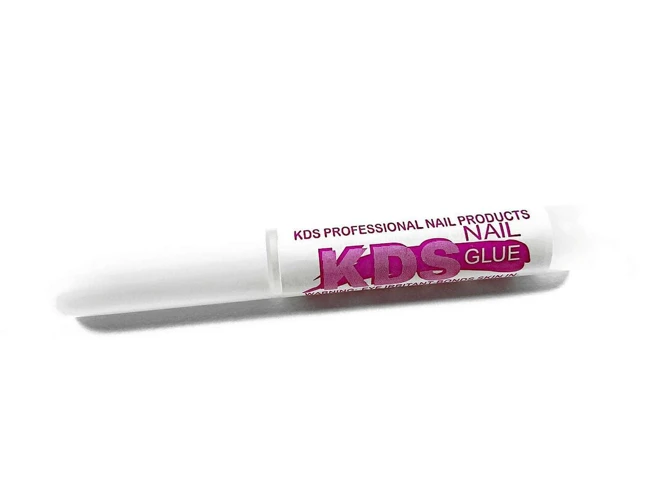
KDS Nail Glue is a type of adhesive that is commonly used in the beauty industry for attaching artificial nails, nail tips, and nail wrap. It is a medical-grade adhesive that is specifically designed for use on nails. The glue is a fast-drying, strong bond and is perfect for individuals who are looking to create a long-lasting and durable finish for their nail designs.
KDS Nail Glue is made using a specialized formula that is safe for use on nails and is free from harmful chemicals. The glue is usually sold in small tubes that are easy to use. It is important to note that KDS Nail Glue is not the same as regular adhesive or superglue, which are not recommended for use on nails as they can cause severe damage.
Unlike other types of nail glue, KDS Nail Glue is waterproof and can withstand exposure to water without losing its adhesive properties. It is also heat-activated, which means that it sets quickly when exposed to heat. This feature makes it ideal for individuals who are seeking a quick and easy way to apply artificial nails or nail tips.
KDS Nail Glue is a versatile product that can be used for a wide range of nail styles, including nail art, French manicures, and more. It is also compatible with a variety of nail materials, including acrylic, gel, and silk.
KDS Nail Glue is a reliable and high-quality product that is perfect for individuals looking to create long-lasting and beautiful nail designs. It is important to follow the instructions carefully when using this glue to avoid any mishaps or damage to your nails. For more information on how to apply nail glue and tips for maintaining your nail design, check out our article on How to Glue on Nails.
Benefits of Using KDS Nail Glue
Using KDS Nail Glue has a lot of amazing benefits. Here are some of them:
- Strong adhesion: KDS Nail Glue provides a strong and long-lasting bond between your natural nail and artificial nail tips.
- Quick-drying: This nail glue dries quickly, saving you time and helping you avoid any accidental smudging.
- Easy to use: The glue tube comes with a precision applicator tip that allows you to easily apply the glue without making a mess.
- Great for repairs: KDS Nail Glue can also be used to fix broken nails and reattach nail tips.
- Perfect for nail art: Because of its precision applicator tip and quick drying time, KDS Nail Glue is also great for creating intricate nail art designs.
- Versatile: KDS Nail Glue can be used for all types of artificial nail tips such as acrylic, silk, fiberglass, and press-on nails.
Using KDS Nail Glue can help you achieve beautiful and long-lasting manicures without having to go to a nail salon. However, it’s important to use the glue correctly to avoid any mishaps. If you’re unsure about how to properly use KDS Nail Glue, refer to our step-by-step guide on how to open and use KDS Nail Glue.
Note: Always remember to use nail glue responsibly. Do not expose it to heat or open flame as it may cause the glue to ignite and lead to serious injuries. If you are experiencing any discomfort or swelling after using KDS Nail Glue, consult a doctor immediately.
When to Use KDS Nail Glue?
When to Use KDS Nail Glue?
KDS Nail Glue is an all-purpose nail glue that can be used for different purposes, such as attaching full cover nails, tips, and wraps to natural nails. It’s a go-to solution for those looking for a quick fix for their nails. Here are some situations where you can use KDS Nail Glue:
| Situation | Description |
|---|---|
| Emergency repair | If you accidentally break a nail and need a repair on the go, KDS Nail Glue is an ideal solution. It can help fix a nail until you can properly get it fixed in a salon or at home. |
| Preparing for a special occasion | If you have a special occasion coming up and want to give your nails a polished and finished look, KDS Nail Glue can be used to attach full cover nails or nail tips. |
| Securing nail wraps | If you are using nail wraps, KDS Nail Glue can be used to secure them in place. The glue dries quickly and provides a strong hold, helping the wraps to last longer. |
| Repairing cracked or split nail | If you have a cracked or split nail, KDS Nail Glue can be used to keep the nail together while it heals. However, it’s important to avoid applying glue to broken or infected nails. |
KDS Nail Glue is a versatile product that can be used for various nail-related needs. Its quick-drying and strong-holding capabilities make it a popular choice among nail enthusiasts. If you want to learn about the best nail glue in the market, check out What is the Best Kiss Nail Glue?
Preparing to Open KDS Nail Glue
Before opening your KDS Nail Glue, it is important to prepare yourself and your supplies properly. Taking the time to properly prepare will lead to a smoother process and better results. In this section, we will go over the steps you should take to get ready to open the glue. This includes choosing the right time, gathering your supplies, and placing the glue tube in warm water. Proper preparation is essential to ensure that your KDS Nail Glue works effectively and lasts as long as possible.
If you’re wondering how to apply nail tips without glue, check out our article “How to Apply Nail Tips Without Glue: Expert Tips”.
Choosing the Right Time
Choosing the right time to open your KDS nail glue is important to ensure that you get the most out of your product. Here are some tips to help you choose the right time:
- Choose a time when you have enough time: It’s important to set aside enough time for the entire process of opening the glue tube. Rushing through the process can lead to the glue getting wasted or even getting injured.
- Choose a time with good lighting: Ensure that you have good lighting when opening the glue tube. Good lighting will help you to see what you’re doing clearly, so you don’t end up spilling the glue tube.
- Choose a time when you won’t be interrupted: It’s important to choose a time when you won’t be interrupted while opening the glue tube. Distractions can lead to careless mistakes and accidents.
- Choose a time when you have a steady hand: You need to have a steady hand when opening the glue tube. If you have shaky hands, try to calm yourself down or take a break until you feel steady enough to open the glue tube.
It’s also important to note that KDS nail glue is temperature-sensitive. You should avoid opening the glue tube in very cold or very hot temperatures. You can warm up the glue tube by placing it in warm water for a few minutes before opening it. This will make it easier to work with and prevent the glue from drying out too quickly. If you want to learn more about how long nail glue lasts, click on this link.
Gather Your Supplies
Gathering Your Supplies
Before you start opening the KDS nail glue, you need to make sure you have all the necessary supplies at hand. Having everything in one place will make the process smoother, quicker, and less stressful. Here’s a list of items you’ll need:
- A tube of KDS nail glue
- A small bowl
- Warm water
- A clean cloth or towel
Make sure the bowl you use is deep enough to submerge the glue tube in it fully. You can use any bowl that easily fits the glue tube. Make sure to use warm water instead of hot water, as hot water can damage the glue. Having a clean cloth or towel at hand will help you wipe off any excess glue or water that may fall on the tube or your hands.
It’s also important to note that before you start, ensure that you have enough time available to complete the task without interruption.
Once you have everything you need, you can move on to the next step of the process. Having all your supplies gathered in one place saves time and energy and ensures that you can go through the process smoothly.
Now that you know what supplies you need let’s move on to the next step.
Place the Glue Tube in Warm Water
Before you can start using KDS Nail Glue to fix your broken or cracked nails, you need to prepare the glue tube. One way to do this is by placing the glue tube in warm water. This will help to liquefy the glue, making it easier to apply to your nails. However, it’s important to do this correctly to ensure that the glue is not damaged and remains effective.
To place the glue tube in warm water, you will need to follow these steps:
| Steps to follow | Instructions |
|---|---|
| Step 1 | Find a container that is big enough to hold the glue tube. You can use a cup or a small bowl for this purpose. Make sure that the container is clean and dry before use. |
| Step 2 | Fill the container with warm water. The water should be warm enough to help liquefy the glue, but not too hot that it melts the glue tube. Test the water temperature with your finger before placing the glue tube in the container. |
| Step 3 | Place the glue tube in the warm water, making sure that the entire tube is submerged. You may need to hold the tube down with a clean spoon or fork to ensure that it stays submerged. |
| Step 4 | Leave the glue tube in the warm water for about 5-10 minutes. This is enough time for the glue inside the tube to warm up and become liquefied. |
| Step 5 | Remove the glue tube from the warm water and dry it with a cloth or a paper towel. Make sure that the glue tube is completely dry before proceeding to the next step. |
Remember that placing the glue tube in hot water can cause the glue to break down and lose its bonding properties. So, it’s important to use warm water only and not to overheat the glue tube.
By following these simple steps, you can prepare the KDS Nail Glue tube for use, and ensure that it is properly liquefied for easy application. Once you have prepared the glue tube, you can move on to the next steps of applying the glue to your nails with confidence.
In the next section, we will talk about the detailed steps to open KDS Nail Glue. If you’re curious to learn more about other nail glue-related topics, such as what is nail foil glue, or how to reuse glue on nails, you can check out our related articles on those topics.
How to Open KDS Nail Glue: Step-by-Step Guide
Are you having trouble opening your KDS Nail Glue? Don’t worry, we’ve got you covered! KDS Nail Glue is a popular choice for those who want to keep their nails looking flawless and perfectly polished. In this step-by-step guide, we will show you how to open your KDS Nail Glue with ease and get the most out of your manicure experience. So, let’s get started! But before we jump into the steps, let’s quickly recap what KDS Nail Glue is and why it’s a great option for nail care. (To learn more about how long fake nails last with glue, visit our article on the topic.)
Step 1: Take Out the Glue Tube from Warm Water
To begin the process of opening KDS nail glue, the first step is to take out the glue tube from warm water. You’ll want to make sure that the water is not too hot, as this can cause the glue to become too runny and difficult to work with. A good temperature is around 80-90 degrees Fahrenheit.
To help you with this step, here is a table outlining the process:
| Step | Action |
|---|---|
| Step 1 | Fill a bowl or cup with warm water. |
| Step 2 | Place the glue tube in the warm water, making sure it is fully submerged. |
| Step 3 | Leave the glue tube in the warm water for about 5-10 minutes, or until the glue inside has become runny and easy to work with. |
| Step 4 | Carefully take the glue tube out of the warm water and dry it off with a cloth. |
It’s important to remember that warming up the glue is necessary because it helps to make the glue easier to work with by thinning it out. This will make it easier to apply the glue accurately and precisely.
If you’d like to know more about nail adhesive, you can check out our article on what is nail foil glue. Also, make sure to keep reading and learn the rest of the steps needed to open KDS nail glue.
Step 2: Wipe the Glue Tube and Cap with a Cloth
After taking out the glue tube from the warm water in the previous step, the next step is to ensure that the glue tube and cap are free from any residue or debris that might have accumulated. It is important to wipe the glue tube and cap clean with a cloth to ensure that there is no dirt or debris that may clog the glue nozzle.
To wipe off the glue tube and cap, take a cloth and gently rub it over the surfaces of the tube and cap. Use a soft and clean cloth to prevent any scratches or damage to the surface of the tube. Ensure that the cloth is free from any fuzz or lint that might stick to the glue tube and cap.
Tip: It is important to wipe the glue tube and cap immediately after taking it out of the warm water to avoid any dryness or hardening of the glue that may be present on the surface.
Once you have wiped off the glue tube and cap, inspect it to ensure that there is no remaining dirt or debris on the surface. Check the nozzle of the glue tube to make sure that there is no blockage or obstruction that could affect the flow and consistency of the glue.
Note: If you find any residue or debris on the nozzle, you can use a pin or a needle to scrape off the dirt gently. Be careful not to puncture the nozzle or damage it in any way.
After ensuring that the glue tube and cap are clean, you are now ready to proceed to the next step of opening the KDS nail glue.
Internal Link: If you are wondering how to reuse glue on nails, click here to read our article on How to Reuse Glue on Nails.
Step 3: Unscrew the Cap of the Glue Tube
To open the KDS Nail Glue, you need to follow the Step 3 which involves unscrewing the cap of the glue tube. Before you unscrew the cap, make sure that you have wiped the tube and the cap with a cloth, as described in Step 2.
Use your thumb and index finger to hold the base of the glue tube, and your other hand to hold the cap. Apply gentle pressure to the cap, and begin to turn it counterclockwise. Keep turning the cap until it comes off completely.
Be careful not to squeeze the glue tube too hard as you unscrew the cap, as this could cause the glue to leak out and create a mess.
If the cap is difficult to unscrew, you can try running it under warm water for a few seconds to loosen any dried glue that may be causing the cap to stick. Once the cap is off, proceed to Step 4 to pierce the cap and begin using the glue.
It’s important to avoid pulling too hard on the cap, as this could cause the entire tube to come loose and spill out the glue. By gently twisting counterclockwise, you should be able to remove the cap without any issues.
Now that you have successfully unscrewed the cap, you can move on to using the glue for your nail applications. Remember to recap the glue tightly after each use to prevent it from drying out.
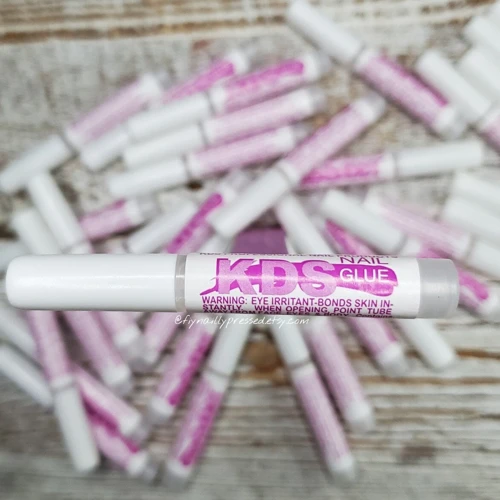
Step 4: Pierce the Cap Using the Pointy Side of the Cap
Before piercing the cap of the KDS Nail Glue, make sure that you have wiped the glue tube and cap with a cloth as mentioned in the previous step. This ensures that the cap is not slippery and provides a good grip.
To pierce the cap, use the pointy side of the cap firmly and insert it into the tip of the glue tube. Make sure that you do it gently and not too forcefully to avoid any damage to the nozzle of the tube.
Once the nozzle is pierced and the glue is ready to use, keep in mind that KDS Nail Glue can be very strong. Use only a small amount of glue to avoid over-gluing and ensure that your nail adheres properly. Applying too much glue can lead to clumpy and uneven results.
If you accidentally apply too much glue and it spills over, do not panic. Use a clean cotton swab to wipe off the excess glue. If necessary, you can also use a non-acetone nail polish remover to remove the glue.
It’s also important to keep the glue away from broken or infected nails as it can worsen the condition. If you’re dealing with broken nails, check out our article on how to glue nail back on. And if you’re having trouble keeping your glue-on nails in place, our article on why do my glue-on nails keep falling off might be helpful.
In the next and final step, we’ll discuss how to use the glue tube and recap it tightly.
Step 5: Use the Glue Tube and Recap Tightly
Now that you have successfully pierced the cap of the KDS Nail Glue, it’s time to use it. Here’s how you can use the glue tube and recap it tightly:
- Apply the glue: Squeeze a small amount of glue onto the nail, and spread it evenly. Be careful not to apply too much, as this can cause the glue to overflow and create a mess.
- Hold the nail in place: Hold the nail in place for a few seconds until the glue dries and sets. This will ensure that the nail remains in place and does not come loose.
- Recap the glue tube: Once you’re done using the glue, recap the tube tightly to prevent the glue from drying out or spilling. Make sure the cap is firmly secured to ensure that the glue remains fresh for future use.
It’s important to note that you should avoid getting the glue on your skin or eyes, as it can cause irritation and even burns. If you accidentally get glue on your skin, wash it off with cold water immediately. Make sure to store the glue in a cool and dry place to prevent it from drying out or becoming unusable.
By following these simple steps, you can easily use KDS Nail Glue to keep your nails looking healthy and beautiful. Remember to use small amounts of glue, avoid applying glue to broken or infected nails, and always store the glue in a safe place. With a little bit of care and attention, you can achieve stunning results with KDS Nail Glue.
Tips for Using KDS Nail Glue
As with any beauty product, it’s important to use KDS nail glue properly to achieve desired results and maintain healthy nails. Here are some valuable tips to help you get the most out of your KDS nail glue while keeping your nails strong and healthy. These tips will help you avoid common mistakes and ensure that your nails look beautiful and well-maintained. So, let’s dive into the Best Practices for using KDS nail glue.
Use Small Amounts of Glue
Applying too much glue can cause the nail to look uneven and can even lead to damage. It’s important to use small amounts of glue. There’s a general rule of thumb that suggests no more than a drop of glue should be used at a time.
Here are some factors to consider when using KDS nail glue:
| Factor | Explanation |
| Consistency | The nail glue has a thick consistency, so you don’t need a lot to make it stick. Using a small amount of glue will also help to avoid excess glue seeping out from under the nail tip and creating a bulky appearance. |
| Setting time | KDS nail glue sets quickly, so you only have a small window of time to work with it. Using small amounts will allow you to control the glue application with greater ease, making it easier to apply precisely where you need it and to avoid mistakes. |
| Frequency of use | While KDS nail glue is strong and effective, it is not intended to be used every day. Using small amounts of glue will limit the amount of exposure your nails have to its ingredients. |
By using small amounts of glue, you can achieve a natural-looking nail without causing damage. If you accidentally apply too much glue, use a cotton swab dipped in acetone to remove the excess. Remember to work quickly and efficiently when using KDS nail glue, and always use caution when working with any nail products.
Don’t Apply Glue to Broken or Infected Nails
When using KDS Nail Glue, it is important not to apply it to broken or infected nails. This can cause further damage and even lead to infection. Here are some reasons why you should avoid using nail glue on damaged nails:
- Risk of Infection: Applying nail glue to a broken or infected nail can increase the chances of infection. The glue can trap bacteria and fungus, which can lead to further harm. It is always best to wait for the nail to heal before using nail glue.
- Further Damage: Using nail glue on a broken nail can cause further damage to the nail bed. The glue can get under the nail and cause it to lift, which can be painful and take longer to heal.
- Unsightly Appearance: If the nail is already damaged, adding nail glue can make it look worse. The glue may not adhere properly, and the broken parts of the nail can still be visible, making the nail look unattractive.
To avoid these issues, it is important to wait for the nail to heal before applying nail glue. If you notice any signs of infection, such as redness, swelling, or discharge, avoid using nail glue altogether until the nail has fully healed. Instead, seek medical attention to treat the infection.
Similarly, if you have a fungal infection, using nail glue can actually make the problem worse. Fungal infections require specific treatments, and nail glue is not an effective solution.
By following these guidelines, you can ensure that you are using KDS Nail Glue safely and effectively. Always pay attention to the condition of your nails and take the appropriate measures to keep them healthy.
Store Glue in a Cool and Dry Place
It is important to properly store your KDS nail glue to ensure its longevity and effectiveness. Here are some tips for storing your glue:
- Keep the glue in a cool place: Heat can cause the glue to dry out and become less effective. Store the glue in a cool, dry place, away from direct sunlight or other sources of heat.
- Avoid moisture: Moisture can also cause the glue to become less effective. Keep the glue in a dry place, away from humid areas like bathrooms or kitchens.
- Seal the glue tightly: After using the glue, make sure to tighten the cap securely to prevent air from entering the tube. This will help prevent the glue from drying out between uses.
- Keep the glue away from children and pets: KDS nail glue can be harmful if ingested, so it is important to keep it out of reach of children and pets.
By following these simple tips, you can ensure that your KDS nail glue stays in top condition, providing you with the strong, long-lasting hold you need for your nail enhancements.
Avoid Contact with Skin and Eyes
It is important to take safety precautions when using KDS Nail Glue. One of the most essential precautions is to avoid contact with skin and eyes. The glue is formulated with ingredients that can irritate skin and cause eye damage if not handled properly.
How to avoid skin contact: When applying the glue to your nails, make sure to keep the glue away from your skin by using a small amount of glue and placing it directly on the nail. If you accidentally get glue on your skin, quickly wipe it off with a cloth or tissue. Avoid touching the glue on your skin, as this will spread the glue and make it difficult to remove.
How to avoid eye contact: If KDS Nail Glue comes into contact with your eyes, you should immediately flush them with water for at least 15 minutes. Seek medical attention if irritation persists. To avoid eye contact, it is best to wear protective goggles when applying the glue to your nails.
To summarize, KDS Nail Glue is a strong adhesive that is best handled with care. When using the glue, avoid contact with your skin and eyes to prevent irritation and injury. Always store the glue in a cool and dry place, away from children and pets. By following these safety precautions, you can enjoy beautiful and long-lasting nails without any issues.
| Safety Precautions for Using KDS Nail Glue | |
|---|---|
| Precaution: | How to avoid |
| Avoid skin contact | Use a small amount of glue and place it directly on the nail. If glue gets on skin, quickly wipe it off with a cloth or tissue. Avoid touching the glue on skin. |
| Avoid eye contact | Wear protective goggles when applying glue to your nails. If glue gets into eyes, immediately flush with water for at least 15 minutes and seek medical attention if irritation persists. |
| Storage | Store in a cool and dry place, away from children and pets. |
Conclusion
In conclusion, opening KDS nail glue can be a simple and easy process if done correctly. By following the step-by-step guide outlined in this article, you can open the glue tube without any issues. Remember to choose the right time to open the tube, gather your supplies, and place the tube in warm water to make it easier to open.
When you are using KDS nail glue, it is important to use small amounts and avoid applying it to broken or infected nails. Store the glue in a cool and dry place to extend its shelf life, and avoid contact with skin and eyes.
Overall, KDS nail glue is a versatile and reliable nail product that can be used to fix broken nails, attach nail tips, and add extra strength to your nails. With its many benefits, KDS nail glue is a must-have for anyone who wants to achieve long-lasting, beautiful nails. So get ready to open your KDS nail glue and start creating stunning nail looks today!
Frequently Asked Questions
1. Can I use KDS Nail Glue on natural nails?
Yes, KDS Nail Glue can be used on natural nails.
2. How long will the glue hold for?
The glue can hold for several days, depending on the individual’s nails and how the glue is used.
3. What do I do if the glue gets on my skin?
Wipe off the glue as soon as possible with a cloth or tissue. Avoid getting the glue on your eyes or mouth.
4. Can I use KDS Nail Glue on fake nails?
Yes, KDS Nail Glue can be used on fake nails. It is actually a popular adhesive choice for attaching artificial nails.
5. Is KDS Nail Glue safe for children to use?
It is recommended that children use this glue under adult supervision, as it can be harmful if ingested or gets in the eyes.
6. How do I remove KDS Nail Glue?
KDS Nail Glue can be removed with acetone or nail polish remover. Soak your nails in the solution for a few minutes to dissolve the glue.
7. Can I use KDS Nail Glue for other purposes besides nails?
No, KDS Nail Glue is designed specifically for use on nails and should not be used for any other purposes.
8. Can I use KDS Nail Glue with nail polish?
Yes, KDS Nail Glue can be used with nail polish. It is recommended to apply the glue before the polish and allow it to dry completely before applying the polish.
9. Is KDS Nail Glue waterproof?
Yes, KDS Nail Glue is waterproof once it dries. This makes it great for use even if hands will be in water frequently.
10. Can KDS Nail Glue be used to fix a cracked nail?
It is not recommended to use KDS Nail Glue to fix a cracked nail. Instead, seek the help of a professional nail technician or doctor.