Picture this: you’ve spent all season nurturing your garden, only to have it destroyed by pesky insects. Or, perhaps you’re tired of ants invading your home and ruining your pantry staples. Whatever your pest problem may be, you need a solution that is effective and easy to use. Luckily, there is a tried and true solution that has been used for generations – tanglefoot glue. In this DIY guide, we will take you through the process of making your own tanglefoot glue step-by-step. Not only will you save money, but you’ll also have the knowledge to tackle any pest problem that comes your way. So, put on your DIY cap and let’s get started!
Benefits of Tanglefoot Glue
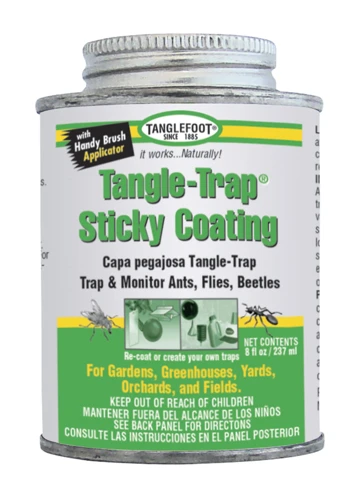
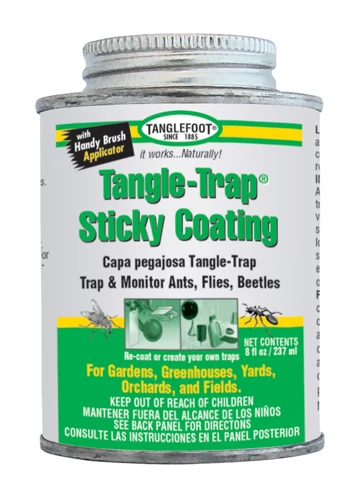
If you’re looking for a natural and effective method of pest control or a way to keep your garden healthy without using harmful chemicals, tanglefoot glue may be the solution you’re looking for. Tanglefoot glue is a non-toxic, sticky substance that can be applied to different surfaces to trap insects and pests such as ants, aphids, and caterpillars. But the benefits of tanglefoot glue extend beyond pest control. In this section, we’ll explore the different ways tanglefoot glue can be used and its benefits for both gardening and pest control. So sit tight and discover how this simple DIY glue recipe can become a lifesaver for your plants and garden.
Pest Control
Tanglefoot glue is an effective solution for pest control. It is perfect for trapping crawling insects and pests without using harmful chemicals. Tanglefoot glue is known to be successful at trapping various pests, including ants, cockroaches, spiders, and caterpillars.
Ants: Tanglefoot glue is an excellent pest control solution for ants. Ants are attracted to sweet smells and are mostly found crawling on floors and walls. You can apply tanglefoot glue along the base of the walls and on floors to prevent ants from crawling around your home. It is best to apply a thin layer of glue because if the layer is too thick, the ants may avoid it.
Cockroaches: Cockroaches are among the most hated pests due to their ability to cause food contamination and carry various diseases. Tanglefoot glue is a solution to trap these pests. Spread tanglefoot glue on a small strip of cardboard and place it in cockroach-infested areas, such as under the sink, behind the refrigerator, or in the pantry.
Spiders: Spiders can be annoying to deal with. They typically hide in dark corners of your home and crawl around unnoticed. Tanglefoot glue is an excellent solution for trapping spiders. Spread glue on a small piece of cardboard and place it in areas where spiders are most prevalent.
Caterpillars: Caterpillars can cause serious damage to plants and crops. To prevent caterpillars from damaging your plants, you can wrap a band of tanglefoot glue around the trunk of the plant. This will trap the caterpillars and prevent them from climbing up the plant.
Tanglefoot glue is an excellent pest control solution for those seeking a natural and efficient way to trap crawling pests. However, it is important to note that glue traps are not recommended for capturing animals, such as mice or rats. For more information on why glue traps are not recommended, see here.
Gardening
Gardening can be a challenging task, especially when dealing with pests that can damage plants and crops. Tanglefoot glue can be an effective tool for protecting your garden from unwanted insects and critters. By creating a barrier around trees, bushes, and other plants, tanglefoot glue can prevent pests from crawling up and damaging the leaves and stems. Tanglefoot glue is particularly useful for protecting fruit trees from crawling insects like ants, which can eat the fruit or inadvertently introduce aphids, scale, or other pests.
To use tanglefoot glue in gardening, apply it to a band of stiff paper or plastic and wrap it around the base of the tree, ensuring that the glue is sticky side up. The glue should be spread evenly around the band to ensure that pests can’t sneak through gaps. Check on the glue regularly and remove any dead insects or debris from the surface to ensure that it remains sticky.
Here’s a table outlining the benefits of using tanglefoot glue for gardening:
| Benefits of Tanglefoot Glue for Gardening | Description |
|---|---|
| Protects plants from crawling insects | Tanglefoot glue creates a barrier that prevents insects from reaching the leaves and stems of plants. |
| Easy to apply | Tanglefoot glue can be applied to a band of paper or plastic, making it easy to wrap around the base of a tree or bush. |
| Non-toxic | Tanglefoot glue is made from natural ingredients and is safe to use in the garden. |
| Cost-effective | Homemade tanglefoot glue is significantly cheaper than store-bought pest control products. |
If you want to learn more about how glue works, check out our article on what makes glue work.
Materials Needed
Making tanglefoot glue requires several materials which are easy to acquire. One of the main ingredients is petroleum jelly, which can be found in most drugstores or supermarkets. The next ingredient is resin, which can be acquired from most hardware stores or online retailers.
Another important ingredient is linseed oil, which can be found in art supply stores or online retailers. The fourth ingredient is honey, which can be sourced from local beekeepers or grocery stores.
Additionally, you will need a stirring utensil such as a spatula or wooden spoon, a heat source for melting the petroleum jelly, and a container for storing the finished glue.
It is important to make sure that all materials are measured accurately and that the mixing process is done meticulously to ensure the glue reaches the desired consistency. If you’re missing one or more of the materials, it may be necessary to purchase them before beginning the process, but the investment is worth it for an effective pest control solution.
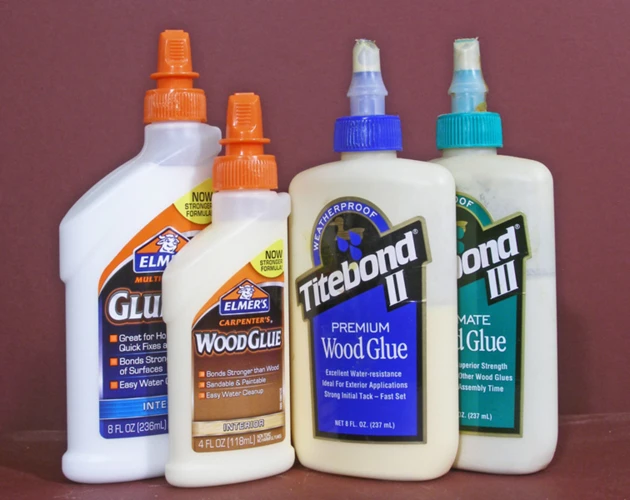
Note: Avoid using any other type of glue as a substitute for tanglefoot glue. While surgical glue, edible glue, Elmer’s glue, paper glue, wood glue, rugby glue, and Decopatch glue may have their unique uses, they are not intended for pest control and may not be effective at trapping insects.
Step-by-Step Guide to Making Tanglefoot Glue
Making your own tanglefoot glue is easy and cost-efficient, and it requires only a few materials. Whether you’re looking to protect your garden or keep pesky insects at bay, tanglefoot glue is a great solution that can be made in the comfort of your own home. With this step-by-step guide, you’ll learn how to make your own tanglefoot glue and discover helpful tips for using it. So, roll up your sleeves and let’s get started! By the way, if you’re interested in learning more about other types of glue, you can click here to find out about edible glue, or here to learn about paper glue.
Step 1: Heat the Petroleum Jelly
To begin making your own tanglefoot glue, the first step is to heat up the petroleum jelly. You’ll want to use a double boiler for this step to prevent the petroleum jelly from burning or scorching. If you don’t have a double boiler, you can create one by placing a heatproof bowl over a pot of boiling water.
Materials Needed:
| 1 cup Petroleum Jelly |
Instructions:
- Fill the bottom of double boiler with water and bring to a boil.
- Place the top pot of the double boiler on the bottom pot.
- Add 1 cup of petroleum jelly to the top pot of the double boiler.
- Stir the petroleum jelly constantly until it’s completely melted.
- Turn off the heat once the petroleum jelly has melted.
Heating the petroleum jelly is an important step in making tanglefoot glue as it helps to create a sticky base that will help trap pests. Make sure to stir the petroleum jelly constantly to prevent it from overheating or browning. You may want to use a candy thermometer to monitor the temperature of the petroleum jelly to ensure it doesn’t exceed 180°F.
Once the petroleum jelly has melted, turn off the heat and proceed to the next step. If you’re unsure about any of the ingredients or materials needed for this project, refer back to the materials needed section of this guide.
Step 2: Add the Resin
Step 2: Add the Resin
Once the petroleum jelly has completely melted, it is time to add the resin. You can find resin at any local hardware store or online. One of the most popular types of resin used in making tanglefoot glue is pine resin. It is easy to find and is known for its sticky, highly adhesive properties that make it difficult for pests to escape. You will need about 1/2 cup of resin for this recipe.
Tip: Use a double boiler to melt the resin to avoid burning it. This will also ensure that it mixes well with the petroleum jelly.
Slowly add the resin to the melted petroleum jelly, stirring constantly to prevent clumps. Keep stirring until the resin has completely melted and combined with the petroleum jelly.
Note: Adding too much resin can cause the glue to become too stiff and difficult to apply, while adding too little resin can make it less effective in catching pests.
Pro tip: If you do not have access to resin, you can use other natural adhesive agents such as honey or tree sap instead. They will add stickiness to the glue and make it more effective in trapping pests.
Once the resin has been added to the mixture, move on to the next step in the process: adding linseed oil.
Step 3: Mix in the Linseed Oil
Mixing in the linseed oil is the third step in the process of creating tanglefoot glue. This step is important because it helps to make the glue more pliable, while also increasing its stickiness and durability. Linseed oil is a natural oil that is derived from the seeds of the flax plant. It has been used for centuries in paints, varnishes, and other products because of its ability to dry quickly and form a hard, protective layer.
To mix the linseed oil into the glue, first measure out the desired amount of linseed oil and pour it into the mixing bowl. Then, slowly add the melted petroleum jelly and pine resin to the bowl, stirring constantly to prevent clumping. It’s important to make sure that the linseed oil is well mixed into the glue mixture so that it will be evenly distributed throughout. This will help ensure that the glue is consistent in its performance when applied to surfaces.
Linseed oil can help to provide additional benefits to the tanglefoot glue. It can help to make the glue more elastic, which can make it more effective at trapping pests. Additionally, it can help the glue to withstand exposure to water and other environmental factors, which can make it more durable and long-lasting.
It’s important to ensure that the linseed oil used in the mixture is of high quality, as low-quality oils may contain impurities that can impact the performance of the glue. Additionally, it’s important to wear gloves and work in a well-ventilated area when mixing the glue, as some of the ingredients can be harmful if ingested or inhaled.
Mixing in the linseed oil is a crucial step in creating tanglefoot glue. By doing so, you can ensure that the glue is pliable, durable, and able to trap pests effectively. If you’re interested in learning more about glue, check out this resource on how much a gallon of glue weighs.
Step 4: Add the Honey
After mixing in the linseed oil, it’s time to add a favorite sweetener to the concoction. While many recipes for tanglefoot glue call for corn syrup, we recommend using honey. It is a natural, healthier option that is readily available.
Step 4: Add the Honey
To begin, measure out a half-cup of honey and pour it into the mixture. Stir the ingredients thoroughly to ensure that everything is properly mixed and blended together.
Using honey instead of corn syrup is a great choice for several reasons. For one, it is a renewable resource and more environmentally friendly than corn syrup. It also acts as a natural preservative, helping to extend the shelf-life of your tanglefoot glue.
Plus, using honey adds an extra layer of attraction for insects. Insects are naturally attracted to sweet substances, so adding honey will help to lure them towards the trap.
It’s important to note that while honey is a great option for luring in pests, it may also attract beneficial insects such as bees. To avoid harming bees, place the tanglefoot glue in areas that are not frequented by bees or other beneficial insects.
Once the honey has been mixed in, continue stirring the mixture until it is smooth and consistent. The resulting glue will have a thick, sticky consistency and will easily trap any insect that comes into contact with it.
With the honey added, the final step is cooling and storing the tanglefoot glue. We’ll cover that in the next section.
Step 5: Cool and Store the Glue
After the glue has been thoroughly mixed, the next step is to cool and store it. Allow the glue to cool down to room temperature before transferring it into a clean, airtight container. It is best to use a container with a wide opening for easy scooping and application. Label the container with the date and name of the glue to keep track of its shelf life.
When storing the glue, it is important to keep it in a cool, dry place away from direct sunlight and heat sources. Do not store the glue in the refrigerator as it can affect its consistency and texture. With proper storage, homemade tanglefoot glue can last for several months.
It is important to note that the glue may harden over time or if exposed to cold temperatures. If the glue hardens, simply heat it up again on low heat until it reaches a smooth consistency. Additionally, avoid storing the glue in metal containers as it can cause the glue to deteriorate.
Cooling and storing the glue properly is a crucial step in the process to ensure the glue lasts and retains its effectiveness. So, be sure to take proper storage precautions to keep your homemade tanglefoot glue ready for use when needed.
Tips for Using Tanglefoot Glue
Tips for Using Tanglefoot Glue:
1. Apply the Glue in the Right Place: To make the most of your tanglefoot glue, it is essential to apply it in the right place. Apply the glue directly on the area where the pests are causing damage or crawling, such as the tree trunk, stem, or pot, to ensure the best results. It’s best to apply a thin layer of glue and use just enough to cover the area.
2. Use it at the Right Time: Tanglefoot glue should be applied at the right time for optimal pest control. Generally, it’s best to apply the glue in the late summer or fall when insects and bugs are most active. Also, regularly check the glue for pests and replace it when it becomes dirty or full of pests.
3. Keep the Glue Sticky and Fresh: To keep the tanglefoot glue sticky and fresh, avoid exposing it to high temperatures or direct sunlight. The glue’s sticky property can be affected by hot temperatures, rendering it less effective. Thus, keeping it in a cool, dark place is crucial. Also, try to avoid contaminating the glue with garden debris or dust.
4. Use Adequate Amounts: Use adequate amounts of tanglefoot glue to avoid overusing the product or leaving it exposed and underutilized. Consider the size and location of the area where the pests are present, and use the appropriate amount of glue for optimal results.
5. Do Not Use on Bark of Young Trees: While tanglefoot glue is an effective control for insects, it is not recommended for use on the bark of young trees, as it may cause damage or scarring to the tree. This is because the glue does not allow free movement of water and air through the bark, which may cause long-term problems for the tree’s health.
By following these tips, you can ensure the proper use and effectiveness of tanglefoot glue in your pest control efforts. It’s an eco-friendly and efficient way of keeping harmful insects at bay, and using it correctly can make a huge difference. If you want to learn more about glues, you might be interested in how much weight can wood glue hold.
Safety Precautions
Safety Precautions
Before using tanglefoot glue, it’s essential to take precautionary measures to avoid risks and ensure safety. Here are some safety precautions you should consider:
- Protective Gear: Wearing protective gear like gloves, goggles, and a mask is a must when making and applying tanglefoot glue. This helps in preventing the irritation caused by the glue.
- Avoid Exposure: Avoid touching the glue or inhaling its fumes, as they can cause respiratory issues and skin irritation. If you accidentally expose yourself to the glue, wash the affected area with soap and warm water. Seek medical attention if the irritation persists.
- Keep Away from Children and Pets: Ensure that you keep the glue out of reach from children and pets. Tanglefoot glue is non-toxic but can be dangerous if it sticks to the face or mouth.
- Store the Glue Properly: It’s essential to store the glue in a cool and dry place, away from sunlight or heat. This helps in ensuring the glue holds its adhesive properties. Storing the glue in a warm place can cause it to melt, and the adhesive strength may weaken.
- Dispose of the Glue Responsibly: After using the glue or disposing of an old glue trap, make sure to dispose of it in a responsible manner. Do not throw the glue in the trashcan. Instead, dispose of it in a hazardous waste facility or contact your local waste management center for guidance.
By taking the necessary safety precautions, you can ensure a safe and effective experience with tanglefoot glue. If you have any questions regarding safety while making or using tanglefoot glue, you can contact a medical professional for guidance.
Remember, safety should always be a top priority when dealing with adhesives or glues. In case of emergencies, seek medical attention immediately. To learn more about glue safety, you can explore related resources like how long surgical glue lasts after laparoscopy or what is rugby glue.
FAQs
As you’re getting started with using tanglefoot glue for pest control and gardening purposes, you may have some questions or concerns. In this section, we’ll answer some of the most frequently asked questions about tanglefoot glue. From its effectiveness on certain pests to its potential impact on beneficial insects, we hope to provide you with the information you need to make informed decisions about using tanglefoot glue in your home or garden. Let’s take a closer look.
What pests can tanglefoot glue trap?
Tanglefoot glue is a highly effective pest control solution, capable of trapping a wide variety of insects and pests. In fact, there are very few pests that can escape the sticky grasp of Tanglefoot glue.
Here is a list of some of the common pests that Tanglefoot glue can effectively trap:
| Pests | Effectiveness of Tanglefoot Glue |
|---|---|
| Ants | Very effective. Ants are unable to move on the sticky surface and quickly become trapped. |
| Caterpillars | Highly effective. Caterpillars that crawl over the glue will become stuck and eventually perish. |
| Earwigs | Effective. Earwigs will have trouble crawling over the sticky surface and will eventually become stuck. |
| Flies | Highly effective. Flies quickly become trapped on the sticky surface of Tanglefoot glue. |
| Moths | Effective. Moths may be attracted to the glue and become stuck when they land on it. |
| Slugs and snails | Very effective. Slugs and snails that crawl over the glue will become trapped and unable to move. |
| Sowbugs and pillbugs | Effective. These pests will have trouble crawling over the sticky surface and will eventually become stuck. |
| Spiders | Effective. Spiders may become trapped on the glue if they crawl over it, but some species may be able to avoid it. |
| Thrips | Highly effective. Thrips are small and delicate insects that are easily trapped on the sticky surface of Tanglefoot glue. |
Keep in mind that Tanglefoot glue is non-toxic and safe to use around pets and children, making it an excellent natural alternative to chemical insecticides.
Is tanglefoot glue harmful to bees or other beneficial insects?
It’s important to note that while tanglefoot glue is an effective way to control a variety of pests, it can also harm beneficial insects such as bees. These insects play a crucial role in pollination and maintaining a healthy ecosystem.
Here are a few things to keep in mind if you’re using tanglefoot glue in an area where bees or other beneficial insects are present:
- Place the glue traps away from flowering plants: If you’re using tanglefoot glue as a pest control measure in your garden, try to place the traps as far away from flowering plants as possible. This will help reduce the likelihood of bees or other pollinators getting stuck in the glue.
- Use less sticky alternatives: If you’re concerned about accidentally trapping beneficial insects, you can try using less sticky alternatives to tanglefoot glue. For example, sticky barriers made from diatomaceous earth or copper tape can be just as effective at catching crawling pests without harming bees or other beneficial insects.
- Remove any trapped insects promptly: If you do find that bees or other beneficial insects have become trapped in your tanglefoot glue traps, it’s important to remove them as soon as possible. Gently remove the insects using a soft brush or toothbrush, and try to release them in an area away from the trap.
By taking these precautions, you can minimize the impact of tanglefoot glue on beneficial insects, while still enjoying the pest control benefits it provides.
How often should I replace tanglefoot glue?
The frequency of replacing tanglefoot glue depends on several factors such as the weather conditions, pest density, and the location where it is being used. However, it is generally recommended to replace the glue once it is coated with insects or dust, or at least once every two weeks to ensure its effectiveness.
Here are some factors to consider when determining how often you should replace tanglefoot glue:
- Weather: In hot and humid conditions, the glue may become sticky and attract more insects, which can quickly fill up the available space. In this case, it’s advisable to replace the tanglefoot glue more frequently.
- Pest density: If you have a high-density infestation, the tanglefoot glue may become overwhelmed by the number of insects and lose its stickiness, so you might need to replace it sooner.
- Location: If the tanglefoot glue is placed in an area with a lot of dust or debris, it may get covered and lose its effectiveness. In such cases, it’s best to replace the glue more often.
Replacing the tanglefoot glue regularly is crucial to keep pests under control. Using old or ineffective glue will not only be a waste of effort, but it could also attract more pests and defeat the whole purpose of using tanglefoot glue as a pest control tool.
So, make sure to monitor the glue regularly and replace it promptly whenever necessary to ensure its continued effectiveness.
Conclusion
In conclusion, making tanglefoot glue at home is an excellent way to control pests and protect your garden plants from damage. By using simple ingredients and following our step-by-step guide, you can create a highly effective sticky glue that traps insects on contact.
Not only is tanglefoot glue effective, but it’s also incredibly versatile. From catching ants and other crawling insects to preventing caterpillars from crawling up plants, there are countless ways to use tanglefoot glue in your garden.
Before using tanglefoot glue, be sure to follow our tips for best results and safety precautions. Always wear gloves and handle the hot glue with care. Additionally, check the glue regularly and replace it as needed to maintain its effectiveness.
Overall, tanglefoot glue is a cost-effective, natural and easy-to-make solution to many pest problems. By making it yourself at home, you avoid harsh chemicals and protect the environment while keeping your garden healthy and free of pests. Give it a try and see the difference for yourself!
Frequently Asked Questions
What materials do I need to make tanglefoot glue?
To make tanglefoot glue, you will need petroleum jelly, pine resin, linseed oil, and honey.
What is the ratio of ingredients to make tanglefoot glue?
The ratio of ingredients for tanglefoot glue is 1:1:1:1 for petroleum jelly, pine resin, linseed oil, and honey.
Can I use a different type of oil instead of linseed oil?
No, it is essential to use linseed oil for tanglefoot glue as it acts as a drying agent and helps the glue to harden.
How long will it take for the glue to cool before storing it?
It usually takes around 30 minutes for the glue to cool before storing it.
How do I apply the tanglefoot glue?
Tanglefoot glue can be applied in a thin layer onto surfaces such as tree trunks or stakes using a brush or spatula.
How long does the tanglefoot glue last?
The tanglefoot glue can last for several months, but it may need to be reapplied if it becomes dirty or filled with insects.
Does tanglefoot glue work on all types of pests?
Tanglefoot glue is especially effective against crawling insects such as ants and caterpillars.
Is it safe to use tanglefoot glue for organic gardening?
Yes, tanglefoot glue is a natural and non-toxic insecticide that is safe to use for organic gardening.
How do I remove tanglefoot glue from skin or clothing?
Tanglefoot glue can be removed from skin or clothing using vegetable oil or petroleum jelly.
Can tanglefoot glue be used indoors?
No, tanglefoot glue is not recommended for indoor use as it can make floors or surfaces slippery and difficult to clean.