Are you looking for a fun and easy activity to do with kids? Are you in need of a sensory distraction or stress-reliever for yourself? Look no further than homemade slime – a fascinating polymer that can be made with just a few simple ingredients. In this article, we’ll explore how to make slime using only glue and water. You’ll be amazed at how easy it is to create an oozy, stretchy substance that can provide hours of entertainment. So gather your materials and get ready to dive in!
Materials Needed
When it comes to making slime, you don’t need a lot of materials. In fact, you only need a few basic items that you probably already have in your home. The most important material you will need is glue. Whether you choose to use white or clear glue is up to you, but if you’re not sure which type of glue to use for your slime, check out our guide on what glue to use for crystals. Water is another key element to making slime, and you’ll also need a mixing bowl, stirring stick, and measuring cup (optional). If you want to add some color to your slime, food coloring is also an option, and you can find out how to make slime with UHU glue or Elmer’s glue by checking out our other slime-making guides. Let’s dive into how to make slime with just glue and water.
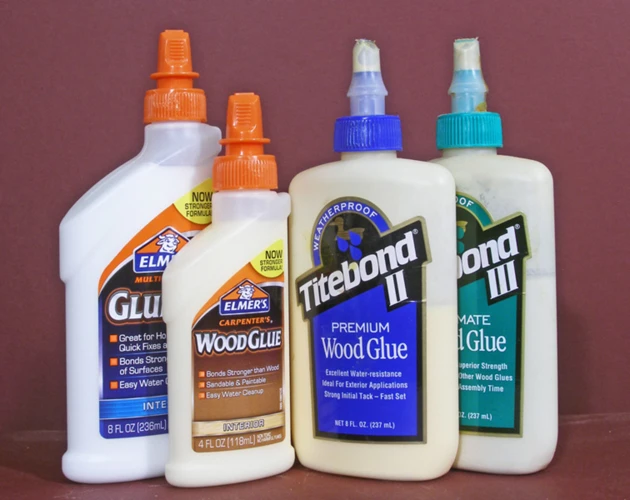
1. White or Clear Glue
To make slime with just glue and water, you will need to start with white or clear glue. This type of glue is readily available in most craft stores and is also available for purchase online. One of the most popular brands of white glue is Elmer’s Glue, which can be found in most stores.
White or clear glue is the main ingredient in slime and acts as a base to give it the desired consistency and elasticity. It is important to use a quality glue to ensure that the slime stretches and bounces properly. Cheaper or lower quality glues can result in a slime that is too runny, stiff, or breaks apart easily.
Other types of glue can be used in place of white or clear glue, including glitter glue or UHU glue. Glitter glue is especially popular for making sparkly slime, while UHU glue is known for its strong adhesive properties which can result in a firmer slime texture.
When selecting a white or clear glue, be sure to check the label to ensure that it is non-toxic and child-friendly. It is also a good idea to purchase enough glue for the amount of slime you plan on making, as some slime recipes require larger amounts of glue.
Using white or clear glue is essential for making slime with just glue and water. You can experiment with other types of glue if you’d like to create different textures or effects in your slime. To learn how to make slime using UHU glue or other ingredients, check out our other articles on how to make slime with UHU glue, how to make slime with glue, detergent, and baking soda, and how to make slime with only glue and water.
2. Water
Water is an essential ingredient for making slime with glue. It is used to dilute the glue and create the desired consistency. It is recommended to use water at room temperature for better results. You can use tap water or distilled water. Tap water works well in most cases, but if you want to avoid any impurities or minerals, distilled water may be a better choice.
To make slime with just glue and water, you will need to measure out the proper ratio of glue to water. The typical ratio is one part glue to one part water. However, you can adjust the ratio according to your preference. If you want a thicker slime, use more glue than water. On the other hand, if you want a runnier slime, use more water than glue.
Here is a list of steps for using water to make slime with glue:
- Measure out the glue and pour it into a mixing bowl.
- Measure out an equal amount of room temperature water and add it to the bowl with the glue. You can use a measuring cup if you prefer.
- Mix the glue and water together using a spoon or stirring stick. Stir until the mixture is smooth and free of lumps.
- If you want to add color to your slime, now is the time to add a few drops of food coloring.
- Continue stirring until the color is evenly distributed throughout the mixture.
You can experiment with the ratio of glue to water to find your desired consistency. Keep in mind that the type of glue used can also affect the consistency of the slime. If you want to try a different type of glue, check out how to make slime with Elmer’s glue or how to make slime with glue stick and Tide for some alternative methods.
Another fun way to add some personality to your slime is by adding glitter or confetti. If you want to know how to use glitter glue sticks, or how to glue glitter onto your slime, you can check out these useful guides.
Once you’re done playing with your slime, it’s important to store it in an airtight container to keep it fresh. How to dry glitter glue quickly and how to glue sugar cubes are also useful to know if you want to make creative crafts with glue. Now that you know how to make slime with glue and water, it’s time to get creative and have some fun!
3. Mixing Bowl
When it comes to making slime with just glue and water, having the right tools is essential. Along with white or clear glue and water, you’ll need a mixing bowl to combine these ingredients together. This mixing bowl should be a decent size to comfortably hold everything without spilling over.
What kind of mixing bowl should you use?
As long as the bowl is made from a material that won’t react with either the glue or water, you’re good to go. Most mixing bowls made from plastic, ceramic, or glass will work just fine. However, it’s always best to steer clear of any metal bowls. Metal can sometimes cause chemical reactions with some of the ingredients, which can compromise the quality of the slime.
To help you choose the right mixing bowl for your slime-making endeavors, here’s a helpful table outlining some commonly used materials that might be suitable:
| Material | Pros | Cons |
|---|---|---|
| Plastic | Lightweight, easy to find | May hold onto scents if not cleaned properly |
| Ceramic | Durable, less likely to stain | May chip or crack if dropped |
| Glass | Does not react with ingredients, easy to clean | May break if dropped |
Keeping your mixing bowl clean
Before and after using your mixing bowl, it’s essential to clean it thoroughly. Soap and warm water should do the trick. Make sure to get any leftover glue and water out of the crevices of your bowl, which can be a common spot for leftover residue. If you’re planning on making different-colored slimes, you might want to consider having different mixing bowls to avoid cross-contamination of colors.
Now that you know all about mixing bowls, you’re ready to move onto the next step in making slime with just glue and water.
4. Food Coloring (Optional)
If you want to give your slime a pop of color, food coloring is a great option. Here’s what you need to know:
| Pros | Cons |
|---|---|
|
|
When using food coloring, start with a few drops and mix thoroughly before adding more. It’s important to add a little at a time so that you can achieve the desired color without making the slime too watery or too sticky. If you’re making slime with younger children, you may also want to consider using gloves to avoid any accidental spills or stains on hands or clothing.
Now that you know some of the pros and cons of using food coloring in your slime, it’s up to you to decide if you want to add a splash of color to your creation.
5. Spoon or Stirring Stick
When making slime with just glue and water, having a spoon or stirring stick is essential to achieving the right consistency. This tool allows you to effectively stir and mix the glue and water together, ensuring that the slime is smooth and free from any clumps or chunks.
Consider using a long-handled spoon or stirring stick to make it easier to reach the bottom of the mixing bowl and fully incorporate all the ingredients. It’s important to use a utensil that is made of non-porous material, such as plastic or stainless steel, to prevent any unwanted reactions that could negatively affect the quality of the slime.
When using a spoon or stirring stick, it’s important to constantly stir the mixture in a slow and steady manner, making sure to scrape the sides and bottom of the bowl so that all the glue and water is evenly mixed. This will help to ensure that the slime has a uniform texture, with no bits of glue or water left unmixed.
Another tip when using a spoon or stirring stick is to avoid over-stirring the mixture, as this can cause the slime to become too hard and rubbery. Stop stirring once the mixture is fully blended and has reached a smooth, runny consistency.
Having a spoon or stirring stick is a crucial component when making slime with just glue and water. Make sure to use a non-porous utensil and stir the mixture in a slow, steady manner to achieve the best results.
6. Measuring Cup (Optional)
When making slime with just glue and water, a measuring cup can be an optional but helpful tool to have. It can assist in achieving the desired consistency of your slime by ensuring that the right ratios are used. It’s important to note that different types of glue may require different ratios of glue to water, so using a measuring cup can provide consistency in your slime making.
If you choose to use a measuring cup, it’s best to use one with clear measurement markings. This can help you accurately measure both the glue and water needed for your slime. Additionally, it’s a good idea to use a separate measuring cup for your glue and water. This can prevent any cross-contamination between the two and keep your slime mixture pure.
Using a measuring cup also allows for more precise adjustments to be made to your slime recipe. For instance, if your slime is too runny, you can add more glue to increase its thickness. Conversely, if it’s too thick, you can add more water to loosen it up.
Tip: When measuring out your glue, make sure to get all of it out of the measuring cup to ensure you are using the correct amount. A spatula can be a useful tool to help you scrape any leftover glue out of the measuring cup.
While the use of a measuring cup is optional when making slime with just glue and water, it can provide consistency in your ratio and help you achieve your desired slime texture. If you choose to use a measuring cup, make sure it has clear measurement markings and separate cups are used for glue and water.
Step-by-Step Instructions
Now comes the exciting part! Follow these simple steps carefully and you’ll have your very own slime in no time. Don’t worry if you’ve never made slime before, this step-by-step guide will make it easy for you. Just make sure to read each step thoroughly before moving on to the next. Grab your materials, let’s get started!
1. Measure Out Glue
When making slime with just glue and water, it’s important to measure out the correct amount of glue to ensure the right consistency. Too much glue can result in an overly sticky and gooey slime, while too little glue can result in a clumpy mess.
To measure out the glue, you’ll need either a measuring cup or a scale. Here are some guidelines to follow:
| Type of Glue | Amount |
|---|---|
| White Glue | 1/2 cup |
| Clear Glue | 1/3 cup |
If you don’t have a measuring cup, you can estimate the amount by filling the mixing bowl with the desired amount of glue. Remember to leave some room for the water and any additional ingredients you may want to add.
Tip: It’s always better to start with less glue and add more as needed. You can always adjust the consistency of the slime later on by adding more water or glue.
2. Add Water
After measuring out the glue, the next step is to add water. This step is crucial in achieving the perfect consistency for the slime. Here are the details on how to add water to the glue:
- Step 1: Get a measuring cup and fill it with water. The amount of water you add to the glue will depend on the type of glue you are using and the consistency you want to achieve. A good starting point is adding the same amount of water as glue, for example, if you used 2 cups of glue, add 2 cups of water.
- Step 2: Slowly pour the water into the mixing bowl with the glue while stirring. It’s important to pour the water gradually to ensure that everything is mixed evenly.
- Step 3: If you added too much water and the mixture becomes too watery, add more glue to thicken it. On the other hand, if the mixture is too thick, gradually add more water until you achieve the desired consistency.
Remember, adding water is a crucial step in creating the perfect slime. Be sure to experiment with the amount of water added to achieve the desired result. With this step-by-step guide and tips, you can create slime that’s fun and satisfying to play with.
3. Mix Glue and Water
Once you’ve added the water to the mixing bowl with the glue, it’s time to mix the two ingredients together. Use a spoon or stirring stick to combine the glue and water until you achieve a smooth consistency. This process may take a few minutes, so be patient and keep stirring until the glue and water are fully incorporated. Make sure there are no lumps or streaks of glue in the mixture.
If you’re struggling to mix the glue and water together, try adding a bit more water to thin it out. Alternatively, you can use a blender or hand mixer to get a smoother consistency. However, be careful not to over-mix, as this can cause the slime to become too stiff and difficult to work with.
As you’re mixing the glue and water together, take note of the texture. If the mixture is too runny, add a bit more glue. On the other hand, if it’s too thick, you can add more water. The ideal consistency should be stretchy and pliable, but not too slimy or sticky.
One way to test if the consistency is right is to try pulling the slime apart. It should be stretchy and hold together without breaking apart too easily. If it’s too stiff and tears apart, add a bit more water. If it’s too sticky and doesn’t hold its shape, add more glue.
Once you’ve achieved the perfect consistency, it’s time to move on to the next step and add some color to your slime.
4. Add Color (Optional)
One of the fun parts of making slime is adding color to make it visually appealing. While this step is optional, it can make a big difference in the end result. Here are a few tips for adding color to your slime:
- Start Small: It’s always a good idea to start by adding just a drop or two of food coloring to your glue mixture. You can always add more later if you want a brighter color.
- Use Gel Food Coloring: Gel food coloring is a great choice for slime making because it’s more concentrated than liquid food coloring. This means you’ll get brighter colors with fewer drops.
- Experiment: Don’t be afraid to mix different colors to create a custom shade for your slime. You can even divide your glue mixture into several bowls and create a rainbow slime!
- Blend Well: Make sure to mix your color in thoroughly to get consistent coloring throughout your slime.
Adding color can be a messy process, so be sure to work on a protected surface and wear clothing you don’t mind getting dirty. With a little bit of experimentation, you can create a beautiful, colorful slime creation that’s all your own!
Tips and Tricks
As you become more comfortable with making slime using glue and water, there are some tips and tricks that can take your slimy creations to the next level. Here are some useful pointers to help you get the most out of your slime-making experience. From experimenting with different ratios to adding unique ingredients, these tips will help you become a slime-making pro in no time.
1. Experiment with Ratios
One of the great things about making slime with just glue and water is the ability to experiment with different ratios and create your desired texture. Depending on the type of glue you use, the amount of water you add can greatly impact the consistency of your slime.
Here are some ratios to start with:
| Glue | Amount | Water | Texture |
|---|---|---|---|
| Clear Glue | 1/2 cup | 1/4 cup | Stretchy and malleable |
| White Glue | 1/2 cup | 1/2 cup | Firm and jiggly |
| Clear Glue | 1 cup | 1/4 cup | Runny and slimy |
Tips for experimenting with ratios:
– Start with a small ratio difference and gradually add more water or glue to adjust as you go.
– Keep track of the ratios you try and the final consistency of the slime to find your preferred texture.
– Use the same measuring cup or spoon for accuracy in your ratios.
– Remember that different brands and types of glue may require different ratios for optimal results.
Experimenting with different ratios and finding the perfect balance can make the slime-making process even more fun and satisfying. Don’t be afraid to try different combinations and see what works best for you!
2. Use Different Types of Glue
When it comes to making slime with just glue and water, it’s important to note that different types of glue can give you different results. Here are some options for experimenting with different types of glue:
- Clear Glue: This type of glue will give you a more transparent slime, which can be fun for adding in mix-ins like glitter or confetti. It’s also a good choice if you want to add your own food coloring to make a custom color.
- White Glue: White glue is a classic choice for slime-making and will give you a brighter, more opaque slime. If you don’t add any food coloring, it will be a classic white color.
- Glue-All: This type of glue is sometimes marketed specifically for slime-making and can be a good choice if you’re looking for a consistent texture and result.
- Washable Glue: If you’re making slime with kids, washable glue might be a good choice. It’s designed to be easy to clean up if it gets on hands, clothes, or surfaces, and can give you a nice stretchy slime.
By trying out different types of glue, you can explore different textures and consistencies for your slime. Plus, some glues may be easier to work with than others depending on your preference and skill level. So go ahead and get creative with different types of glue to find your perfect slime recipe!
3. Add Glitter or Confetti for Extra Fun
Adding glitter or confetti is a great way to take your slime-making experience to the next level and add some extra pizzazz. Here are some tips to ensure success:
- Choose the Right Glitter: There are many types and sizes of glitter to choose from, including fine, chunky, and even holographic. Experiment with different types to see which one you like the most, but keep in mind that larger glitters may make your slime more chunky and less stretchy.
- Don’t Overdo It: While it may be tempting to add a lot of glitter, too much can overpower the clarity and stretchiness of your slime. Start with a small amount and gradually add more until you achieve the desired effect.
- Mix It Thoroughly: Glitter can clump together, which can make your slime uneven. To prevent this, mix the glitter or confetti into the glue before adding the water. This will give it a better chance of dispersing evenly and creating an eye-catching effect throughout your slime.
- Use Clear Glue: Clear glue is a great option when adding glitter or confetti because it allows the sparkles to shine through without being masked by a white base.
By following these tips and tricks, you can create a slime that is both visually stunning and fun to play with. Just remember to store your finished product in an airtight container to keep it fresh and stretchy for as long as possible.
4. Store in an Airtight Container
It’s important to store your homemade slime in an airtight container to prevent it from drying out and becoming hard. You can use any type of container with a tightly sealed lid, such as a plastic tub or a resealable plastic bag.
Here are some tips for storing your slime:
- Make sure your hands are clean and dry before handling the slime. This will prevent any dirt or bacteria from getting inside the container and contaminating the slime.
- Squeeze out any air from the container before sealing it. This will help create a vacuum seal and keep the slime moist.
- Store the container in a cool, dry place away from direct sunlight. Heat and humidity can cause the slime to melt or become sticky.
- If your slime becomes too stiff, try adding a small amount of water to soften it up. You can also try kneading it with your hands to warm it up and make it more pliable.
By following these simple tips, you can enjoy your homemade slime for days or even weeks to come. So don’t let your hard work go to waste, store your slime properly and keep the fun going!
Conclusion
In conclusion, making slime with just glue and water is a fun and easy activity for both kids and adults. With the right materials, anyone can create a gooey, squishy masterpiece in no time. Plus, it’s a great sensory experience for those who enjoy tactile play.
Not only is making slime a great activity for parties and playdates, it can also be a stress-reliever for adults. Kneading and stretching the slime can be a calming way to relax and unwind after a long day.
Remember to experiment with different ratios of glue and water to find the consistency you like best. Adding food coloring, glitter, or confetti can also make your slime unique and personalized.
When storing your slime, make sure to keep it in an airtight container to prevent it from drying out. And don’t forget to clean up any spills or messes promptly to avoid any damage to surfaces.
Overall, making slime is a simple and enjoyable way to spend some quality time with loved ones or indulge in some much-needed self-care. Get creative, have fun, and enjoy the endless possibilities of slime-making!
Frequently Asked Questions
Can you make slime with only glue and water?
Yes, you can make slime with just glue and water. It’s a simple and easy recipe!
What kind of glue should I use?
You can use either white or clear glue for this recipe.
Do I need a measuring cup?
While a measuring cup is optional, it can help you get the right ratio of glue and water.
How much water should I add?
You should add an equal amount of water as you do glue. For example, if you use 1 cup of glue, add 1 cup of water.
What can I use for coloring?
You can use food coloring to add color to your slime. Gel or liquid coloring works best.
Can I use something besides food coloring for color?
You can use other types of coloring, such as paint or dye, but make sure it’s non-toxic.
Can I add glitter or confetti?
Absolutely! Adding glitter or confetti can make your slime extra fun. Just make sure it’s safe to use with your glue.
How long will the slime last?
If stored properly in an airtight container, your slime can last up to a week. It’s best to make a fresh batch each time you play with it.
Can I use this recipe with different types of glue?
Yes, you can try using different types of glue to see what works best for you. Some glues may result in a different texture or consistency.
What happens if I add too much water?
If you add too much water, your slime may become too runny and not hold together. Add more glue to balance it out.