Do you need a paper bag for carrying groceries or gifts, but don’t have any glue on hand? Fear not! Making your own paper bag without glue is easier than you might think. Not only is it convenient, but it’s also a fun way to get creative and add a personal touch to your bag. In this step-by-step guide, we’ll show you how to make a paper bag without glue using just a few simple materials. So grab a piece of paper and let’s get started!
Materials Needed
When it comes to making a paper bag without glue, you are going to need a few materials to get started. The great thing about this DIY project is that all of the materials you need are fairly easy to come by and are probably already in your home. You won’t need any glue for this project, so you can say goodbye to sticky fingers and hello to a fun and easy crafting experience. Here are the materials you will need to make your own paper bag:
Paper
Choosing the right type of paper is important when making a paper bag. You can use any type of paper, but the thicker the paper, the sturdier the bag will be. For this project, it is best to use a sheet of paper measuring at least 18 x 24 inches. You can use almost any kind of paper such as craft paper, gift wrapping paper, newspaper, or old magazines. If using newspaper, make sure the ink is dry to avoid any smudging. The paper can be plain or have designs or illustrations on it for a more creative touch. Just ensure that the paper is not too glossy, as it may be more difficult to fold. Using recycled paper is also a great way to make a sustainable and eco-friendly paper bag.
Scissors
When it comes to making paper bags, scissors are a crucial tool for cutting the paper to the desired shape and size. It is recommended to use sharp scissors to ensure precise cuts and reduce the risk of tearing the paper. Dull scissors may cause the paper to bunch up or crumple, resulting in an uneven edge.
It is important to use the appropriate type of scissors for the job. Choose scissors with a long blade to easily cut through the paper without requiring multiple efforts. Additionally, a pair of non-slip scissors can be a great investment as they provide a secure grip, preventing the scissors from slipping and potentially injuring your fingers.
Finally, after the project is complete, it is important to clean the scissors to ensure longevity and continued performance. A simple wipe with a damp cloth followed by a dry one should suffice. It is also advisable to store the scissors in a safe, dry place to avoid rusting.
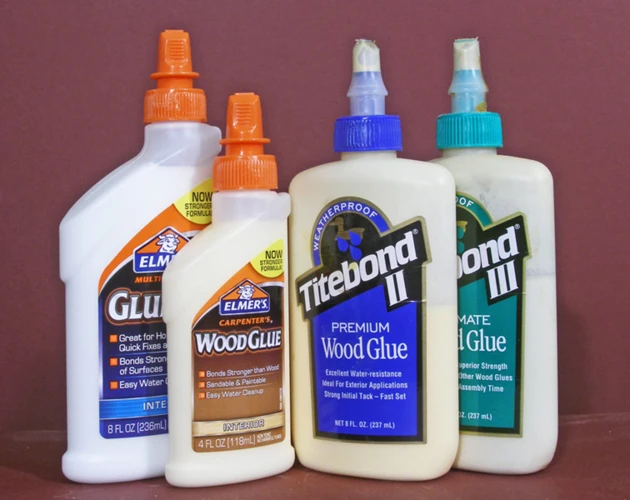
If you’re interested in learning more about what to use as glue for paper crafts, check out our guide on What to Use as Glue.
Ruler or Straight Edge
When making a paper bag without glue, having a ruler or straight edge can be extremely helpful in ensuring that your folds and cuts are precise and even. This will help to make the bag sturdier and more reliable for carrying items.
Using a ruler or straight edge is especially important when cutting the paper, as it can be difficult to make straight cuts freehand. In order to use a ruler or straight edge effectively, you will need to hold it firmly against the paper and use a pencil or pen to mark where you want to make your cuts or folds.
To make it easier to see your markings, you may want to consider using a colored pencil or pen. Additionally, you can use the ruler or straight edge to ensure that your folds are at the correct angle and that your corners are square.
Here’s a table summarizing the importance of having a ruler or straight edge when making a paper bag without glue:
| Importance | Reasons |
| 1. | Ensures precise and even cuts and folds |
| 2. | Makes the bag sturdier and more reliable for carrying items |
| 3. | Assists in creating straight cuts freehand |
| 4. | Helps to ensure that folds are at the correct angle and corners are square |
While glue isn’t necessary when making a paper bag without glue, it is important to have the right type of glue for various craft projects. For example, you may be wondering, “What glue is safe for electronics?” The answer is that it depends on the specific project and materials you are using. You can find more information about different types of glue and what materials they bond well with at the following link: /what-materials-does-white-glue-bond-well-with/.
Pencil or Pen
When it comes to making a paper bag without glue, a pencil or pen is an essential tool that will help you make accurate measurements and markings. It’s important to have a good quality writing tool that can make clear, precise lines on the paper. A blunt or smudged pencil or pen can make it difficult to follow your markings and result in a less polished finished product.
One tip is to use a ruler or straight edge to guide your pencil or pen when making lines on the paper. This will help you create straight and even lines, which is especially important when marking out the areas to be cut. Another tip is to use a sharpener to keep your pencil or a refillable pen that always has ink ready for use.
It’s important to note that while glue isn’t required for making a paper bag using this method, there may be other projects where glue is necessary. For example, if you are working with electronics, it’s important to choose a glue that is safe for use with them. You can find out more about safe glues for electronics by checking out our article on ‘what glue is safe for electronics‘. If you’re ever unsure about what glue to use for a particular project, it’s always best to do some research first to ensure you make the right choice.
Having a good quality pencil or pen is essential for creating a successful paper bag without glue. With the right tools and a bit of creativity, you can make a unique and functional bag that’s perfect for any occasion.
Step-by-Step Guide
Now that you have gathered all the materials, it’s time to start making your paper bag. Not only is this a fun arts and crafts activity, but it is also a useful skill to have when you need to wrap a gift or bag your lunch. Follow these simple step-by-step instructions carefully, and you will be able to make a paper bag without glue in no time. And don’t worry, you won’t need any of the glue types listed in what kind of glue to mount air plants, what glue to use for pool table bumpers, how to make food glue, how to glue air-dry clay, how to glue jewelry, which is stronger glue or tape, or what is fibrin glue.
Step 1: Folding the Paper
To start making your own paper bag without glue, the first step is to properly fold the paper. Here’s how to do it:
- Take a sheet of paper: Choose a sheet of paper that is sturdy enough to hold items without tearing, such as brown kraft paper or wrapping paper.
- Fold in half: Take the paper and fold it in half vertically, making a sharp crease at the bottom.
- Make the sides: Keeping the paper folded, fold each side towards the center crease, making two small triangles at the top of the paper. Crease them well.
- Unfold the sides: Unfold the sides, so the paper is once again folded in half vertically with the two triangles at the top.
- Create the bottom: Fold the bottom of the paper upwards, about two inches, and crease it well. This will create the bottom of the bag.
Once you’ve completed this step, you’re ready to move onto the next step in creating your paper bag without glue. Make sure to take your time and carefully fold the paper to ensure your bag turns out sturdy and durable.
Step 2: Cutting the Paper
To continue making your paper bag without glue, the next step is to cut the paper. Take your ruler or straight edge and make a line approximately 2 inches from the top of the paper. Then, take your scissors and cut along this line. This will create the opening of your bag.
Be sure to cut in a straight line to ensure the bag will be even and look nice once completed. Use the ruler or straight edge to keep your scissors on track if needed.
Next, fold the paper in half lengthwise, making sure the opening you just created is at the top. Use the crease created in the previous step as a guide to make another crease at the center of the paper. This will create the bag’s sides.
Once you have the center crease, use your scissors to cut along the crease, creating two separate halves. Each half will become a side of the bag.
Now, trim a small triangle from each bottom corner of the paper. To do this, measure about 1 inch in from the side edge of the paper and draw a diagonal line down to the point where the bottom of the paper meets the center crease. Cut along the line to create the triangle, and repeat on the other side.
Finally, fold the bottom of the bag as if you were wrapping a present. Fold the bottom edge up by about an inch, then crease it tightly so it stays in place. Repeat this step one more time, folding the bottom edge up again and creasing it firmly.
Your bag now has a flat base and two sides ready to be brought together in the next step.
Step 3: Making the Bottom of the Bag
The third step is crucial to creating a sturdy and functional paper bag. Follow these instructions carefully to ensure the bottom of the bag is secure and strong enough to hold your items.
Step 1: Start by folding the bottom edges of the paper inward, toward the center crease. The size of the fold will depend on how big you want the base of your bag to be. A good rule of thumb is to fold about 2-3 inches inward on each side.
Step 2: Use your ruler or straight edge to create a crease along the folded edge of the paper. This will help to hold the fold in place.
Step 3: Flip the paper over and repeat steps 1 and 2 on the other side.
Step 4: Open up the bottom of the paper by folding the two flaps outward. You should now see a triangle shape at the bottom of the paper.
Step 5: Fold the two triangles inward toward each other, creating a diamond shape at the center of the paper.
Step 6: Fold the top and bottom tips of the diamond shape toward the center crease. This will create two small triangles.
Step 7: Open up the two small triangles and fold them outward. This will create two flaps on either side of the bag.
Step 8: Fold the flaps inward toward the center of the bag, tucking them underneath the triangles at the bottom. Crease them well to keep them in place.
Step 9: Turn the bag over and repeat these steps on the other side.
Congratulations! You have now successfully made the bottom of your paper bag without glue. The sturdy base will make it easy to carry items without fear of them falling out.
Step 4: Folding the Top of the Bag
Once you’ve completed the previous step, the body of your paper bag is complete. Now, it’s time to focus on the bag’s top section.
To start, take the top of the paper bag and fold it down about a half-inch to an inch (depending on the desired size of your bag’s opening). Once you have made the first fold, use a ruler or straight edge to measure and ensure that the fold is straight.
Next, fold the top down again, this time a little more than the first fold, and crease it firmly. You have now created a double-fold for the top of your paper bag.
Now, take the open edge of the top fold and fold it inward towards the inside of the bag, about a half-inch or so. Again, use your ruler or straight edge to make sure the fold is straight.
Once this is complete, fold the open edge back downward over the previous folds, creating a flap to close the bag. Crease it firmly and use your fingers to give the folds a final crisp edge.
Congratulations, you’ve just made a paper bag without using any glue! Your paper bag is now complete and ready to use.
| Step 1 | Fold the top of the paper bag down by half-inch to an inch. |
|---|---|
| Step 2 | Fold the top down again, a little more firmly than the first fold, creating a double fold. |
| Step 3 | Fold the open edge of the top fold inward towards the inside of the bag. |
| Step 4 | Fold the open edge back downward over the previous folds, creating a flap to close the bag. Crease it firmly and give the folds a final crisp edge. |
Decorating Your Bag
Now that you’ve made your paper bag without glue, it’s time to add a personal touch and decorate it! There are countless ways to decorate your paper bag, but here are a few ideas to get you started.
Painting: One of the simplest ways to decorate your paper bag is by painting it. You can use acrylic or watercolor paints to create a unique design on your bag. Use a paintbrush or sponge brush to apply the paint evenly across the bag. You can also add patterns or designs using stencils or painter’s tape.
Stickers: Another easy way to decorate your paper bag is by using stickers. You can find stickers in almost any design or theme, or make your own using printable sticker paper and an inkjet printer. Simply peel the sticker backing off and apply it to your bag.
Stamping: If you have rubber stamps, you can use them to add an interesting pattern or design to your paper bag. Dip the stamp in an ink pad and stamp it onto the bag in a repeating pattern. You can also use a potato or other household object to create a custom stamp.
Collage: If you have magazines or other paper scraps lying around, you can use them to create a collage on your paper bag. Cut out images or designs that you like and use a glue stick or double-sided tape to attach them to the bag.
Personalization: Lastly, don’t forget to add your own personal touch to the bag. You can write your name or a message on the bag using a marker or paint pen. Alternatively, you can create a custom label or tag to attach to the bag using printed paper and ribbon.
With these decorating ideas and your own creativity, your paper bag will become a unique and personalized accessory for yourself or as a gift for someone special. The possibilities are endless, so have fun and let your imagination run wild!
Conclusion
In conclusion, making a paper bag without glue is a fun and easy project that anyone can do with just a few materials. By following the step-by-step guide outlined above, you can create a sturdy and practical paper bag that can be used for carrying groceries, lunches, or even as a gift bag.
Not only is making a paper bag without glue a great way to save money on purchasing new bags, but it also helps reduce waste by repurposing materials that would otherwise end up in the landfill. This is a simple but important step towards sustainable living and reducing our impact on the environment.
Additionally, there are endless opportunities for creativity when making your own paper bag. You can experiment with different sizes, colors, and patterns to create a unique and personalized bag that reflects your individual style.
We hope that this article has inspired you to try making your own paper bag without glue. With a little bit of creativity and some basic materials, you can create a functional and beautiful bag that is eco-friendly and one-of-a-kind.
Frequently Asked Questions
1. Can I use any type of paper?
You can use any type of paper as long as it is not too thin or too thick. Standard printer paper or craft paper works best.
2. Do I need to use glue for this project?
No, you do not need to use glue. This project is designed to be made without any adhesive.
3. Can I make the bag larger or smaller?
Yes, you can adjust the size of the bag by starting with a larger or smaller piece of paper and adjusting the measurements accordingly.
4. Can I decorate the bag before or after folding it?
You can decorate the bag before or after folding it, depending on your preference. Just be sure to take your time when decorating so you don’t accidentally tear the paper.
5. How much weight can the bag hold?
The weight capacity of the bag will depend on the strength of the paper you use. Generally, the bag should be able to hold a few small items like snacks or lunch items.
6. Can I reuse the bag?
Yes, as long as the paper is not torn or damaged, you can reuse the bag as many times as you like.
7. Is this project suitable for children?
Yes, this project is suitable for children ages 6 and up with adult supervision.
8. Can I make the bag with patterned paper?
Yes, you can use patterned paper to create a unique and stylish bag.
9. How do I clean the bag?
To clean the bag, simply wipe it down with a damp cloth and allow it to air dry.
10. Can I add handles to the bag?
Yes, you can add handles to the bag by punching holes on either side and attaching a ribbon or string.