Introduction
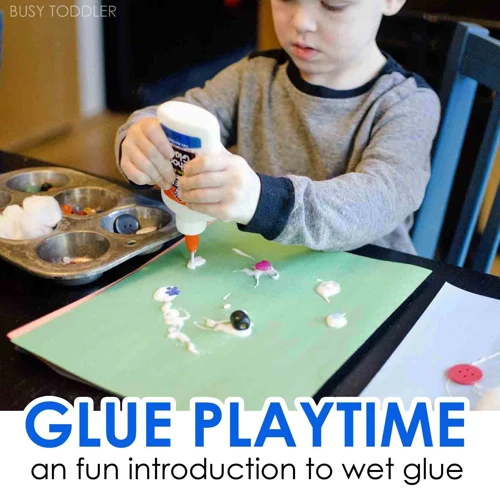
As a woodworker, one of the most important skills you’ll need to master is gluing wood together. Whether it’s for furniture, cabinetry, or any other woodworking project, the quality of the glue joint can mean the difference between a sturdy, long-lasting piece and a poorly constructed one that falls apart over time. That’s why it’s crucial to choose the right glue for the job, prepare the surface properly, and apply the glue correctly. In this guide, we’ll take you through the steps of how to glue wood together so that you can create strong, durable joints every time.
Why is Choosing the Right Glue Important?
Choosing the right glue is crucial for anyone working with wood, whether you are a seasoned professional or a DIY enthusiast. Not all glues are created equal, and each type has its strengths and weaknesses. Choosing the wrong type of glue can result in a weak bond, causing your project to fall apart or break over time. To ensure that your project is durable, it is important to have an understanding of the different types of wood glue and their appropriate uses.
| Glue Type | Strength | Drying Time | Water Resistance |
|---|---|---|---|
| PVA Glue | Medium | Fast | Not water-resistant |
| Polyurethane Glue | Strongest | Slow | Water-resistant |
| Epoxy Glue | Very strong | Slow | Water-resistant |
| Cyanoacrylate Glue | Very strong | Fast | Not water-resistant |
Some factors to consider when choosing the right glue for your project include the strength required for the joint, drying time, and water resistance. For example, if you are gluing something that needs to be waterproof, like a cutting board or a boat, a polyurethane or epoxy glue would be a better choice than a PVA or cyanoacrylate glue. On the other hand, if you need to make quick repairs, such as gluing a loose piece of trim back in place, a fast-drying cyanoacrylate glue may be the way to go.
It’s important to choose the right glue for your project to ensure a strong and lasting bond. By understanding the different types of glue and their appropriate uses, you can make an informed decision and achieve the best possible results. If you need further guidance on how to glue wood to other materials, such as rubber, metal, or concrete, we have articles that cover those topics as well.
What Tools Will You Need?
When it comes to gluing wood, having the right tools on hand is essential for a successful project. Here are the tools you’ll need:
- Clamps: Clamps are necessary to hold the glued pieces of wood together while the glue sets. It’s best to use at least 2 clamps to ensure a strong bond.
- Sandpaper: Before glueing, the surface of the wood must be sanded to ensure a smooth and even surface.
- Clean cloth: Cleaning the wood surface is paramount to bond well. Make sure to use a cloth that is not too rough to clean it smoothly.
- Glue applicator: There are several types of glue applicators that can be used, including brush, roller, and bottle with nozzle. It’s important to choose an applicator that allows for precision and control.
- Protective gear: Gloves should be worn to avoid skin contact with the glue. Eye protection may also be necessary, depending on the type of glue being used.
It’s important to make sure that all tools are in good condition before starting the project. Broken or faulty tools can result in a subpar finished product. Now that you have all the tools you’ll need, it’s time to choose the right glue for your project.
Choosing the Right Glue

When it comes to woodworking, choosing the right glue is crucial for creating a strong and durable bond. With so many different types of glue available, it can be confusing to know which one to use for your project. Understanding the properties and characteristics of each type of glue can help you make the right choice. In this section, we’ll explore the most common types of glue used in woodworking and their unique features. By the end of this section, you’ll be able to confidently select the best glue for your next project. And if you’re looking for information on gluing other materials, such as rubber or marble, be sure to check out our other articles linked below.
PVA Glue
PVA glue, also known as polyvinyl acetate glue, is a popular choice among woodworkers for several reasons. It is easy to find in most hardware stores and is relatively inexpensive. Additionally, it is easy to use and clean up.
Advantages of PVA glue:
- It has strong bonding capabilities and creates a tight seal on wood surfaces.
- It dries clear, making it ideal for use in projects where the glue line will be visible.
- PVA glue is water-soluble, meaning it can be cleaned up easily with water and a damp cloth while still wet.
- It has a low odor, making it safe for indoor use.
Disadvantages of PVA glue:
- It is not waterproof, so it should not be used for projects that will be exposed to moisture or humidity.
- It has a longer drying time than some other types of glue, taking around 30 minutes to an hour to completely dry, depending on environmental conditions.
- It cannot be sanded until it is fully dry, which can be inconvenient when working on time-sensitive projects.
PVA glue can be used for a variety of woodworking projects such as assembling furniture, creating small crafts, and repairing wooden items. It is not recommended for outdoor projects, like garden furniture or wooden boats.
If you want to learn about other adhesives, you can check how to glue marble to metal or what is a strong glue.
Polyurethane Glue
Polyurethane glue, also known as Gorilla Glue, is a waterproof adhesive that expands as it dries, creating a strong bond between the pieces of wood. One of the benefits of polyurethane glue is that it can be used on both porous and non-porous surfaces. This makes it a great choice for a variety of woodworking projects.
When using polyurethane glue, it is important to keep in mind that it foams and expands as it dries. This means that you should use it sparingly, as a little bit goes a long way. Apply a thin layer of glue to one surface and then press the two pieces of wood together, securing them with clamps while the glue dries.
Another great feature of polyurethane glue is that it can be used indoors or outdoors. It is also resistant to heat and moisture, which makes it a good choice for projects that will be exposed to the elements.
One important thing to note when working with polyurethane glue is that it can be difficult to remove if it gets on your skin or surfaces that you didn’t intend it to be on. It is important to protect your skin and work surface when using this type of glue.
Polyurethane glue is a waterproof adhesive that is great for use on both porous and non-porous surfaces. It expands as it dries, creating a strong bond between pieces of wood, and can be used indoors or outdoors. Just remember to use it sparingly and protect your skin and work surface.
Epoxy Glue
Epoxy glue is a popular choice among woodworkers due to its exceptional bonding strength and durability. It is a two-part adhesive that consists of a resin and hardener. When mixed together, they create a strong chemical reaction that hardens the glue and creates a waterproof bond.
One of the benefits of epoxy glue is its ability to fill gaps. It can be used on uneven surfaces and will create a strong bond, even on surfaces that are hard to bond with other glues. This makes it an excellent choice for projects where a strong bond is necessary but the surface may not be perfectly flat.
However, it is important to note that epoxy glue can be difficult to work with and requires careful handling. It is also not ideal for projects that require flexibility, as it is a rigid adhesive.
Here is a comparison chart between epoxy glue and other popular wood glues:
| Epoxy Glue | PVA Glue | Polyurethane Glue | |
|---|---|---|---|
| Waterproof | Yes | No | Yes |
| Drying Time | 24 hours | 30 minutes to 1 hour | 4-24 hours |
| Strength | Very High | Medium | High |
| Flexibility | No | Yes | No |
When working with epoxy glue, it is important to follow the manufacturer’s instructions carefully. Generally, the two components are mixed in equal parts and must be thoroughly combined before application. It is also important to work quickly, as epoxy glue has a short working time before it begins to harden.
If you are working on a project that requires bonding of non-wood materials such as rubber or metal, you may find one of our other glue guides helpful. Check out our guide on how to glue rubber to wood, our guide on how to glue metal to concrete, or our guide on how to glue marble for more information.
Cyanoacrylate Glue
When it comes to cyanoacrylate glue, also known as super glue, its fast-acting bond and versatility make it a popular choice among woodworkers. It’s perfect for small projects that require a quick fix, bonding the pieces together in a matter of seconds.
However, it’s important to note that cyanoacrylate glue is not suitable for larger projects or for use on porous surfaces. When using this type of glue, be sure to work quickly and use it sparingly, as a little goes a long way.
One of the benefits of using cyanoacrylate glue is that it requires no mixing or clamping, making application a breeze. However, it’s still essential to properly prepare the surfaces that need to be joined.
To use cyanoacrylate glue, follow these steps:
| Step | Description |
|---|---|
| 1 | Clean the surfaces that need to be bonded thoroughly. |
| 2 | Apply a small amount of glue to one of the surfaces. |
| 3 | Press the surfaces together and hold them in place for several seconds. |
| 4 | Allow the glue to cure for at least one hour. |
It’s important to note that cyanoacrylate glue can be difficult to remove once it has cured, so it’s essential to take caution when applying it. If accidentally applied to the wrong surface, use acetone to remove it.
Cyanoacrylate glue is an excellent choice for small woodworking projects that require quick and easy bonding. However, it’s not suitable for larger projects or porous surfaces. It can be applied without the need for mixing or clamping, making it extremely convenient to use. Just be sure to work quickly and with caution when using this type of glue.
Selecting the Right Glue for Your Project
Selecting the Right Glue for Your Project
When selecting the right glue for your project, it’s important to consider the type of wood you’re using, the conditions the project will be exposed to, and the desired strength of the bond. Here is a breakdown of some common types of wood glue and their recommended uses:
| Type of Glue | Recommended Use |
|---|---|
| PVA Glue | PVA glue is great for general woodworking projects and is particularly effective when used on porous woods such as oak, ash, and mahogany. It dries clear, has a moderate drying time, and is water-resistant when dried. |
| Polyurethane Glue | Polyurethane glue is ideal for projects that will be exposed to moisture or temperature changes. Because it expands as it dries, it’s especially effective for filling gaps that may exist in the wood. This glue is popular for outdoor furniture projects and can be used for projects that will be submerged in water, such as boat repairs. |
| Epoxy Glue | Epoxy glue is great for projects where a strong bond is needed, such as with furniture repairs. It is particularly effective when bonding two different types of wood or when attaching metal hardware to wood. This glue has a long drying time and requires careful mixing, but it’s incredibly strong and can be sanded and painted over once dry. |
| Cyanoacrylate Glue | Also known as “super glue,” cyanoacrylate glue is great for small projects or repairs that require an instant bond. This glue is not recommended for projects that will be exposed to moisture or temperature changes. It’s commonly used for small woodworking repairs or for attaching small pieces of hardware to wood. |
By selecting the right glue for your project based on the type of wood, desired strength, and expected conditions, you can ensure a strong and long-lasting bond. However, if you have a unique project that requires a special glue, such as gluing underwater or gluing pottery, be sure to research the appropriate glue for your needs. Don’t hesitate to ask a professional or consult with a salesperson at your local hardware store for guidance on which glue to choose.
Preparing the Surface
The process of gluing wood is not just about applying glue to the wood pieces and pressing them together. To ensure that the joint is strong, you need to prepare the surface properly before applying the glue. This involves cleaning the surface thoroughly, sanding the wood, and fitting the pieces together properly to ensure a tight joint. Proper surface preparation is essential to ensure a solid and lasting bond. In some cases, the preparation needs extends to specific types of projects. For example, if you’re searching for information on how to glue a countertop to a cabinet, the preparation step would require different steps than gluing wood together for a woodworking project.
Clean the Surface Thoroughly
Before gluing your wood pieces together, it is essential to clean the surface thoroughly. Any debris, dust, or other contaminants on the surface can interfere with the glue’s ability to bond properly with the wood. This can lead to weak joints or even complete failure over time.
To clean the surface, first, use a dry cloth to remove any loose debris, such as sawdust or wood chips. Then, use a damp cloth to wipe down the surface and remove any remaining dirt or dust. Make sure to use clean water for this step as dirty water can leave behind residue that can hinder adhesion.
It is important to note that some wood surfaces may require additional cleaning steps beyond just wiping with a damp cloth. For example, if the wood has been previously finished with a wax or oil-based product, you may need to use a solvent or sandpaper to remove the coating and expose the bare wood.
Once you have thoroughly cleaned the surface, allow it to dry completely before proceeding with gluing. Any moisture left on the surface can also interfere with the glue’s ability to bond and dry properly.
By taking the time to properly clean your wood surface before gluing, you ensure a strong and lasting bond that will stand the test of time. For more specific gluing techniques, check out our other articles such as What Glue to Use for Phone Screen Repair, How to Glue a Countertop to a Cabinet, or How to Glue Shells to a Mirror.
Sanding the Wood
Before applying glue, it’s essential to prepare the surface of the wood properly. Sanding the wood is an essential step in this process. Sanding helps to remove any bumps, rough patches, or debris that could prevent the pieces from fitting together correctly. Follow these steps for sanding the wood:
- Step 1: Start with a coarse grit sandpaper (60-80 grit) to remove any rough spots or imperfections.
- Step 2: Use a medium grit sandpaper (120-150 grit) to smooth out the surface and prepare it for finishing.
- Step 3: Finish sanding the wood with a fine grit sandpaper (220-240 grit) to create a smooth surface that will bond well with the glue.
- Step 4: Always sand with the direction of the grain to avoid scratches or damage to the wood.
It’s important to note that the wood should not be over-sanded, as this can cause a weak joint. Pay attention to the amount of material being removed during the sanding process. Sanding too much can weaken the wood and affect the strength and durability of the joint. A light touch is all that’s needed to create a smooth surface that will bond well with the glue.
By properly sanding the wood, you’ll create a clean, smooth surface that will give the glue a strong, secure bond. Take the time to prepare the wood properly before gluing, and you’ll be rewarded with a strong, long-lasting joint.
Fitting the Pieces Together
Before you can apply glue to the wood, it’s crucial to have a precise fit for the joint. Even the strongest glue won’t be able to hold a joint that doesn’t fit snugly together. Fitting the pieces together involves several important steps that can’t be overlooked. Here’s what you need to do to ensure a perfect fit:
- Measure the pieces: Before cutting the wood, be sure to measure the pieces you’re planning to join. This will help you make sure everything is cut to the right size before you start fitting the pieces together.
- Dry-fit the pieces: Dry-fitting means fitting the pieces together without any glue. This step is important because it allows you to check if everything lines up correctly and if the pieces are the right size. If the pieces don’t fit well, it’s much easier to make adjustments before adding any glue to the joint.
- Check the joint: Once you’ve dry-fit the pieces, inspect the joint carefully. Make sure the joint is flush and there are no gaps. If the joint is uneven, use a chisel or a sandpaper to remove any bumps or unevenness.
- Test the joint: After everything is fitting together correctly, test the joint to make sure it’s strong. This can be done by gently tapping the joint with a mallet or hammer. If the joint feels loose, it’s not fitting well enough and needs to be adjusted.
Taking the time to fit the pieces together correctly is well worth it in the end. A joint that has been well-fitted will be much stronger and more durable, which is exactly what you want for your woodworking project.
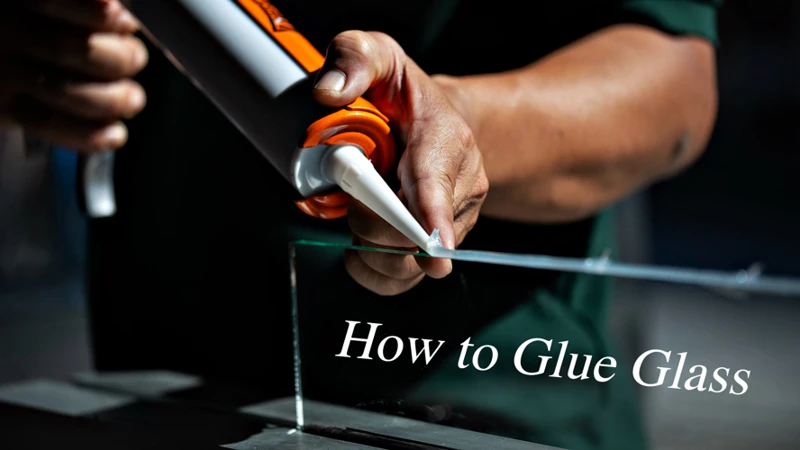
Applying the Glue
As you reach the crucial step of applying glue to your woodwork project, it’s important to pay attention to the details and follow a few guidelines. Applying the right amount of glue is crucial to achieve a strong joint. You also need to make sure that the joint is securely held in place while the glue dries. It’s vital to clean up any excess glue before it dries and ruins your workpiece. In this section, we’ll cover the steps you need to follow to apply glue properly for a successful woodworking project.
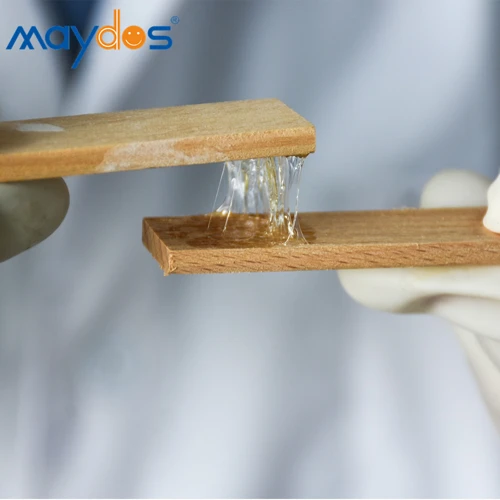
Apply a Thin Layer of Glue
When applying glue to your wood project, it’s essential to apply a thin layer to ensure a strong joint. Avoid over-applying glue, as it can lead to excess squeeze-out and messy joints. Here’s how to apply a thin layer of glue:
- Use a clean brush or roller: Use a clean brush or roller to apply your glue evenly to the surface. Avoid using your fingers, which can leave oils on the surface and affect the bond.
- Apply glue to both surfaces: Apply glue to both surfaces that will be bonded, ensuring full coverage of the area that will come in contact with each other.
- Spread the glue evenly: Use a clean brush or roller to spread the glue evenly over the surface. Be careful not to apply too much pressure, which can lead to excess glue being spread around the surface.
- Use a glue comb: For larger projects, you may want to consider using a glue comb to spread the glue evenly across the surface.
- Allow the glue to tack up: After applying the glue, allow it to sit for a few minutes to tack up. This will help the glue to adhere better and create a stronger bond.
Remember to always read the manufacturer’s instructions for the specific glue you are using, as different brands may have different application techniques and drying times. By applying a thin and even layer of glue, you’ll be on your way to creating a strong and lasting bond for your wood project.
Using Clamps to Secure the Joint
To ensure a strong, secure joint, using clamps is crucial. Clamps apply pressure to the joint, keeping the pieces together while the glue dries. Here are the steps to properly use clamps when gluing wood:
| Step | Instructions |
|---|---|
| Step 1 | Choose the right size clamp: Make sure to select a clamp that is the appropriate size for the project. It’s important to choose a clamp that can apply enough pressure to hold the pieces together securely. A general rule of thumb is to use one clamp for every foot of the joint. |
| Step 2 | Position the clamps: Place the clamps across the joint, distributing them evenly along the length. Make sure the clamps are positioned in a way that applies pressure directly over the glue line. |
| Step 3 | Apply pressure: Using moderate pressure, tighten the clamps enough to close the joint, but not so much that the excess glue is squeezed out. Too much pressure can also cause the joint to warp or bend. |
| Step 4 | Check alignment: Check to make sure the pieces are still aligned properly before the glue dries. If the pieces have shifted, adjust the alignment and re-tighten the clamps. |
| Step 5 | Let the glue dry: Leave the clamps in place until the glue has completely dried. This can vary depending on the type of glue used and the drying conditions. Check the glue instructions for recommended drying times. |
| Step 6 | Remove the clamps: After the glue has dried, carefully remove the clamps by gradually loosening the pressure until they are completely released. Be sure not to force the clamps off, as this can damage the joint. |
By following these steps, you can ensure that your joint stays securely in place throughout the drying process. It’s important to use caution when applying pressure, and to make sure the pieces are properly aligned before allowing the glue to dry.
Wiping Off Excess Glue
After applying the glue and securing the joint with clamps, it is important to wipe off any excess glue to ensure a clean and smooth finish. This step needs to be done carefully as any residual glue can cause issues when sanding and finishing the joint later on.
To begin with, take a clean cloth or sponge and dip it in warm water. Slowly and gently wipe the area where the excess glue is present. Be careful not to rub too hard as this can push the glue deeper into the wood grain.
If the glue has already started to harden, it may be necessary to use a scraper or chisel to remove it. However, this should be done with caution to avoid damaging the wood surface.
Alternatively, there are glue removers available that can make the process easier. These products soften the glue, allowing it to be wiped off easily.
Once all the excess glue has been removed, allow the joint to dry completely before moving onto the next step. It is important not to rush this step as any remaining moisture can affect the final finish.
To summarize, wiping off excess glue is an important step in ensuring a clean and smooth finish in a woodworking project. Take your time and use the right tools to avoid damaging the wood surface and achieve professional results.
| Tools needed | Tips |
|---|---|
| Cloth or sponge | Dip in warm water and wipe gently |
| Scraper or chisel | Use with caution to avoid damaging the surface |
| Glue remover | Softens glue for easy removal |
Drying and Finishing
As the saying goes, patience is a virtue, and it certainly applies to the process of drying and finishing your glued wood project. Rushing through this step can lead to flaws in the final product, making it weaker and less aesthetically pleasing. In this section of our guide on How to Glue Wood, we will explore the final steps to ensure that your joint is as strong as possible, looks great, and will last for many years to come. Let’s delve into the details of this critical final phase of the process.
Allowing the Glue to Dry Completely
After applying the glue and clamping the wood together, it’s important to allow the glue to dry completely before handling the wood. The drying time can vary depending on the type and brand of glue used, as well as the humidity and temperature of the room. It’s important to follow the manufacturer’s recommended drying time, which can usually be found on the bottle or packaging.
To ensure the joint is fully dried, it’s best to leave the clamps on for at least 4 to 6 hours. For larger projects or thicker pieces of wood, it may be necessary to leave the clamps on overnight or even for 24 hours.
Checking the glue for dryness is crucial before removing the clamps. One way to check is to gently press on the joint. If the glue feels soft or squishy, it’s not dry yet and needs more time. Another way is to use a toothpick or small piece of scrap wood to poke into the glue. If it feels tacky or sticky, it’s not dry yet. Once the glue feels hard and dry, it’s safe to remove the clamps.
Removing the clamps can be done carefully and slowly. It’s important to avoid yanking or pulling on the wood, as this can damage the joint. Instead, use a clamp releasing tool or gently tap the clamps with a rubber mallet to loosen them. Once the clamps are released, inspect the joint to ensure it’s fully dried and secure.
Finishing the joint can be done after the glue has completely dried. Using a sandpaper with a fine grit, gently sand the joint to remove any excess glue or rough edges. Then, apply a finish or stain to the wood as desired to protect and enhance its natural beauty.
Patience and attention to detail are key when allowing the glue to dry properly. Rushing this step can result in a weak joint that may break or loosen over time. By taking the time to ensure the glue is completely dry, you’ll have a strong joint that will last for years to come.
Table: Tips for Allowing Glue to Dry Completely
| Tip | Description |
| Follow recommended drying time | Check the bottle or packaging for the manufacturer’s recommended drying time and follow it closely. |
| Leave clamps on for at least 4 to 6 hours | For smaller projects, 4 to 6 hours may be sufficient, but for larger projects or thicker wood, it may need to be left on overnight. |
| Check for dryness before removing clamps | Use a toothpick or gently press on the glue to check for dryness before removing the clamps. |
| Remove clamps carefully | Avoid yanking or pulling on the wood as this can damage the joint. Use a clamp releasing tool or gently tap with a rubber mallet to loosen. |
| Inspect joint after removing clamps | Make sure the glue is fully dried and the joint is secure before finishing the wood. |
Sanding and Finishing the Joint
After the glue has dried completely, you can move on to sanding and finishing the joint for a smooth and professional look.
Step 1: Sand the joint
Use a sandpaper with a grit of 220 to sand the joint. Sand in the direction of the grain until the glue becomes smooth and flush with the wood. Avoid sanding too much, as it can weaken the joint.
Step 2: Apply wood filler (if necessary)
If there are any gaps or holes in the joint, you can use wood filler to fill them in. Apply the filler with a putty knife, overfilling slightly. Allow it to dry completely and then sand it down until it is flush with the wood surface.
Step 3: Apply finish
You can leave the joint as it is, or you can apply a finish over it to protect it and add a beautiful look. You can use stain, lacquer, varnish, or paint, depending on your preference. Apply the finish with a brush, following the manufacturer’s instructions. Allow the finish to dry completely before handling the joint.
By following these steps, you will have a strong and beautiful joint that will last for years to come. Remember to always choose the right glue, prepare the surface thoroughly, and apply the glue evenly for the best results.
Conclusion
After reading through this complete guide on how to glue wood, you should be well-equipped to tackle any woodworking project that requires you to join two pieces of wood together. It’s important to remember that choosing the right glue, preparing the surface properly, and applying the glue correctly are all crucial steps in creating a strong bond between the pieces of wood. By following the tips and techniques outlined in this guide, you can ensure that your wood joints are both durable and visually appealing. So pick up your tools and get to work on your next project with confidence!
Follow These Steps for a Strong Joint Every Time
The key to a successful wood glue joint is to follow a few simple steps. By choosing the right type of glue and properly preparing and applying it, you can create a strong bond that will hold for years to come.
Step 1: Choose the Right Glue
First and foremost, it is important to choose the right glue for your project. As we discussed earlier, there are several types of glue to choose from, including PVA, polyurethane, epoxy, and cyanoacrylate. Each type of glue has its own unique properties, so be sure to choose the one that is best suited for your particular project.
Step 2: Prepare the Surface
Before applying any glue, it is crucial to properly prepare the surface of the wood. This means cleaning the surfaces thoroughly, sanding the wood to ensure a good fit, and ensuring that the pieces fit together tightly without gaps.
Step 3: Apply the Glue
Once the surface is prepared, it’s time to apply the glue. Start by applying a thin layer of glue to one surface, using a brush or roller to spread it evenly. Then, fit the pieces together, making sure that they align perfectly. Use clamps to secure the joint and wipe off any excess glue with a damp cloth.
Step 4: Allow the Glue to Dry
Once you have applied the glue and secured the joint with clamps, it’s time to let the glue dry. The amount of time it takes for the glue to dry will depend on the type of glue you are using, as well as the temperature and humidity in your workspace. Be sure to allow the glue to dry completely before moving on to the next step.
Step 5: Sand and Finish the Joint
Once the glue is dry, it’s time to sand and finish the joint. Start by sanding the joint to remove any excess glue or rough edges. Then, apply a finish or sealant to the joint to protect it from moisture and wear.
Conclusion
By following these simple steps, you can create a strong and durable wood glue joint that will hold up over time. Remember to choose the right type of glue for your project, properly prepare the surface, apply the glue evenly, allow it to dry completely, and finish the joint with a protective sealant. With a little practice, you’ll be creating professional-grade wood glue joints in no time!
Frequently Asked Questions
What is the best glue for woodworking?
Choosing the best glue for a woodworking project depends on the type of wood being used, the strength required, and the conditions the finished piece will be exposed to. PVA, polyurethane, epoxy, and cyanoacrylate are all popular choices for woodworkers.
Can I use regular school glue for woodworking?
You should not use regular school glue for woodworking projects. While school glue is suitable for paper or lightweight crafts, it will not create a strong bond for wood joints. You should always use woodworking-specific glue for projects.
How do I clean up excess glue?
Excess glue should be wiped off with a damp cloth before it dries. If the glue has already dried, you can carefully scrape it off with a chisel or sandpaper. Avoid using solvents, as they can damage the wood.
Can I glue together different types of wood?
Yes, you can glue together different types of wood. However, you need to consider the strengths and weaknesses of each wood type to ensure a secure bond. Choosing the right glue and proper surface preparation can help create a strong joint.
Do I need clamps to glue wood together?
Yes, clamps are essential for creating a strong bond when gluing two pieces of wood together. They apply pressure to the glued joint, preventing the pieces from moving or shifting as the glue dries.
How long does wood glue take to dry?
The drying time for wood glue depends on the type of glue used, temperature, humidity, and the thickness of the glue layer. Drying times can range from 20 minutes for cyanoacrylate glue to several hours for PVA and polyurethane glue.
Can I speed up the drying time of wood glue?
Yes, you can speed up the drying time of wood glue by applying more heat. A fan or heat gun can be used to help dry the glue faster. However, be careful not to overheat the glue, as this can damage the wood or weaken the bond.
What should I do if the joint doesn’t hold after glueing?
If a joint does not hold after being glued, it means that the bond was not strong enough or the surface was not properly prepared. You can try reapplying the glue, ensuring that the surfaces are clean and dry, and using clamps to apply pressure during the drying process. If this still does not work, the joint may need to be reinforced with screws or dowels.
Can I use wood glue for outdoor projects?
Yes, you can use wood glue for outdoor projects by choosing a waterproof and weather-resistant adhesive such as polyurethane glue or epoxy. It’s also essential to ensure that the wood surfaces are properly prepared and sealed to prevent moisture from penetrating the joint.
Can I remove dried glue from wood?
Yes, dried glue can be removed from wood using sandpaper or a chisel. You can also use a glue remover solution, but be careful not to damage the wood surface. It’s best to avoid letting glue dry on the wood in the first place, so wipe off excess glue while it’s still wet.