Embarking on a craft project that involves adorning wood with the ocean’s treasures can be a delightful endeavor. The fusion of organic seashells with a rustic wood surface can create decor pieces that evoke the serenity of the seaside. However, to ensure that your creation stands the test of time, understanding how to glue seashells to wood is paramount. This process requires patience, precision, and the right materials.
Choosing the Right Materials
Selecting appropriate supplies is crucial for the success of your seashell project. The types of shells and wood you choose will influence the aesthetic and durability of your piece. Opt for quality materials that complement each other, ensuring that the natural beauty of the shells is showcased effectively against the wood backdrop.
Understanding the Process
To achieve a professional look, it’s essential to grasp the method of affixing seashells to a wooden surface. It’s not merely about applying seashell glue; it’s about preparing your materials, arranging the shells thoughtfully, and allowing adequate drying time. This guide will provide you with a comprehensive roadmap to mastering this artisanal skill.
Essential Supplies for Seashell Attachment
Before diving into the project, gather all the necessary tools and materials. You’ll need a variety of shells, the wooden object you’re decorating, and the correct adhesive. Your workspace should also be well-organized and equipped to handle the intricacies of seashell art.
Types of Shells and Wood Surfaces
- Collect an assortment of seashells of different shapes and sizes for visual interest.
- Choose a wood surface that’s smooth and clean to provide a good foundation for the shells.
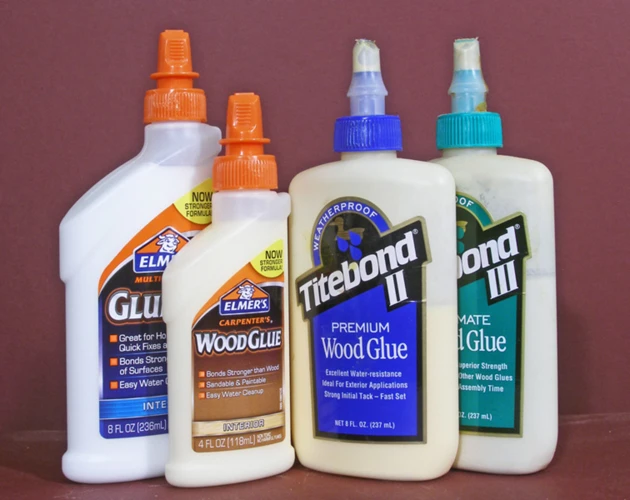
Listing the Best Glues for Seashells
Not all adhesives are suitable for seashell art. The best glue for seashells will bond effectively, dry clear, and be resilient against moisture. Epoxy resins, polyurethane adhesives, and silicone-based glues are among the top contenders for this type of project.
Preparation: How to Seal Seashells
Prepping the shells before gluing them is a critical step. Cleaning and sealing them will enhance their durability and make them easier to adhere to the wood surface.
Pre-crafting Cleaning Techniques
Start by washing the shells in a mixture of warm water and mild soap. Use a soft brush to scrub away any dirt or debris. Rinse the shells thoroughly and let them dry completely before proceeding to the next step.
Sealing Shells for Enhanced Durability
Applying a sealer will protect the shells from damage and wear. Choose a clear sealer designed for use on natural materials and apply it with a brush or spray, following the product’s instructions. Allow the sealer to dry fully before beginning the gluing process.
How to Glue Seashells to Wood: Step-by-Step Guide

Now that your materials are ready, it’s time to begin the process of creating your seashell masterpiece. Follow these steps to ensure a secure and attractive finish.
Step 1: Preparing the Wood Surface
Sand the wood lightly to create a smooth base. Wipe away any dust with a damp cloth and allow the surface to dry. This will help the glue shells to wood more securely.
Step 2: Arranging Your Seashells
Plan your design by arranging the shells on the wood without gluing them first. This allows you to experiment with different layouts and make adjustments before committing to the placement.
Step 3: Applying the Seashell Glue
Using the adhesive you’ve chosen, apply a thin layer to the part of the shell that will be in contact with the wood. Be careful not to use too much glue, as this can cause the shells to slide or the glue to seep out from underneath.
Step 4: Pressing Shells onto the Wood
Place each shell onto the wood surface, pressing down firmly for a few seconds to create a strong bond. Be sure to follow the pattern you’ve laid out in the previous step.
Step 5: Drying and Curing Time
Allow ample time for the glue to dry and cure. This can take anywhere from a few hours to overnight, depending on the glue used. Check the adhesive’s instructions for specific drying times.
Additional Crafting Tips

Beyond adhering seashells to wood, you can apply similar techniques to other materials and projects to expand your crafting repertoire.
How to Attach Seashells to Canvas
To glue shells to a canvas, choose a flexible adhesive that can absorb the movement of the canvas without cracking. Apply the glue carefully and press the shells onto the surface, allowing for adequate drying time.
How to Make a Shell Box
Creating a shell box involves selecting a sturdy box as your base and using a strong adhesive to attach the shells. Arrange the shells in an appealing design and glue them one by one for a unique and beautiful keepsake.
Finishing Touches: Best Varnish for Seashells

After your seashells are securely in place, applying a varnish can add a protective layer and enhance the overall look of your project.
Varnishing Techniques for a Professional Finish
Choose the best varnish for seashells that offers UV protection and a waterproof finish. Apply the varnish with a brush, covering the shells and the wood. Allow it to dry according to the product’s instructions for a glossy or matte finish, depending on your preference.
Troubleshooting Common Issues

Even with careful planning and execution, you may encounter some issues while gluing seashells to wood. Here’s how to address them.
What Kind of Glue to Use for Seashells When Problems Arise
If you find that the shells are not adhering properly, you may need to re-evaluate your choice of adhesive. Ensure the glue is suitable for the materials you’re working with and that it’s being applied correctly.
Preventing and Repairing Broken Seashells
Handle the shells gently to prevent breakage. If a shell does crack or break, use a small amount of the same glue to repair it. Hold the pieces together until the adhesive sets.
FAQs: Gluing Shells to Wood and More
Let’s address some common questions that arise during seashell crafting projects.
Can You Glue Shells to Wood with PVA Glue?
While PVA glue is versatile, it may not provide the strongest hold for seashells on wood, especially if the item will be handled frequently or exposed to moisture.
What is the Best Glue for Seashells in Different Projects?
The ideal seashell glue varies depending on the project’s specific requirements. Generally, epoxy or silicone-based glues are reliable options for their strength and flexibility.
Conclusion
Are you looking to add a touch of the ocean to your crafts by attaching seashells to wood? If so, you’ll find our guide on how to glue rocks to wood quite helpful, as the same techniques can often be applied to seashells. For those who also work with other materials, check out our detailed tutorials on how to glue rhinestones to glass for a bit of sparkle, or learn about how to glue sequins to fabric to add some shimmer to your textile projects. Each guide is designed to help you achieve the best results in your creative endeavors.
Summarizing the Best Practices for Seashell Crafting
Mastering how to glue seashells to wood involves careful preparation, choosing the right materials, and allowing proper drying time. By following these best practices and troubleshooting tips, you can create beautiful seashell crafts that capture the essence of the ocean and endure over time.