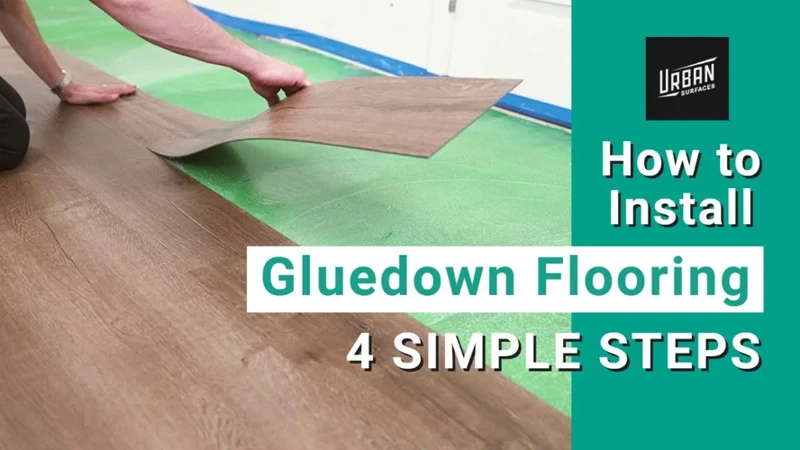
Introduction
If you’re planning on installing linoleum flooring in your home, it’s important to know how to properly glue it down. While it may seem like a daunting task, with the right tools and a step-by-step guide, anyone can do it. In this article, we’ll walk you through the process of gluing linoleum step-by-step. We’ll cover everything from gathering materials to finishing touches and provide tips and tricks along the way. Let’s get started!
What is Linoleum Flooring?
Linoleum flooring is a type of floor covering that has been around for more than a century. It is made from natural materials such as linseed oil, cork dust, wood flour, and pigments, making it an eco-friendly option for homeowners. Unlike vinyl flooring, which is made of synthetic materials, linoleum is biodegradable and does not release harmful chemicals into the environment. Linoleum comes in a variety of colors and designs, making it a versatile option for any room in the house. It is also durable, long-lasting, and easy to maintain. However, it is important to use the proper installation techniques, including gluing, to ensure that the linoleum stays in place and looks great for years to come.
Why Proper Gluing is Important?
Proper gluing is crucial when installing linoleum flooring. Using the right adhesive and applying it correctly can help prevent the linoleum from lifting or warping over time. If the glue is not applied properly, it can also create bubbles or gaps, which could lead to tripping hazards or damage to the flooring. Choosing the right type of adhesive is also important to ensure that it will adhere to the subfloor properly and provide a strong bond.
When linoleum is not glued correctly, it can also make it easier for moisture to seep through the gaps and cause damage to the subfloor. This could lead to increased repair costs if the subfloor needs to be replaced. Additionally, improper gluing can lead to a shorter lifespan for the linoleum flooring.
Proper gluing can significantly increase the durability and longevity of your linoleum flooring. It also enhances the appearance of your flooring and can provide a safer and more stable surface to walk on. It is important to take the time to properly glue your linoleum flooring during installation and follow all manufacturer guidelines to ensure a successful project.
Step 1: Gather Materials and Tools
Before starting the installation process, it’s essential to gather all the necessary materials and tools. Having everything you need at your disposal will make the job much more manageable and efficient. The materials and tools required to glue linoleum can vary depending on the type of subfloor and linoleum selected. To ensure a successful installation, we’ve compiled a list of essential materials and tools that you will need. Once you have all the necessary equipment, you’ll be ready to move on to the next step of the installation process. Want to know how to glue cedar boards together or how to lay vinyl flooring without glue? Check out our other articles by clicking on the links.
List of Materials and Tools
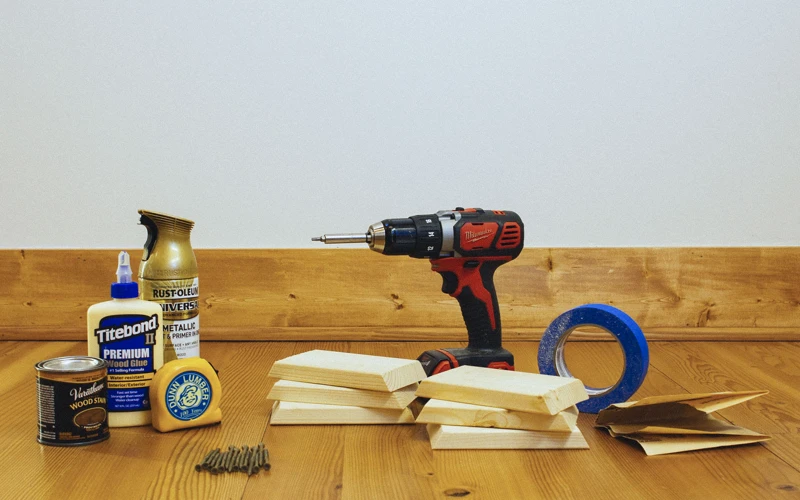
When it comes to gluing linoleum, having the right materials and tools is crucial for achieving a successful and long-lasting installation. Here is a list of essential materials and tools you will need:
| Materials | Tools |
|---|---|
| Linoleum flooring | Measuring tape |
| Vinyl adhesive | Straight edge |
| Silicone sealant (optional) | Notched trowel |
| Acetone or other solvent cleaner | Roller |
| Carpenter’s square | Utility knife |
| Masking tape | Heat gun (optional) |
Some of these materials and tools may already be in your toolbox or garage, while others may need to be purchased from a hardware store. Make sure to have all necessary materials and tools prior to starting the linoleum installation process. This will prevent any unnecessary trips to the store mid-installation and ensure that the process runs smoothly from start to finish.
If you need more information on the amount of adhesive needed, check out our article on How Much Glue for Vinyl Flooring? for tips and guidance.
Step 2: Preparation

Before you can begin gluing linoleum, proper preparation is essential. This step is crucial for achieving long-lasting results. Preparing your subfloor and choosing the right adhesive will help ensure that the linoleum stays in place for years to come. In this section, we’ll discuss the necessary steps to take before applying the glue and highlight why proper preparation is so important. In case you need guidance on gluing other materials, check out our articles on how to glue carpet to plywood or how to glue wood to wall.
Preparation Checklist
A crucial step in gluing linoleum is proper preparation. Not only will it ensure a higher-quality finished product, but it will also extend the longevity of the linoleum. To make sure that everything is set up for success, use the following preparation checklist:
| Step | Task |
| 1 | Ensure that the subfloor is level, clean, and free of debris, dust, grease, and adhesive residue. |
| 2 | Inspect the subfloor for any cracks, holes, or damage. If any issues are noted, fix them before gluing the linoleum. |
| 3 | Room temperature should be maintained between 68°F to 77°F for a minimum of 48 hours to acclimate and stabilize the room. |
| 4 | Measure the room to determine the amount of linoleum needed. Don’t forget to include waste allowance for cutting and fitting. |
| 5 | Check for any FLOOR MOVEMENT in the area where the linoleum will be installed. This movement can cause the glue to break down over time, |
| 6 | Use a moisture meter to examine the moisture content of the subfloor. If it is more than 3 pounds or 75% relative humidity, the subfloor is too damp for linoleum installation. |
| 7 | Use the recommended adhesive for your type of linoleum. Check the manufacturer’s instructions carefully before buying, and make sure you have enough adhesive for the installation process. |
| 8 | Be sure to wear appropriate personal protective equipment, such as gloves and safety glasses, when handling adhesive or using tools like a trowel or knife. |
Following this preparation checklist will provide a strong foundation for a successful linoleum installation. It is essential to check whether the subfloor is level and clean from any debris, dust, grease, or adhesive residue, as these contaminants can have a detrimental impact on the adhesive. Additionally, measuring the area and calculating waste allowance can help reduce the amount of material waste and save unnecessary expenses. Lastly, wearing protective gear is an essential safety measure when handling adhesives and tools.
If you want to learn more about gluing different types of materials, you can check these helpful articles: How to Glue Cedar Boards Together, What Glue for Carpet Pad on Concrete, or What Glue for Engineered Flooring.
Subfloor Preparation
Before applying any adhesive, it is important to prepare the subfloor properly. Subfloor preparation is crucial for the longevity and the durability of the linoleum flooring. Here are some steps for subfloor preparation:
- Remove any old flooring: It is necessary to remove any previous flooring from the subfloor. This includes carpet, linoleum, or tiles. If there is an adhesive residue left on the floor, it must be scraped off or sanded. Failure to remove the old flooring might cause the new linoleum to not adhere correctly.
- Clean the subfloor: Sweep, vacuum, and damp-mop the subfloor before applying any adhesive. Make sure there is no dust, debris, or grease left on the subfloor as this will negatively impact the bond between subfloor and linoleum flooring.
- Level the subfloor: If there are any imperfections or unevenness on the subfloor, it is necessary to level them out or fill them with an appropriate leveling compound. Otherwise, these uneven parts will create visible bumps or sags in the linoleum.
- Humidity level: Check the humidity levels before laying the linoleum. If the humidity is too high or too low, it can cause warping or bending of the flooring.
- Allow the subfloor to dry: Once you have cleaned and leveled the subfloor and checked the humidity, allow it to dry completely before applying adhesive.
By properly preparing the subfloor, you will ensure a strong bond between the floor adhesive and your linoleum flooring, making it last longer and remain durable. If you encounter any difficulties or have any questions, it is recommended to seek advice or professional help. You may check out how to lay vinyl flooring without glue for an alternative method.
Step 3: Glue Application
After making the necessary preparation in Step 2, it is now time to glue the linoleum onto the subfloor. Proper glue application is crucial for a durable and long-lasting linoleum floor. In this step, we will discuss the essential aspects of gluing linoleum flooring, including selecting the right adhesive and calculating the necessary amount. We will also provide practical guidelines for the proper application of adhesive, ensuring a secure and functional floor. Let’s get started!
While gluing linoleum may seem daunting, it is not as complicated as it sounds. By following the steps carefully, you can easily complete the process. But, before we delve into the details of glue application, it is important to note that different floor types require different installation techniques. To learn more about other flooring types, such as carpet or vinyl plank, check out our articles on how to glue carpet to aluminum or how to repair glue-down vinyl plank flooring. Now, let’s take a closer look at gluing linoleum flooring.
Choosing the Right Adhesive
When it comes to gluing linoleum, it’s crucial to choose the right adhesive for the job. Using the wrong adhesive can result in the linoleum not sticking properly or even becoming damaged. Here are some factors to consider when selecting an adhesive:
Type of Linoleum: Different types of linoleum may require different types of adhesive. For example, a linoleum with a felt backing may require a specific type of adhesive. Be sure to read the manufacturer’s recommendations before choosing an adhesive.
Subfloor Material: The subfloor material on which the linoleum will be installed can also impact the choice of adhesive. For instance, a concrete subfloor may require a different adhesive than a wooden subfloor.
Moisture: If the subfloor has a high level of moisture, it’s important to choose an adhesive that is moisture-resistant to prevent the linoleum from becoming damaged over time.
Application Method: Some adhesives may only be suitable for specific application methods (such as rolling or troweling). Make sure to choose an adhesive that is compatible with the chosen application method.
Environmental Concerns: If you’re looking for an eco-friendly option, there are adhesives available that are made from natural materials and have low VOC emissions.
After taking these factors into consideration, some popular types of adhesive for linoleum flooring include pressure-sensitive adhesive, acrylic adhesive, and epoxy adhesive. It’s important to follow the manufacturer’s instructions for the chosen adhesive to ensure proper installation.
Note: If you’re also interested in learning how to glue carpet to concrete, check out our detailed guide on how to do so for step-by-step instructions and tips.
Calculating Amount of Adhesive Needed
Before applying the adhesive, it’s important to calculate the amount of glue needed to avoid running out of it or wasting excess glue. The amount of adhesive needed primarily depends on the size of the linoleum flooring and the type of adhesive being used.
Calculating the Amount of Adhesive Needed Table:
| Size of the Flooring Area | Type of Adhesive | Amount of Adhesive Needed |
|---|---|---|
| Up to 50 square feet | Water-based | 1 gallon |
| Up to 50 square feet | Solvent-based | quart |
| Between 50 to 300 square feet | Water-based | 1 gallon per 50 square feet |
| Between 50 to 300 square feet | Solvent-based | quart per 50 square feet |
| Above 300 square feet | Water-based | 1 gallon per 40 square feet |
| Above 300 square feet | Solvent-based | quart per 40 square feet |
Firstly, measure the size of the flooring area in square feet. Then, refer to the table above to determine the amount of adhesive needed for the particular size of the flooring area and type of adhesive. For example, if your flooring area is up to 50 square feet and you’re using water-based adhesive, you will need 1 gallon of adhesive.
It’s important to note that the amount of adhesive needed may vary depending on the thickness of the adhesive layer applied. Additionally, it’s always better to have slightly more adhesive than required in case of unexpected mistakes or discrepancies during installation.
By calculating the necessary amount of adhesive required and ensuring that it is on hand, you can avoid any unnecessary trips to the store and streamline the gluing process.
Applying the Adhesive
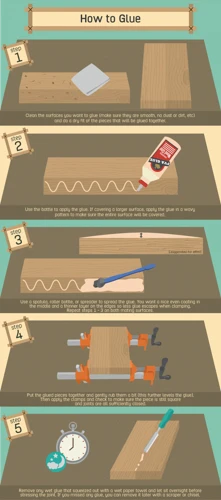
When it comes to applying the adhesive for your linoleum installation, there are a few important steps to follow to ensure proper adhesion. Here is a step-by-step guide:
- Before you start, make sure to follow the adhesive manufacturer’s instructions for mixing, spreading, and drying time.
- Start in one corner of the room and use a notched trowel to evenly spread the adhesive onto the subfloor.
- Only spread enough adhesive for one section at a time, typically no more than one square yard. This will prevent the adhesive from drying out before the linoleum is laid down.
- Use the notched side of the trowel to create ridges in the adhesive. This will help the linoleum adhere better to the subfloor.
- Carefully lay the linoleum onto the adhesive, making sure to align it with the walls and any patterns in the linoleum.
- Use a flooring roller to firmly press the linoleum into the adhesive, starting from the center and working towards the edges.
- Repeat this process for the remaining sections of the floor, making sure to apply the adhesive in small sections and align the linoleum carefully.
- After all sections of the floor have been covered with linoleum, use a flooring roller to go over the entire floor again, pressing firmly to ensure good adhesion.
- Clean up any excess adhesive with a damp cloth before it dries.
Remember to work quickly and carefully when applying the adhesive. The adhesive can dry out quickly, so only spread enough for one section at a time. Also, double-check your measurements and alignment before laying down the linoleum, as it can be difficult to adjust once it’s in contact with the adhesive. By following these steps, you should be able to create a smooth and secure linoleum floor that will last for years to come.
Step 4: Placing Linoleum
Now that you have applied the adhesive, it’s time for the exciting part: placing the linoleum! This step requires precision and attention to detail to ensure a smooth and flawless finish. As you approach this step, it’s important to keep in mind the dimensions and shape of the room, as well as any obstacles that may be in the way. So, let’s explore the process of placing linoleum in your space and bringing your flooring vision to life.
Cutting the Linoleum to Fit
Once you have prepared the subfloor and applied the adhesive, it’s time to cut the linoleum to fit your space. This can be a bit tricky, but with the right tools and technique, you can achieve a professional-looking result.
Tools:
– Measuring tape
– Utility knife
– Straightedge or ruler
– Marker or chalk
Steps:
- Begin by measuring the area where you will be installing the linoleum. Be sure to measure both the length and width of the space. Measure in several spots to ensure accuracy, as walls are not always perfectly straight.
- Using your measurements, mark the linoleum with a marker or chalk. Be sure to double-check your measurements before cutting to avoid costly mistakes.
- Place a straightedge or ruler along the line you have marked. Using a utility knife, cut through the linoleum along the line. It’s important to use a sharp utility knife to avoid jagged or uneven edges.
- Repeat this process for all sides until you have the exact size you need.
- If you need to cut curved lines or angles, use a template or stencil to ensure accuracy.
- When cutting around corners or edges, be sure to leave a small overhang. This will allow you to later trim the linoleum to fit exactly, ensuring a seamless finish.
Tips:
– When cutting the linoleum, work slowly and steadily to avoid mistakes. Rushing can lead to uneven cuts or jagged edges.
– To prevent the linoleum from shifting while cutting, use masking tape to hold it in place.
– Keep extra linoleum on hand in case of mistakes or mis-measurements.
With these tips and techniques, you should be able to cut your linoleum to the perfect size and shape for your space.
Rolling Out the Linoleum
After cutting the linoleum to fit the room, it’s time to roll it out. Rolling out the linoleum is a crucial step, as it determines the final appearance of the flooring. Follow the steps below to roll out the linoleum effectively:
- Starting Point: Determine the starting point of the room. It’s best to start in a corner, away from the door. This ensures that there are no gaps or uneven joints at the entrance.
- Roll the Linoleum: Roll out the linoleum across the room, making sure to keep it straight and aligned with the walls. Use a linoleum roller to flatten the flooring and remove any air pockets that may have formed.
- Trim Excess: If there is any excess linoleum at the edges of the room, use a sharp knife or a pair of scissors to trim it down. Make sure to leave a small gap between the edge of the flooring and the wall, to allow for expansion and contraction of the material.
- Joints: Where two pieces of linoleum meet, align them carefully and overlap them slightly. Use a straightedge and a sharp knife to cut through both layers of linoleum, creating a seamless joint.
- Seam Sealer: If desired, apply a seam sealer to the joints. This helps to prevent moisture and dirt from seeping underneath the linoleum. Follow the manufacturer’s instructions for application and drying time.
By following these steps, you can ensure that the linoleum is rolled out properly and looks seamless. Remember to work carefully and thoroughly, paying close attention to details such as joints and excess material.
Securing the Linoleum
Once the linoleum sheet has been rolled out and placed on top of the adhesive layer, the next step is to secure it properly in position. This is important to prevent any air or moisture from getting trapped beneath the surface and causing damage to the flooring. Here are the steps to securing the linoleum:
- Smooth out any wrinkles: Use a flooring roller to smooth out any wrinkles or bumps on the linoleum surface. This will ensure a flat and even surface, as well as optimal adhesion to the subfloor.
- Trim the excess: Use a sharp utility knife to trim away any excess linoleum at the edges of the room. Be careful not to cut into the baseboards or walls.
- Apply pressure: Apply pressure to the linoleum surface using a heavy object such as a weighted roller or stack of books. Work from the center of the room outwards, pressing down firmly on the edges to ensure a secure bond.
- Seal the edges: Apply a small amount of seam sealer to the edges of the linoleum sheet to ensure a tight seal. This is especially important if the linoleum surface will be exposed to moisture. Use a putty knife to smooth out the sealer and blend it with the linoleum surface.
- Wait for the adhesive to dry: Once the linoleum has been secured in place, allow the adhesive to dry completely. This can take anywhere from 24 to 48 hours, depending on the type and brand of adhesive used. Avoid walking on the linoleum surface during this time.
By following these steps, the linoleum flooring will be securely in place and ready for use. It is important to note that the curing time of the adhesive should be respected to ensure a long-lasting and durable bond. Skipping this step may result in the linoleum coming loose or lifting at the edges over time.
Step 5: Finishing Touches
It’s time for the final touches! After successfully placing and securing the linoleum, there are still a few important steps to take to ensure that your flooring is properly installed. This phase is crucial in making sure that everything looks neat and tidy, as well as in allowing the adhesive to fully cure. So, let’s dive into the last few steps of this process and complete your linoleum floor installation.
Trimming Excess Linoleum
After allowing the adhesive to cure for the recommended time, it’s time to trim the excess linoleum. Here are the steps to follow:
- Begin by removing any spacers that were used to create a gap between the wall and the linoleum. Use pliers to carefully pull them up from the adhesive.
- Using a sharp utility knife or linoleum knife, trim the excess linoleum around the edges of the room.
- Make sure to carefully cut along the edge of the wall and any corners to achieve a clean cut.
- Once the excess linoleum is trimmed off, you can start applying a sealant to the edges to prevent any water or dirt from seeping under the linoleum.
- If you are using a sealant, follow the manufacturer instructions carefully. Apply it in a thin layer around the edges using a small paintbrush or roller and allow it to dry before walking on the floor.
- After trimming and sealing, clean up any excess adhesive or debris left on the surface of the linoleum or surrounding floor areas.
Remember that proper trimming is essential to ensuring that your linoleum floor looks polished and professional. Taking the time to trim carefully will help your linoleum floor last longer and look better.
Allowing the Adhesive to Cure
Once the linoleum has been securely placed and all excess material has been trimmed, it is important to allow the adhesive to cure properly. This will ensure that the linoleum remains firmly in place for years to come. The curing time will depend on the type of adhesive used and the surrounding temperature and humidity levels. However, as a general rule of thumb, most adhesives require 24-48 hours to fully cure.
Tips for Allowing the Adhesive to Cure:
| TIP | DESCRIPTION |
|---|---|
| Keep the Room Temperature Consistent | Fluctuations in temperature and humidity can affect the curing process. It’s important to keep the room at a consistent temperature of at least 65-70°F and a humidity level of 40-60% during the curing process. |
| Avoid Heavy Traffic | While the adhesive is curing, it’s important to avoid heavy foot traffic on the linoleum. This can disrupt the adhesive and cause the linoleum to shift, resulting in an uneven surface or even bubbles in the linoleum. |
| Allow Sufficient Time to Fully Cure | It’s essential to allow the adhesive enough time to fully cure before using the space. Rushing this process can result in damage to the linoleum or even cause the adhesive to fail. Plan on at least 24-48 hours of curing time, depending on the type of adhesive used. |
| Avoid Moving Heavy Furniture or Appliances | During the curing process, it’s important to avoid moving any heavy furniture or appliances across the linoleum. This can also disrupt the adhesive and cause the linoleum to shift, leaving gaps or uneven surfaces. |
With these tips in mind, the process of gluing linoleum can be a success. By taking the time to properly prepare the subfloor, choosing the right adhesive, and allowing sufficient curing time, you can enjoy a beautiful and long-lasting linoleum floor in any space.
Tips and Tricks for Gluing Linoleum
So you’ve gathered all the necessary materials and tools, prepped your subfloor, applied the adhesive, placed the linoleum, and trimmed the excess. But what about those small details that can make a big difference in the final outcome of your linoleum installation? In this section, we will provide you with some tips and tricks to take your linoleum gluing game to the next level. From choosing the appropriate type of linoleum to working with wavy or uneven subfloors, we’ve got you covered. Keep reading for some expert advice on how to perfect your linoleum glue job.
Choosing the Appropriate Type of Linoleum
When it comes to choosing linoleum for your flooring project, it’s important to consider a few key factors. Durability is perhaps the most important factor to consider. Make sure you choose a linoleum that is designed for high-traffic areas if you anticipate substantial foot traffic. Additionally, water resistance is important for areas such as kitchens and bathrooms.
Color and design are purely aesthetic considerations but are important nonetheless. Linoleum comes in a variety of colors and patterns, so choose a design that fits your personal taste and complements the rest of your home’s décor.
Another factor to consider is installation method. Some types of linoleum require adhesive while others come with adhesive backing, making them easier to install without mess. Be sure to choose a product that is compatible with your installation method and recommended adhesive.
Lastly, consider environmental impact when choosing linoleum. Look for products that are made from sustainable materials and manufactured in an eco-friendly way.
To summarize, when choosing linoleum for your flooring project, keep in mind durability, water resistance, color and design, installation method, and environmental impact. By considering these factors, you can select the appropriate type of linoleum that will meet your needs and last for years to come.
Working with Wavy or Uneven Subfloors
When it comes to laying linoleum flooring, working with a wavy or uneven subfloor can be a complicated task. But fear not, there are ways you can tackle this challenge. Here are some tips for working with wavy or uneven subfloors:
1. Use a Self-Leveling Compound: If your subfloor has significant dips, use a self-leveling compound to even it out before applying the adhesive. Pour the compound onto the subfloor and use a trowel to spread it evenly. Once it dries, your subfloor should be level enough to lay the linoleum.
2. Fill in Small Gaps: For smaller gaps, use a floor patch and leveler. Mix the patching compound and apply it into the gaps using a putty knife. Smooth out the surface and let it dry before installing the linoleum.
3. Make Sure Your Linoleum is Flexible: When working with a wavy subfloor, it’s important to choose a linoleum that is flexible. Look for linoleum that has a cushioned back or is specifically designed for uneven surfaces.
4. Cut the Linoleum in Small Sections: If your subfloor is extremely wavy, consider cutting the linoleum into smaller sections to make it easier to work with. This will allow you to lay each section separately and adjust it accordingly without having to lift up the entire sheet.
By following these tips, you can successfully lay linoleum on a wavy or uneven subfloor. Remember, always properly prepare your subfloor before applying the adhesive to ensure the best results.
Adding a Sealant for Extra Protection
When it comes to installing linoleum flooring, applying a sealant can be a great way to provide extra protection to your newly installed floors. A sealant acts as an additional layer of defense against moisture, dirt, and other potentially damaging elements. It can also help prolong the lifespan of your flooring.
Types of Sealants
There are two main types of sealants that can be used for linoleum flooring: solvent-based and water-based. Solvent-based sealants are more traditional and often provide a stronger, longer-lasting seal. However, they can also emit harsh fumes and require more careful handling. Water-based sealants, on the other hand, have a milder odor and are easier to clean up, but may not provide as long-lasting of a seal.
Application Process
Before applying a sealant, it is important to ensure that the adhesive used for the linoleum flooring has completely dried and cured. This can take anywhere from a few hours to a few days, depending on the type of adhesive used and the environmental conditions.
Next, clean the entire surface of the linoleum flooring to remove any dirt, dust, or debris. Make sure the surface is completely dry before applying the sealant.
Once the surface is prepped and ready, apply the sealant of your choice according to the manufacturer’s instructions. Be sure to wear protective gloves and ensure adequate ventilation when working with solvent-based sealants.
Maintenance
While a sealant can provide extra protection for linoleum flooring, it is important to regularly maintain and clean your floors to ensure they stay in top condition. Use a pH-neutral cleaner and avoid abrasive or harsh cleaning products that can damage the sealant or the flooring itself.
Conclusion
Adding a sealant can be a great way to provide extra protection for your linoleum flooring. Whether you choose a solvent-based or water-based sealant, proper application and regular maintenance can help prolong the life of your floors and keep them looking their best.
Conclusion
In conclusion, gluing linoleum may seem like a daunting task, but with the right tools and preparation, it can be a manageable DIY project. Properly gluing linoleum is important for its longevity and durability. It not only keeps it from shifting or buckling but also prevents moisture from seeping underneath and causing damage. By following the step-by-step guide outlined above and using the appropriate adhesive, you can ensure that your linoleum flooring stays in place for years to come.
Remember to always choose the appropriate type of linoleum for your space, and take into account any uneven or wavy subfloors that may need extra preparation. Adding a sealant can also provide added protection against moisture and wear.
Don’t rush the process and allow the adhesive to cure fully before walking or placing furniture on the flooring. Taking the time to properly glue your linoleum flooring can save you time and money in the long run by avoiding any damage or repairs caused by improper installation.
By following these tips and tricks and utilizing the guide provided, you can make gluing linoleum a successful DIY project. Happy flooring!
Frequently Asked Questions
1. What materials do I need to glue linoleum?
Some materials you will need include a trowel, linoleum roller, adhesive, and linoleum flooring.
2. Do I need to prepare the subfloor before laying linoleum?
Yes, it is essential to prepare the subfloor to ensure the linoleum adheres correctly. This includes removing any old adhesive, cleaning the surface, and repairing any damage.
3. Can I use any adhesive for gluing linoleum?
No, it is important to choose an appropriate adhesive that is compatible with linoleum flooring. Some adhesives can contain chemicals that can harm the flooring.
4. How do I calculate the amount of adhesive needed?
To calculate the amount of adhesive needed, determine the square footage of the area you want to cover and then refer to the adhesive manufacturer’s recommendation for coverage.
5. Is it necessary to trim the excess linoleum?
Yes, after placing the linoleum and securing it, it is necessary to trim the excess linoleum with a sharp knife or scissors for a clean finish.
6. How long should I wait for the adhesive to cure before walking on the linoleum?
The amount of time needed for the adhesive to cure can vary depending on the type of adhesive used. Generally, it is best to wait 24-48 hours before walking on the linoleum.
7. Can I install linoleum on a wavy or uneven subfloor?
Technically, linoleum can be installed on a wavy or uneven subfloor. However, it is not recommended as it can result in an uneven surface and cause the linoleum to fail over time.
8. Is it necessary to apply a sealant after gluing linoleum?
No, it is not necessary to apply a sealant. However, some people choose to add a sealant to provide extra protection and make the linoleum easier to clean.
9. Can I overlap the linoleum pieces during installation?
No, it is best to avoid overlapping the linoleum pieces during installation as it can result in an uneven surface and cause the linoleum to fail over time.
10. How do I maintain my linoleum flooring after installation?
To maintain your linoleum flooring, it is recommended to sweep or vacuum regularly, clean up spills promptly, and avoid harsh chemicals. It is also important to use furniture pads to protect against scratches and dents.