Crystal pieces add a touch of elegance to any setting, but when they break, it can be disheartening. Fortunately, with the right knowledge and materials, you can restore their beauty. Understanding how to glue crystal is essential for anyone interested in maintaining the integrity and brilliance of these delicate items.
Understanding the Basics of How to Glue Crystal
Before diving into the repair process, it’s crucial to grasp the basics. Crystal is a non-porous material, which means the adhesive choice and application method are paramount to achieving a seamless bond.
The Importance of Strong Crystal Glue
A strong crystal glue not only mends the damage but also ensures the repair lasts. The strength and clarity of the glue are vital to preserve the crystal’s aesthetic and structural integrity.
Choosing the Right Glue for Crystal Repair
When you’re ready to mend a cherished piece, selecting the appropriate glue is the first step. Not all adhesives are equal; choosing poorly can result in weak bonds or visible blemishes.
Best Adhesive for Crystal: A Comparative Guide
Finding the best adhesive for crystal can be a challenge. Options range from epoxy resins to specialized crystal glues, each with its pros and cons.
Crystal Adhesive Guide: Selecting the Perfect Product
This crystal adhesive guide is designed to help you select the perfect product. Factors to consider include drying time, viscosity, and whether the glue dries clear.
Jewelry Glaze Aleene’s: An Option for Delicate Crystal Work
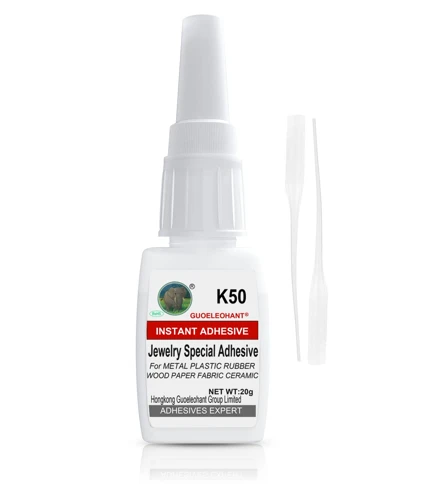
For those intricate crystal projects, jewelry glaze aleene’s is an excellent choice. Its fine-tip applicator allows for precise work on even the most delicate of pieces.
DIY Crystal Gluing Process
With the right adhesive picked out, you’re ready to begin the repair. The DIY crystal gluing process can be straightforward if approached methodically.
Preparation and Safety Tips for DIY Crystal Gluing
Before starting, ensure you’re working in a well-ventilated area and have protective gloves and eyewear. Surface preparation is key; the pieces must be clean and dry for the glue to adhere properly.
Step-by-Step Guide to Fix Broken Crystal
- Assemble all necessary materials and tools.
- Clean the crystal surfaces with alcohol to remove any oils or debris.
- Apply a thin layer of glue to one side of the broken edges.
- Carefully align the pieces and press them together.
- Wipe away any excess glue before it dries.
- Allow the adhesive to cure as per the manufacturer’s instructions.
How to Glue Crystal Without Bubbles
One of the most common issues when adhering crystal is the formation of air bubbles. To glue crystal without bubbles, apply the adhesive sparingly and slowly press the pieces together to allow any trapped air to escape.
Crystal Bonding Techniques
While the basic gluing process is straightforward, certain situations may require more advanced strategies. Crystal bonding techniques can vary based on the type and extent of the damage.
Advanced Crystal Bonding Techniques for Durable Repairs
For larger or more complex breaks, using a two-part epoxy can provide a stronger bond. Clamping the pieces together during the curing process can also ensure a more secure repair.
Glue for Crystal Repair: Best Practices for Long-Lasting Hold
A glue for crystal repair must be used thoughtfully to achieve a durable fix. Factors such as clamping pressure, curing temperature, and moisture can all impact the bonding strength.
Finishing Touches and Curing
Once the crystal is glued and in place, the focus shifts to finishing touches and allowing the adhesive to cure fully to ensure the repair is as invisible and strong as possible.
Ensuring Proper Drying and Curing Time for Strong Adhesion
Allow plenty of time for the glue to set and cure fully. Rushing this process can weaken the bond and lead to future breaks. Follow the manufacturer’s instructions for the best results.
Polishing and Final Inspection of the Repaired Crystal
After the adhesive has cured, inspect the repair carefully. If there are any excess glue residues, they can often be removed with a razor blade or fine-grit sandpaper, followed by a thorough polishing.
Troubleshooting Common Issues
Even with careful application, sometimes the gluing process doesn’t go as planned. Knowing how to troubleshoot these issues can save your crystal piece from further damage.
How to Address Bubbles After Gluing
If bubbles appear after gluing, you can sometimes gently press the area to expel them before the adhesive sets. If the glue has already cured, it may be necessary to carefully separate the pieces and start over.
Fixing Mistakes and Removing Excess Glue
Mistakes happen, but they can often be rectified. Excess glue can be scraped off with a blade or dissolved with acetone, depending on the type of adhesive used.
Conclusion and Additional Resources
The process of gluing crystal doesn’t have to be intimidating. With the right materials and techniques, you can confidently restore your precious items to their former glory.
Maintaining and Caring for Your Glued Crystal Pieces
After repair, treat your crystal with care. Avoid exposing the piece to extreme temperatures and handle it gently to prevent the bond from weakening.
When working on your DIY projects, knowing the right adhesive techniques can make all the difference. Whether you’re looking to affix silicon, mend a precious crystal, or add some sparkle with glitter, we’ve got you covered. Learn the nuances of working with different adhesives in our handy guides. Discover the best practices on how to glue silicon for a firm hold, get tips on using cyanoacrylate in our article about how to use super glue, and for those glittery projects, find out how to apply glitter glue effectively. And if it’s crystal that you’re looking to adhere, stay tuned for our upcoming article on ‘How To Glue Crystal’ for step-by-step instructions and expert advice!
Finding the Right Products for Future Crystal Repair Projects
As you gain experience in crystal repair, you’ll find certain products that work best for your needs. Keep a log of the adhesives that have provided the best results for easy reference in future projects.


