It’s finally time to install those pipes, but you’re unsure of the process for gluing CPVC. Don’t worry – with the right tools and techniques, even a beginner can successfully complete the job. This step-by-step guide will walk you through the process of gluing CPVC pipes, from preparation to post-gluing tips. Before you know it, you’ll be able to confidently tackle any plumbing project involving CPVC pipes. So roll up your sleeves and let’s get started!
What is CPVC?
Many people confuse CPVC with PVC, but they are not the same thing. So, you may ask: What is CPVC? CPVC is an acronym for chlorinated polyvinyl chloride. It is a thermoplastic that is used for piping systems in domestic, commercial, and industrial applications. Compared to regular PVC, CPVC can withstand higher temperatures and pressures, which makes it ideal for hot and cold water applications, sprinkler systems, and more. In this article, we will be discussing everything you need to know about CPVC, including its features, applications, and how to glue CPVC pipes properly.
Features of CPVC
CPVC, or Chlorinated Polyvinyl Chloride, is a widely used plastic material that is derived from PVC. CPVC has a number of features that makes it a popular choice of material for both residential and commercial plumbing applications.
Here are some key features of CPVC:
- High Temperature Resistance: CPVC can withstand higher temperatures than regular PVC, making it suitable for use in hot water systems and other high-temperature applications. It can handle temperatures up to 200°F.
- Corrosion Resistant: CPVC is highly resistant to corrosive chemicals and substances, making it a popular choice for industrial applications as well.
- Durable: CPVC is a tough and durable material that can withstand a high amount of stress and abuse. It is also resistant to impact damage and can maintain its structural integrity even in harsh conditions.
- Easy to Install: CPVC is lightweight and easy to install, making it a popular choice for DIY plumbing projects as well as professional installation.
- Low Thermal Conductivity: CPVC has a low thermal conductivity, which means it doesn’t lose heat as quickly as other materials. This makes it ideal for use in hot water systems where heat retention is important.
If you want to learn more about other types of piping materials and how to glue them, check out our articles on how to glue copper pipe, how to glue tile to plastic, how to glue ABS to PVC, and what is vinyl glue.
Applications of CPVC
CPVC is a highly versatile material, with a wide range of applications across industries. Its strength, durability, and resistance to high temperatures make it an ideal choice for a variety of uses. Here are some common applications of CPVC:
- Plumbing: CPVC is commonly used in plumbing systems for both residential and commercial buildings. It is well-suited for use in hot and cold water systems, and its ability to resist corrosion and scale buildup makes it a popular choice for water treatment applications.
- Fire Sprinkler Systems: CPVC is often used in fire sprinkler systems due to its ability to withstand high temperatures and its flame-retardant properties.
- Industrial Piping Systems: CPVC’s strength and chemical resistance make it a popular choice for industrial piping systems, particularly those used for transporting corrosive or high-temperature fluids.
- Electrical Conduit: CPVC is commonly used in electrical conduit systems due to its fire-resistant properties and ability to withstand high temperatures.
It’s worth noting that while CPVC is a type of plastic, it is important to use the correct type of glue when working with it. Using the wrong type of glue, such as PVC glue, can lead to weak connections and potential leaks. Always make sure to use glues specifically designed for use with CPVC pipes and fittings for best results.
For those looking for more information on the types of glue suitable for different applications, check out what kind of glue to use on pool liner, what is barge glue, and what is the best glue for refrigerator plastic. Additionally, if you need to re-glue PVC pipes, be aware of the differences between PVC and CPVC and follow the appropriate instructions using how to re-glue PVC pipe guidelines.
Tools and Materials Needed
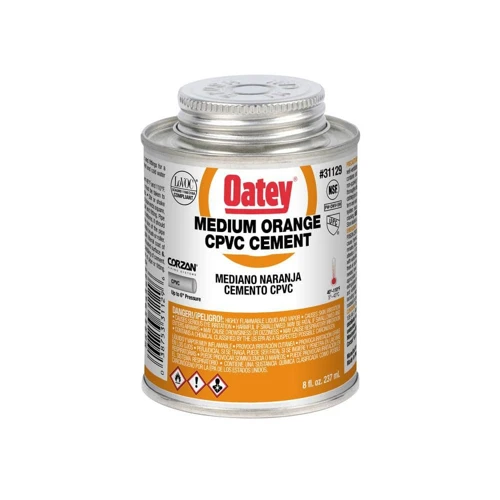
Tools and Materials Needed: Before you start gluing CPVC pipes, there are several tools and materials you will need. Firstly, you will need to purchase the CPVC primer and cement. Make sure they are made for use with CPVC as other types of cement and primer may not work with this kind of piping. You can purchase these materials at any hardware or plumbing store.
In addition to the primer and cement, you will need a few other tools to complete the job. These may include a measuring tape, a hacksaw or pipe cutter, sandpaper or emery cloth, a clean rag, and a marker for making the cuts. You may also need a deburring tool to remove any rough edges created during the cutting process.
When measuring and cutting the CPVC pipes, accuracy is key. Even small mistakes can cause leaks or other problems down the road. As such, it’s crucial to have a steady hand and the right tools. If you’re unsure about the measurements, don’t hesitate to double-check before making any cuts.
Prior to purchasing any materials or beginning the job, it’s important to ensure that you are using the right type of piping. CPVC is different from PVC and other materials, and using the wrong kind of glue can cause serious problems. For instance, if you use PVC glue on CPVC, the material may crack or warp over time. If you’re unsure about the type of piping you have, consider consulting a professional or doing additional research.
To learn more about the risks of using PVC glue on CPVC pipes, click here. Alternatively, if you’re interested in learning how to glue another type of plastic piping, such as PETG, check out our guide on how to glue PETG.
Preparation before Gluing
When it comes to gluing CPVC pipes, preparation is key to a successful bond. Before gluing, it’s important to take the necessary steps to ensure the pipes and fittings are clean, cut to the correct size, and dry-fit together correctly. In this section, we’ll go over the tools and materials you’ll need, as well as the steps for preparing your pipes and fittings before applying the glue. So, let’s dive in and get ready for the gluing process!
Measuring and Cutting CPVC Pipes
Before connecting CPVC pipes, it’s essential to measure and cut them precisely to ensure a strong and tight fit. Here are the steps to follow for measuring and cutting CPVC pipes.
| Tools Needed | Materials Needed |
|---|---|
| Measuring Tape | CPVC Pipes |
| Hacksaw or Pipe Cutter | CPVC Fittings |
1. First, measure the length of the pipe you need to cut. Use a measuring tape to ensure you get the exact measurement.
2. Mark the spot where you need to cut the pipe using a pencil or a marker.
3. Use a hacksaw or a pipe cutter to cut the pipe along the marked spot. Make sure to hold the saw or cutter straight and perpendicular to the pipe to ensure a clean and even cut.
4. After cutting the pipe, make sure to file down any rough or sharp edges using a deburring tool. This will help prevent any leaks and ensure a secure fit.
5. Repeat the process for all the pipes you need to connect.
Note: A pipe cutter is a preferable tool to use, as it provides a more precise and even cut compared to a hacksaw.
Tip: It’s always better to measure twice and cut once to avoid any mistakes and prevent wastage of materials.
Cleaning CPVC Pipes and Fittings
Cleaning CPVC Pipes and Fittings is an essential step before gluing them together. Any dirt, oil, or debris can weaken the bond and cause leaks. Here are the steps to effectively clean CPVC pipes and fittings.
| Materials Needed | Steps to Follow |
|---|---|
| CPVC Cleaner |
|
| Wire Brush |
|
| Water |
|
Note: Do not use any other cleaning agents besides CPVC cleaner as they may damage the surface of the pipe or fitting. It is essential to wear safety gloves to avoid any chemical contact with bare hands.
Dry-Fitting the Pipes and Fittings
Before you begin gluing CPVC pipes, it’s important to dry-fit them first. This means fitting the pipes and fittings together without any glue, to make sure they fit properly and align correctly. Here are the steps for dry-fitting the pipes and fittings:
Step 1: Lay out all the necessary pipes and fittings to ensure that you have everything you need.
Step 2: Make sure the pipes and fittings are clean and free of any debris or dirt. This will help ensure a good fit.
Step 3: Take the pipes and fittings that need to be joined together and fit them together by hand. Make sure they align properly and the ends are flush against each other.
Step 4: Measure the length of the joined pipes to ensure that they are the correct length. This can be done by using a tape measure or a ruler.
Step 5: Make any necessary adjustments to the pipes or fittings by cutting or sanding them down to the correct length. This will ensure that the pipes fit together tightly and securely.
Step 6: Once you are happy with the fit and alignment of the pipes and fittings, disassemble them and place them aside.
Remember, dry-fitting the pipes and fittings is important to ensure that they fit correctly without any glue. This will ensure that there are no leaks or other issues after gluing the pipes and fittings together.
Steps to Glue CPVC Pipes

Now that you have prepared your CPVC pipes and fittings, it’s time to proceed with gluing them together. The process of gluing CPVC pipes may seem daunting for beginners, but with the right tools and techniques, it can be accomplished easily. In this section, we will guide you through the step-by-step process of gluing CPVC pipes using primer and cement. Follow these instructions carefully to ensure a strong and durable connection. Let’s get started!
Applying CPVC Primer
Before applying the CPVC cement, it is important to apply a CPVC primer. The primer is necessary to ensure a strong and lasting bond between the CPVC pipes and fittings. Here are the steps to properly apply the CPVC primer:
| Step | Instructions |
|---|---|
| Step 1 | Gather the materials needed, including the CPVC primer, a clean rag or brush, and safety equipment such as gloves and goggles. |
| Step 2 | Using the clean rag or brush, apply the CPVC primer in a thin and even layer on the outside of the CPVC pipes where the fittings will be connected. |
| Step 3 | Use a back and forth motion along the surface of the pipe to ensure full coverage. |
| Step 4 | Use enough primer to fully coat the area where the fitting will be inserted. |
| Step 5 | Allow the primer to dry according to the manufacturer’s instructions. |
Remember to check the label of your primer for specific instructions on drying time and application methods, as they may vary by brand.
It’s important to take these steps seriously to ensure a safe and secure connection between the pipes and fittings. Skipping or rushing the priming process can lead to weaker bonds, which can ultimately result in leaks or other problems in your plumbing system.
Applying CPVC Cement
To apply the CPVC cement, follow these steps:
- Prepare the CPVC Cement: Open the CPVC cement container, and stir the content with a stirring stick to ensure it’s well mixed. Pour the cement into the cement applicator bottle, or use a clean brush to apply the cement directly from the can. Only apply a small amount of cement, as you don’t want it to drip or smear outside the joint.
- Apply the CPVC Cement: Now that you have your cement ready, apply it to both the pipe ends and the fittings evenly and generously. Avoid applying the cement too close to the edge of the fitting socket, as this may cause the cement to push out when the pipes are inserted. Apply the cement quickly, as it dries within seconds.
- Join the Pipes and Fittings: Once you’re done applying the cement, immediately join the pipes and fittings together. Twist and push firmly for about 15 seconds to ensure a secure fit. Make sure the alignment is correct, and adjust it if necessary before the cement dries.
- Hold the Pipes and Fittings Firmly: After joining the pipes and fittings, hold them firmly in place for at least 30 seconds. This is to ensure that the bond sets correctly without movement or pressure.
- Clean the Excess CPVC Cement: After holding the joint securely for 30 seconds, use a dry cloth to carefully wipe away any excess cement around the joint. Be careful not to disturb the joint itself, as it needs to set for at least 15 minutes before being moved or disrupted.
Remember to work quickly and accurately when applying the cement, as it sets within seconds. Any mistakes made during the process will result in an imperfect joint, which can lead to leaks and other problems in the future.
Connecting the Pipes and Fittings
The actual process of connecting the pipes and fittings involves some precision and attention to detail. Here are the steps to guide you through:
- Step 1: Quickly apply cement to the inside of the fitting using the dauber or brush included with the cement container. Be sure not to over-apply as this can cause a clog or blockage. Apply in a circular motion to ensure even coverage.
- Step 2: Next, apply cement to the outside of the pipe using the same dauber or brush. Again, do not over-apply and ensure even coverage.
- Step 3: Quickly insert the pipe into the fitting while rotating the pipe slightly to ensure even coverage of the cement. You will feel it “bottom out” when the pipe is fully inserted. Hold it there for a few seconds to allow the cement to take hold.
- Step 4: Repeat this process for all other pipes and fittings, working from one end of the system to the other. Be sure to double-check that the pipes and fittings are in their correct positions before cement dries.
- Step 5: Once all pipes and fittings are connected, hold and support them in place for at least 30 seconds. This helps to prevent the pipes from moving or slipping out of place.
Remember, the cement dries quickly, so it’s essential to complete the connecting process as efficiently as possible. If you find that a pipe does not fit or align correctly, avoid forcing it into place. Instead, remove the pipe and examine why it’s not fitting correctly. It may require cutting or adjusting before reapplying the cement and reinserting it into the fitting.
Wiping off Excess Glue
After connecting the pipes and fittings, it is important to wipe off excess glue to ensure a tidy and professional-looking result. Here are the steps to follow for wiping off excess glue:
- Use a dry cloth or rag to immediately wipe off any excess glue on the outside of the joint. The longer the glue sits on the joint, the more difficult it will be to remove later.
- If there is still excess glue, use a professional-grade cleaner specifically designed to remove CPVC glue from pipes and other surfaces. Be sure to follow the manufacturer’s instructions.
- Afterward, rinse the joint with water, using a clean rag to wipe away any remaining residue. Be careful not to apply too much pressure, as this could damage the joint.
- Give the joint ample time to dry completely before turning on the water supply. This usually takes around 30 minutes or as recommended by the manufacturer’s instructions.
By wiping off excess glue immediately and properly, you can avoid unsightly and potentially damaging drip marks, ensure a strong and durable bond, and maintain a professional and polished finish.
Post-Gluing Tips
Congratulations! You have successfully glued your CPVC pipes together. But wait, your job is not done yet. Proper post-gluing care is crucial to ensure that the joint is strong and leak-free. In this section, we will discuss some essential post-gluing tips that you must follow. So, let’s dive in and learn how to take care of your newly glued CPVC pipes.
Allowing Enough Time to Bond
Allowing enough time for the joint to bond is crucial for a strong and durable connection. CPVC cement typically takes around 15 minutes to dry and 2 hours to fully cure. However, the drying and curing time may vary depending on the temperature, humidity, and thickness of the cement layer.
To make things easier, refer to the guidelines provided by the manufacturer. Check the curing time on the packaging and avoid using the joint until it is fully cured. Put a label or a tape on the joint to remind other people not to touch or use it until it’s fully cured.
It’s best to wait for at least 24 hours before exposing the joint to water or pressure. This will give ample time for the cement to bond the pipe and fitting together. If you are working on a larger project, it’s advisable to work in sections to prevent any accidental damage or disturbance to the freshly glued joints.
After the curing time, you can then proceed to turning the water back on and checking for any leaks. Check the connections thoroughly and make sure that everything is tight and secure. If you notice any leaks, turn off the water supply immediately and redo the joint following the same steps from preparation to gluing.
Patience is key when it comes to allowing enough time for the joint to bond. Rushing the process can compromise the strength of the connection and lead to leaks. Take the extra time to ensure that the connection is done correctly and securely, and you’ll have a functioning plumbing system for years to come.
Here is a table that summarises the time needed for each step of the CPVC gluing process:
| Step | Time Needed |
|---|---|
| Drying Time | 15-20 minutes |
| Curing Time | 2 hours – 24 hours |
| Fully Functional | 24 hours |
Checking for Leaks
Once you’ve finished gluing the CPVC pipes, it’s important to check for leaks before using the piping system. Follow these steps to ensure that your CPVC joints are secure and leak-free:
- Turn on the Water: Turn on the water supply to your piping system and let it flow for a few minutes to see if there are any leaks.
- Inspect the Joints: Visually inspect each joint to see if there are any signs of leaks. Make sure to check both the hot and cold water lines.
- Check the Pressure: Check the water pressure in the system to make sure it’s consistent throughout. An inconsistent water pressure could mean that there’s a leak somewhere in the system.
- Use a Leak Detector: If you suspect that there might be a leak, use a leak detector to pinpoint the source of the problem. They’re available at most hardware stores and can help you find difficult leaks quickly and easily.
- Address Any Leaks: If you find a leak, turn off the water supply to the system and repair the joint using the same primer and cement that you used for the initial gluing process. Make sure to let the joint dry completely before turning the water supply back on.
Checking for leaks is an important step in ensuring that your CPVC piping system is functioning properly. By following these steps, you can catch any leaks early on and prevent any damage to your home or property.
Finishing Touches and Clean-up
After successfully connecting your CPVC pipes, it’s important to finish up the project with some final touches and clean-up. Follow these steps to ensure a professional-looking and long-lasting result:
| Step | Instructions |
|---|---|
| Step 1: | Allow the glue to dry for at least 30 minutes before turning on the water supply. |
| Step 2: | Use sandpaper to smooth out any rough or jagged edges on the pipes and fittings. |
| Step 3: | Remove any excess glue or primer with a cloth or rag while it’s still wet. |
| Step 4: | Turn on the water supply and check for any leaks. Repeat steps 2-4 if necessary. |
| Step 5: | Once the connection is leak-free, clean up any remaining debris or tools. |
| Step 6: | Dispose of any leftover glue and primer according to your local regulations. |
Remember, the finishing touches and clean-up are just as important as the gluing process itself. Taking the time to smooth out rough edges and clean up excess glue not only improves the appearance of the final product but also helps to ensure the connection is leak-free and long-lasting.
Conclusion
In conclusion, gluing CPVC pipes may seem daunting at first, but with the right tools and materials, preparation, and steps, it can be accomplished by beginners. Remember to always follow safety precautions and read instructions carefully before starting.
Using a CPVC-specific primer and cement, along with making sure the pipes and fittings are clean and dry, is crucial for a strong bond. Dry-fitting before gluing is also important to ensure proper alignment and fit.
Post-gluing, it’s important to allow enough time for the bond to fully set and to check for leaks before finishing up with any necessary touches and clean-up.
With practice and patience, anyone can successfully glue CPVC pipes for various applications, such as plumbing, irrigation, and more. Don’t be scared to give it a try and take the first step towards mastering this important skill. Remember, safety always comes first!
Frequently Asked Questions
What is the difference between PVC and CPVC?
CPVC can handle higher temperatures and pressures than PVC, making it ideal for hot water distribution systems.
Why is it important to clean the pipes and fittings before gluing?
Dirt and debris can prevent a strong bond from forming between the pipes and fittings, leading to leaks in the future.
Can CPVC pipes be glued together in wet conditions?
No, CPVC cement requires dry conditions in order to form a strong bond between the pipes and fittings.
How long does CPVC cement take to dry?
CPVC cement typically takes around 15-30 minutes to dry, but it can take up to 2 hours to fully cure.
Can CPVC pipes be used for gas lines?
No, CPVC is not approved for use with gas and should only be used for water distribution.
Do I need to use a primer before applying CPVC cement?
Yes, using a primer is necessary to ensure a strong bond between the pipes and fittings.
Can I use regular PVC cement on CPVC pipes?
No, regular PVC cement is not compatible with CPVC and will not form a strong bond.
Do I need any special tools to glue CPVC pipes?
No, but having a good-quality pipe cutter and deburring tool can make the job easier and produce better results.
How can I fix a mistake after gluing CPVC pipes together?
Unfortunately, once CPVC cement dries, it cannot be undone. The only solution would be to cut out the section that was glued and start over.
Can I use silicone instead of CPVC cement?
No, silicone is not a suitable alternative to CPVC cement and will not create a strong enough bond between the pipes and fittings.