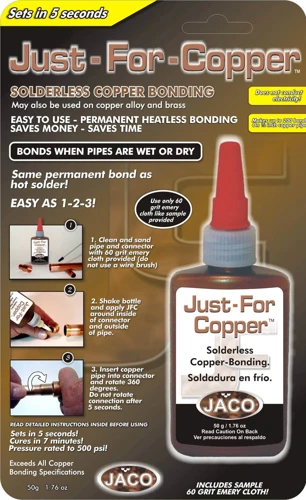
Copper is a highly versatile metal that is used for a wide range of applications, from electrical wiring to jewelry making. Whether you need to repair a copper pipe or create a custom piece of art, knowing how to glue copper can be a valuable skill. But with so many different types of adhesives available, it can be hard to know where to start. Do you need an epoxy resin or a cyanoacrylate glue? What about a polyurethane adhesive or a silicone sealant? In this comprehensive guide, we will explore the different types of adhesives that are best suited for gluing copper, as well as the steps you need to follow to prepare the surface and apply the adhesive correctly. So let’s dive in and discover how to glue copper like a pro!
Choosing the Right Adhesive
When it comes to gluing copper, choosing the right adhesive is crucial for a successful bond. There are many types of adhesives available, each with its own specific properties and suitable applications. It can be perplexing to know where to start, but with the right knowledge and understanding, finding the perfect adhesive for your copper project is achievable. In this section, we will discuss some of the most common adhesives used for copper, including their strengths and weaknesses. If you’re interested in learning about gluing other materials, check out our articles on how to glue acetal, how to glue ABS, and how to use E6000 glue on wood.
Epoxy Resin
Epoxy resin is one of the strongest and most durable adhesives for bonding copper. It consists of two parts: resin and hardener. When these two are mixed together, they create a strong chemical reaction that forms a hard and rigid bond. Epoxy resin is perfect for bonding copper because it has a high resistance to water, oil, and heat, making it an ideal choice for outdoor applications.
To use epoxy resin for bonding copper, you need to mix the resin and hardener in equal amounts. Once mixed, you will have a limited amount of time to apply the adhesive before it starts to harden. It’s important to work quickly and efficiently.
To apply epoxy resin to copper, follow these steps:
- Clean the copper surface: Use sandpaper to roughen the copper surface, and then clean it with a degreaser or alcohol to remove any oils, dirt, or debris.
- Apply the epoxy: Mix the two parts of the epoxy resin according to the manufacturer’s instructions. Use a small brush, wooden stick or toothpick to apply the adhesive to the copper surface. Be careful not to apply too much adhesive, as this can cause it to overflow when clamped.
- Clamp the copper: After applying the adhesive, gently press the surfaces together, then clamp them tightly in place with a C-clamp or another type of clamp. Ensure the pressure is distributed evenly along the entire surface of the bond.
- Allow drying and curing time: Leave the adhesive to cure for the suggested time according to the manufacturer’s instructions. During this time, avoid disturbing the bond.
- Remove any excess glue: Once the cure time is complete, remove any excess glue from the bond with a scraper or a blade. Be careful not to damage the bond.
It’s important to note that epoxy resin can be toxic, so it’s essential to work in a well-ventilated area and wear gloves and protective gear. Additionally, it’s essential to follow the manufacturer’s instructions strictly when working with epoxy resin.
If you encounter any problems with your bond, don’t worry! You can check out our other guides such as how to glue a stone back into a ring or how to glue wood to brick for more helpful tips and tricks.
Cyanoacrylate Glue
Cyanoacrylate glue, also known as super glue, is a popular adhesive option for gluing copper because of its fast-drying capabilities. When using this glue, it’s important to keep a few things in mind to ensure successful results.
Advantages:
- Fast-drying: Cyanoacrylate glue sets in seconds, which makes it an ideal option for those looking for a quick fix.
- Strong bond: This adhesive creates a strong bond that can resist vibration and impact.
- Easy to use: Unlike other adhesives, cyanoacrylate glue doesn’t require mixing, which makes it very easy to use.
Disadvantages:
- Brittleness: Due to its hard and stiff nature, cyanoacrylate glue can make the copper brittle, which might not be ideal for certain applications.
- Not suitable for high-temperature applications: This glue can break down at high temperatures, so it’s not recommended for high-temperature applications.
- Not water-resistant: Cyanoacrylate glue is not waterproof, so it’s not an ideal option for applications where the copper will be exposed to water.
When using cyanoacrylate glue, always remember to wear gloves to protect your skin. Clean the copper surface thoroughly before applying the glue, and roughen it to ensure better adhesion. Apply the glue sparingly to one of the surfaces being joined and press the two pieces together quickly. It’s important to clamp the pieces tightly and let the glue dry and cure for at least an hour before using the item.
While cyanoacrylate glue is a great option for small-scale copper gluing applications, it might not be suitable for larger projects. In that case, it might be better to use a more heavy-duty adhesive like epoxy resin or polyurethane adhesive. If you’re looking to glue copper to PTFE or glue a lawn mower seat back on, cyanoacrylate glue might not be the right solution. Check out our other articles on how to glue PTFE and how to glue a lawn mower seat back on for tips on these specific projects.
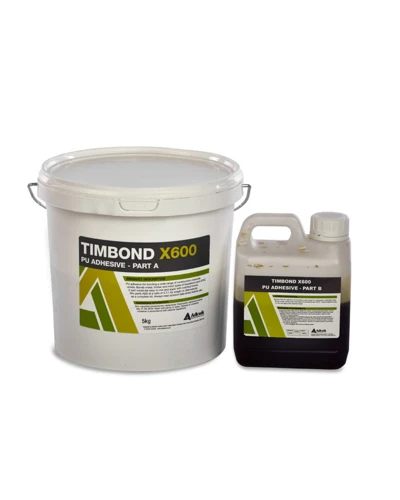
Polyurethane Adhesive
Polyurethane Adhesive: Polyurethane adhesive is another popular type of glue for bonding copper. This adhesive is known for its excellent bonding strength and versatility. It can be used to bond a wide range of materials, including copper, and can work well for both porous and non-porous surfaces.
One of the major advantages of polyurethane adhesive is its resistance to water and temperature changes. It can withstand exposure to water without losing its bonding strength, making it ideal for applications where the glued copper part may be exposed to water. Additionally, it can also work well in a range of temperature conditions, both hot and cold.
However, it’s important to note that polyurethane adhesive can expand as it cures, which means that clamping may be necessary to prevent any warping or bending of the copper pieces being glued together. Additionally, it can take longer to dry compared to other adhesives, with a drying time of around 8-24 hours.
To use polyurethane adhesive for copper, start by cleaning the surface thoroughly. Apply the adhesive to one of the surfaces and press the two pieces together firmly. If necessary, clamp the pieces together for a secure bond and let them dry for 8-24 hours, depending on the manufacturer’s instructions.
Tips:
- Wear gloves and protective gear while working with polyurethane adhesive as it can be harmful to skin and eyes.
- Work in a well-ventilated area to avoid inhaling any fumes.
- Follow the manufacturer’s instructions carefully for best results.
If you need information on how to glue other materials, you can read our guide on how to glue soapstone together. You can also learn more about silicone glue by reading our article on what is silicone glue. Additionally, if you want to know how long it takes for acrylic glue to dry, you can read our guide on how long does acrylic glue take to dry.
Silicone Sealant
Silicone sealant is another option for gluing copper as it creates a strong and flexible bond that is resistant to water and high temperatures. It is commonly used for sealing and bonding materials, making it an ideal choice for various copper-based projects.
To use silicone sealant for gluing copper, follow these steps:
| Step | Description |
|---|---|
| 1 | Clean the surface: Before applying the silicone sealant, clean the copper surface thoroughly to remove any dirt, dust, or debris. |
| 2 | Apply primer (if necessary): If the copper surface is non-porous or smooth, applying a primer can improve the adhesion of the silicone sealant. |
| 3 | Apply the sealant: Using a caulking gun or similar tool, apply a bead of silicone sealant along the seams or edges of the copper pieces you want to bond. |
| 4 | Press the pieces together: Immediately after applying the silicone sealant, press the copper pieces together firmly. This will help remove any air pockets and ensure a strong bond. |
| 5 | Allow drying time: Let the sealant dry for at least 24 hours before handling the copper. Keep in mind that drying time may vary depending on the humidity and temperature of the working environment. |
Silicone sealants are available in various colors and formulations, including those specifically designed for copper bonding. When choosing a silicone sealant, make sure it is appropriate for copper and that it has the required tensile and tear strength for your project.
Note: While silicone sealant can be a great choice for bonding copper, it may not be the best choice for projects that require a high-strength bond. In these cases, you may want to consider other adhesive options, such as epoxy resin or polyurethane adhesive.
Solvent Cement
When it comes to gluing copper, one option you may consider is using solvent cement. Solvent cement is a type of adhesive that uses chemicals to fuse together the copper pieces. It is a popular choice for joining copper pipes in plumbing applications.
One thing to keep in mind when using solvent cement is that it is a very strong adhesive that dries quickly, so you need to work fast and be careful not to make mistakes. This type of adhesive requires a bit more preparation than some other options, but it can provide a very strong bond if done correctly.
Before using solvent cement, it is important to make sure that the surfaces you are bonding are clean and free of any oils or debris. This can be done by using a rag and a cleaning solution such as acetone or denatured alcohol.
Next, you will need to apply the adhesive. Solvent cement typically comes with a brush applicator attached to the lid of the container. Apply a generous amount of the cement to one of the copper surfaces, making sure to cover the entire area that will be bonded.
Once the adhesive has been applied, quickly press the two copper pieces together. It is important to make sure that the pieces are aligned correctly, as the adhesive will begin to bond almost immediately.
Some solvent cements have a curing time of just a few minutes, while others may take up to 24 hours to fully cure. It is important to follow the manufacturer’s instructions for drying and curing times to ensure the strongest bond.
Here is a table highlighting some pros and cons of using solvent cement as a copper adhesive:
| Pros | Cons |
|---|---|
| Creates a very strong bond. | Dries quickly, so mistakes cannot be easily corrected. |
| Can be used to bond copper pipes, providing a leak-proof seal. | Requires more preparation than some other types of adhesive. |
| Relatively inexpensive compared to other types of adhesive. | Strong fumes, so it is important to work in a well-ventilated area and wear protective gear. |
Solvent cement can be a great option for bonding copper in certain applications, such as plumbing. However, it does require careful preparation and quick, precise application to ensure the strongest bond.
Preparing the Copper Surface
Before you start gluing copper, it’s important to properly prepare the surface. Failure to prepare the surface can result in weak bonds that can break easily. The preparation steps may vary depending on the type of adhesive you use, but in general, the process involves cleaning the surface, roughening it, and in some cases applying primer. Let’s dive into the specific steps you need to follow to ensure a strong bond between your copper pieces.
Cleaning the Surface
Before gluing copper, one of the most essential steps is to ensure that the surface is entirely clean. Cleaning copper surfaces not only removes any debris or contaminants present on the surface but also prepares the surface for better adhesion. Here are some tips for cleaning copper surfaces:
| Tips for Cleaning Copper Surfaces |
|---|
| Use Acetone: Acetone is an excellent solvent that can easily remove any oils or residue present on the copper surface. Apply a small amount of acetone on a clean cloth and wipe the surface thoroughly. |
| Baking Soda and Vinegar: Make a paste by mixing baking soda and vinegar. Apply the paste to the copper surface and scrub the surface with a brush. Rinse the surface with water and dry it with a clean cloth. |
| Commercial Copper Cleaner: Many commercial copper cleaners are available in the market, specially formulated to clean copper surfaces. Follow the manufacturer’s instructions and use the product accordingly. |
| Brass Brush: A brass brush is a useful tool to remove any hardened dirt or stains from the copper surface. Scrub the surface gently with the brush to avoid any scratches on the surface. |
| Deionized Water: Deionized water is free of any minerals or contaminants that could leave a residue on the copper surface. Using deionized water to clean the copper surface ensures that the surface is entirely clean. |
It is essential to ensure that the copper surface is entirely dry after cleaning. Water or moisture on the surface can interfere with the adhesive’s effectiveness, resulting in an improper bond. It is recommended to wipe the surface dry with a clean, lint-free cloth. By following these cleaning tips, you can ensure a better bond and a long-lasting adhesive bond between the copper pieces.
Roughing the Surface
One important step in preparing the copper surface for gluing is roughing the surface. This helps the adhesive to properly grip onto the copper, ensuring a strong and long-lasting bond.
To roughen the surface, you can use sandpaper or a wire brush. When selecting sandpaper, choose a coarse grit such as 80 or 100. This will create small scratches and grooves on the surface of the copper, providing an ideal texture for the adhesive to adhere to.
It’s important to note that you should only roughen the surface if the copper is smooth. If the surface is already rough or textured, there’s no need to further roughen it.
When using a wire brush, use firm pressure and move the brush back and forth in different directions to create a textured surface. Repeat this process until the entire surface area has been roughened.
After roughening the surface, use a soft cloth to remove any debris or particles left behind. This will ensure that the surface is clean and ready for the next step in the gluing process.
| Tips for Roughening the Surface of Copper | |
|---|---|
| Do | Use sandpaper or wire brush to create a textured surface |
| Do | Select a coarse grit sandpaper (80-100 grit) |
| Don’t | Roughen the surface if it’s already textured or rough |
| Do | Use a soft cloth to remove debris after roughening |
By properly roughening the surface of the copper, you can ensure that the adhesive will create a strong bond. This step is crucial in the overall success of gluing copper materials together.
Applying Primer (if necessary)
Before applying the adhesive, you may need to apply a primer to the copper surface. A primer helps the adhesive bond better to the surface and also provides protection against corrosion. However, not all adhesives require a primer, so it’s important to check the manufacturer’s instructions before applying any.
Types of Primers
There are different types of primers available for copper, so it’s important to choose the right one for your project.
| Primer Type | Benefits |
|---|---|
| Zinc Chromate | Provides excellent corrosion resistance |
| Acid Etch Primer | Creates a rough surface for better adhesion |
| Epoxy Primer | Provides high bonding strength and chemical resistance |
Applying the Primer
If the adhesive manufacturer recommends using a primer, follow these steps to apply it to the copper surface:
1. Clean the surface with a degreaser and dry it thoroughly.
2. Apply the primer using a brush or spray gun.
3. Allow the primer to dry completely before applying the adhesive.
4. If necessary, lightly sand the surface with fine-grit sandpaper to ensure proper adhesion.
It’s important to note that some primers require a specific curing time before applying the adhesive. Check the manufacturer’s instructions for details on the curing time and allow the primer to cure completely before applying the adhesive.
By taking the time to properly prepare the copper surface with a primer (if necessary), you can ensure a strong and long-lasting bond between the copper pieces.
Gluing the Copper
Assembling copper pieces is no easy feat, but with the right adhesive and technique, it’s possible to create a strong and lasting bond. So, once you’ve chosen the right adhesive and prepared the surface, it’s time to move on to the next step: gluing the copper. In this section, we’ll go over the step-by-step process of applying the adhesive, clamping the pieces together, and letting it cure. Read on to discover the secrets to gluing copper like a pro.
Applying Adhesive
When it comes to applying adhesive to copper, there are a few things to keep in mind to ensure that the bond is as strong as possible. Here are the steps to follow:
| Step | Description |
|---|---|
| 1 | Clean the surfaces: Use a clean, dry cloth to remove any dirt, dust, or grease from the copper surfaces you will be gluing. This will help the adhesive bond more effectively. |
| 2 | Apply the adhesive: Following the manufacturer’s instructions, apply the adhesive to one of the copper surfaces. Be sure to apply enough adhesive to create a strong bond, but not so much that it oozes out when the surfaces are pressed together. |
| 3 | Spread the adhesive: Use a small brush or spatula to spread the adhesive evenly over the surface. This will help ensure that the bond is strong and uniform. |
| 4 | Join the surfaces: Carefully align the two copper surfaces and press them together firmly. Be sure to use gentle, even pressure to avoid squeezing out too much adhesive. |
It’s important to note that the type of adhesive you select for your copper project will impact the application process. For example, epoxy resin may require mixing before application, while cyanoacrylate glue may only require a small amount per surface. Be sure to follow the manufacturer’s instructions carefully for the best results.
Clamping the Pieces Together
To ensure a strong bond between the copper pieces, it’s important to apply pressure by clamping them together while the adhesive sets. This helps the adhesive to spread evenly and create a solid connection. Here are some tips to keep in mind when clamping copper:
| Tip | Description |
|---|---|
| Choose the Right Clamps | Use clamps that provide strong and even pressure. Spring clamps, bar clamps, and hand screw clamps are all good options for gluing copper. Make sure the clamps are easy to handle and won’t damage the surface of the copper. |
| Apply Even Pressure | When clamping the copper, make sure to apply pressure evenly to all sides. Uneven pressure can cause the adhesive to squeeze out from one side and create a weak bond on the other side. Use enough pressure to create contact between the two surfaces, but not so much as to deform or bend the copper. |
| Clean Up Excess Adhesive | As you clamp the copper pieces together, be aware of any excess adhesive that may squeeze out from the sides. Wipe this excess adhesive away with a clean cloth or scraper to prevent it from hardening in place and creating a rough patch on the copper surface. |
| Check the Alignment | Before the adhesive dries, double-check the alignment of the copper pieces to make sure they haven’t shifted during the clamping process. If they have, adjust the clamps to correct the alignment and apply even pressure again. |
By following these tips, you can ensure that the clamping process is effective in creating a strong bond between the copper pieces. Remember that the adhesive’s strength relies heavily on the prep work and clamping technique, so take your time and do it right for the best results.
Drying Time
After applying the adhesive to the copper surface, it is important to let it dry completely before moving on to the curing process. The drying time will depend on the adhesive you have chosen, as well as the conditions in which you are working. Here are some general guidelines for drying times:
- Epoxy Resin: Epoxy resin typically takes 24 to 48 hours to dry completely.
- Cyanoacrylate Glue: Cyanoacrylate glue dries very quickly, usually within seconds to a few minutes.
- Polyurethane Adhesive: Polyurethane adhesive can take anywhere from a few hours to overnight to dry.
- Silicone Sealant: Silicone sealant usually takes around 24 hours to dry completely.
- Solvent Cement: Solvent cement may take several hours to dry, depending on the temperature and humidity of your workspace.
During the drying process, it is important to keep the copper pieces steady and undisturbed. Any movement or disruptions during this time can compromise the adhesive’s ability to bond properly. Be sure to also follow any specific instructions provided by the adhesive manufacturer for optimal drying results.
Once the adhesive has dried completely, you can move on to the curing process, which helps to fully bond and strengthen the copper pieces.
Curing Time
After the adhesive has been applied and the copper pieces have been clamped together, it’s important to allow sufficient time for the curing process to take place. Curing time refers to the amount of time needed for the adhesive to fully harden and achieve its maximum bonding strength. Each type of adhesive has its own specific curing time, which may vary depending on factors such as temperature and humidity.
Adhesive Curing Time
Epoxy Resin 24-48 hours
Cyanoacrylate Glue 24 hours
Polyurethane Adhesive 24-48 hours
Silicone Sealant 24-72 hours
Solvent Cement 24 hours
As seen in the table above, different types of adhesives have different curing times. It’s important to follow the manufacturer’s instructions for the specific adhesive being used, as well as taking into consideration external factors such as temperature and humidity.
During the curing process, it’s important to avoid disturbing the copper pieces and the adhesive. Any movement or stress during this time can weaken the bond and compromise its strength. It’s recommended to leave the clamped pieces undisturbed for the entire curing time for best results.
Once the curing time is complete, the clamps can be safely removed and the glued copper pieces can be used as desired. It’s important to note that the bonding strength will continue to increase over time, up to several days or even weeks in some cases. So, it’s advisable to avoid exposing the glued copper pieces to excessive stress or heavy use until the bonding strength has fully developed.
Taking the time to properly allow for curing is an essential step in ensuring a strong and reliable bond between copper pieces.
Tips for Success
When it comes to gluing copper, there are a few tips you should keep in mind to ensure your project is a success. These tips are crucial for achieving a strong and durable bond between the copper pieces you’re working with. By following these tips, you’ll be able to not only achieve a successful glue job but also stay safe in the process. Let’s take a closer look at these tips and how they can help you achieve your desired results.
Use Gloves and Protective Gear
When it comes to gluing copper, safety should be a top priority. Before getting started, make sure to equip yourself with proper protective gear, including gloves, eye goggles, and a respiratory mask. Here are some reasons why:
- Chemical Exposure: Some adhesives used for copper gluing contain hazardous chemicals. Gloves will help protect your skin from prolonged exposure to these chemicals. It is essential to avoid skin contact with these chemicals as some may cause skin irritations, rashes, or burns.
- Eye Protection: If any adhesive comes into contact with your eyes, it can cause severe damage, including loss of vision. That’s why wearing eye goggles is crucial when working with adhesives.
- Inhalation of Fumes: During the gluing process, fumes may be released that can be harmful when inhaled. Wearing a respiratory mask will help protect your lungs from these fumes, reducing the risk of respiratory problems.
It is essential to wear the protective gear correctly. Ensure that gloves fit correctly and do not have any holes or damage that could compromise their effectiveness. Additionally, goggles should be fitted snugly and provide a clear view of the work area. A respiratory mask should also fit well and provide adequate protection from fumes.
By taking the necessary precautions, you can ensure your safety when gluing copper. Remember, it’s better to be safe than sorry.
Work in a Well-Ventilated Area
When working with adhesives, it is important to work in a well-ventilated area. This is because many adhesives contain volatile organic compounds (VOCs) which can be harmful if inhaled. These compounds can cause a range of health problems from headaches to dizziness, nausea, and even respiratory problems, so it’s essential to take precautions.
To ensure that you are working in a well-ventilated area, here are some tips:
- Work outdoors if possible. If not, choose a room with windows and open them up to create airflow.
- Consider using fans to help circulate the air and move any harmful fumes out of the room.
- If working in a small or enclosed space, wear a respirator mask. This can help filter out harmful VOCs and protect your respiratory system.
- Avoid working in a space with poor ventilation or near an open flame or heat source as this can increase the risk of a fire.
Remember, working in a well-ventilated area is crucial when working with adhesives to protect yourself from the harmful effects of VOCs. By taking the necessary precautions, you can safely complete your project and enjoy the beauty and durability of copper.
Follow the Adhesive Manufacturer Instructions
One of the most important things to note when gluing copper is to follow the adhesive manufacturer’s instructions. Different adhesives may have varying procedures, so it’s crucial to read and understand the instructions before applying the glue. Here are some tips to keep in mind:
- Read the label carefully: Take note of any warnings, safety precautions, application instructions, and curing/drying times specified on the label.
- Use the recommended amount: Applying too little or too much adhesive can affect the bond strength. The manufacturer’s instructions will usually indicate how much glue to use based on the surface area and type of material.
- Work within the recommended temperature range: Some adhesives may not work well in extremely hot or cold temperatures. Be mindful of the temperature range indicated on the label and try to work within those limits.
- Apply the adhesive evenly: This will ensure that the glue adheres evenly and prevents any weak spots in the bond.
- Avoid disturbing the joint while the adhesive is curing: Most adhesives require a certain amount of time to cure fully. Avoid touching or moving the joint during this time to prevent weakening the bond strength.
By following the manufacturer’s instructions, you can ensure that you are using the adhesive correctly and achieving the best possible bond strength for your copper project.
Prep Work is Important
The success of your copper gluing project can greatly depend on the preparation of the copper surface. To ensure a strong and long-lasting bond, proper prep work is crucial. Here are some steps to follow:
| Clean the Surface | Before gluing, make sure the copper surface is free of any dirt or debris. Use a degreaser or rubbing alcohol to clean the surface thoroughly. Any dirt or oil can affect the strength of the adhesive bond. |
| Rough the Surface | Use sandpaper or a wire brush to rough the surface of the copper. This provides a better surface for the adhesive to grip onto. Be careful not to rough the surface too much, as it can damage the copper. |
| Apply Primer (if necessary) | Depending on the type of adhesive being used, a primer may be necessary to ensure a strong bond. Check the adhesive manufacturer’s instructions to see if a primer is recommended for your particular project. |
By taking the time to properly prep the copper surface, you can ensure a strong and reliable bond between the copper pieces. Skipping these important steps can result in a weak bond and the failure of your project. Remember to follow the adhesive manufacturer’s instructions and work in a well-ventilated area to ensure your safety while completing the prep work.
Conclusion
In conclusion, gluing copper can be a straightforward process if you choose the right adhesive, prepare the surface properly, and follow the correct steps for gluing. Remember to always use gloves and protective gear, work in a well-ventilated area, and follow the manufacturer’s instructions for the adhesive you choose. Prep work is also essential, so take the time to clean and roughen the surface and apply primer if necessary.
Using epoxy resin is an excellent choice for bonding copper, as it provides a strong and durable hold. However, cyanoacrylate glue is also a great option for small projects or projects that require a quick bond. Polyurethane adhesive and silicone sealant are ideal for projects that require waterproofing, while solvent cement is an excellent option for plumbing or HVAC applications.
Properly preparing the copper surface is crucial to achieve a strong bond. Cleaning the surface removes any dirt, grease, or debris that can hinder the bond. Roughening the surface provides a more significant surface area to bond to. Applying primer is necessary when gluing dissimilar materials, such as copper and plastic or copper and wood.
When it comes to gluing, applying the adhesive evenly and using the proper amount is crucial. Clamping the pieces together helps ensure a strong bond, but make sure not to over-tighten the clamp to avoid damaging the materials. Drying time and curing time vary depending on the adhesive, so make sure to follow the manufacturer’s instructions for the best results.
In summary, with the right adhesive, proper surface preparation, and following the correct steps, gluing copper can be a successful project that results in a strong and lasting bond. Remember to always work safely and carefully, and have fun with your project!
Frequently Asked Questions
What type of adhesive is best for copper?
There are several adhesives that work well with copper, including epoxy resin, cyanoacrylate glue, polyurethane adhesive, silicone sealant, and solvent cement. The best type of adhesive for copper will depend on the specific project and conditions.
Can you glue copper without roughing the surface?
Roughing the surface of the copper will help the adhesive bond more securely. It’s not recommended to skip this step, especially if you want a strong and long-lasting bond.
Do you need to use primer before gluing copper?
It may be necessary to use primer on the copper surface before applying adhesive, depending on the type of adhesive being used. Follow the adhesive manufacturer’s instructions to determine if primer is necessary.
How long does it take for the adhesive to dry?
The drying time for the adhesive will depend on the specific type of adhesive being used. Typically, it will take anywhere from a few minutes to several hours for the adhesive to dry.
How long does it take for the adhesive to cure?
The curing time for the adhesive will depend on several factors, including the specific type of adhesive being used, the conditions of the environment, and the size and complexity of the project. It may take anywhere from a few hours to several days for the adhesive to fully cure.
Can you remove adhesive from copper if you make a mistake?
Yes, it’s usually possible to remove adhesive from copper if you need to make a correction. However, you’ll need to use specific products and techniques, so it’s best to follow the adhesive manufacturer’s instructions and be careful during the gluing process.
What should you do if the adhesive doesn’t bond properly?
If the adhesive doesn’t bond properly, you may need to start the process over again. Check the surface preparation and application of the adhesive to ensure everything was done correctly and consider trying a different type of adhesive if needed.
Is it necessary to use clamps when gluing copper?
It’s recommended to use clamps when gluing copper to ensure a secure bond. However, if clamps can’t be used, you can try holding the pieces together by hand until the adhesive sets.
Can you use glue to fix a cracked copper pipe?
It’s not recommended to use glue to fix a cracked copper pipe, as it may not provide a long-lasting solution. It’s best to replace the damaged section of the pipe to ensure the integrity of the plumbing system.
Can you glue copper to other materials?
Yes, you can glue copper to other materials, such as wood, plastic, and glass. However, the best type of adhesive to use will depend on the specific materials being bonded.