Are you tired of walking on a cold, hard concrete floor? Adding carpet to your concrete floors can make your home look and feel more comfortable. But how can you glue carpet to concrete? Don’t worry, we’ve got you covered! In this guide, we will walk you through the steps to successfully glue carpet to concrete. From preparing the surface to adding finishing touches, we’ve got all the details you need to know. Let’s dive into the materials and steps needed to complete this project like a pro.
Materials Needed
When it comes to gluing carpet to concrete, having the right materials is key to a successful installation that lasts for years to come. Before getting started, make sure you have the following materials on hand and ready to use: carpet glue, concrete cleaner, measuring tape, straight edge, utility knife, trowel, broom, vinyl trim strips, masking tape, and protective gear. Each of these items plays an important role in the process of gluing carpet to concrete. If you need more information about other types of glue, check out our guide on what glue to use on carpet.
Carpet Glue
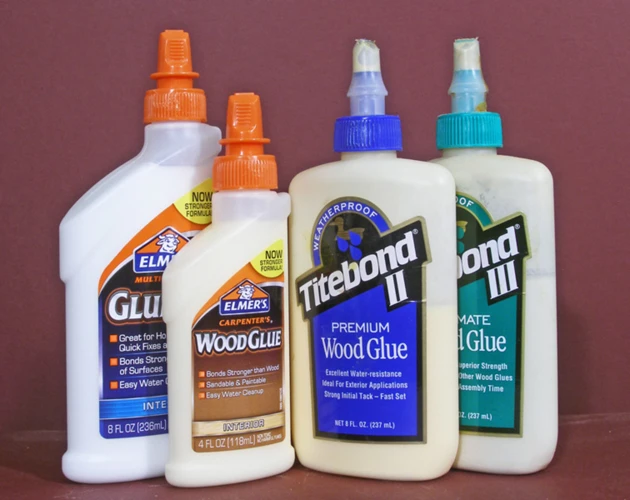
When it comes to gluing carpet to concrete, choosing the right carpet glue is essential for a successful installation. You’ll want to use a high-quality adhesive that’s specifically designed for carpet installation on concrete surfaces. Some good options include Roberts 8015 Universal Carpet Adhesive and TEC® Skill Set™ Carpet Adhesive. It’s important to make sure the glue is compatible with both the concrete surface and the type of carpet being used.
It’s also worth noting that some carpet tiles come with peel-and-stick adhesive already attached, eliminating the need for additional glue. If you are using peel-and-stick carpet tiles, be sure to follow the manufacturer’s instructions for installation.
Investing in a good carpet glue will not only provide a strong bond between the carpet and the concrete but will also ensure that the carpet lasts for many years to come.
Concrete Cleaner
Concrete cleaner is an essential material for preparing the concrete surface. Any dirt, debris, or oils on the concrete can affect the adherence of the carpet glue and the longevity of the carpet installation. Before applying the concrete cleaner, it is necessary to thoroughly sweep the concrete surface using a broom to remove any surface-level debris.
Once the debris is cleared, a specialized concrete cleaner can be used. One option is to use a commercial-grade degreaser, which will remove any oils or greases that can interfere with carpet adhesion. Another option is to use a specially-formulated concrete cleaner designed for use in preparation for carpet installation.
The concrete cleaner should be applied using a spray bottle or a watering can. A measuring tape can help to ensure that the cleaner is applied evenly. It is important to follow the manufacturer’s instructions when applying the cleaner and allow it to sit for the recommended amount of time, which is typically around 10-15 minutes.
Once the cleaner has had time to work, a stiff-bristled brush should be used to scrub the surface. This will dislodge any remaining dirt or debris that the cleaner has loosened. The surface should then be rinsed thoroughly with clean water to remove any remaining cleaner and debris.
After cleaning the concrete surface, it is essential to allow it to dry completely, which can take up to 24 hours. Once the surface is completely dry, it will be ready for carpet installation.
Pro Tip: In case you need to glue plywood to concrete, the concrete surface still needs to be cleaned and dried properly before applying the adhesive. For more information, refer to our article on how to glue plywood to concrete.
Measuring Tape
Measuring Tape is a fundamental tool in the gluing carpet on concrete process. It helps measure the size of the area where the carpet will be placed, and determine the amount of carpet required for it. It is important to take accurate measurements to ensure that the carpet fits properly on the concrete surface. An inch or two can make a significant difference in the final outcome.
To use a measuring tape, first, stretch it out along the length of the area to be carpeted. Start from one end and measure the entire length of the area. Then move to the other side and measure the width of the area. Make a note of these measurements in a safe place as you will need them while cutting the carpet.
If the concrete surface has irregular corners or curves, consider taking measurements at several points and calculating the average to achieve accurate results. Additionally, make sure the measuring tape is level with the floor surface to avoid errors in your measurements.
Pro Tip: As you are measuring the area, it is a good idea to add an additional inch or two to your measurements. The extra carpet can be used to reposition the carpet or cut it down to size.
With the measuring tape in hand, you are ready to ensure that you have enough carpet to fit the area to be covered. Now, it is time to cut the carpet. We will cover cutting the carpet in detail later in the preparation section.
If you want to learn more about gluing different materials, be sure to check out other helpful articles on our website, including How to Glue Laminate Edging, How to Install Glue-Up Shower Walls, What is the Best Exterior Glue, What Glue for Linoleum, What is the Best Glue for Outdoor Carpet, and How to Glue Paneling to Walls.
Straight Edge
A straight edge is an essential tool when gluing carpet to concrete. It is used to make sure that the carpet is cut straight and is laying properly on the surface. This tool is also helpful in ensuring that the carpet fibers are all pointing in the same direction. A straight edge can be made of various materials such as metal, plastic, or wood.
Here are some examples of straight edges to consider:
| Straight Edge Material | Description | Pros | Cons |
|---|---|---|---|
| Metal | A durable straight edge that is perfect for heavy use | Durable, long-lasting, and able to withstand heavy use | May scratch surfaces such as concrete if not used carefully. Heavy and may be difficult to handle |
| Plastic | A lightweight straight edge that is easy to use | Lightweight and easy to handle. Less likely to scratch surfaces such as concrete | Not as durable as metal, may warp or bend easily if subjected to excessive force |
| Wood | A traditional material that is easy to find and relatively inexpensive | Inexpensive and readily available. Easy to handle and can be cut to custom sizes | Not as durable as metal or plastic. Prone to warping or splitting over time. |
When using a straight edge, it is important to make sure that it is placed firmly on the carpet before cutting. A slight movement can result in an uneven or jagged cut which may be difficult to correct. Additionally, it is important to use a sharp utility knife to ensure a clean cut. Dull blades might result in the fibers being torn or pulled, which will damage the carpet. By using a sharp straight edge and utility knife, you can make sure that your carpet is cut smoothly and accurately.
Utility Knife
One of the essential tools needed in gluing carpet to concrete is a utility knife. This tool is used for cutting the carpet to the right size and trimming the excess at the end. Utility knives come in different shapes and sizes, and it’s important to choose the right one for your project. Some utility knives have retractable blades that can be adjusted depending on the depth of the cut, while others have fixed blades that are more durable.
To ensure safety, be sure to handle the utility knife with care and always use it away from your body. Wear protective gear such as cut-resistant gloves to avoid accidental cuts. When using the utility knife, make sure that the blade is sharp to make the cutting process easier and more efficient. A dull blade may result in uneven cuts that can lead to poor carpet installation.
To avoid damaging the concrete surface, it’s important to use a straight edge when cutting the carpet. This helps in creating clean and straight cuts that fit perfectly into the space where the carpet is being placed. Use masking tape to mark the areas where you need to cut the carpet and make sure to follow these marks closely with your utility knife.
Important Note: Be sure to keep the utility knife away from children and pets as it can cause serious injury if not handled properly. When not in use, store the utility knife in a safe place, ideally a toolbox or a drawer with a lock.
Trowel
A trowel is an essential tool when gluing carpet to concrete. It is used to spread the glue evenly and smoothly over the surface. A good trowel should have a comfortable handle that allows you to grip it firmly, and a flat, smooth blade that will not leave any marks on the glue or concrete surface.
When selecting a trowel, look for one with a blade that is the right size for your project. A blade that is too small will take longer to spread the glue, while a blade that is too large may be difficult to control.
Once you have selected your trowel, be sure to clean it thoroughly before use. Any residue left over from a previous project may affect the quality of the glue and make it more difficult to spread.
When spreading the glue with the trowel, use a smooth, sweeping motion. Begin with a thin layer of glue and gradually add more as needed. Make sure to cover the entire surface of the concrete where the carpet will be installed.
Tip: To ensure a smooth and even application, use a straight edge to guide the trowel as you spread the glue. This will help you to avoid any bumps or uneven spots in the adhesive.
After you have finished applying the glue, be sure to clean your trowel thoroughly with warm, soapy water. This will prevent the glue from hardening on the blade and ensure that your trowel is ready for use the next time you need it.
| Trowel | |
|---|---|
| Function | Used to spread glue evenly and smoothly over the surface |
| Features | A comfortable handle that allows you to grip it firmly. A flat, smooth blade that will not leave any marks on the glue or concrete surface |
| Selecting the Right Size | Look for a blade that is the right size for your project. A blade that is too small will take longer to spread the glue, while a blade that is too large may be difficult to control |
| Cleaning | Be sure to clean the trowel thoroughly before use and after use with warm, soapy water. This will prevent the glue from hardening on the blade and ensure that your trowel is ready for use the next time you need it |
Broom
One of the essential materials needed for gluing carpet to concrete is a broom. This tool is crucial in ensuring that the concrete surface is free from dirt, dust, and debris before applying the glue. A clean and smooth surface ensures that the carpet adheres properly to the floor and prevents any lumps or bumps from forming.
Here are some important things to keep in mind when using a broom for this project:
- Choose a broom with stiff bristles to remove any stubborn dirt or debris from the concrete surface.
- Sweep the concrete surface thoroughly in a back and forth motion to remove any loose dirt or debris.
- Pay close attention to corners and edges, where dirt can accumulate.
- Use a dustpan to collect and dispose of the dirt and debris.
- After sweeping, use a damp cloth or mop to remove any remaining dust or dirt.
By using a broom and following these steps, you can effectively prepare the concrete surface for gluing carpet. Remember to keep the surface clean and free from debris to ensure a successful and long-lasting installation.
Vinyl Trim Strips
Vinyl Trim Strips are an essential tool for a seamless carpet installation process. These strips are flexible plastic strips used to cover the edges of carpet where they meet vinyl or other flooring materials. They give a neat and finished look to the carpet while also protecting it from fraying or unraveling over time.
When choosing vinyl trim strips, it is important to select a color that matches the carpet and the surrounding flooring. The strips come in a variety of colors, from neutrals like beige and gray to bolder shades like black and red.
It is also important to select the correct size of trim strip for your carpet installation. The most common size is 1 3/8 inches, but other sizes are available depending on the thickness of the carpet.
Vinyl trim strips are easy to install and require minimal tools. To properly install the trim strips, you will need masking tape, a straight edge, and a utility knife.
First, measure the length of the area where the trim strip will be installed and cut the strip to the correct length. Next, place the strip against the edge of the carpet and use masking tape to hold it in place.
Using a straight edge as a guide, use a utility knife to cut the strip to match the contour of the carpet. Be sure to make the cuts at a slight angle to prevent fraying.
Finally, remove the masking tape and press the trim strip firmly in place. Trim any excess with a utility knife and smooth out any rough edges with your fingers.
Tip: It is always a good idea to wear gloves when handling vinyl trim strips to prevent injury from the sharp edges.
Vinyl trim strips are an inexpensive and easy way to ensure a professional-looking finish to your carpet installation project. With their flexibility and easy installation process, they are a great addition to any DIY toolkit.
Masking Tape
Masking tape is an essential item to have when gluing carpet to concrete. This tape is designed to be easily removed without leaving adhesive residue, making it perfect for protecting your baseboards and other areas where the glue may come into contact. Here are some suggestions for using masking tape effectively:
| Tip | Description |
|---|---|
| Use a high-quality tape | Look for a masking tape that is designed for painting projects, as these are typically strong and will adhere well to surfaces. |
| Apply the tape carefully | Take the time to apply the tape evenly and smoothly, pressing it down firmly so that no gaps are left where glue could seep through. |
| Remove the tape promptly | Do not leave the tape on for longer than necessary, as the longer it sits on the surface, the harder it may be to remove. Try to remove the tape within a few hours of completing the installation. |
| Be mindful of the carpet pile | When applying the tape to the baseboard, be cautious not to press down too hard as it could flatten the carpet pile. Instead, try to position the tape just above the baseboard and press down lightly so that it adheres to the wall. |
By using masking tape properly, you can protect your walls and baseboards from any glue that may seep through during the installation process. This will not only save you time and money on repairs, but it will also help to ensure a clean, professional-looking finished product.
Protective Gear
When it comes to any type of DIY project, safety should always be a top priority. Before you start gluing carpet to concrete, make sure that you have the necessary protective gear to keep yourself safe. Here are some items that you should have on hand:
- Gloves: Protect your hands by wearing a sturdy pair of gloves. Choose gloves that are made from a material that can withstand exposure to chemicals.
- Safety glasses: Wearing safety glasses can help prevent any glue or debris from getting into your eyes while you work.
- Dust mask: Using a dust mask can help prevent any dust and debris from getting into your lungs.
- Appropriate clothing: Wear long sleeves and pants to protect your skin from any chemicals or sharp objects that you may encounter during the project.
Using this protective gear will not only keep you safe during the project, but it will also give you peace of mind. Additionally, it’s important to make sure that you use these items correctly. For example, be sure to wear your gloves throughout the duration of the project and dispose of any contaminated protective gear properly after you’re finished. Taking these extra steps ensures that you’re protecting your health and safety while still completing the project effectively.
Preparation
Before you begin gluing carpet to concrete, it is essential to prepare the surface and carpet properly. This step plays a crucial role in ensuring a successful installation. In this section, we will guide you through the necessary preparations to make the process as smooth and efficient as possible. From cleaning the concrete surface to measuring the carpet placement and cutting, to preparing the carpet glue, you will learn all the essential preparation steps required for a flawless carpet installation. So, let’s dive in and get started!
Clean the Concrete Surface
Before gluing carpet to concrete, it’s important to make sure that the concrete surface is clean and free of any debris or dirt particles. This will ensure that the carpet adheres properly and will last longer. Follow these steps to clean the surface:
Step 1: Remove any loose debris or dirt using a broom or vacuum cleaner. Make sure to remove as much dirt as possible, especially in areas where the carpet will be placed.
Step 2: Use a concrete cleaner or degreaser to remove any stains or oil that may have collected on the surface. Follow the instructions on the cleaner carefully and use a scrub brush or pressure washer to thoroughly clean the surface.
Step 3: Rinse the surface with water and allow it to dry completely before proceeding with the installation process.
By taking the time to properly prepare the concrete surface, you can ensure that your carpet will adhere properly and last longer. Don’t skip this step in the process, as it can dramatically affect the overall success of your carpet installation.
Measure the Carpet Placement and Cut
Properly measuring and cutting the carpet is crucial for a successful installation. Here are the steps for accurate measurements and cutting:
| Step | Description |
|---|---|
| Step 1 | Measure the area: Measuring tape is an essential tool for this step. Make sure to measure the length and width of the area where you plan to install the carpet. Don’t forget to include any doorways or closets. |
| Step 2 | Calculate: Once you have the measurements, calculate the amount of carpet you need. Keep in mind the excess carpet needed for cutting and trimming. |
| Step 3 | Lay out the carpet: Roll out the carpet in the area where you plan to install it. This will give you a better idea of where you need to make cuts and trim. |
| Step 4 | Mark and cut: Use a straight edge and a utility knife to mark and cut the carpet to fit the room’s measurements. Make sure to cut on a clean and smooth surface and keep the blade sharp for a clean cut. |
Remember to double-check your measurements and cuts before moving forward with the installation process. Accurate measurements and precise cutting are necessary for a smooth installation and professional look.
Prepare the Carpet Glue
Before you can start gluing your carpet to the concrete surface, it’s important to prepare the glue properly. Unprepared glue can lead to uneven and lumpy carpet placement, and may result in the carpet coming loose over time. Here are the steps to follow to ensure you prep your carpet glue correctly:
Step 1: Start by choosing the right glue for your carpet. Not all carpet glues are created equal, so make sure you select one that is compatible with the type of carpet you have. Check the carpet manufacturer’s guidelines or consult with a home improvement professional if you’re unsure which type of glue to use.
Step 2: Mix the glue according to the instructions on the packaging. Some carpet glues come premixed, while others need to be mixed with water before use. Make sure you use the right amount of water and mix thoroughly to ensure a smooth consistency.
Step 3: Apply a small amount of glue to a small area of the concrete surface as a test. This will allow you to check that the adhesive is working properly and that it won’t cause any damage to the carpet fibers.
Step 4: If the glue passes the test, then you can start applying it to the concrete surface in small sections. Use a trowel to spread the glue evenly in the desired area, working in small, manageable sections.
Step 5: Be sure to follow the manufacturer’s recommended coverage rate when applying the glue. This will ensure that you use the right amount of glue and that it will bond properly with the carpet.
By following these steps, you can rest assured that your carpet glue will be properly prepared and provide a strong and long-lasting bond with the concrete surface.
Installation
Now that you’ve prepared the concrete surface and cut the carpet to size, it’s time to move on to the installation phase. This can be a tricky process, but fear not – with the proper technique and the right tools, you’ll have your carpet secured to your concrete floor in no time. Here’s a step-by-step guide on how to glue your carpet to concrete using high-quality carpet glue.
Apply the Glue on the Concrete
Now that you have prepared the concrete surface, measured and cut the carpet, and prepared the carpet glue, it is time to apply the glue on the concrete. This step is crucial as it will determine the durability of the carpet’s adhesion to the concrete. Here are the steps to follow:
| Step 1: | Begin by applying a thin layer of the carpet glue on the concrete surface using a trowel. Make sure the layer is smooth and even to prevent bumps or lumps underneath the carpet. |
| Step 2: | Only apply glue for the area you can work on within 20 minutes. This will prevent the glue from hardening before you can finish the installation process. |
| Step 3: | If you are using a pressure-sensitive carpet glue, wait for 5 to 10 minutes for the glue to become tacky. Take note of the manufacturer’s instructions on waiting time before applying the carpet to the concrete. |
| Step 4: | Hold the carpet firmly by the corners and slowly unroll it over the section where you applied the glue. Take extra care not to wrinkle or crease the carpet as this can compromise its appearance and durability. |
| Step 5: | Continue applying the carpet glue and unrolling the carpet in sections until you finish the entire area. Use a broom or your hands to press the carpet firmly onto the glue, ensuring there are no bubbles or air pockets. |
| Step 6: | Smooth out any uneven parts using a straight edge or your hand. Remove any excess glue drippings immediately using a damp sponge or cloth as it can be difficult to remove once it dries. |
By following these steps to apply the carpet glue on the concrete, you can be assured that your carpet will be secured properly and stay in place for a longer period of time.
Place the Carpet on the Glue
Once you have applied the carpet adhesive, it’s time to place the carpet on the glue. Make sure to work quickly and efficiently, as the glue can begin to dry out if left too long. Follow these steps to properly place the carpet:
| Step | Description |
|---|---|
| Step 1: | Starting at one edge of the room, align the edge of the carpet with the wall. Make sure to push it down firmly into the glue to create a strong bond. |
| Step 2: | Smooth out any wrinkles or bubbles in the carpet as you work your way across the room. A carpet roller tool can help with this process. |
| Step 3: | Use a straight edge to ensure that the carpet is lined up straight. You don’t want to end up with a crooked carpet installation! |
| Step 4: | If you are installing a large carpet, have a friend help you to prevent any misalignments or wrinkles. |
| Step 5: | Continue to work your way across the room, pressing down firmly on the carpet until the entire surface is covered. |
Remember to work quickly and efficiently when placing the carpet on the glue. You don’t want the glue to dry out before you’ve finished installation. Once the carpet is firmly in place, you can move on to trimming the excess carpet and adding finishing touches.
Trim the Excess Carpet
Once the carpet has been placed on the glue, it’s time to trim the excess carpet. Trimming the carpet ensures that the carpet fits perfectly on the concrete surface. Here are the steps to trim the excess carpet:
| Step | Description |
|---|---|
| 1 | Allow the carpet to rest on the glue for at least 24 hours before trimming. |
| 2 | Using a straight edge and a utility knife, carefully cut along the edges of the carpet to remove the excess material. |
| 3 | Be sure to leave a small gap of about 1/8 inch between the edge of the carpet and the walls or any other obstacles. This gap will allow the carpet to expand and contract with changes in temperature and humidity, preventing it from buckling or bunching up. |
| 4 | Clean up any excess glue or carpet debris using a broom or a vacuum cleaner. |
| 5 | Install vinyl trim strips along the edges of the carpet to give it a finished look and to prevent the edges from fraying over time. |
Keep in mind that trimming the carpet can be a delicate process, so take your time and be patient. If you rush the process, you may end up with uneven edges or other imperfections that will be difficult to fix later on. By following these steps carefully, you can ensure that your carpet will look great and last for years to come.
Add Finishing Touches
After trimming the excess carpet, you can add some finishing touches to make your carpet look even better. Here are some ideas:
| Option | Description |
| Install Vinyl Trim Strips | Install vinyl trim strips along the edges of your carpet to give it a neat finish. Vinyl trim strips not only look good, but they also protect the edges of the carpet from fraying. |
| Add Rugs or Mats | If you want to add some color or texture to your carpet, consider adding rugs or mats. Rugs and mats not only look good, but they also protect the carpet from wear and tear. |
| Use Double-Sided Tape | If you don’t want to install vinyl trim strips, you can use double-sided tape to secure the edges of the carpet. Double-sided tape works well on concrete surfaces and is easy to apply. |
| Apply a Carpet Sealer | If you want to protect your carpet from stains and spills, you can apply a carpet sealer. Carpet sealers create a barrier that repels liquids and helps prevent stains from setting in. |
Adding some finishing touches to your newly installed carpet can really make a difference. Consider some of the options listed above to give your carpet that extra bit of style and protection.
Cleaning Up
With the carpet successfully glued to the concrete, it’s time to move on to the final stage of the process: cleaning up. This phase is just as important as the others, as it helps ensure the longevity and durability of the carpet. In this section, we’ll cover the necessary steps to take in order to leave the installation area looking as good (if not better) than when you began. Let’s get started.
Remove the Masking Tape and Protective Gear
After completing the installation of the carpet onto the concrete, it’s time to remove the protective gear and masking tape to reveal the finished product.
Step 1: Carefully remove the masking tape from any edges or corners of the carpet. Slowly pull the tape back on itself, being careful not to damage the edges of the carpet in the process.
Step 2: Remove any protective gear, such as gloves and boots, and dispose of them properly. It’s important to use protective gear during the installation process to avoid any potential harm from the carpet glue or cleaning chemicals.
Step 3: Store the tools and equipment properly. Make sure to clean and dry the trowel, straight edge, and utility knife as they may have residue from the carpet glue and concrete cleaner. Store the tools in a safe place, preferably a locked cabinet or out of reach of children.
Step 4: Inspect the finished product. Take a moment to admire your hard work and ensure that the carpet installation is smooth and secure. If there are any parts of the carpet that need further attention, address them immediately to avoid any future problems or damages.
By following these steps, you can ensure that your carpet installation project is a success, and that the final product looks professional and secure.
Clean Up the Tools and Equipment
After completing the carpet installation process, it is important to clean up the tools and equipment you used to avoid any lingering messes or damage to your equipment. Here is a step-by-step guide on how to clean up your tools and equipment:
| Tools and Equipment | Cleaning Steps |
|---|---|
| Trowel | First, scrape off any excess glue and carpet fibers using a utility knife. Afterward, soak a clean cloth with warm water and soap, then use it to wipe down the trowel until it is completely clean. Dry it off with a dry cloth afterwards. |
| Straight Edge | Next, wipe down the straight edge with a clean cloth soaked in warm water and soap. Make sure to remove any glue residue or dirt. Then dry off the straight edge with a dry towel. |
| Broom | Clean the broom by removing any carpet fibers or debris. Then, mix warm water and soap in a bucket and use this solution to scrub the broom’s bristles. Afterward, rinse the broom with water and let it dry off in a warm, ventilated area. |
| Utility Knife | Using a cloth dampened with warm, soapy water, wipe the blade of the utility knife clean. Do not forget to handle the knife with care to prevent any injuries. Rinse the knife with water, dry and store it in a safe location. |
| Measuring Tape | Clean the measuring tape with a damp cloth and mild soap. Wipe off any grime or dust that may have accumulated on the tape. Then rinse with warm water and dry with a clean towel before storing. |
| Vinyl Trim Strips | Wipe the vinyl trim strips with a clean cloth and a solution of warm water and soap. Be sure to remove any debris or dirt thoroughly to avoid corrosion. Rinse with clean water and allow them to dry before storing.. |
Properly cleaning and storing your tools and equipment is essential to extending their lifespan and ensuring they are ready for your next job. By following these steps, you can be confident that your equipment is in great condition and ready for future use.
Conclusion
After following this step-by-step guide, you should be able to successfully glue carpet to concrete, creating a durable and visually appealing flooring solution. Always remember to prioritize safety by wearing protective gear and working in a well-ventilated area.
Ensure that you have all the necessary materials, including carpet glue, concrete cleaner, measuring tape, straight edge, utility knife, trowel, broom, vinyl trim strips, masking tape, and protective gear. Cleaning the concrete surface and properly measuring and cutting the carpet to size are crucial steps for a successful installation.
When applying the glue on the concrete, make sure to spread it evenly with the trowel and avoid areas with cracks or uneven surfaces. Once the carpet is placed on top of the glue, use a straight edge to smooth out any bumps or wrinkles. Trim the excess carpet with a utility knife, then add finishing touches such as vinyl trim strips to complete the look.
After the installation is complete, remove the masking tape and protective gear, and clean up any tools and equipment used. With the right materials and careful attention to detail, gluing carpet to concrete can be a straightforward DIY project that adds comfort and style to any space.
Frequently Asked Questions
What type of carpet glue is best for concrete?
The best type of carpet glue for concrete is a solvent-based adhesive. It provides a strong bond and dries quickly. Be sure to check the label to ensure it is suitable for use on both concrete and carpet.
Can I glue carpet to uncleaned concrete?
No, it is important to clean the concrete surface before application. Any dust, debris, or existing adhesive may interfere with the bond or result in an uneven finish.
Do I need protective gear when using carpet glue?
Yes, it is important to wear protective gear such as gloves and a mask when using carpet glue. These can protect you from any fumes or irritation during the application process.
Can I use a different cutting tool instead of a utility knife?
You can use a carpet or linoleum knife instead of a utility knife, but be sure it has a sharp blade to ensure clean cuts.
Do I need to let the carpet glue dry before placing the carpet?
Yes, it is important to let the glue dry for several minutes before placing the carpet on it. This will ensure a strong bond and prevent the carpet from shifting or moving during installation.
Can I use the same carpet glue for carpet tiles?
Yes, carpet glue can also be used for carpet tiles. However, be sure to follow the manufacturer’s instructions for the specific type of tile and glue being used.
What is the purpose of vinyl trim strips?
Vinyl trim strips are used to create a clean edge where the carpet meets other surfaces, such as walls or doorways. They also help to protect the carpet from fraying and provide a finished look.
What cleaning solution should I use to prepare the concrete surface?
A simple mixture of warm water and dish soap can be used to clean the concrete surface before installation. Be sure to rinse thoroughly and allow the surface to dry completely before applying the glue.
How long will the carpet glue bond last?
The bond between the carpet and concrete surface should last a long time if installed correctly. However, it is important to maintain the carpet and keep the area clean to avoid any damage or wear and tear over time.
Can I install carpet on a concrete surface outdoors?
Yes, carpet can be installed on a concrete surface outdoors, but it is important to use a carpet glue and adhesive tape that are designed for outdoor use. It is also important to consider weather and other environmental factors that may affect the carpet over time.