Butcher block countertops have become a popular choice for both traditional and modern kitchens, revered for their durability and timeless appeal. Crafted from straight cuts of wood glued together to form a sturdy surface, these countertops offer a warm and inviting touch to any culinary space. Not only do they provide a reliable work surface, but they also contribute a natural aesthetic that can complement a variety of design styles.
Choosing the Best Adhesive for Butcher Block Countertop
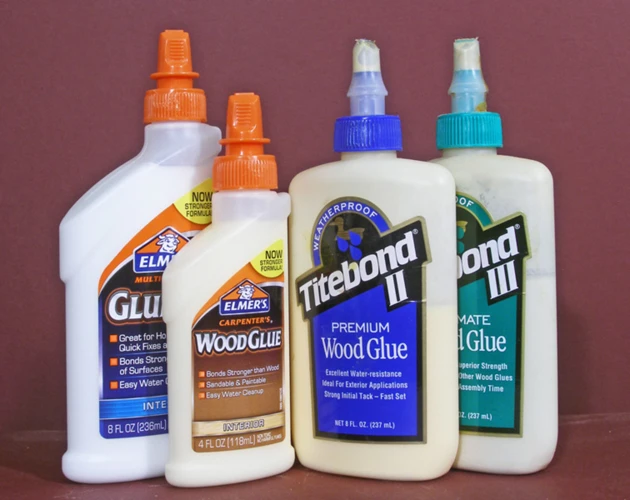
When it comes to installing or repairing your butcher block, the integrity of the bond between the wood pieces is paramount. Selecting the best adhesive for butcher block countertop ensures longevity and maintains the countertop’s visual appeal.
Types of Adhesives Suitable for Wood Countertops
- PVA Glue (Polyvinyl Acetate) – Commonly used wood glue perfect for indoor projects.
- Epoxy Resin – Offers superior strength and moisture resistance, ideal for high-humidity areas.
- Polyurethane Glue – Expands as it dries, filling in gaps for a strong bond.
Factors to Consider When Selecting an Adhesive
- Moisture Exposure – Kitchens are prone to spills; a waterproof adhesive is essential.
- Strength Requirements – High-strength adhesives are necessary to endure the heavy usage of countertops.
- Curing Time – Depending on your project timeline, the adhesive’s drying time can be a crucial factor.
Preparing to Glue Butcher Block Together
Before the gluing process begins, preparing your butcher block surfaces is a critical step to ensure a successful bond.
Cleaning and Sanding the Surfaces
Start by thoroughly cleaning the wood surfaces to remove any debris or grease. Once clean, sand down the edges that will be joined to create a smooth, level surface that allows for better adhesion.
Aligning the Butcher Blocks for Clamping
Align the butcher blocks carefully, ensuring the edges to be glued are flush. This attention to detail will minimize the need for extensive sanding post-gluing and provide a more aesthetically pleasing result.
How to Glue Butcher Block Together
The process of gluing butcher block together is straightforward if you follow the steps meticulously to achieve a durable and clean-looking joint.
Applying the Adhesive
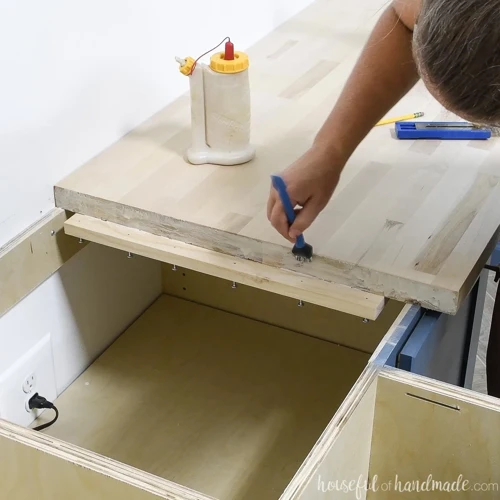
Apply a generous amount of the chosen adhesive evenly across the edge of one butcher block piece. Spread it out to cover the entire surface that will be joined to prevent any weak spots in the bond.
Clamping the Butcher Blocks
After joining the pieces, use bar clamps or C-clamps to apply even pressure along the seam. This step is vital to ensure a tight bond and to keep the surface level while the adhesive cures.
Curing Time and Conditions
Allow the adhesive to cure according to the manufacturer’s recommendations, which typically ranges from a few hours to overnight. The curing environment should be dry and at a moderate temperature for the best results.
Filling Gaps and Seams on Butcher Block Countertops
Even with the most careful gluing, some gaps or seams may be visible. Using a butcher block countertop gap filler can address these minor imperfections smoothly.
Choosing the Right Butcher Block Countertop Gap Filler
Select a gap filler that is specifically designed for wood countertops and matches your butcher block’s color and grain pattern for a seamless look.
Application Techniques for Seam and Gap Filler
Apply the butcher block seam filler carefully, pressing it into any gaps or seams, then removing the excess with a putty knife. Once dried, sand it down to create a flush surface with the rest of the countertop.
Connecting Two Butcher Blocks: Step-by-Step Guide
Joining wood countertops involves precision and the right technique to ensure they not only look uniform but also remain functional and durable.
Joining Butcher Block Countertops Together
For connecting two butcher blocks, apply adhesive to the cleaned and sanded edges and use dowels or biscuits to align and strengthen the joint. Clamps should be used to secure the pieces as the adhesive cures.
Ensuring a Seamless Connection
Once the adhesive has set, inspect the seam. If any inconsistencies are found, use butcher block seam filler to correct them. Sanding the seam until it is smooth will help in achieving a seamless connection.
Finishing Touches: Sanding and Sealing Joined Countertops
After gluing butcher block together, the final steps are crucial to both the look and the longevity of your countertops.
Sanding the Butcher Block Countertop Seam
Using progressively finer grits of sandpaper, sand the seam until it is completely smooth to the touch and visually indistinguishable from the rest of the countertop.
Sealing the Countertop for Protection and Aesthetics
Seal the wood with a food-safe sealant to protect against moisture and stains. This not only extends the life of your countertops but also enhances their natural beauty.
If you’re taking on a DIY project and need to know how to effectively join surfaces together, you’re in luck. While you’re here to learn about how to glue butcher block countertops together, you might also find it helpful to explore other gluing techniques. For instance, our step-by-step guide on how to glue Corian countertops could provide valuable insights for similar surface materials. If you’re working outdoors, the article on how to glue pool tiles back on might come in handy for those poolside repairs. And for woodworking enthusiasts, our tips on how to glue cedar boards together will help ensure a strong and lasting bond. Whatever your project may be, we’ve got the guidance you need to get the job done right.
Maintenance Tips for Glued Butcher Block Countertops
Regular maintenance will keep your butcher block countertops looking great and functioning well for years to come. Clean spills promptly, avoid cutting directly on the surface to prevent scratches, and reapply sealant as needed to prevent water damage and maintain the wood’s luster. With these care tips, your butcher block countertops will remain a centerpiece in your kitchen for many delightful culinary adventures.

