Embrace the elegance of salon-quality nails from the comfort of your home with the magic of glue on nails. These convenient beauty accessories have revolutionized the way we approach nail fashion, offering versatility and sophistication without the hefty price tag. Before diving into the world of DIY glue on nails, it’s crucial to grasp some foundational glue on nails tips to ensure your faux manicure remains flawless for days on end.
Understanding Glue on Nails Tips
Glue on nails, also known as press-on nails, are a game changer for nail enthusiasts. They provide an immediate transformation, with a variety of designs and shapes available for every occasion. These tips come with a layer of nail glue which, when applied correctly, can secure your stylish nail look for an extended period. To achieve long-lasting press-on nails, understanding the right techniques for application and maintenance is key.
Choosing the Best Adhesive for Fake Nails
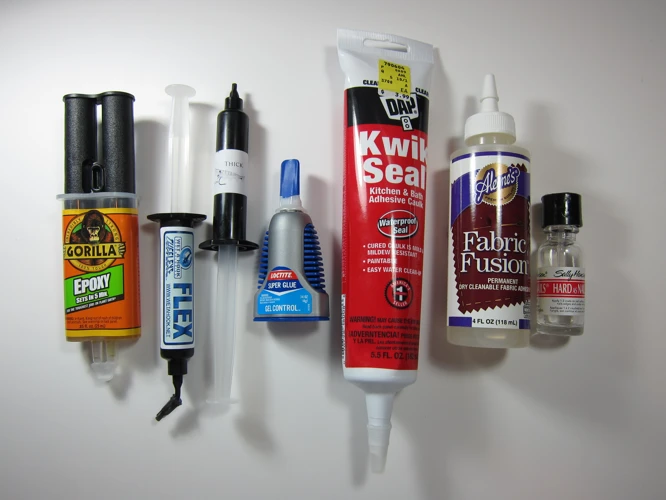
Selecting the best adhesive for fake nails is a critical step in ensuring your press-ons stay put. The market is flooded with various nail glue products, each promising to be the ultimate solution. However, not all adhesives are created equal, and choosing the right one can be the difference between a short-lived nail look and impressively enduring press-on nails.
Finding the Best Press-On Nails and Nail Glue
When scouting for press-on nails and nail glue, consider the bond strength, drying time, and ease of use. The best adhesive for fake nails should offer a secure attachment while being gentle on your natural nails. Opt for reputable brands and check reviews to gauge the performance of the nail glue you’re considering. Remember, a robust adhesive is the foundation of a successful fake nail application.
Preparation for Long-Lasting Press-On Nails
Preparation is paramount when aiming for a durable manicure. Effective pre-application steps can drastically extend the lifespan of your glue on nails, ensuring they look pristine for as long as possible.
Cleaning and Prepping Your Nail Beds
Start with thoroughly cleaned and dried nail beds. Any oils or residues can weaken the bond between the nail glue and your natural nails. Use an alcohol wipe or a cotton pad soaked in nail polish remover to dehydrate the nail surface, creating the perfect canvas for glue on nail maintenance.
Buffing Nails Before Glue Application
Gently buffing your natural nails can enhance the adhesion of the nail glue. By creating a slightly rough surface, the glue has more area to cling to, promoting better attachment. Ensure you buff evenly to avoid weak spots where lifting could occur.
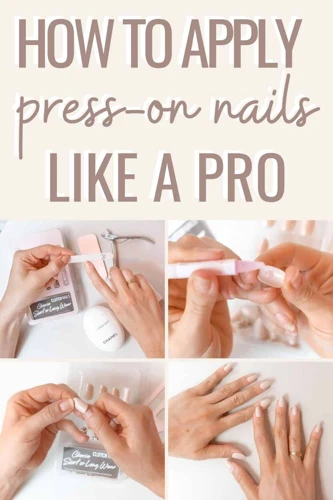
DIY Glue on Nails Application
Now that your nails are prepped, it’s time to delve into the exciting world of DIY glue on nails. The application process can be straightforward, but attention to detail is essential for achieving professional-looking results.
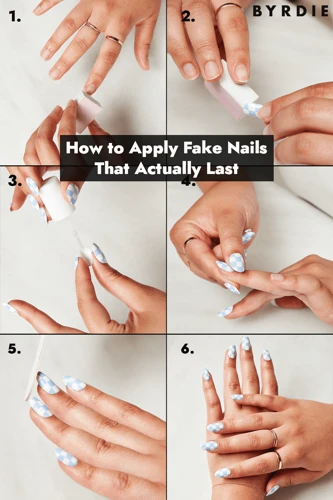
Step-by-Step Guide on How to Apply Press-On Nails
- Select the correct size press-on nail for each finger to ensure a natural look.
- Apply a thin layer of nail glue to your natural nail.
- Place the press-on nail onto your natural nail, starting from the cuticle and pressing down towards the tip.
- Hold the press-on nail firmly for 10-15 seconds to allow the glue to set properly.
- Repeat for all nails and admire your handiwork!
Nail Glue Application Techniques
For optimal nail glue application, use a modest amount to avoid spillage over the edges of your nails. Too much glue can cause a mess and weaken the bond, while too little may not hold the nail securely. A pea-sized drop should be sufficient for even coverage.
Ensuring Proper Fit and Alignment
Take extra care to align the press-on nail with your natural nail’s shape. Misalignment can lead to premature lifting and a less appealing finish. Double-check the fit before the glue sets to guarantee a seamless look.
Maximizing the Durability of Your Press-On Nails
After mastering the application, the next step is to ensure your press-on nails stand the test of time. A few strategic practices can make press-on nails last, keeping them looking as good as new.
How to Make Press-On Nails Last Longer
To make press-on nails last, avoid using your nails as tools to prevent lifting or cracking. Applying a top coat can also provide an additional layer of protection against wear and tear. Be gentle with your hands and consider wearing gloves when performing tasks that could potentially damage your nails.
Additional Tips for Glue on Nail Maintenance
Regularly check the edges of your press-on nails for signs of lifting and apply a drop of nail glue if necessary. Store your nail glue in a cool, dry place to maintain its efficacy, and keep a spare tube on hand for quick touch-ups.
Aftercare and Maintenance
With your press-on nails perfectly in place, it’s important to follow a regimen of artificial nail care to maintain their elegance and integrity.
Artificial Nail Care Best Practices
Avoid using your nails to open cans or remove staples. When showering or bathing, minimize the time your nails are submerged in water. After exposure to water, gently pat your nails dry to prevent water from weakening the glue bond.
Avoiding Water and Moisture
Water and moisture are the archenemies of press-on nails. Prolonged or frequent exposure can cause the adhesive to break down and the nails to lift. Therefore, it’s wise to wear gloves while cleaning or doing dishes to protect your manicure.
Removal and Replacement
When the time comes to remove your press-on nails, it’s crucial to do so safely to avoid damaging your natural nails. The right removal technique can make the process painless and preserve the health of your nails.
Safe Removal of Glue On Nails
Soak your nails in warm, soapy water for 10-15 minutes to loosen the glue. Gently wiggle the press-on nails to aid removal. If resistance is met, soak for an additional few minutes rather than forcing them off. Once removed, clean any residual glue from your natural nails.
Are you dealing with the sticky situation of glue where it shouldn’t be? While you’re perfecting the art of applying glue-on nails, you might also encounter unwanted adhesive on surfaces like walls, teeth, or hands. Don’t worry; we have helpful guides to tackle these challenges. Discover how to clean up your mishaps with our articles on how to get glue stick off walls, how to get brace glue off teeth, and how to get nail glue off hands. Meanwhile, if you’re looking to ensure your glue-on nails stay put, continue reading for tips and tricks on achieving a lasting bond.
Conclusion: Enjoying Your Beautiful Press-Ons
Your journey to maintaining the perfect set of glue on nails doesn’t have to be a challenging one. By following these essential steps and tips, you can confidently flaunt your long-lasting press-on nails with pride. Remember, the key to a successful fake nail application lies in preparation, precision, and preservation. With care and attention, your press-on nails can be a statement of beauty and a testament to your savvy nail care expertise.