The allure of glue-down vinyl plank flooring lies in its ease of installation and durability, making it a popular choice for homeowners looking for a cost-effective flooring solution. However, even with the most well-executed installation, gaps can still appear between the planks over time, which can be unsightly and cause the flooring to not function as intended. If you’re facing this perplexing problem, fear not! In this comprehensive guide, we’ll walk you through the causes of gaps, the tools and materials you need, the preparation required, and step-by-step instructions on how to fix both small and large gaps. Plus, we’ll share some tips on how to prevent future gaps and how to properly maintain your glue-down vinyl plank flooring to keep it looking its best. Let’s fix those gaps and restore your flooring’s functionality and beauty!
Causes of Gaps
It can be perplexing to notice gaps in your glue down vinyl plank flooring, especially when you thought you took all the necessary precautions during installation. Gaps in the flooring can not only negatively affect the appearance of your floor, but they can also be a tripping hazard. Understanding the causes of gaps in the flooring is crucial to preventing them from happening in the future. Let’s take a closer look at some of the common reasons why gaps appear in glue down vinyl plank flooring. For those interested in hardwood floors instead, we have a helpful article on how much it costs to install glue down hardwood floors.
Subfloor Issues
When it comes to vinyl plank flooring, subfloor issues can be a major cause of gaps. A subfloor that is not level or has uneven areas can cause the planks to shift and separate over time. This problem can also occur if the subfloor is too brittle or has too much give. Here are some common subfloor issues that may cause gaps in your vinyl plank flooring:
- Uneven surface: If your subfloor is not level, this can cause the planks to lift and create gaps as weight is applied to the surface over time. Use a leveling compound to even out any low spots.
- Debris: If debris such as dirt, drywall dust, or even pet hair is left on the subfloor, it can cause an uneven surface that can cause the vinyl planks to shift and create gaps.
- Moisture: Moisture can cause subfloors to warp and buckle over time, which can lead to gaps in your vinyl plank flooring. Make sure your subfloor is completely dry before installing vinyl planks.
- Improper installation: If the subfloor was not properly installed, it can also cause gaps in the vinyl plank flooring. Make sure your subfloor is installed according to manufacturer’s instructions.
- Subfloor damage: If the subfloor is damaged, it can cause the vinyl planks to shift and create gaps. Look for signs of water damage, rot, or cracks in the subfloor.
Addressing subfloor issues is crucial to fixing gaps in your vinyl plank flooring. Take the time to inspect your subfloor before installing vinyl planks and address any issues that arise before installation. If you already have gaps in your vinyl plank flooring, addressing subfloor issues may still need to be part of the solution to prevent gaps from reoccurring in the future.
Expansion and Contraction
All flooring types, including glue down vinyl plank flooring, are prone to expansion and contraction due to temperature and humidity changes. This can cause gaps to form if the planks are not properly acclimated or if the installation process is not done correctly. The following are some factors that can contribute to expansion and contraction:
- Environmental factors – Temperature and humidity changes in the room can cause the vinyl to expand and contract. It is important to maintain a consistent temperature and humidity level in the room.
- Subfloor – Uneven and damaged subfloors can cause the vinyl plank flooring to move and shift, leading to gaps.
- Improper installation – If the planks are not installed with enough space for expansion and contraction, gaps can occur when they expand.
To prevent gaps due to expansion and contraction, it is important to properly prepare the subfloor and acclimate the vinyl plank flooring before installation. Leaving a small gap around the perimeter of the room and other fixed objects, such as cabinets, can allow for the expansion and contraction of the vinyl plank flooring. Finally, it is important to avoid excessive moisture, either from spills or from humidity, as this can cause the planks to swell and lead to gaps.
Tip: Always follow the manufacturer’s instructions for installation and maintenance to prevent gaps and other issues with your glue down vinyl plank flooring.
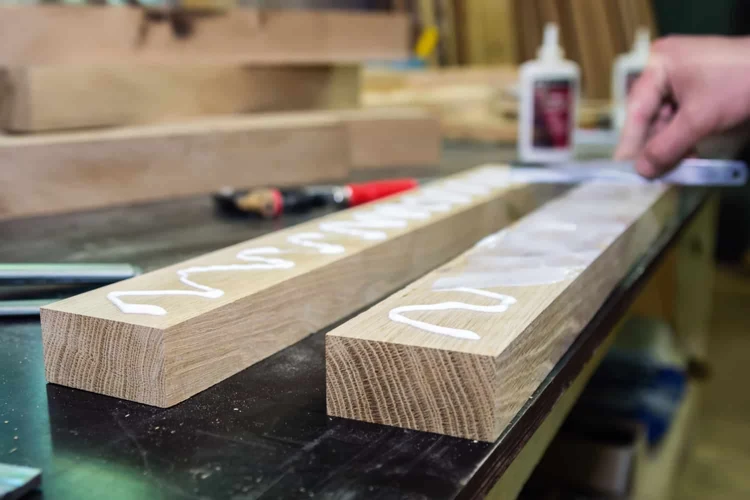
Tools and Materials
To fix gaps in glue down vinyl plank flooring, you will need specific tools and materials. Here is a list to help you get started:
Tools:
– Utility knife or razor blade
– Caulking gun (if using caulk)
– Rubber gloves (if using epoxy)
– Measuring tape
– Straight edge or ruler
– Chisel (for removing damaged boards)
Materials:
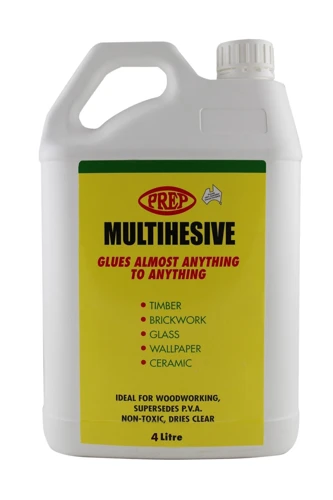
– Filler strips (wood or vinyl)
– Caulk or wood filler (depending on gap size)
– Epoxy (for large gaps)
– Replacement vinyl planks (for large repairs)
– Microfiber cloth or mop
– Cleaning solution (to ensure a clean and dry subfloor)
Make sure you have all of these tools and materials before starting the repair process. Using the right materials and tools will make the process much easier and more effective. Additionally, having everything prepared beforehand will save you time and allow you to complete the repair as quickly and efficiently as possible.
Preparation
Before you start fixing gaps in your glue-down vinyl plank flooring, it’s important to properly prepare the area. Preparation is key to ensuring a successful repair that will last for the long term. There are a few important steps that you should take before attempting to fill any gaps. Follow these steps carefully to ensure that your repair is as effective as possible.
Cleaning and Drying
Before fixing the gaps in your glue-down vinyl plank flooring, it is crucial to ensure that the area is perfectly clean and dry. Any dust, debris, or moisture left on the floor can hinder the effectiveness of the filler material and cause further damage. Here are the steps to follow for cleaning and drying the floor:
| Step | Description |
|---|---|
| Step 1 | Remove all furniture, rugs, and loose items from the room. |
| Step 2 | Sweep or vacuum the floor to remove all dust, dirt, and debris. Pay special attention to the gaps in the flooring and make sure they are free of any loose particles. |
| Step 3 | Wipe the floor with a damp mop or cloth to remove any remaining dirt or residue. Avoid using too much water, as excess moisture can seep into the gaps and cause further damage. |
| Step 4 | Allow the floor to dry completely before proceeding with the gap-filling process. You can speed up the drying process by using a fan or dehumidifier. |
By following these cleaning and drying steps, you will create an optimal surface for applying the filler material. Remember, taking the time to properly prepare the area will ensure that your repair work is successful and long-lasting.
Remove Obstacles
Before starting to fix the gaps in glue down vinyl plank flooring, it is necessary to prepare the area. One of the essential preparations is to remove any obstacles in the way of the process. Obstacles may hinder the flooring from lying flat, which results in improper bonding and more gaps.
The following table shows some of the common obstacles found on glue down vinyl plank flooring and how to remove them:
| Obstacle | Removal Method |
|---|---|
| Dirt and debris | Clean the floor with a vacuum or broom, then mop with a damp cloth to remove any dirt and debris. |
| Adhesive residue | Use a scraper or putty knife to remove any adhesive residue, then clean the floor with a recommended cleaning solution. |
| Furniture or appliances | Move the furniture or appliances out of the room, preferably to another location. If it is impossible, move them to one side of the room and fix the gaps on the other side first. |
| Thresholds or baseboards | Remove the thresholds or baseboards temporarily, then reinstall them after fixing the gaps. Be careful not to damage them during the process. |
| Moldings or quarter-rounds | Remove the moldings or quarter-rounds carefully, then reinstall them after fixing the gaps. You can use a pry bar to remove them gently. |
Once all the obstacles are removed, the area is ready for the gap-filling process. It is essential to keep the area clean, organized, and free from any debris or obstacles during this process. This will prevent any further gaps from occurring due to external factors.
Measure and Cut Filler Strips
When fixing gaps in glue down vinyl plank flooring, it’s important to properly measure and cut filler strips to ensure a precise fit. Here are the steps to follow for this process:
Step 1: Measure the gap – Use a measuring tape to determine the size of the gap. Measure both the length and width of the gap to ensure accurate measurements.
Step 2: Cut the filler strips – Using a utility knife or a saw, cut the filler strips to the exact length and width of the gap. Make sure to use a straight edge as a guide to ensure even and precise cuts.
Step 3: Sand the edges – After cutting the filler strips, use sandpaper to smooth any rough edges and ensure a snug fit.
Step 4: Test fit – Place the filler strips into the gap to test the fit. They should fit securely and not move or wiggle around.
Step 5: Make adjustments – If necessary, trim the filler strips to ensure a proper fit. It’s better to err on the side of caution and cut a little less than necessary, as you can always remove more material later.
By following these steps to measure and cut filler strips, you can ensure that your repairs are precise and long-lasting.
How to Fix Small Gaps
You may have noticed small gaps between your glue down vinyl plank flooring that can be frustrating to look at. These gaps can be caused by a variety of issues, such as changes in temperature, humidity, or improper installation. The good news is that these small gaps can be fixed easily and inexpensively using some simple tools and materials. In this section, we will discuss several methods you can use to fix those pesky gaps and restore the appearance of your floors. Let’s dive into the solutions and get your floors looking as good as new!
Apply Caulk
When fixing small gaps in glue down vinyl plank flooring, applying caulk can be an effective solution. Here’s a step-by-step guide on how to do it:
| Tools and Materials | |
|---|---|
| Caulk gun | |
| Vinyl floor caulk | |
| Caulk smoothing tool | |
| Rag or paper towel |
1. Clean the gap thoroughly with a rag or paper towel. Ensure that there is no dirt or debris left in the gap.
2. Insert the caulk gun into the gap and gently squeeze the trigger to apply the vinyl floor caulk. Be careful not to apply too much or too little caulk.
3. Use the caulk smoothing tool to even out the caulk within the gap. This will ensure that the caulk is evenly distributed throughout the gap without any air bubbles or gaps.
4. Wait for the caulk to dry completely. The drying time will depend on the type of caulk used, so make sure to read the instructions carefully.
5. Once the caulk is dry, clean the surface of the vinyl plank floor using a rag or paper towel. Ensure that there is no caulk residue left on the surface.
By following these steps, you can easily fix small gaps in glue down vinyl plank flooring using caulk.
Use Wood Filler
One of the most effective ways to fix small gaps in glue-down vinyl plank flooring is by using a wood filler. Here is a step-by-step guide on how to use wood filler to fill gaps in your vinyl plank floor:
Step 1: Choose the right Wood Filler
Make sure to choose a wood filler that is specifically designed for use with vinyl plank flooring. Look for a filler that is easy to apply, dries quickly, and can be sanded or painted over. The filler should also be able to expand and contract with changes in temperature and humidity.
Step 2: Clean the Area
Before applying the filler, make sure to clean the area thoroughly using a vacuum or a broom and a microfiber mop. Ensure that the area is completely dry before you begin.
Step 3: Apply the Filler
Take a putty knife and apply the wood filler into the gap. Make sure to fill the gap completely and level the surface of the filler with the floor’s surface. For better results, do not overfill the gap as it will require more sanding later.
Step 4: Let it Dry
Allow the wood filler to dry completely. The drying time may vary depending on the product. Check the manufacturer’s instructions for the recommended drying time.
Step 5: Sand the Filler
Using a fine-grit sandpaper, gently sand and level the surface of the filler with the surrounding vinyl planks. Make sure not to sand too hard or you’ll damage the floor. Use a microfiber cloth to clean up any residue from sanding.
Step 6: Paint or Seal the Filler
If needed, you can paint or seal the filler to match the surrounding vinyl plank flooring. Make sure to choose a product that is compatible with the wood filler you used.
By following these simple steps, you can easily use wood filler to fix small gaps in your glue-down vinyl plank flooring. It’s important to remember that wood filler is not suitable for larger gaps, and in that case, you should consider replacing the damaged plank.
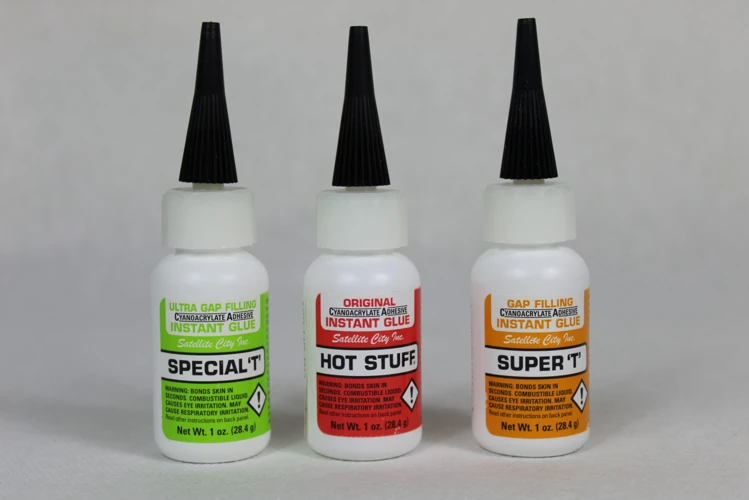
Fill with Epoxy
One effective way to fix gaps in glue down vinyl plank flooring is by filling them with epoxy. Epoxy is a strong adhesive that can bond well with a variety of surfaces. Here is a step-by-step guide on how to fill gaps with epoxy:
| Step 1: | Clean the gaps thoroughly using a vacuum and a damp cloth. Make sure to remove any debris or dust from the gaps. |
|---|---|
| Step 2: | Use a mixing bowl to mix the two-part epoxy according to the manufacturer’s instructions. Make sure to wear gloves to protect your hands. |
| Step 3: | Using a putty knife, spread the epoxy mixture over the gaps, making sure to fill them completely. Smooth out the surface of the epoxy to create an even surface. |
| Step 4: | Allow the epoxy to dry completely as per the manufacturer’s instructions. This can take several hours or even overnight, depending on the specific epoxy you are using. |
| Step 5: | Once the epoxy is dry, you can sand it down using a fine grit sandpaper to create a smooth surface that is even with the rest of the vinyl plank flooring. |
| Step 6: | Clean the area again and use a floor cleaner to make the entire floor look well-maintained and polished. |
Filling gaps with epoxy is a simple and effective solution for fixing gaps in glue down vinyl plank flooring. However, it is important to follow the manufacturer’s instructions carefully to ensure that the epoxy sets properly and creates a strong bond with the flooring surface.
How to Fix Large Gaps
Dealing with large gaps in your glue down vinyl plank flooring can leave you feeling overwhelmed and uncertain about how to proceed. But fear not! With the right tools and preparation, it’s possible to fix those unsightly gaps and restore your flooring to its former beauty. In this section, we’ll explore the steps you need to take to tackle larger gaps in your flooring, using methods that are sure to yield great results. Read on to learn more!
Remove Damaged Boards
When the gaps in your glue down vinyl plank flooring are too large to be filled with filler strips or caulk, the only solution is to replace the damaged boards. Here are the steps to remove damaged boards from your vinyl plank flooring:
| Tools | Materials |
|---|---|
| Utility knife or handsaw | New vinyl plank boards |
| Pry bar or chisel | Adhesive |
| Caulk gun |
Step 1: Identify the damaged boards that need to be replaced. Use a utility knife or handsaw to make a cut across the width of the board just above the damaged area. This cut will allow you to pry up the damaged board.
Step 2: Use a pry bar or chisel to carefully lift the damaged board from the subfloor. If the board is glued down, apply heat with a hair dryer to soften the adhesive before prying up the board.
Step 3: Once the damaged board is removed, scrape off any remaining adhesive from the subfloor using a scraper or razor blade.
Step 4: Measure the length and width of the gap left by the damaged board. Use these measurements to cut a replacement board to the correct size.
Step 5: Apply adhesive to the back of the replacement board using a caulk gun. Fit the replacement board into the gap, making sure it is flush with the surrounding boards.
Step 6: Use a heavy object such as a stack of books to weigh down the replacement board while the adhesive dries. Follow the manufacturer’s instructions for drying time.
Step 7: Once the adhesive is dry, fill any remaining gaps around the replacement board with caulk to prevent water or debris from getting underneath.
By following these steps, you can remove damaged boards from your glue down vinyl plank flooring and replace them with new ones. This process may take some time and effort, but it is worth it to ensure the longevity and beauty of your flooring.
Replace with New Boards
Replacing damaged boards in glue down vinyl plank flooring is one of the most effective ways to fix large gaps. You will need some tools and materials to complete this task, including a circular saw, pry bar, hammer, replacement vinyl plank flooring, adhesive, utility knife, and a measuring tape. Here is a step-by-step guide on how to replace damaged vinyl planks:
- Find the damaged board and remove it by using a pry bar and hammer. Try to work the pry bar under the board without damaging the surrounding boards.
- Use a circular saw to cut the length of the board down the center.
- Lift both halves of the board out of place and disassemble them by removing any remaining adhesive using a utility knife.
- Using the measuring tape, measure and cut the replacement plank to the same length as the removed board. Make sure to account for any expansion gaps needed.
- Apply adhesive to the back of the replacement board and press it into place. Use a weight to hold it down while the adhesive dries according to the manufacturer’s instructions.
- Using a utility knife, remove any excess adhesive that may have seeped out from the sides of the replacement board.
Remember, when replacing boards in glue down vinyl plank flooring, it is essential to use the same type of vinyl plank flooring as the rest of your floor. This ensures that the color and texture match perfectly, and the board fits snugly among the surrounding boards. With this guide, you can fix large gaps in your vinyl plank flooring like a pro.
How to Prevent Future Gaps

Preventing future gaps in your glue down vinyl plank flooring is crucial to maintaining a smooth, even surface. Here are some tips to help you prevent gaps:
1. Choose the right flooring for your space: Different areas of your home have different humidity levels and temperatures. Make sure to choose a vinyl plank flooring designed for the specific needs of your space to avoid expansion and contraction that could cause gaps.
2. Prepare your subfloor: Properly preparing your subfloor will help to prevent gaps from forming in your vinyl plank flooring. Ensure that your subfloor is clean, level, and free from moisture before installing your flooring.
3. Acclimate your flooring: Letting your vinyl plank flooring acclimate to the room temperature and humidity level for at least 48 hours before installation will help to prevent gaps from forming due to expansion and contraction.
4. Install a moisture barrier: Installing a moisture barrier between your subfloor and vinyl plank flooring will help to prevent moisture from reaching your flooring and causing gaps.
5. Avoid exposure to direct sunlight: Direct sunlight can cause vinyl plank flooring to expand and contract, causing gaps. Use window coverings to prevent sunlight from directly hitting your flooring.
6. Maintain a consistent room temperature and humidity: Fluctuations in temperature and humidity can cause vinyl plank flooring to expand and contract, leading to gaps. Use a humidifier or dehumidifier as needed to maintain a consistent room environment.
By following these tips, you can help to prevent gaps from forming in your glue down vinyl plank flooring and ensure that your floors remain beautiful and durable for years to come.
Maintenance and Care
Proper maintenance and care of your glue down vinyl plank flooring can prevent gaps from forming and increase the overall longevity of your floor. Here are some tips to keep in mind.
Clean Regularly: One of the most important things you can do to maintain your vinyl plank flooring is to clean it regularly. Use a soft-bristled broom or a vacuum with a hard floor attachment to remove any loose dirt and debris. Then, use a damp mop to wipe away any remaining dirt. Avoid using harsh chemicals, abrasive cleaners, or steam mops, as these can damage the surface of your vinyl flooring.
Protect from Scratches: Vinyl plank flooring is relatively durable, but it can still be scratched by sharp objects and heavy furniture. You can minimize the risk of scratches by putting felt pads under the legs of your furniture and using floor mats at entryways to collect dirt and debris that could cause scratches. Avoid dragging heavy furniture or appliances across the floor, as this can damage the planks.
Control Humidity: Fluctuations in humidity can cause vinyl plank flooring to expand or contract, which can lead to gaps. To prevent this from happening, try to maintain a consistent level of humidity in your home. Use a dehumidifier in damp areas or during humid seasons, and a humidifier during dry seasons.
Address Issues Quickly: If you notice any gaps forming in your vinyl plank flooring, it’s important to address the issue as soon as possible. The longer you wait, the larger the gaps may become, and the more difficult they will be to fix.
By following these tips, you can help maintain the appearance and functionality of your glue down vinyl plank flooring for years to come.
Conclusion
As you can see, fixing gaps in glue down vinyl plank flooring is no rocket science. Whether you’re dealing with small or large gaps, there’s always a simple solution that you can apply to get your flooring back to its perfect condition. By identifying the causes of gaps, preparing your materials and tools, and following the right steps, you can easily fix gaps, both small and large, and prevent future ones from happening.
Moreover, it is important to note that proper maintenance and care of your vinyl plank flooring can prolong its lifespan and prevent gaps from forming in the first place. Regular cleaning and sweeping, avoiding heavy furniture, and keeping humidity levels in check can all go a long way in keeping your vinyl flooring in top condition.
In conclusion, always pay attention to the signs of gaps in your glue down vinyl plank flooring and take prompt action to fix them before they get worse. By following the steps outlined in this article, you can save time and money in the long run and enjoy your beautiful flooring for many years to come.
Frequently Asked Questions
What are the common causes of gaps in glue down vinyl plank flooring?
The most common causes are subfloor issues and expansion/contraction of the flooring due to temperature and humidity changes.
Can gaps in vinyl plank flooring be fixed?
Yes, depending on the size of the gap, it can be fixed using different methods.
What tools and materials do I need to fix gaps in vinyl plank flooring?
You will need caulk, wood filler, epoxy, plastic putty knife, utility knife, vacuum, and a measuring tape.
How do I prepare the flooring before fixing the gaps?
You need to clean and dry the area, remove obstacles, and measure and cut filler strips.
What is the best way to fix small gaps in vinyl plank flooring?
You can apply caulk, use wood filler, or fill with epoxy.
How do I fix large gaps in vinyl plank flooring?
You need to remove the damaged boards and replace them with new ones.
Can I prevent gaps from appearing in my vinyl plank flooring?
Yes, maintaining the proper temperature and humidity levels in the room, as well as ensuring the subfloor is level and free from damage, can prevent gaps from appearing in the flooring.
Is it necessary to hire a professional to fix gaps in my vinyl plank flooring?
No, most of the methods to fix gaps in vinyl plank flooring can be done by homeowners with basic tools and materials.
How often do I need to maintain my vinyl plank flooring to prevent gaps?
Regular cleaning and proper maintenance can prevent gaps from appearing. A deep clean should be done every 6-12 months.
Can I use any type of filler to fix gaps in vinyl plank flooring?
No, it is important to use a filler that is specifically designed for use with vinyl plank flooring, to ensure it adheres properly and does not damage the surface of the flooring.