For enthusiasts and professionals in the 3D printing realm, maintaining the workspace is as crucial as the intricate designs they create. A clean print bed is the cornerstone of a successful 3D printing process, ensuring adhesion and the quality of the printed objects.
Understanding the Importance of Regular Print Bed Maintenance
Regular cleaning print bed routines extend its life and prevent issues related to prints not sticking or the accumulation of leftover adhesives. A pristine surface is essential for optimal print quality and repeatability of results, which underscores the importance of understanding how to remove glue from print bed effectively.
Removing Glue from Your Print Bed
Glue is a common adhesive choice for 3D printing, providing a strong hold for materials during printing. However, it can leave a residue that needs to be cleaned to ensure a smooth surface for your next print.
Precautions Before You Begin the Cleaning Process
Before embarking on the cleaning journey, it’s vital to take certain precautions. Ensure the print bed is cool to avoid burns, and if you’re using chemicals as part of your adhesive removal techniques, work in a well-ventilated area and use gloves to protect your skin.
Adhesive Removal Techniques for a Glue-Free Surface
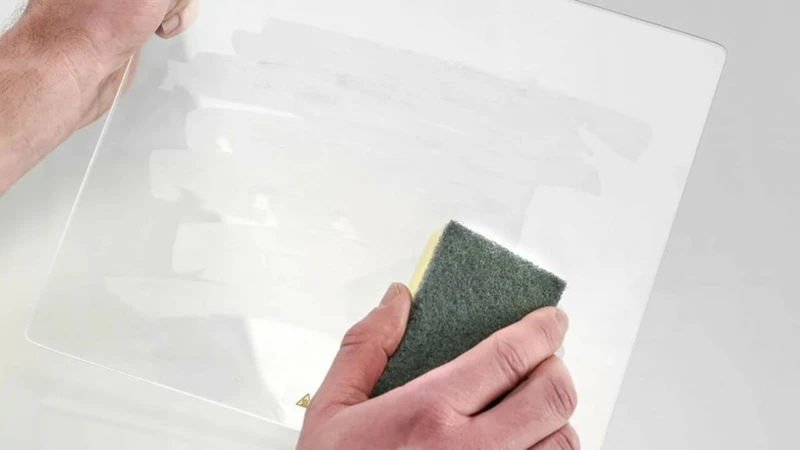
One effective technique is to apply a warm, damp cloth to the area, allowing the moisture to soften the adhesive. After a few minutes, gently scrape off the softened glue with a plastic scraper to avoid scratching the bed.
Solvent for Glue on Print Bed: Selecting the Right Product
Choosing the right solvent for glue on print bed is crucial. Isopropyl alcohol (IPA) is a popular choice, as it breaks down the adhesive without damaging the print bed. Apply it sparingly with a soft cloth and gently scrub until the surface is clean.
Non-Abrasive Cleaning Methods for Print Bed Care
Preserving the integrity of your print bed means using non-abrasive cleaning methods that won’t scratch or damage the surface. This ensures the longevity of the print bed and consistent quality of your prints.
DIY Print Bed Cleaning Solutions
Create your own cleaning solution by mixing equal parts of water and vinegar. This natural solution can effectively dissolve glue residues. Using a spray bottle can help distribute the solution evenly across the print bed before wiping it off with a soft cloth.
Proper Use of Scrapers and Tools
When using scrapers, opt for plastic ones over metal to prevent scratches. Gently slide the tool under the edges of the glue residue, applying minimal force to lift it off the print bed. Always scrape away from yourself for safety.
Cleaning Print Bed: Step-by-Step Guide
Thorough cleaning of your 3D printer’s bed ensures that your next project starts on the right foot. Here’s a detailed guide to help you achieve a spotless surface.
Preparation: What You’ll Need
- Protective gloves
- Isopropyl alcohol or your chosen solvent
- Plastic scraper
- Soft cloths or paper towels
- DIY cleaning solution (optional)
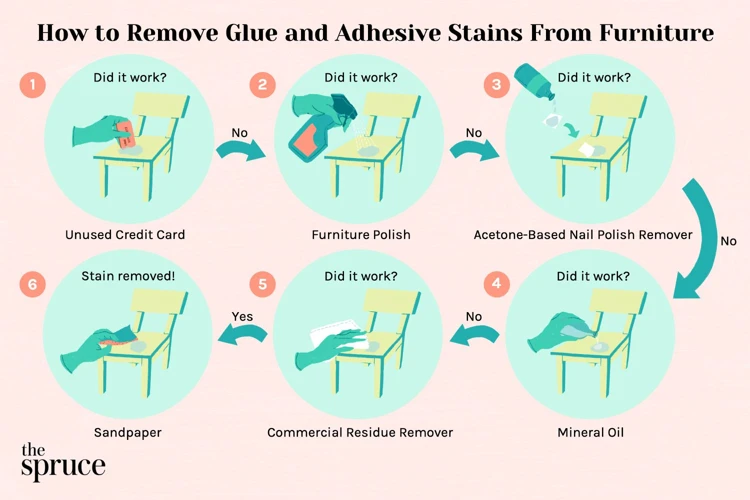
The Cleaning Process: Detailed Instructions
Begin by ensuring the bed is cool. Apply your cleaning solution or solvent with a soft cloth, allowing it to sit briefly. Use the scraper with care to lift the softened glue. Finish by wiping the bed down with a clean, dry cloth to remove any remaining residue.
Print Bed Adhesive Solutions

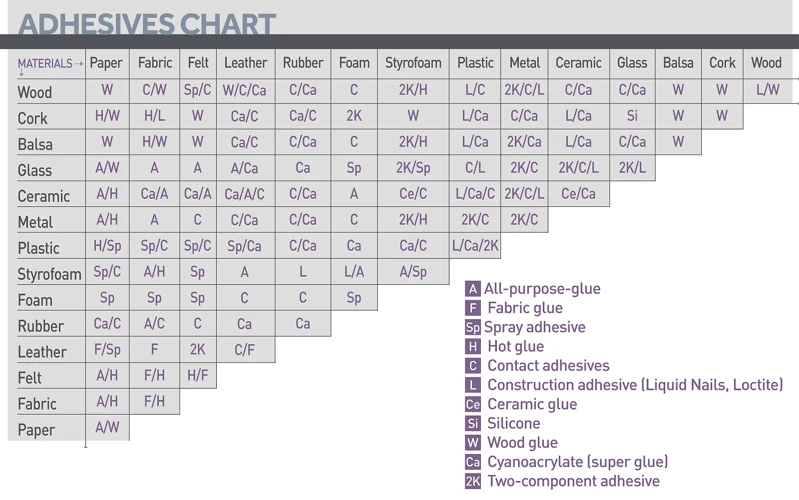
Selecting the right adhesive can make a significant difference in the ease of cleaning your print bed after printing. It’s important to find a balance between strong adhesion during printing and easy removal post-print.
Choosing the Right Adhesive for Your Prints
Options range from water-soluble glues to specialized 3D printing adhesives. Each has its advantages, and your choice will depend on the type of printing material and the desired ease of post-print cleaning.
Application Tips for Even Adhesive Distribution
For an even application, spread a thin layer of the adhesive across the print bed using a spatula or a dedicated glue stick for 3D printing. This will facilitate not only better adhesion but also easier removal of the glue residue.
3D Printer Maintenance: Beyond the Print Bed
A clean print bed is just one aspect of 3D printer maintenance. To ensure your printer operates smoothly, regular check-ups and cleaning of other components are necessary.
Regular Check-Ups and Component Cleaning
Inspect moving parts and lubricate them as needed. Keep the extruder clean and replace the nozzle if it shows signs of wear. A dust-free environment contributes to the longevity and performance of your printer.
Calibrating Your Printer for Optimal Performance
Calibration is key to achieving the best results. Ensure your print bed is level, and the printer’s firmware is updated. Regular calibration checks keep your prints precise and reduce the chances of errors that could affect the print bed’s condition.
Conclusion and Best Practices for Print Bed Care
Consistency in maintenance practices is the key to extending the life of your 3D printer and ensuring the quality of your prints. Taking the time for proper cleaning and care pays off in the long run.
Summary of Effective Cleaning Techniques
Effective cleaning techniques include using non-abrasive methods, selecting the right solvent, and applying the appropriate adhesive removal techniques. These methods ensure a clean and functional print bed.
If you’re dealing with the sticky aftermath of a 3D printing project, you might be wondering how to clean glue off a print bed effectively. But glue doesn’t just end up on print beds; it can find its way onto various surfaces and items. For those who’ve encountered glue mishaps on footwear, our guide on how to clean glue off shoes can help you salvage your favorite pair. If you’re struggling with residue on your floors, check out our tips on how to clean floor glue. And for the crafters out there, we’ve also got you covered with our article on how to get wood glue off clothes, ensuring that your wardrobe stays as pristine as your crafts.
Developing a Maintenance Schedule for Longevity
To maximize the lifespan of your 3D printer, develop a maintenance schedule that includes regular cleaning 3D print surface tasks and inspections. This proactive approach helps avoid common issues and ensures your printer is always ready for the next project.