When it comes to the latest craze in DIY projects, slime-making is at the top of the list. This gooey and fun substance is easy to make, but many people have questions about the process. One of the most common questions is how much slime a gallon of glue can make. It can be difficult to know where to start when making slime, but with the right recipe and a little creativity, the possibilities are endless. In this article, we’ll explore the world of slime-making, from the science behind glue to tips for successful slime creations. So, let’s get started!
Why Glue is the Secret Ingredient in Slime
Glue is a key ingredient when it comes to making slime. But have you ever wondered why? What is it about glue that makes it such an important component for creating the perfect slime? In this section, we’ll explore the properties of glue that make it the secret ingredient in slime-making. From its ability to create a stretchy and gooey consistency to its ability to bind other add-ins together, we’ll delve into the science behind why glue is essential. So let’s get started! If you’re also curious about what kind of glue to use on poster board, follow the link for more information.
How Glue Works in Slime
When making slime, glue acts as the main ingredient and is responsible for the stretchy, slimy texture that we all know and love. But how exactly does glue work to make slime?
Glue is made from a type of polymer called polyvinyl acetate (PVA). When mixed with certain substances, such as borax or contact lens solution, PVA molecules begin to bond together and form long chains. These chains are called polymers. In the case of slime-making, the borax or contact lens solution acts as a cross-linker, which helps to connect the polymer chains of the glue. The resulting mixture is a long, stretchy material that we know as slime.
Using the right type of glue is key to making successful slime. PVA glue is the best glue to use for making slime because it contains a high concentration of PVA polymer. You can find PVA glue at most craft stores or online. Here is a guide on how to use PVA glue on paper.
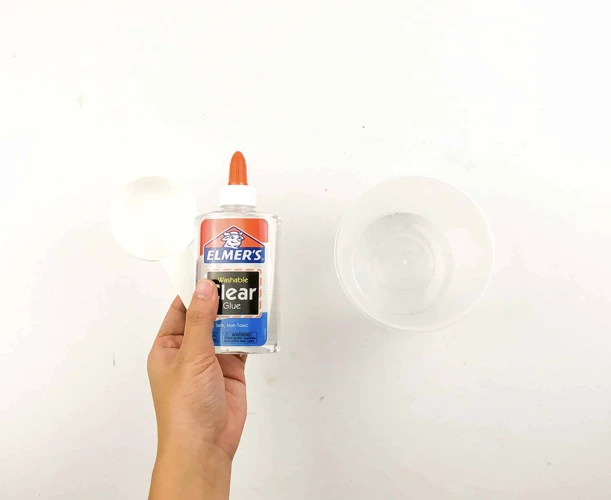
It’s important to note that not all glues are created equal when it comes to slime-making. Some types of glue, such as clear or glitter glue, may contain additional ingredients that can affect the texture and consistency of your slime. For example, clear glue can make a translucent slime while glitter glue can make a sparkly slime.
When choosing a glue for making slime, it’s best to stick with a white school glue or PVA glue to ensure consistent results.
Glue works in slime-making by forming long polymer chains that are connected by a cross-linker substance. PVA glue is the best type of glue to use in slime-making due to its high concentration of PVA polymer. When choosing a glue for slime-making, stick with a white school glue or PVA glue to ensure consistent results. For more information on choosing the right type of glue for your project, check out this guide on what glue to use on poster board.
The Best Glue for Making Slime
When it comes to making slime, not all glues are created equal. The best type of glue for making slime is white school glue, also known as PVA glue. This glue is readily available at craft stores, online, and even in supermarkets.
One of the main reasons white school glue is the best glue for making slime is because it has polyvinyl acetate as its main ingredient. This ingredient is what makes the glue elastic and stretchy, which is essential for successful slime making. Additionally, white school glue is non-toxic, making it safe for children to handle.
Another option for making slime is clear glue, which is also a type of PVA glue. Clear glue will result in a transparent slime, which can be fun for certain recipes. However, it may not be as opaque as white glue and may require more coloring to achieve the desired effect.
While other types of glue, such as super glue or hot glue, may work to create slime, they are not recommended as they can be dangerous to handle and may not result in the desired consistency.
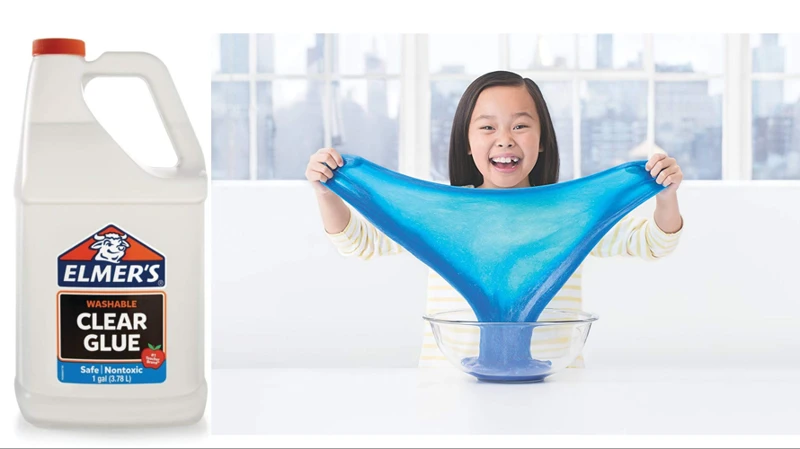
It’s important to note that not all white school glues are the same. It’s recommended to use a quality brand such as Elmer’s or Cra-Z-Art in your slime making process, as they have been tested and proven to work well.
By using the best glue for slime making, you’ll be setting yourself up for success when it comes to creating fun and stretchy slime creations.
How Much Glue You Need for Your Slime
Determining the right amount of glue to use in your slime recipe can be a bit tricky, but it’s an essential step to ensure that your slime turns out just right. The ratio of glue to other key ingredients, like activator and add-ins, will depend on the specific type of slime you want to make. Here is a basic guideline for how much glue to use for different types of slime:
| Type of Slime | Amount of Glue | Additional Add-ins |
|---|---|---|
| Basic slime | 1 cup | Food coloring, glitter |
| Butter slime | 2 cups | Model magic clay |
| Cloud slime | 1.5 cups | Instant snow powder, foam soap |
| Floam slime | 1.5 cups | Styrofoam balls |
Keep in mind that these ratios are just guidelines, and it’s best to experiment to find the perfect ratio for your desired consistency and texture.
If you’re using glue alternatives or substitutes, such as gelatin or cornstarch, the amount of glue you’ll need may be different, and the consistency of the slime may also be affected. You can visit the “How to Make Clear Slime Without Glue” article for alternative recipes.
The type of glue you use can also affect the outcome of your slime. If you’re unsure about the glue’s properties, it’s a good idea to check its safety and composition by visiting “what is glue crawler?” or “what glue is safe for fish?” articles.
The key to determining how much glue you need for your slime is to experiment and adjust the amounts of activator and add-ins and other ingredients until you get the perfect texture and consistency. It may take a few tries, but once you get it just right, you’ll be able to create all kinds of unique and fun slime creations.
How Much Slime Can You Make with a Gallon of Glue?
Have you ever found yourself wondering just how much slime you can make with a gallon of glue? Well, wonder no more because we have all the answers you need! By following these simple steps, you can create a large batch of slime to enjoy with your friends and family. Before we dive into the specifics, let’s first learn about why glue is the secret ingredient in slime and which types of glue work best. If you want to learn more about different types of glue, visit our article on glue code.
The Basic Recipe for Making Slime with Glue
Making slime is not only fun but also super easy! While there are many homemade slime recipes out there, the basic recipe for slime typically only requires a few simple ingredients. Here’s what you’ll need to get started:
- A gallon of white school glue: The most common type of glue used for making slime is white school glue, which you can find at any craft or office supply store.
- Borax or liquid starch: To turn the glue into slime, you’ll need to activate it with either borax or liquid starch. Borax can sometimes be difficult to find, so liquid starch is often a more accessible option.
- Water: You’ll need water to dilute the glue and to make the slime more flexible and stretchy.
- Add-ins: Once you have the basic slime recipe down, you can add in all sorts of fun extras to customize your slime. This can include things like food coloring, glitter, or even small toys or beads.
To make your slime, start by pouring your entire gallon of glue into a large mixing bowl. Then, slowly add in water while stirring the mixture with a spoon or spatula. You typically want to add about 1 cup of water for every gallon of glue, but you can adjust this amount depending on how slimy you want your slime to be.
Once the water is mixed in, it’s time to activate the slime with either borax or liquid starch. To use borax, mix 1 teaspoon of borax with 1 cup of warm water, stirring until it dissolves. Then, slowly add the borax mixture to the glue while stirring constantly. If you’re using liquid starch, add it to the glue in small amounts while stirring until the slime starts to come together.
As you add the activating ingredient, you should see the slime start to thicken and come together. Keep stirring until the slime is no longer sticky and is stretchy and pliable. At this point, you can add in any additional add-ins you want to customize your slime.
Making slime with glue is a quick and easy process that anyone can do with just a few simple ingredients. With a little bit of experimentation and creativity, you can use this basic recipe to create all sorts of fun and unique slime creations!
How to Customize Your Slime Recipe
When making slime, there are countless ways to customize your recipe to make it unique and stand out. Mixing in different colors, textures, and even scents can transform a basic slime recipe into a work of art. Here are some ideas for customizing your slime recipe:
1. Glitter: Adding glitter to your slime is an easy and popular way to add some sparkle to your creation. You can find glitter in a variety of colors and sizes at craft stores or online.
2. Foam beads: Foam beads are a fun addition to slime that can give it a crunchy texture. You can find foam beads in a variety of colors and sizes online or at your local craft store.
3. Essential oils: Adding a few drops of essential oil to your slime can give it a pleasing scent. Popular choices include lavender, peppermint, and lemon.
4. Food coloring: Food coloring can be used to give your slime a vibrant hue. Be careful not to add too much, as this can affect the slime’s consistency.
5. Clear glue: Using clear glue instead of white glue can give your slime a translucent appearance. This can be especially effective when mixed with glitter or other add-ins.
6. Beads: Small plastic beads can be mixed into slime to create a fun, bumpy texture. You can find beads in a variety of colors and sizes at craft stores or online.
7. Glow in the dark paint: Adding glow in the dark paint to your slime recipe can create a cool effect that glows in the dark.
8. Charcoal powder: Adding a small amount of charcoal powder to your slime recipe can result in a gray or black slime color that looks like fluffy clouds.
9. Thermochromic pigment: This pigment can change colors based on temperature, so adding it to your slime recipe can create a unique color-changing effect.
10. Baking powder: Adding just a small amount of baking powder to your slime mixture can create a lighter, fluffier texture.
Remember that when customizing your slime recipe, it’s important to start with a basic recipe and add in small amounts of each add-in until you achieve your desired result. Have fun experimenting with different combinations and creating your own unique slime recipes!
If you want to know more about how to glue air-dry clay, you can find useful information in our How to Glue Air-Dry Clay article.
Factors That Affect How Much Slime You Can Make
The amount of slime you can make with a gallon of glue is not an exact science. There are various factors that can affect the outcome, such as:
- Type of glue: Different types of glue have different consistencies which can affect how much slime you can make from a gallon. For example, glue used for pool cue tips may have a thicker consistency compared to white school glue.
- Amount of activator: The activator is what causes the glue to turn into slime. Using too much or too little activator will affect the overall amount of slime produced.
- Humidity: The humidity in the air can affect how much activator you need to use to achieve the desired slime consistency. In more humid conditions, you may need less activator compared to a dry climate.
- Add-ins: Adding in additional ingredients such as glitter, foam beads, or dye can also affect the amount of slime produced. These ingredients take up space in the mixture and can reduce the overall amount of slime.
- Size of mixing container: The size of your mixing container can affect the final amount of slime. If the container is too small, it may not allow enough space for all ingredients to combine properly.
It’s important to keep in mind that each of these factors can have a significant impact on the amount of slime produced from a gallon of glue. Experimenting with different add-ins and activator amounts can result in varying amounts of slime. It’s best to start with a basic recipe and then adjust as needed to achieve your desired consistency and amount.
One additional factor to consider is the type of glue used when basing miniatures for tabletop gaming. This type of glue requires a thicker consistency, making it more difficult to achieve a higher amount of slime with a gallon of glue. To get the desired consistency, it may be necessary to add more activator than with other types of glue. For more information on what glue to use for basing miniatures, check out this guide.
How to Store Excess Slime
Once you have made a batch of slime, you may find that you have some excess that you want to preserve for later use. Proper storage is crucial for maintaining the texture and consistency of your slime. Here are some tips on how to store excess slime:
Airtight containers: The best way to store slime is in an airtight container. This will prevent air from getting in and drying out the slime, causing it to harden and lose its stretchiness. You can use plastic containers with lids, or even resealable plastic bags.
Avoid direct sunlight: Slime should be stored in a cool, dry place away from direct sunlight. UV rays can break down the chemical bonds in the slime, causing it to lose its elasticity and become brittle.
Label the container: It’s a good idea to label your container with the date that you made the slime. Slime can last for several weeks if stored properly, but you may forget when you made it and it’s best not to keep it for too long.
Don’t mix different types of slime: If you have different types of slime, it’s important not to mix them together as they may react and change their texture or color.
Reactivating slime: If your slime has become dry or hard, you can try adding a few drops of water or saline solution to reactive it. Knead the slime vigorously for a few minutes until it becomes soft and stretchy again.
| Storing Slime | Do’s | Dont’s |
|---|---|---|
| Airtight Containers | Seal the container tightly to prevent air from getting in. Keep the container in a cool and dry place away from direct sunlight. | Avoid using containers that have been used before or aren’t cleaned properly. Don’t store slime in the refrigerator or freezer as it can change the texture of slime. |
| Labeling the Container | Write the date on the container so you know when you made slime. Also, write the type of slime so you can avoid mixing different types. | Avoid using a label that’s hard to remove as it can stick to the slime. Don’t mix different types of slime in the same container. |
| Reactivating Slime | Add a few drops of water or saline solution and knead it vigorously. You can also microwave the slime for a few seconds to soften it up. | Avoid adding too much water or saline solution as it can change the consistency of the slime. Don’t use a microwave for a long period of time as it can overheat and melt the slime. |
Properly storing your slime can help extend its shelf life and keep it fresh for longer. Follow the above tips for storing your excess slime and avoid making common mistakes that can make your slime unusable.
Tips for Successful Slime-Making
Creating the perfect slime can be a fun and fulfilling experience, but it’s not always easy. Even with the right ingredients and tools, there are certain factors that can make or break your slime-making success. To help ensure that your slime turns out just the way you want it, we’ve gathered some helpful tips and tricks that will guide you through the process, from choosing the right add-ins to avoiding common mistakes. So, grab your glue and get ready to take your slime-making skills up a notch!
Choosing the Right Add-Ins
When it comes to making slime, choosing the right add-ins is key to creating a unique and fun texture. Here are some add-ins to consider, along with some tips for incorporating them into your slime recipe:
- Glitter: Adding glitter to your slime is a great way to give it some sparkle and shine. You can use any color glitter you like, and can either add it to the glue before adding the activator, or sprinkle it on top of the slime once it’s made.
- Food coloring: Food coloring is a fun way to add a pop of color to your slime. Just be careful not to add too much, or your slime may become too dark or stained.
- Scented oils: Adding scented oils to your slime can give it a pleasant aroma. Choose a scent that you love, and add a few drops to the glue before mixing in the activator.
- Beads: Adding beads to your slime can create a fun crunchy texture. You can use small plastic beads, or even small foam balls.
When choosing add-ins for your slime, it’s important to consider the texture and consistency of the slime you want to create. If you want a smooth, stretchy slime, avoid adding anything that could create lumps or bumps. However, if you’re looking for a more textured slime, beads or even small foam balls can be a fun addition.
Incorporating add-ins into your slime recipe is easy. Simply add them to the glue before mixing in the activator. Depending on the type of add-in, you may need to adjust the amount of activator you use in order to maintain the desired texture and consistency.
Remember, experimenting with different add-ins is part of the fun of making slime, so don’t be afraid to get creative and try something new. Just be sure to avoid adding anything that could harm your skin or the environment. So, choose your add-ins wisely and have fun making your own unique slime recipe!
Understanding the Science Behind Slime
Slime has become a popular trend among children and adults alike. But what makes slime so fascinating? It all comes down to the science behind it. Here are some key scientific concepts to keep in mind when making slime:
Viscosity: The ability of a substance to resist flow is known as its viscosity. Slime’s unique texture is due to its high viscosity. Glue is a key ingredient in slime that creates this thickness.
Polymer Chains: When you mix glue and other ingredients to create slime, molecules in the glue combine into long chains called polymers. These polymers stretch and move when you play with slime, giving it its stretchy and malleable properties.
Borax Reaction: Many slime recipes call for the addition of borax. When borax is added to the glue mixture, it causes the polymer chains to cross-link, creating a stronger and more consistent slime texture.
Pigments and Dyes: Adding pigments or dyes to your slime can change its appearance and make it more visually appealing. Some pigments can even glow in the dark.
Chemical Reactions: Slime-making involves chemical reactions that can be used to teach children about chemistry. This can include observing changes in texture and color, as well as explaining the science behind the reaction.
By understanding the science behind slime, you can make more informed choices when creating your own slime recipes. It can also be a great way to introduce children to basic scientific concepts in a fun and hands-on way.
Common Slime-Making Mistakes to Avoid
When making slime, there are a few common mistakes that can easily be avoided with proper attention and care. Here are some of the most frequent mistakes to look out for:
- Using Too Much Activator: One of the most common mistakes in slime-making is using too much activator, which can result in a slime that is too rubbery or tough. Make sure to add activator slowly and in small amounts, mixing thoroughly before adding more.
- Using Too Little Activator: On the flip side, using too little activator will result in a slime that is too sticky and won’t hold its shape. Again, add activator slowly and mix well before adding more.
- Not Mixing Thoroughly: Failing to mix the ingredients thoroughly can result in clumps or inconsistencies in the slime. Take the time to mix everything together well before adding any extras.
- Using the Wrong Type of Glue: Different types of glue can result in different textures of slime. Make sure to use the correct type of glue for the type of slime you want to make, whether that be clear glue, white glue, or glitter glue.
- Adding Too Many Add-Ins: Add-ins can be a fun way to customize your slime, but adding too many can overwhelm the mixture and make it difficult to blend everything together. Stick to one or two add-ins for the best results.
- Not Measuring Ingredients: Slime-making is a science, and precise measurements are important for achieving the desired texture. Make sure to measure out all ingredients carefully before starting.
Avoiding these common mistakes will help ensure that your slime turns out perfectly every time. Remember to take your time and pay attention to the details, and you’ll be rewarded with a fun and satisfying sensory experience.
Creating Your Own Unique Slime Recipes
Crafting your own unique slime recipe can be a fun and creative activity. With a gallon of glue as your base ingredient, there are countless ways to customize your slime to make it truly your own. Here are some ideas for add-ins and mix-ins to create unique textures, colors, and scents for your slime:
| Add-In | Description |
|---|---|
| Beads or Sequins | Add a pop of color and texture to your slime. |
| Glow-in-the-Dark Paint | Create a fun, luminescent effect for your slime. |
| Essential Oils | Add a relaxing or invigorating scent to your slime. |
| Food Coloring | Create a vibrant, eye-catching color for your slime. |
| Glitter | Add some sparkle to your slime. |
| Cornstarch | Adjust the consistency of your slime by adding more or less cornstarch. |
| Shaving Cream | Create a fluffy, cloud-like texture for your slime. |
| Borax Solution | For a firmer slime, add a small amount of Borax solution to your glue mixture. |
Remember to experiment and have fun with your slime-making process. You never know what unique combination of ingredients you may discover!
Tips: When incorporating add-ins, start with small amounts and gradually add more as needed. Keep in mind that certain add-ins, such as glitter or beads, may require more glue to maintain the right consistency. Don’t be afraid to try new things – that’s part of the fun of creating your own unique slime recipes!
Conclusion
In conclusion, making slime with glue can be a fun and enjoyable activity for kids and adults alike. Not only is it a creative outlet, but it also has some educational value as it introduces them to the science of polymers.
It is important to choose the right glue for making slime, as not all types of glue will produce the same results. Elmer’s glue or PVA glue is the best option as it is smooth and non-toxic.
When it comes to measuring the right amount of glue, a gallon of glue can make a large quantity of slime, depending on the recipe and mix-ins. It is important to understand the science behind slime-making, as well as the factors that can affect the final outcome.
To store excess slime, place it in an airtight container and keep it in the refrigerator. This will prevent any mold or bacteria growth and allow it to stay fresh for several weeks.
Finally, it is important to have fun and experiment with different ingredients to create your own unique slime recipes. With these tips and tricks, you can become a master slime-maker and enjoy this fun and entertaining activity with your friends and family.
Frequently Asked Questions
1. Can I use any type of glue to make slime?
No, not all types of glue work well for slime-making. The best type of glue to use is white school glue, as it is water-soluble and creates a stretchy slime.
2. How much activator do I need to make the slime?
The amount of activator you need depends on the type of activator and the amount of glue you are using. A common ratio is 1:1 (equal parts glue and activator), but you may need to adjust based on the recipe and your desired slime consistency.
3. Can I make slime without borax?
Yes, there are many alternative activators you can use to make slime without borax. Some popular options are contact lens solution, baking soda, and liquid starch.
4. Why isn’t my slime stretchy?
If your slime isn’t stretchy, it may be due to not adding enough activator. Try adding more activator slowly until you achieve the desired consistency.
5. How do I store slime?
Slime should be stored in an airtight container, ideally in a cool, dry place. If your slime gets too hard or too sticky over time, you can try adding a little bit of water or activator to adjust the consistency.
6. Can I add food coloring to my slime?
Yes, adding food coloring is a great way to customize your slime. Just be sure to add it slowly and mix well to avoid over-coloring.
7. Can I add glitter to my slime?
Yes, adding glitter is a popular add-in for making sparkly slime. Just be aware that some types of glitter may stain clothing or surfaces.
8. How long does homemade slime last?
Homemade slime can last up to a few weeks if stored properly in an airtight container. However, the texture may change over time or if over-handled.
9. How do I clean up slime?
If slime gets on clothing or fabric, try removing it with a mixture of warm water, white vinegar, and dish soap. For hard surfaces, use a scraper to remove excess slime, then wipe with a damp cloth and mild cleaner.
10. Can I add other ingredients to my slime?
Yes, there are many ingredients you can add to customize your slime, such as beads, foam balls, or even essential oils for scent. Just be sure to research any new ingredients to ensure they are safe for use in slime.