Introduction to Wood Glue Clamping Time
When it comes to woodworking, achieving a seamless and strong bond between pieces of wood is essential. The key to such success often lies in understanding the concept of wood glue clamping time. This is the period during which glued parts must remain secured by clamps to ensure the adhesive cures properly, leading to a durable join.
The Importance of Proper Clamping in Woodworking
Proper clamping not only maintains the alignment of the wood pieces during the gluing process but also applies the necessary pressure to distribute the glue evenly, reducing the risk of weak spots in the bond. It is a pivotal step in the creation of any wood project clamping technique and therefore should be approached with attention and care.
Factors Affecting Glue Clamping Duration

Types of Woodworking Adhesive and Their Cure Times
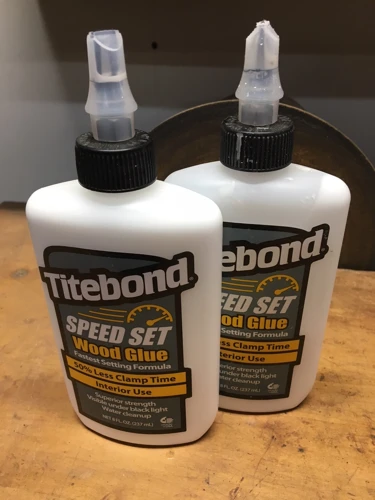
Different types of woodworking adhesive cure at varying rates. PVA glues, epoxy resins, and polyurethane adhesives each have unique properties that dictate their curing process and consequently the glue clamping duration.
Impact of Environmental Conditions on Wood Glue Drying Time
Temperature, humidity, and airflow can significantly impact wood glue drying time. Higher humidity and lower temperatures generally prolong the drying process, while a drier, warmer environment can accelerate it.
Wood Species and Their Influence on Clamping Time
The wood species being bonded also plays a role in determining the appropriate clamping time. Dense hardwoods may require longer clamping times compared to softer woods due to differences in porosity and surface texture.
Best Clamping Practices for Wood Projects
How to Apply Glue for Optimal Bonding Strength
To achieve optimal adhesive bonding strength, it’s vital to apply wood glue evenly across the joint surface. Be mindful not to over-apply, as excessive glue can weaken the bond and create a mess.
Determining the Right Glue Clamp Pressure
Applying the right glue clamp pressure is a balancing act. Too much pressure can squeeze out the glue and starve the joint, while too little can lead to a weak bond. A firm, even pressure is the goal.
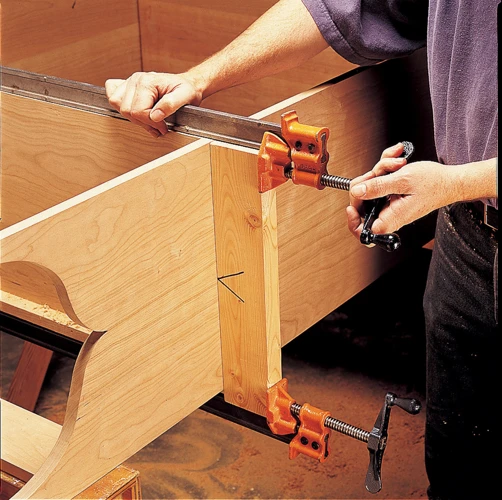
Tips for Aligning and Clamping Wood Pieces
- Ensure surfaces to be joined are flat and smooth.
- Use appropriate clamping pads to protect the wood surface.
- Check for squareness after applying the clamps.
How Long to Keep Wood Glued Pieces Clamped

General Guidelines for Wood Glue Set Time
While the wood glue set time can vary, a general rule of thumb is to allow for at least 30 minutes to an hour for initial set, with a full cure time ranging from 18 to 24 hours. These timeframes can be adjusted based on the specific adhesive and conditions.
Adjusting Clamping Time Based on Project Requirements
Depending on the intricacy and end-use of the wood project, clamping times may need to be lengthened or shortened. Delicate workpieces might benefit from longer clamping periods, while quick-set adhesives can be used when time is of the essence.
Woodworking Glue Tips and Tricks
How to Avoid Common Gluing Mistakes
One of the most effective woodworking glue tips is to take preventive measures against common gluing mistakes. Ensure that your work area is clean, your tools are prepared, and you have enough clamps ready before beginning the glue-up process.
Advanced Techniques for Enhanced Adhesive Bonding Strength
Advanced techniques such as using cauls to distribute pressure or applying a sizing coat to end-grain surfaces can significantly enhance adhesive bonding strength and result in a more professional finish.
Post-Clamping: What Comes Next?
How to Test if the Wood Glue is Fully Dried
After removing the clamps, it’s crucial to test if the wood glue is fully dried. Gently tapping on the joint and observing for any movement can be a simple yet effective method to check the bond’s integrity.
Finishing Your Wood Project After Clamping
The final finishing touches can make or break the appearance of your wood project. Sanding the joint area smooth and applying a finish not only enhances the visual appeal but also adds a layer of protection to the wood.
Troubleshooting Common Wood Glue Issues

What to Do If the Wood Glue Doesn’t Bond Properly
If the wood glue doesn’t bond properly, it may be necessary to carefully separate the pieces, clean off the old glue, and attempt the gluing process again, this time with more attention to clamping pressure and time.
How to Remove Excess or Spilled Glue
Excess or spilled glue should be addressed immediately. For PVA glue, a damp cloth can wipe away wet excess. Once the glue has dried, a sharp chisel or scraper can be used to gently remove the residue without damaging the wood.
When working on woodworking projects, understanding the drying time for different types of adhesives is crucial to achieving a strong bond. If you’re using wood glue, you might be wondering about the ideal clamping time to ensure maximum adhesion. For more information on adhesive drying times, check out our guides on how long it takes for hot glue to set, how long hide glue takes to dry, and how long it takes for nail glue to dry. These insights will help you plan your projects more effectively and understand the differences between various gluing processes.
Conclusion: Achieving Strong, Durable Bonds in Woodworking
In conclusion, understanding and applying best clamping practices is fundamental to achieving strong, durable bonds in woodworking. By respecting the wood glue clamping time and considering the various factors that affect it, woodworkers can ensure that their creations will stand the test of time. Whether you’re a seasoned pro or a beginner, keeping these tips in mind will elevate the quality of your wood projects.