As homeowners, we always want our homes to look their best, and a beautifully painted surface can make all the difference. However, oil-based paints can be a bit of a challenge when it comes to cleaning and maintenance. How can we keep these surfaces looking their best without damaging them? Well, fear not because we’ve got you covered. In this article, we will walk you through the best ways to clean and maintain your oil-based painted surfaces, step-by-step, so you can keep your home looking its best. So, let’s dive in and gather the necessary tools to get started.
Gather the Right Tools

When it comes to cleaning and maintaining oil-based painted surfaces, having the right tools is crucial. You don’t want to risk damaging the surface or leaving behind any residue. So, before you start cleaning, make sure you have the appropriate materials on hand. These may include a clean cloth, mild soap, and vinegar. It’s important to gather these items because they will help you to achieve the best results possible without causing harm to the painted surface. If you’re curious about the pros and cons of using oil-based paint in your home, check out our article on the Pros and Cons of Oil-Based Paint in Your Home.
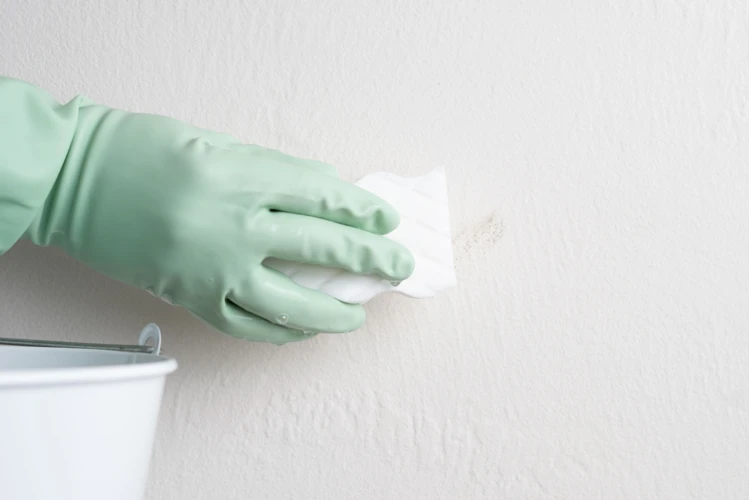
Clean Cloth
Having a clean cloth is essential for cleaning and maintaining oil-based painted surfaces. When selecting a cloth, opt for a lint-free one to avoid any fibers sticking to the paint. Microfiber cloths are an excellent choice for this purpose as they are gentle on the surface and trap dust and dirt particles easily.
Before using the cloth, be sure to dust off any loose debris with a soft-bristled brush. This will prevent any scratches or marks on the painted surface while cleaning.
When using the cloth to clean, avoid using harsh chemicals or abrasive materials that may damage the paint. Instead, dampen the cloth with mild soap or vinegar solution to gently clean the surface.
TIP: Avoid using paper towels for cleaning as they can easily shred and leave tiny pieces on the surface that might be difficult to remove.
By using a clean and appropriate cloth, you can avoid damaging the painted surface and ensure it stays clean and well-maintained for longer periods. For more information on oil-based paint tips and tricks, check out our article on oil-based paint tips.
Mild Soap
When it comes to cleaning and maintaining oil-based painted surfaces, using a mild soap is a safe and effective option. Mild soap is gentle on the painted surface and does not contain harsh chemicals. Follow these steps to effectively use mild soap in cleaning and maintaining oil-based painted surfaces:
- Dilute the soap: To effectively clean the painted surface, dilute a small amount of mild soap in a few cups of warm water. Using too much soap can leave a residue, so be sure to dilute it properly.
- Test the solution: Before applying the soap solution to the entire surface, test it on a small, inconspicuous area first. This will help you ensure that the solution doesn’t cause any damage or discoloration to the painted surface.
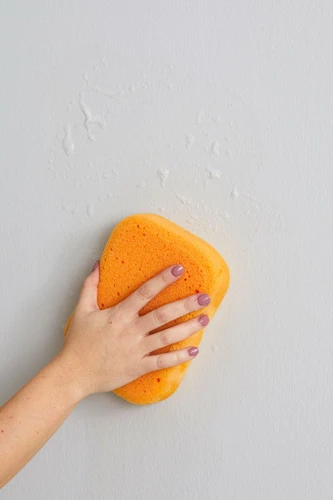
- Apply the solution: After diluting the soap and testing it on a small area, it’s time to apply the solution. Dip a clean cloth in the solution and gently rub it on the painted surface. Be sure to avoid using abrasive cloths or sponges that can scratch the surface.
- Rinse the surface: After cleaning the surface, rinse it thoroughly with clean water to remove any soap residue. Be sure to dry the surface completely with a clean, dry cloth after rinsing.
- Avoid using too much water: While it’s important to rinse the surface after cleaning, too much water can be harmful to oil-based painted surfaces. Avoid letting water pool or seep into cracks or crevices.
Using a mild soap can help you effectively clean and maintain your oil-based painted surfaces without causing damage or discoloration. However, it’s important to use it properly and in moderation. Using too much soap or water can damage the paint, so always dilute the soap properly and avoid using too much water.
Vinegar
Vinegar is an excellent natural cleaner that can be used to clean and maintain oil-based painted surfaces. It is a mild acid that can cut through grease and grime effectively. Vinegar is also a great natural deodorizer and can eliminate any unpleasant odors from the surface.
Here are some ways you can use vinegar to clean and maintain oil-based painted surfaces:
1. Cleaning greasy surfaces: Mix equal parts of white vinegar and warm water to create a cleaning solution. Dip a clean cloth in the solution and wring it out. Use the damp cloth to wipe down greasy surfaces, such as kitchen cabinets, backsplashes, and countertops.
2. Removing grime: To remove stubborn grime or stains from the surface, mix 1/4 cup of vinegar with 1/4 cup of baking soda to create a paste. Apply the paste to the stained area and let it sit for 10-15 minutes. Then, scrub the surface with a soft brush and rinse with clean water.
3. Cleaning brushes: Vinegar can also be used to clean oil-based paint brushes. Pour white vinegar into a container and dip the brushes into the vinegar. Let them soak for several minutes, then rinse with clean water. This will help break down any dried paint on the brushes and make them easier to clean.
4. Removing paint odors: If you’ve recently painted a room with oil-based paint, the strong paint odor can linger for several days. To eliminate the odor, place a bowl of vinegar in the room overnight. The next day, the room should smell fresh and clean.
Vinegar is an eco-friendly and effective cleaner for maintaining oil-based painted surfaces. It’s important to note that vinegar should never be used on marble or granite surfaces as it can etch or damage the surface.
If you want to learn more about oil-based paint, check out our article on 5 Benefits of Oil Paint.
Pre-Cleaning
Before diving into the process of cleaning and maintaining your oil-based painted surfaces, it’s important to prepare them for the actual cleaning. Pre-cleaning is a crucial step that should not be skipped. This step will entail removing dirt and dust, as well as any stains or peeling paint. Depending on the state of your painted surfaces, pre-cleaning may take a little extra effort, but it will make the actual cleaning easier and more effective. You can also follow a few important tips for drying oil-based paint during the pre-cleaning process, ensuring you don’t damage the paint. Learn more about the drying process of oil paint to ensure you take appropriate measures during this important cleaning step.
Dust and Vacuum
Before beginning the cleaning process, it’s important to pre-clean the painted surfaces to remove any loose dust or debris. This will ensure that the surfaces are properly cleaned without damaging the paint.
Dust and Vacuum: The first step in pre-cleaning is to dust and vacuum the painted surfaces. Use a soft-bristled brush or a dust cloth to gently remove all loose dust from the surface. Be careful not to press too hard, as this can cause scratches on the surface.
Once the loose dust is removed, use a vacuum cleaner with a brush attachment to vacuum the surface. This will help to remove any remaining dust or debris from the surface. Make sure to use a soft-bristled brush attachment, as a hard-bristled brush can scratch the surface.
It’s important to note that lead-based paint may be present in older homes, particularly those built before 1978. If you suspect that your painted surfaces may contain lead-based paint, it’s important to take proper precautions, such as wearing a NIOSH-approved respirator and using a vacuum equipped with a HEPA filter. For more information on working with lead paint, check out our article on working with lead paint.
By dusting and vacuuming the surfaces, you are removing any loose contaminants that could interfere with the cleaning process. This ensures that the surfaces are properly cleaned and ready for the next steps.
Remove Stains and Marks
Removing stains and marks from oil-based painted surfaces requires a gentle but effective approach. It is important to choose the right cleaning materials and method so as not to damage the paint. Here are some ways to remove stains and marks from oil-based painted surfaces:
| Stain/Mark | Cleaning Solution | Method |
|---|---|---|
| Grease and Oil Stains | Mild Soap and Water |
1. Combine mild soap with water. 2. Dip a clean cloth in the solution and wring it out. 3. Gently scrub the stained area with the damp cloth. 4. Rinse the area with clean water and dry with a cloth. |
| Water Stains | Vinegar |
1. Mix equal parts of vinegar and water in a bowl. 2. Dip a clean cloth in the solution and wring it out. 3. Gently scrub the stained area with the damp cloth. 4. Rinse the area with clean water and dry with a cloth. |
| Fingerprints and Smudges | Mild Soap and Water |
1. Combine mild soap with water. 2. Dip a clean cloth in the solution and wring it out. 3. Gently wipe the marked area with the damp cloth. 4. Rinse the area with clean water and dry with a cloth. |
It is important to note that harsh chemicals or abrasives should not be used on painted surfaces, as they can damage the paint. For tougher stains such as ink or rust, it’s best to consult a professional.
If you want to learn more about removing oil-based paint, check out our detailed guide here. Or if you want to learn about the environmental impact of oil paint, read our article here. Additionally, if you are interested in exploring different types of paint, we offer some tips on oil paint versus other types of paint and tips for choosing oil paint colors.
Scrape Peeling Paint
When dealing with oil-based painted surfaces, it is crucial to take care of any peeling paint as soon as possible. If left unattended, the peeling paint can lead to more significant problems, such as water damage or mold growth. Here’s how to scrape peeling paint:
| Step 1: | Identify peeling paint areas by visually examining the surfaces. Use a scraper to test areas that appear to be peeling. |
| Step 2: | Clean the affected area with a clean cloth dipped in warm, soapy water or vinegar solution. Rinse the area with warm water and let it dry. |
| Step 3: | Use a putty knife or scraper to scrape off any loose or peeling paint. Be careful not to apply too much pressure and accidentally scratch or gouge the surface. |
| Step 4: | Smooth out the surface by sanding it lightly with fine-grit sandpaper. Sand in the direction of the wood grain to avoid scratches. |
| Step 5: | Clean the sanded area with a clean cloth to remove any dust or debris. Then, prime and paint the repaired area to match the rest of the surface. |
By following these steps, you can effectively remove any peeling paint and prevent further damage to your oil-based painted surfaces. It’s important to always wear protective gear, such as gloves and a mask, when working with paint and solvents.
Cleaning and Maintenance
Now that you have pre-cleaned the oil-based painted surfaces and gathered the necessary tools, it’s time to move onto the crucial step of cleaning and maintenance. This step is vital in maintaining the quality and longevity of the paint. Without proper care and attention, the paint can become dull, stained, and susceptible to damage. By following the steps below and staying consistent with your cleaning routine, you can keep your oil-based painted surfaces looking vibrant and fresh for years to come.
Wash the Surfaces
To effectively clean oil-based painted surfaces, it’s important to properly wash the surfaces using the right methods and materials. Here are the steps to follow:
| Step 1: | Fill a bucket with warm water and add a few drops of mild soap. |
| Step 2: | Using a clean cloth soaked in the soapy water, gently scrub the painted surface. Be sure to work in small sections at a time so the soap doesn’t dry and leave streaks. |
| Step 3: | Rinse the cloth frequently to avoid spreading dirt and grime around. |
| Step 4: | If your painted surface is particularly dirty or stained, you can add a small amount of vinegar to the mixture. The vinegar cuts through grease and grime and helps to remove stubborn stains. |
| Step 5: | Once you’ve finished scrubbing the entire surface, use a clean cloth and fresh water to rinse away any soap or vinegar residue. |
| Step 6: | Dry the surface thoroughly with a clean, dry cloth to prevent water damage or streaks. |
It’s important to avoid using abrasive materials or harsh chemicals when cleaning oil-based painted surfaces, as they can damage the paint and cause discoloration or peeling. By following these simple steps and regularly cleaning and maintaining your painted surfaces, you can keep them looking their best for years to come.
Remove Stains and Marks
One of the most common issues with oil-based painted surfaces is the appearance of stains and marks over time. These blemishes not only ruin the aesthetic appeal of your surfaces, but they can also cause them to deteriorate faster. Here’s how to remove stains and marks from your oil-based painted surfaces:
| Stain/Mark | Solution |
| Oil or Grease | Mix water and dish soap to create a lather, then apply to the affected area using a sponge. Rinse with water and dry. |
| Water Stains | Make a paste by combining baking soda and water, then apply to the affected area using a cloth. Let sit for a few hours before wiping clean with a damp cloth. |
| Scuff Marks | Apply a small amount of toothpaste to a damp sponge, then gently rub the affected area in a circular motion. Rinse with water and dry. |
| Crayon or Marker | Use a cloth dabbed in rubbing alcohol to scrub the affected area. Avoid using too much pressure as it may damage the paint, and always test a small, inconspicuous area first. |
By following these simple solutions, you can easily remove stains and marks from your oil-based painted surfaces without causing any damage to your surfaces. Remember to always test any cleaning solution in a small, inconspicuous area first to ensure it won’t damage your paint.
Prevent Water Damage
Water can be a major threat to oil-based painted surfaces, as it can cause the paint to peel or even break down completely if not addressed promptly. To prevent water damage, there are several steps you can take:
- Avoid excessive moisture: One way to prevent water damage is to avoid excessive moisture in the first place. Keep an eye out for leaks, and fix them as soon as possible. Use a dehumidifier in areas that tend to be humid, such as the basement or attic.
- Seal the surface: Another way to prevent water damage is to seal the painted surface. Apply a layer of clear sealant over the top of the paint to protect it from moisture. Be sure to choose a sealant that is compatible with oil-based paint.
- Repaint as necessary: If you notice any areas where the paint is peeling or cracking, it’s important to fix them as soon as possible to prevent water from seeping through. Scrape off any loose paint, sand the surface smooth, and repaint the area.
- Be careful with cleaning: When cleaning your painted surfaces, avoid using excessive water. Use a damp cloth or sponge rather than a soaking wet one. Avoid using abrasive cleaners that can wear away the paint.
By taking these steps to prevent water damage, you can help ensure that your oil-based painted surfaces stay looking great for years to come.
Special Considerations

As you dive into the task of cleaning and maintaining your oil-based painted surfaces, it’s important to keep in mind that there are certain special considerations you may need to take into account. These considerations can range from the type of paint used to the potential presence of lead or chalk. It’s crucial to approach these situations with care, so let’s take a closer look at what you need to know to handle these special circumstances.
Working with Lead Paint
When working with lead paint, it is important to take special precautions to prevent lead poisoning. Follow these tips to stay safe while cleaning and maintaining lead-painted surfaces:
- Wear protective gear: Always wear gloves, goggles, and a respirator mask when working with lead paint. This will help prevent you from inhaling or coming into contact with any harmful particles.
- Avoid dry scraping: Dry scraping lead paint can release toxic dust into the air. Instead, wet the surface with a mixture of water and mild soap before scraping.
- Clean up safely: Dispose of any contaminated materials (such as rags and sponges) in a sealed plastic bag. Thoroughly wash your tools and work area with a mixture of water and mild soap. Then wipe everything down with a wet cloth to ensure there is no dust or debris left behind.
- Consider consulting a professional: If you are unsure of how to safely clean or make repairs to a lead-painted surface, it is always best to seek help from a professional.
By following these guidelines, you can clean and maintain lead-painted surfaces without putting yourself or others at risk. Remember to always prioritize safety when working with any hazardous materials.
Working with Chalk Paint
When it comes to cleaning and maintaining surfaces painted with chalk paint, there are a few things to keep in mind.
1. Avoid Harsh Cleaners: Chalk paint can be quite fragile and easily damaged, so it’s important to avoid harsh or abrasive cleaners. Stick to gentle, non-abrasive cleaners like mild soap and water.
2. Be Gentle: When cleaning chalk paint, it’s important to be gentle. Avoid scrubbing too hard or using abrasive scrubbers that can scratch or damage the surface.
3. Use a Soft Cloth: When cleaning chalk paint, use a soft cloth or sponge to avoid damaging the surface. Microfiber cloths are a great option as they are gentle and non-abrasive.
4. Protect the Surface: To protect your chalk painted surfaces, consider applying a clear wax or sealer. This will help protect the paint from damage and make it easier to clean in the future.
If you’re working with chalk painted surfaces, remember to be gentle, avoid harsh cleaners and protect the surface with a clear wax or sealer. With these tips in mind, you can keep your chalk painted surfaces looking beautiful for years to come.
How Often Should You Clean?
Maintaining the cleanliness of oil-based painted surfaces depends on various factors. One of the most critical factors is the level of exposure to external impacts like dust, grime, and extreme weather conditions. If the painted surface is exposed to frequent dirt and grime, it is important to clean it more regularly. On the other hand, if the surface is located in a less exposed area, it may not require frequent cleaning.
Another crucial factor to consider is the type of paint used. Different types of paint have different durability levels and may require different levels of maintenance. For instance, while some types of oil-based paint can withstand harsh weather conditions, others may start peeling off quickly. It is important to check the manufacturer’s guidelines on how often the paint should be cleaned and maintained.
It is generally recommended to clean oil-based painted surfaces once or twice a year as part of routine maintenance. The frequency of cleaning should also depend on the extent of wear and tear visible on the surface. If the surface is looking particularly dirty or stained, it may need to be cleaned more often. It is also important to remember that a regular cleaning routine helps to extend the life of the paint and maintain the overall appearance of the surface.
There is no clear-cut answer to how frequently oil-based painted surfaces should be cleaned. It depends on various factors including the level of exposure, type of paint used, and the extent of wear and tear on the surface. However, a general rule of thumb is to clean the surfaces once or twice a year as part of routine maintenance to keep them looking their best.
Conclusion
In conclusion, maintaining oil-based painted surfaces can seem like a daunting task, but with the right tools and techniques, it can be easily accomplished. It’s important to gather the necessary tools beforehand, including a clean cloth, mild soap, and vinegar. Before beginning the actual cleaning process, it’s important to pre-clean the surfaces by dusting and vacuuming, removing any stains or marks, and scraping away any peeling paint.
Once the pre-cleaning is complete, the real cleaning and maintenance can begin. Simply washing the surfaces with soap and water can go a long way in keeping them clean and looking new. However, for tougher stains and marks, vinegar can be used as a natural and effective cleaner. It’s also important to take steps to prevent water damage, as water can be particularly damaging to paint.
Finally, there are some special considerations to keep in mind when working with certain types of paint, such as lead paint or chalk paint. However, with the right knowledge and precautions, cleaning and maintaining these painted surfaces can be done safely and effectively.
In terms of frequency, it’s generally a good idea to clean and maintain oil-based painted surfaces at least once a year, or more frequently if they are exposed to particularly harsh conditions or wear and tear.
Overall, following these steps and taking the necessary precautions can help keep your oil-based painted surfaces looking beautiful and well-maintained for years to come.
Frequently Asked Questions
Can I use any type of soap to clean oil-based painted surfaces?
No, you should only use a mild soap to clean oil-based painted surfaces. Harsh soaps can damage the paint finish.
How often should I clean and maintain oil-based painted surfaces?
It depends on the level of use and exposure to environmental factors. Generally, you should aim to clean and maintain them at least once every few months.
What should I do if I notice peeling paint on my oil-based painted surfaces?
You should immediately scrape off the peeling paint and sand the affected area. Then, repaint the surface with fresh oil-based paint.
Can I use vinegar to clean oil-based painted surfaces?
Yes, vinegar is a great natural cleaning solution that can effectively remove dirt and grime from oil-based painted surfaces.
What should I do to prevent water damage to my oil-based painted surfaces?
Avoid using too much water when cleaning and be sure to wipe off any excess water immediately. You can also use a waterproof sealant to protect your surfaces from water damage.
How do I know if the paint on my surfaces contains lead?
You can purchase a testing kit at a hardware store or hire a professional to test for lead paint.
Can I use a pressure washer to clean oil-based painted surfaces?
No, pressure washers can be too harsh and damage the paint finish. Stick to using a gentle cleaning solution and cloth.
What should I do if I accidentally spill something on my oil-based painted surfaces?
You should immediately blot up the spill with a clean cloth or paper towel. Then, use a mild soap solution to clean the spot.
Can I use a regular cloth to clean oil-based painted surfaces?
No, it’s important to use a soft, clean cloth that won’t scratch the paint finish. Microfiber cloths are a good option.
Can I use the same cleaning solution for both oil-based and water-based painted surfaces?
No, oil-based and water-based paints require different cleaning solutions. Always use the appropriate cleaning solution for the type of paint on your surfaces.