Introduction
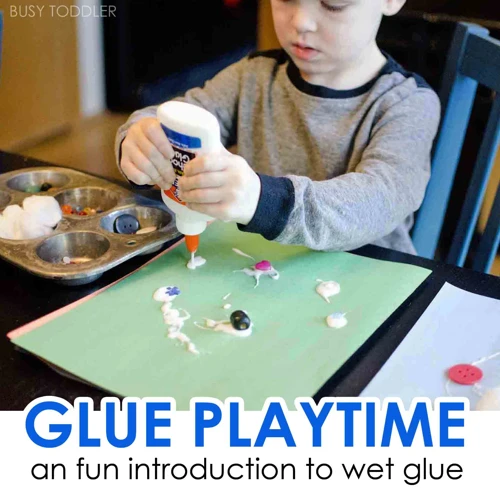
When it comes to decorating and protecting buildings with strong, lightweight, and durable materials, FRP panels are a popular choice for architects and contractors alike. However, securing these panels in place requires proper gluing techniques. In this guide, we’ll take a closer look at the step-by-step process of gluing FRP panels and explore the different types of adhesives available. With the right tools and knowledge, you can ensure a secure and long-lasting installation for your FRP panels.
What are FRP panels?
FRP panels, also known as Fiberglass Reinforced Panels or Fiberglass Reinforced Plastic panels, are a type of composite material widely used in construction, particularly in areas where high strength and durability are required.
FRP panels consist of a thermoset resin matrix reinforced with fiberglass. The fiberglass gives the material its strength and stiffness, while the resin matrix binds the fibers together and provides protection against moisture and other environmental factors.
Benefits of FRP Panels
FRP panels have many advantages over traditional materials like wood, metal, and concrete. Some of the benefits of FRP panels include:
- High strength-to-weight ratio
- Resistance to corrosion, chemicals, and UV rays
- Low maintenance requirements
- Easy to install and fabricate
- Excellent thermal and sound insulation properties
Applications of FRP Panels
Thanks to their unique combination of strength, durability, and versatility, FRP panels have a wide range of applications in various industries. Some of the common uses of FRP panels include:
- Wall and ceiling panels in healthcare facilities, laboratories, and food processing plants
- Roofing and skylights in commercial buildings and greenhouses
- Exterior cladding in residential and commercial construction
- Decking and flooring in industrial and marine environments
- Recreational equipment, like boats and campers
FRP panels are an excellent choice for applications that require a combination of strength, durability, and aesthetic appeal. They are available in a variety of colors and finishes, making them an ideal choice for both functional and decorative purposes.
If you’re interested in learning how to glue FRP panels, check out our step-by-step guide below. And if you’re looking for more information on other types of adhesives, such as E6000 glue or polyurethane glue, check out our guides on E6000 glue or strong adhesive options.
Why is gluing important?
Gluing is important in attaining a solid bond between FRP panels and the substrate. Without a strong bond, the panels may eventually become loose or even fall off, leading to expensive repairs. Using the right adhesive can make all the difference in the success of the project. Here are some reasons why gluing is important in FRP panel installations:
| Reason: | Description: |
|---|---|
| Strong Bond | Gluing the FRP panels to the substrate creates a strong bond which keeps them firmly in place. This bond is essential for any location where the panels may be subject to stress or strain. |
| Water Resistance | Water-resistant adhesives keep the panels in place even in damp areas such as bathrooms or kitchens. The adhesive creates a barrier between the panels and the substrate, preventing water from seeping in and causing damage. |
| Stability | Gluing the FRP panels to the substrate creates stability in the installation. Once the adhesive has cured, the panels become a single piece, eliminating the possibility of individual panels shifting or moving out of alignment. |
| Extended Life | Using the proper adhesive can extend the life of the installation. A strong adhesive prevents moisture and other contaminants from getting behind the panels, which can lead to deterioration and damage of the substrate over time. |
Taking the time to select the right adhesive and properly following the gluing process is an essential step in ensuring a successful FRP panel installation.
Types of Adhesives
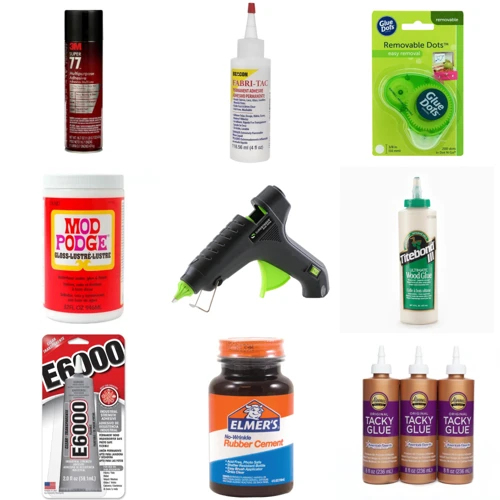
When it comes to FRP paneling, selecting the right adhesive is crucial for achieving a strong and durable bond. There are various types of adhesives available on the market, each serving a specific purpose. Depending on the FRP panel’s application and the surface it will be glued to, you’ll need to choose the adhesive that best suits your needs. In this section, we’ll go over the different types of adhesives you can use to glue FRP panels and their benefits to help you make the right decision. Whether you have experience gluing wood at a 90-degree angle, brass, broken plastic, or even sandstone, the adhesive you need for FRP panels may be different. Let’s explore the right type of adhesive for FRP paneling.
Epoxy Adhesive
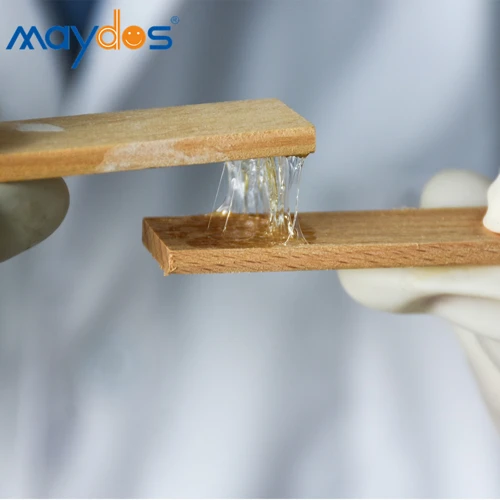
Epoxy adhesive is an excellent choice for bonding FRP panels together due to its strong bonding strength. Epoxy adhesive is made up of two parts: a resin and a hardener, which must be mixed together in order to activate the adhesive properties. The curing process begins when the two parts are mixed together and can vary in time, with some adhesives fully curing in as little as 5 minutes.
One of the benefits of using epoxy adhesive is that it can be easily applied to surfaces with a brush or a roller. This adhesive is also very versatile and can be used on both porous and non-porous surfaces. It is also very resistant to chemicals and can be used to bond FRP panels with similar or dissimilar surfaces. If you need to bond FRP panels to a different material, such as metal or wood, you can find helpful instructions on how to do so in our article on how to glue marble to metal or how to glue wood at 90 degree angle.
It is important to note that not all epoxy adhesives are created equal. Some epoxy adhesives can become brittle over time, especially if exposed to UV light. If you are concerned about the longevity of your bond, you may want to consider using an epoxy adhesive that has been specifically formulated for outdoor use, such as marine epoxy. Marine epoxy is specially designed to withstand the harsh outdoor elements and is often used in boat building and repair.
When using epoxy adhesive, it is important to follow the manufacturer’s instructions carefully. Make sure to mix the resin and hardener in the correct proportions and apply the adhesive evenly to both surfaces being bonded. You should also work quickly, as epoxy adhesives begin to cure as soon as they are mixed together. Once you have applied the adhesive, you can clamp the panels together to ensure a strong bond. You can find out more about how to clamp panels together in our article on how to glue countertop.
Epoxy adhesive is an excellent choice for bonding FRP panels due to its strong bonding strength and versatility. By following the manufacturer’s instructions carefully, you can ensure a long-lasting bond that will hold up over time. If you need information about bonding different materials with epoxy, you can read detailed instructions on how to glue brass or how to stitch and glue.
Polyurethane Adhesive
When it comes to selecting an adhesive for FRP panels, polyurethane adhesive is a popular choice among many professionals. It is a versatile adhesive that can bond various materials, including plastics, ceramics, and rubber.
One of the primary benefits of polyurethane adhesive is its waterproof and weather-resistant feature, making it suitable for outdoor applications. It is also resistant to temperatures, making it stable in both high and low temperatures.
This adhesive is available in one or two-part adhesives, which require mixing before use. With a fast curing time, the one-part polyurethane adhesive sets in a relatively shorter time than the others. A two-part polyurethane adhesive offers a stronger bond than the one-part option, albeit taking longer to cure.
However, due to its strong bond, polyurethane adhesive can be challenging to remove, and it can also stain surfaces. It is advisable to take precautions and use gloves when applying the adhesive.
To determine if the polyurethane adhesive is suitable for your FRP panel project, you must consider the type of materials you are bonding and the environmental conditions the panels will be exposed to. Using the wrong adhesive may lead to weak bonds or adhesive failure over time.
| Adhesive Type | Pros | Cons |
|---|---|---|
| Epoxy Adhesive | Strong bond; Resistant to high temperatures; Waterproof | Longer curing time; Requires mixing before use; May discolor over time |
| Polyurethane Adhesive | Fast curing time; Strong bond; Waterproof; Resistant to temperature and weather changes | Difficult to remove; May stain surfaces |
| Acrylic Adhesive | Fast curing time; Good for bonding non-porous surfaces | Weak bond; Not suitable for high-temperature applications |
Polyurethane adhesive is a reliable choice for bonding FRP panels. However, it is crucial to consider the specific needs of your project before selecting an adhesive. If you need to learn more about gluing broken plastic or gluing sandstone together, you can have a look at our guides on how to glue broken plastic or how to glue sandstone together.
Acrylic Adhesive
Acrylic adhesive is another common type of adhesive used for gluing FRP panels. It is a versatile adhesive that offers a strong bond and has a lower odor than other adhesives. Acrylic adhesive is also resistant to water, making it a great choice for panels that will be exposed to moisture.
Advantages:
- Strong bond
- Low odor
- Water-resistant
Acrylic adhesive also has a good resistance to temperature changes and can be used in both high and low temperatures. It can also be used on a variety of surfaces such as metal, wood, concrete, and plastic, making it a versatile adhesive for different applications.
Disadvantages:
- Shorter working time compared to other adhesives
- Requires a clean surface for proper bond
One thing to note is that acrylic adhesive has a shorter working time than other adhesives, meaning it sets quicker once it comes in contact with air. It is important to work quickly and accurately when using acrylic adhesive. Additionally, like all adhesives, it requires a clean surface for proper bonding. Be sure to thoroughly clean and prepare the surface before applying the adhesive.
Acrylic adhesive is a great choice for bonding FRP panels due to its water resistance, versatility, and strong bond. Just be sure to work quickly and accurately, and properly prepare the surface before application.
Preparing the Surface
Before gluing FRP panels, preparing the surface is crucial to ensure a strong and durable bond. You don’t want to go through the trouble of applying adhesive only to have the panels separate later. Taking the time to properly clean, sand, and prime (if desired) the surface will increase the chances of a successful installation. In this section, we’ll walk through the steps of preparing the FRP panel surface for gluing, so you can feel confident in your installation.
Clean the Panels
Before gluing FRP panels, it is important to thoroughly clean the surface to ensure proper adhesion. To begin the cleaning process, gather the following materials:
- Bucket
- Water
- Mild detergent
- Clean cloth or sponge
Step 1: Fill the bucket with warm water and add a few drops of mild detergent.
Step 2: Dip the clean cloth or sponge into the soapy water and gently wipe down the surface of the FRP panel. Be sure to remove any dirt, grease, or debris that may have accumulated on the surface of the panel.
Step 3: Rinse the cloth or sponge in clean water and wipe down the surface of the panel again to remove any leftover soap residue.
Step 4: Rinse the FRP panel with clean water to remove any remaining residue.
Step 5: Dry the surface of the FRP panel with a clean towel. It is important to make sure the surface is completely dry before moving on to the next steps. Any remaining moisture may interfere with the adhesive bonding process.
Properly cleaning the FRP panels before gluing them together is a crucial step in the process. Failure to do so could result in weak bonding and a poor final product. With a few simple steps and the use of mild detergent and water, you can ensure a clean and proper surface to work with.
Sand the Surface
Before applying the adhesive, it is important to properly sand the surface of the FRP panels to ensure a stronger bond. Sanding the surface actually creates a larger surface area, which allows the adhesive to bond better to the panels. Here are some steps to follow when sanding the surface:
- Choose the Correct Sandpaper: The type of sandpaper used will depend on the condition of the panel’s surface. If the surface is smooth, a 120-grit sandpaper is recommended. If the surface has imperfections, use a 80-grit sandpaper first to remove the imperfections, then use the 120-grit sandpaper to smooth.
- Clean the Surface: Before sanding, make sure the surface is clean and free of debris to prevent scratches on the panel’s surface.
- Sand in a Circular Motion: To ensure an even coverage of sanding, use slow, circular motions. Do not sand too hard or too long in one spot, as this can cause damage to the panel’s surface.
- Wipe Clean: After sanding, wipe the surface clean with a damp cloth to remove any dust or debris created during the sanding process.
By properly sanding the surface of FRP panels before applying adhesive, the resulting bond will be stronger and more reliable in the long term. This step may seem small, but it can make a big difference in the overall success of the gluing process.
Prime the Surface (optional)
Before applying adhesive to the FRP panels, it is important to prime the surface. This step is necessary if the FRP panels have a glossy finish, as it helps to improve the adhesion of the adhesive to the panels.
Here are the steps to prime the surface:
- Clean the surface of the FRP panels using a damp cloth to remove any dirt, dust or debris that may be present. Make sure that the surface is completely clean and dry before proceeding.
- Apply a coat of primer to the surface of the FRP panels using a paintbrush or roller. Make sure that the primer is applied evenly and covers the entire surface of the panels.
- Allow the primer to dry completely. This usually takes about 24 hours. Check the manufacturer’s instructions for the exact drying time.
- Sand the surface lightly with fine-grit sandpaper to smooth out any rough spots or imperfections. This will help the adhesive to adhere better to the surface.
It is important to note that priming the surface is an optional step. However, it is recommended if the FRP panels have a glossy finish. Skipping this step might compromise the adhesion of the adhesive to the panels, which can result in the FRP panels coming loose over time.
By taking the time to prime the surface of the FRP panels, you are ensuring that the panels adhere properly to your chosen surface for a long lasting effect.
Applying the Adhesive
Once you have prepared the surface of your FRP panels, it’s time to start applying the adhesive. This is a crucial step in the gluing process, as it determines the bond strength and durability of your panels. It’s important to choose the right adhesive and follow a step-by-step process for applying it correctly. In this section, we’ll dive into the details of how to apply the adhesive to your FRP panels, so that you can achieve a strong and long-lasting bond.
Apply the Adhesive
Before applying the adhesive, it is important to choose the right type of adhesive based on your project needs. As mentioned earlier, there are different types of adhesives, including epoxy, polyurethane, and acrylic adhesives. Once you have chosen the adhesive, it’s time to apply it to the surface. Here are the steps to apply the adhesive:
| Step 1: | Cut the adhesive tube’s nozzle to fit your required bead size and apply the adhesive on the panel’s backside, starting from the center and moving outwards in a spiral motion. |
| Step 2: | Apply the adhesive in a zigzag pattern across the panel’s width with a ¼ inch bead of adhesive, keeping it 1 inch away from the panel’s edges to avoid the adhesive’s squeeze-out. |
| Step 3: | Apply sufficient adhesive on the panel’s perimeter (about 1inch) so that it can spread to create a secure bond with the adjoining panel’s edges. |
| Step 4: | For longer panels, apply a series of beads of adhesive with a gap of 6 inches between each bead. Then create a zigzag pattern on each bead. |
| Step 5: | Do not use too much adhesive that it flows out from the edges, causing a mess. Instead, use a consistent amount and avoid over-applying to lessen waste. |
By following these steps to apply the adhesive, you can achieve optimal adhesion between the FRP panels and the surface, resulting in a strong and secure bond.
Spread the Adhesive
After applying the adhesive to the FRP panels, the next step is to spread it evenly over the surface. This step is crucial to ensure that the panels adhere properly and there are no air pockets between them. Here’s how you can spread the adhesive effectively:
- Use a notched trowel: A notched trowel is the best tool to spread adhesive on FRP panels. It will ensure that the adhesive is spread evenly and consistently. The notches on the trowel help create grooves in the adhesive, which helps to increase the surface area of the adhesive, providing better adhesion.
- Spread the adhesive in one direction: Spread the adhesive in one direction only. Avoid overlapping the adhesive strokes as this can cause air pockets between the panels and will affect the overall strength of the bond.
- Wiggle the panels: Wiggle the panels slightly once they’ve been placed on the surface. This will help the adhesive settle and bond better. Continue to wiggle for a few minutes to ensure that the adhesive has spread properly before clamping the panels together.
- Check for air pockets: After the adhesive has been spread, inspect the surface of the panels for air pockets or voids. If you find any, use a putty knife to push the adhesive into the void. This will eliminate air pockets and ensure better adhesion.
By following these steps, you can spread the adhesive correctly, ensuring that FRP panels are firmly bonded. Remember to work quickly as the adhesive can dry out and become less effective over time.
Clamp the Panels Together
To ensure a strong and secure bond between the FRP panels, the next step after applying the adhesive is to **clamp the panels together** using appropriate tools. Here are some tips to keep in mind when clamping the panels together:
| Tip #1: | Use an adequate number of clamps to hold the panels together. Depending on the size of the panels, it is recommended to use at least one clamp per foot. |
| Tip #2: | Make sure the clamps are evenly spaced along the panels to prevent warping or buckling during the drying process. This is especially important for longer panels. |
| Tip #3: | Apply even pressure to the clamps. Use a clamp with sufficient force to hold the panels together, but be careful not to over-tighten as this can cause the adhesive to squeeze out and create an uneven bond. |
| Tip #4: | Check the alignment of the panels before tightening the clamps. Adjust the position of the panels as necessary to ensure a tight and even fit before applying the clamps. |
| Tip #5: | Remove any excess adhesive that may have squeezed out from between the panels before it dries. This will make sanding and finishing the edges much easier. |
Remember to always follow the adhesive manufacturer’s instructions for clamping time and drying time. This will ensure that the adhesive sets properly and produces a strong bond between the FRP panels.
Drying and Finishing
As we near the end of the FRP panel gluing process, it’s important that we don’t rush the drying and finishing steps. Properly allowing the adhesive to fully dry and providing a neat finish can make all the difference in the final outcome. Let’s explore some tips and tricks for this crucial last stage.
Let the Adhesive Dry
Once you have applied and spread the adhesive on the FRP panels, it is important to let it dry properly in order to achieve a strong and long-lasting bond.
Step 1: Check the instructions provided by the adhesive manufacturer for the proper drying time. It can vary depending on the type of adhesive used.
Step 2: Ensure that the ambient temperature and humidity level match the recommended conditions for the adhesive to dry effectively.
Step 3: Avoid touching or moving the panels until the adhesive has completely dried. This can take anywhere from a few hours to overnight depending on the adhesive and environmental conditions.
Step 4: Once the adhesive is dry, gently remove any excess dried adhesive from the edges of the panels using sandpaper or a razor blade.
Step 5: Inspect the bond to ensure it is strong and secure. If there are any areas where the bond is weak, apply more adhesive and allow it to dry again.
Properly letting the adhesive dry is crucial in ensuring a successful and long-lasting FRP panel installation. Rushing the drying process or applying too little adhesive can lead to a weak bond and cause the panels to come loose over time.
Sand the Edges
After the adhesive has dried, it’s time to sand the edges of the FRP panels to ensure a smooth and even finish. This step is crucial for achieving a professional-looking end result. Sanding is also necessary to remove any excess or stray adhesive that may have seeped out during the gluing process.
Here’s how to sand the edges of the FRP panels:
- Step 1: Start by attaching a fine-grit sandpaper to a sanding block. A sanding block will ensure that the sandpaper is applied evenly to the surface, preventing any uneven sanding that could cause further damage to the panel.
- Step 2: Hold the sanding block at a 45-degree angle and begin sanding the edges of the panels in a back and forth motion.
- Step 3: Be sure to sand the edges of the panels lightly, as excessive sanding could damage the panel’s finish or cause unevenness.
- Step 4: When you’re finished sanding, wipe the edges of the panels clean with a damp cloth to remove any dust or debris.
When sanding the edges of FRP panels, it’s important to proceed with caution and to be deliberate in your strokes to avoid damaging the surface. Remember to use a light touch and a fine-grit sandpaper to achieve the best results.
Once the sanding process is complete, you can move on to the final step of finishing the panels with sealant if desired. This optional step can help to further protect the panels and enhance their appearance.
Apply Sealant (optional)
Applying sealant to your FRP panels is an optional step but highly recommended. It helps protect the panels from moisture and other environmental factors that may cause damage. Sealant also keeps the adhesive in place and adds an extra layer of strength.
When selecting a sealant, make sure it is compatible with your adhesive and FRP panel material. Silicone sealant is a popular choice because it is waterproof, flexible, and durable. However, it may not be suitable for all types of FRP panels and adhesives. Consult with the manufacturer’s instructions before selecting a sealant.
Apply the Sealant
Once the adhesive has completely dried, you can begin applying the sealant. Here are the steps to follow:
- Clean the surfaces where you will be applying the sealant. Ensure that they are free from dust, debris, and any other contaminants.
- Cut the tip of the sealant tube at a 45-degree angle using a sharp pair of scissors. Make the hole slightly smaller than the gap you want to fill.
- Insert the tube of sealant into a caulking gun and squeeze a small amount onto the surface. Work in small sections to ensure that the sealant does not dry before you can spread it.
- Use a sealant spreader or your finger to smooth the sealant into the gap. Make sure that the sealant is evenly distributed and fills the entire gap.
- Remove any excess sealant using a damp cloth or paper towel.
Sand the Edges
Once the sealant has dried, you can sand the edges of the FRP panels to ensure a smooth surface. Use a fine-grit sandpaper and work in a gentle circular motion. Be careful not to sand too much or you may damage the sealant.
Benefits of Sealant
Applying sealant to your FRP panels provides numerous benefits. It helps prevent moisture from penetrating the surface, which can cause damage over time. Sealant also protects the adhesive from damage and adds an extra layer of strength and durability to the panels. Plus, it provides a finished look to your project by filling any gaps and creating a smooth surface.
Applying sealant to your FRP panels is highly recommended, but it’s optional. However, it provides numerous benefits and adds an extra layer of protection and durability to your project. Always consult with the manufacturer’s instructions before selecting your sealant and be sure to follow the proper application techniques to ensure success.
Conclusion
As we conclude this step-by-step guide, it’s important to highlight the benefits of properly glued FRP panels. By following the outlined process, your panels will be securely attached, ensuring durability and longevity. Moreover, the finished product will have a clean and professional appearance that enhances the aesthetics of any room. Let’s delve deeper into the advantages of using our recommended adhesives and surface preparation techniques for glueing FRP panels.
Benefits of Properly Glued FRP Panels
Properly gluing FRP panels has several benefits that make it a popular choice for construction and renovation projects. Here are some of the key benefits:
| Benefit | Description |
|---|---|
| Waterproofing | FRP panels are naturally waterproof and when properly glued, the seam between two panels becomes just as waterproof. This makes FRP panels an excellent choice for bathrooms, kitchens, and other damp areas. |
| Durability | Once properly glued, FRP panels form a nearly indestructible bond. This means they can withstand heavy use and abuse, making them perfect for commercial spaces or areas with high traffic. |
| Easy to Clean | Properly sealed FRP panels have a smooth surface that is easy to clean and resists the growth of mildew and mold. This makes FRP panels a hygienic and low-maintenance choice for areas that require frequent cleaning. |
| Versatility | FRP panels can be cut to any shape or size, making them an ideal solution for custom installations. They can also be painted or decorated to match any design scheme. |
| Cost-Effective | FRP panels are a cost-effective solution compared to other building materials like ceramic tiles or stone. They also require less maintenance, saving you money in the long run. |
Properly glued FRP panels are a highly practical and dependable option for areas that require a durable and waterproof surface. Their other benefits, such as low-maintenance and versatility, make them a popular choice for many types of commercial and residential projects.
Frequently Asked Questions
What is the best adhesive to use for gluing FRP panels?
The best adhesive to use for FRP panels is epoxy adhesive, as it provides a strong and long-lasting bond.
Do I need to sand the surface before applying the adhesive?
Yes, it is important to sand the surface before applying the adhesive, as it will help create a better bond between the panels and the adhesive.
Can I use any type of sealant?
No, it is important to use a sealant that is compatible with the adhesive used, to ensure a proper bond and prevent any damage to the panels or adhesive.
How long should I let the adhesive dry before removing the clamps?
The drying time depends on the adhesive used, but generally, it is recommended to let the adhesive dry for at least 24 hours before removing the clamps.
Do I need to prime the surface before gluing the panels?
Priming the surface is optional, but it can help improve the bond between the panels and the adhesive, especially if the surface is porous.
Can I glue FRP panels to any surface?
FRP panels can be glued to most surfaces, but it is important to ensure that the surface is clean, dry and free of any dust, grease or debris.
Can I use a hair dryer to speed up the drying process?
No, it is not recommended to use a hair dryer or any other source of heat to speed up the drying process, as it can affect the quality of the bond between the panels and the adhesive.
Can I paint FRP panels after gluing them?
Yes, FRP panels can be painted after gluing them, but it is important to use a paint that is compatible with the adhesive and the sealant used, to avoid any damage to the panels or the bond.
Do I need to wear gloves when applying the adhesive?
Yes, it is recommended to wear gloves when applying the adhesive, to avoid any skin irritation or allergic reaction, and to ensure proper hygiene.
Do I need to use a specific type of clamp?
No, any type of clamp can be used, as long as it is strong enough to hold the panels together and apply enough pressure to ensure a proper bond.