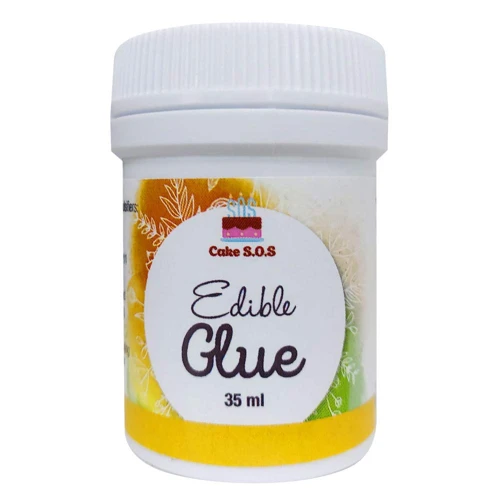
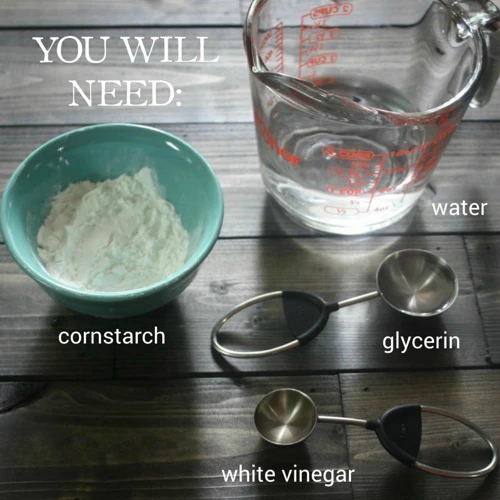
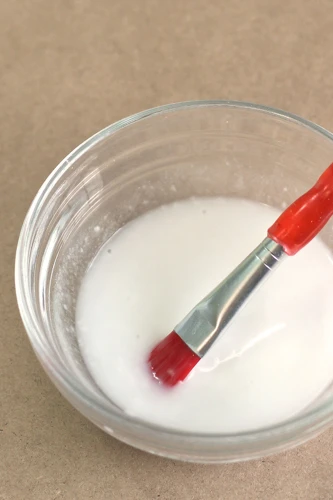
As a sweet tree connoisseur or just a casual foodie, you may have come across a need for edible glue to create your perfect edible art. Making edible glue at home can be a daunting task, but fear not! This complete guide will provide you with all the necessary information to create the perfect edible glue for your sweet trees. From safety measures to troubleshooting tips, we have got you covered. So, grab your apron and let’s explore the world of edible glue together.
Why Choose Edible Glue?
Are you in search of a reliable adhesive for your sweet trees? Look no further than edible glue! Using edible glue for your sweet tree creations is a fantastic choice for both safety reasons and aesthetics. Unlike other types of glue that may contain harmful chemicals, edible glue is completely safe to consume. Plus, it’s transparent and dries clear, making it a great choice for creating a seamless and professional-looking finish. In this article, we’ll provide a complete guide on how to make edible glue for sweet trees, so you’ll have all the information you need to create the perfect adhesive for your creations. Want to learn more about other types of glue you can make at home? Check out our guide on how to make body glue.
Safety First
When it comes to creating any kind of food item, safety should always be your top priority. This is especially true when it comes to making edible glue for sweet trees. While the ingredients used to make the glue are generally safe for consumption in small amounts, it’s important to take some precautionary measures to ensure that the glue is prepared and stored correctly.
Here are some safety tips to keep in mind when making and using edible glue for sweet trees:
| Safety Tip | Description |
|---|---|
| Wash Your Hands | Before you start making the glue, make sure to wash your hands thoroughly with soap and warm water. This will help remove any dirt, germs, or bacteria that could contaminate your glue. |
| Use Food-Grade Ingredients | This should go without saying, but make sure to use only food-grade ingredients when making edible glue for sweet trees. This means using items like confectioner’s sugar and water, rather than non-food-grade adhesives like regular school glue. |
| Avoid Cross-Contamination | When making and storing your edible glue, keep it separate from any non-food items or cleaning products. This will help prevent cross-contamination and ensure that your glue stays safe to use. |
| Store the Glue in the Fridge | Once you’ve made your edible glue, store it in a sealed container in the fridge. This will help prevent the growth of bacteria or mold, and extend the shelf life of your glue. |
| Be Careful When Using Glue with Children | If you’re using edible glue with children, make sure to closely supervise them to avoid any accidents. Young children may be tempted to eat the glue, so be sure to explain that the glue is only for use on the sweet tree. |
By following these safety tips, you can ensure that your edible glue is safe to use and free from contaminants. If you’re unsure about any aspect of the glue-making process, refer to our guide on making glue with sugar and water for more information.
Aesthetics Matter
When it comes to creating sweet trees, aesthetics matter just as much as taste. Your tree should not only be delicious, but also visually appealing to those who see it. Edible glue helps you achieve the perfect look for your sweet tree, as it can be used to securely attach a variety of candies and treats to the branches.
Using edible glue allows for a seamless and professional look, as opposed to using other alternatives such as regular glue or tape. These options not only look unappetizing, but they can also be harmful if accidentally ingested.
To make your sweet tree stand out, experiment with various shapes and sizes of candies, and don’t be afraid to mix different colors and textures to create a visually stunning display. Consider using hard candies, gumdrops, chocolate balls, and even lollipops for a fun twist.
Remember to always follow safety guidelines when creating your sweet tree, including wearing gloves and only using edible ingredients. With the right combination of taste and aesthetics, you can create a sweet tree that is not only delicious, but also a work of art.
To explore more fun and creative crafting ideas with glue, try visiting our other guides such as How to Make Slime with Just Water and Glue, How to Make Cheesecloth Ghosts with Glue, and How to Make Glue Balls.
Ingredients Needed
When it comes to making edible glue for sweet trees, the ingredients used are all edible and safe for consumption. Here are the ingredients needed to make a batch of edible glue:
- Tylose Powder: This is a plant-based product that is used in the food industry as a thickener and binding agent. It allows the glue to dry faster and become stronger over time.
- Water: Water is the primary liquid used in the recipe. It helps to dissolve the Tylose powder and create a smooth, sticky glue.
- Light Corn Syrup: This syrup is a sweetener that adds a bit of stickiness to the glue, making it easier to work with.
- Food Coloring: If you want to add color to your sweet tree, you can use a few drops of food coloring. Gel-based food coloring works best because it doesn’t affect the consistency of the glue.
It’s important to note that the type of glue you make depends on the project you’re working on. For example, if you’re making a slime recipe, you may use different ingredients such as glue and borax instead of Tylose powder. If you’re interested in making other types of glue, check out these recipes for goo with glue and soap, slime with baby powder and glue, or eraser putty with glue.
Tools Required
To make edible glue for sweet trees, it is essential to have certain tools on hand. Some of the basic tools required for this recipe include a mixing bowl, whisk, spoon, and airtight container. It is important to use food-grade tools to ensure the safety of the final product.
One essential tool required for making edible glue is a food processor. A food processor is used to grind down the ingredients into a fine powder. This will make it much easier to mix the ingredients together and ensure that the glue has a smooth, even consistency.
Another important tool is a spray bottle. This is used to mix the ingredients in the right proportions and also for transferring the glue to the sweet trees. The spray bottle helps in creating an even, thin layer of glue on the sweet tree, which helps the sweets and candies adhere better.
A baking brush or a small paintbrush can be used as an alternative to a spray bottle for applying the edible glue. However, using a baking brush or paintbrush can be a bit tricky, as it can be difficult to apply the glue evenly across the surface of your sweet trees.
Lastly, make sure to have a clean and sanitized workspace, as well as clean tools, to avoid contamination of the edible glue. Using contaminated tools or a dirty workspace can ruin your final product and pose a health risk.
If you want to try out some other DIY projects, you can learn how to make a piñata with a balloon and glue or how to make liquid latex with Elmer’s glue by following the respective links.
The Recipe
Preparing edible glue for sweet trees is an important aspect of the dessert-making process. The recipe for this versatile glue is easy to follow and requires only a few ingredients and tools that you can easily obtain. When you’re able to make edible glue at home, you eliminate the need to purchase expensive ready-to-use glue which can often contain artificial ingredients. Plus, you have control over the consistency, color, and taste of your glue. In the following section, we will provide you with the step-by-step instructions to make your very own edible glue. But before we get to that, let’s discuss the ingredients and tools you’ll need for the recipe. You may also be interested in learning how to make a piñata with glue or how to make liquid latex with Elmer’s glue.
Step-by-step Instructions
Here are the step-by-step instructions for making edible glue for sweet trees:
| Step 1: | Measure out 1 cup of confectioner’s sugar and add it to a bowl. |
| Step 2: | Add 2 tablespoons of warm water to the bowl and mix with a whisk. |
| Step 3: | If the mixture seems too thick, add a few more drops of water until it reaches the desired consistency. |
| Step 4: | Add a few drops of food coloring if desired and mix well. |
| Step 5: | Transfer the edible glue to a squeeze bottle or piping bag for easy use. |
It is important to note that the consistency of the edible glue may vary depending on the humidity and temperature in the room. If the glue becomes too thick or dry, add a few more drops of water to thin it out. Similarly, if the glue becomes too runny, add more confectioner’s sugar to thicken it up.
Once you have made the edible glue, it is important to use it within a few hours to ensure the best results. To store any unused glue, transfer it to an airtight container and keep it in the refrigerator. Before using it again, allow the glue to come to room temperature and mix well.
By following these simple steps, you will be able to create high-quality edible glue that is perfect for making sweet trees and other confectionery treats.
Storage Tips
Proper storage of your homemade edible glue is crucial for its longevity and effectiveness. Here are some storage tips to ensure the longevity of your edible glue:
- Airtight container: Once you’ve made your edible glue, store it in an airtight container to prevent it from drying out. If the glue is exposed to air, it will lose its adhesive properties.
- Refrigerate the glue: If you plan on storing the glue for a longer period, refrigerating it is recommended. This will keep the glue fresh and prevent it from spoiling.
- Use the glue within two weeks: To ensure that the glue maintains its adhesive properties, it is advisable to use it within two weeks. The longer the glue is stored, the higher the risk of it losing its effectiveness.
- Label the container: It is important to label the container so that you don’t forget what’s inside. Make sure to include the date you made the glue.
Remember that the consistency of the glue can change over time, even with proper storage. If the glue appears to be too thick when you take it out of the storage container, you can add a few drops of water to thin it out. If the glue appears to be too thin, mix in a small amount of powdered sugar to thicken it.
By following these storage tips, you can ensure that your homemade edible glue is always ready for use and maintains its adhesive properties for a longer period.
Troubleshooting
Unfortunately, even the most carefully made edible glue can sometimes run into issues. While it’s frustrating to encounter problems, it’s important to remember that with a few simple adjustments, most issues can be resolved quickly and easily. In this section, we’ll go over some common problems that you may run into while making and using edible glue and provide solutions and alternatives to help you achieve the results you want. So, let’s dive into troubleshooting edible glue!
Common Problems with Edible Glue
Making edible glue for sweet trees may seem like a simple and straightforward process, but sometimes things don’t always go according to plan. Here are some common problems that you may encounter when making edible glue, along with tips on how to solve them:
- Problem: Edible glue is too thin or runny
If your edible glue is too thin or runny, it might not be able to hold the candies or other decorations in place.
Solution: Try adding more powdered sugar to thicken the mixture. You can also try cooking the glue for a longer period of time to evaporate more of the liquid and thicken it up. - Problem: Edible glue is too thick or lumpy
If your edible glue is too thick or lumpy, it can be difficult to spread and use effectively.
Solution: Add a small amount of warm water to the mixture and stir until it reaches the desired consistency. Alternatively, you can strain the glue through a fine mesh sieve to remove any lumps. - Problem: Edible glue dries too quickly
If your edible glue dries too quickly, you might not have enough time to position your decorations before it hardens.
Solution: Try working in smaller sections or batches, and only apply the glue to one area at a time. You can also try adding a small amount of corn syrup to the mixture, which can help to slow down the drying process. - Problem: Edible glue won’t stick to the decorations
If your edible glue won’t stick to the decorations, it can be frustrating and time-consuming to keep trying to apply it.
Solution: Make sure that the decorations are clean and free of any oils or residue. You can also try lightly sanding the surface of the decorations to create a rougher texture for the glue to adhere to.
By being aware of these common problems and solutions, you can ensure that your edible glue is of high quality and helps to create a beautiful and delicious sweet tree.
Solutions and Alternatives
When using edible glue, there may be some common issues that you could encounter during the preparation process. Fortunately, you can fix them by trying out some solutions and alternatives. Here are some of them along with the benefits of using each option:
| Issue | Solution/Alternative |
|---|---|
| The glue is too runny. | Solution: Add more sugar icing to the mixture and stir constantly. |
| The glue is too thick. | Solution: Add a little water, one tablespoon at a time, until you reach the desired consistency. |
| The glue is too sticky. | Solution: Add some cornstarch to the mixture and stir well. |
| The glue is too dry. | Solution: Add a few drops of water to the mixture until you achieve the desired consistency. |
| You don’t have some of the ingredients. | Alternative: You can substitute some of the ingredients. For instance, for sugar icing, you can use melted marshmallows or ready-made royal icing. For corn syrup, you can use honey or golden syrup. |
By trying out these solutions and alternatives, you can prevent the common problems that might negatively affect your sweet tree creation process. Remember to make these changes in small increments until you achieve the desired texture, consistency, and taste.
How to Use Edible Glue for Sweet Trees

After creating your perfect edible glue for your sweet trees, the next step is learning how to use it! Here are some tips and tricks to help you get started:
1. Preparation Is Key
Before you start using the edible glue, make sure you have everything you need on hand. This includes your sweet treats, decorations, and any other tools you may need. You should also make sure your glue is at the right consistency for the job. If it’s too thick, you may struggle to apply it evenly. If it’s too thin, it may not hold the decorations in place.
2. Use a Small Amount of Glue
When using edible glue, less is often more. Use a small amount of glue on each decoration to avoid getting excess glue on your sweet tree. This will help keep your tree looking neat and tidy.
3. Apply Glue to the Right Spot
It’s important to apply the edible glue to the right spot on your sweet tree. You want the decoration to stay in place, but you don’t want the glue to be visible. Make sure you apply the glue to the back of the decoration, or in a spot where it won’t be noticed.
4. Be Patient
Edible glue takes some time to fully set. Don’t try to move your sweet tree too soon, or your decorations may fall off. Give the glue plenty of time to set before handling your sweet tree.
5. Clean Up Any Excess Glue
If you accidentally get excess glue on your sweet tree, don’t worry. You can clean it up easily using a damp cloth or a Q-tip. Just be sure to do this before the glue sets completely.
By following these tips, you’ll be able to use your edible glue to create stunning sweet trees that are sure to impress!
Conclusion
As you wrap up your journey to creating edible glue for sweet trees, you should feel accomplished and well-versed in the technique. The art of creating edible glue may seem difficult at first, but with the right ingredients and tools, it comes together wonderfully.
So, what have we learned here today? We have learned how to make a safe and aesthetically pleasing glue that can bring any sweet tree design to life. We have also learned how to properly store the glue and troubleshoot any potential problems that may arise.
As you move forward with your sweet tree designs, remember the importance of safety and aesthetics when choosing your glue. Using non-toxic, edible glue will ensure that your sweet trees are safe to consume and look as beautiful as they taste.
Expanding beyond sweet trees, you can use this edible glue recipe for a variety of other edible creations. From cake decorating to gingerbread house building, your newfound knowledge of edible glue can take you to new heights in the world of culinary masterpieces.
So, go ahead and get creative! Experiment with different ingredients and colors to design your own unique sweet trees. With your new edible glue recipe, the possibilities are endless. Happy crafting and bon appétit!
Frequently Asked Questions
What is edible glue?
Edible glue is a type of adhesive used for decorating baked goods, made from edible ingredients that won’t harm the person consuming it.
What are the advantages of making your own edible glue?
Making your own edible glue ensures that it is safe to use, cost-effective, and can be customized to your needs.
What are the basic ingredients needed to make edible glue?
The basic ingredients for edible glue include water, tylose powder, and confectioners’ sugar.
What are the tools required for making edible glue?
The tools required for making edible glue include a mixing bowl, whisk, measuring spoons, and an airtight container for storage.
How long does it take to make edible glue?
Making edible glue takes around 10-15 minutes, depending on the recipe you choose to follow.
Can edible glue be stored for a long time?
Yes, if stored properly in an airtight container, edible glue can last for a few weeks at room temperature.
What are the common problems faced while using edible glue?
The common problems faced while using edible glue include clumping, inconsistency, and dryness of the mixture.
What are some alternative options to edible glue?
Some alternative options to edible glue include using royal icing, melted chocolate, or piping gel for decorating baked goods.
Can edible glue be used for any type of baked goods?
Yes, edible glue can be used for any type of baked good, including cakes, cookies, and cupcakes.
Is it safe to consume edible glue?
Yes, edible glue is safe for consumption as it is made from food-grade ingredients that are safe to ingest.


