Introduction
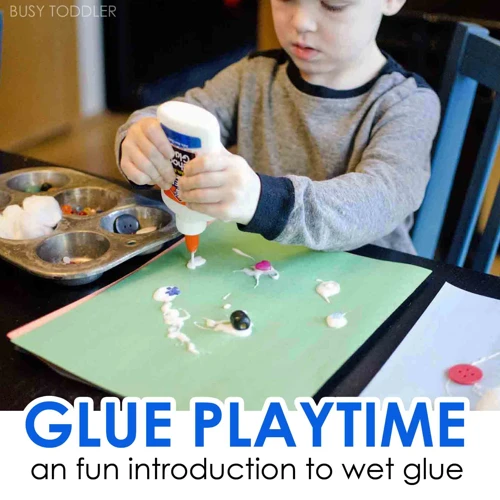
Welcome to our simple DIY guide on how to make goo with glue and water! If you’re looking for a fun and easy activity that will keep both kids and adults entertained for hours, making goo is the perfect solution. The best part is that with just a few household staples, you can create a fascinating sensory experience that is both squishy and stretchy. In this article, we’ll provide you with a step-by-step guide on how to make your own goo, as well as some tips and tricks to make the process go smoothly. Let’s get started!
What is Goo?
Goo is a fascinating substance that can be made using only a few simple ingredients. It is a type of polymer, which means it is made up of long chains of molecules that are bound together. Goo is a non-Newtonian fluid, which means it behaves in a unique way – it can be both a solid and a liquid depending on how it is handled. When subjected to pressure, the long chains of molecules in the goo push against one another, causing the substance to become more solid. Conversely, when there is no pressure, the chains relax and the substance becomes more liquid.
Making goo is a popular DIY project for children and adults alike. It is easy and fun to make and can be a great way to explore the properties of polymers. Goo can be made using a variety of different substances, but the most common recipe involves mixing glue and water. Other ingredients, such as food coloring or glitter, can be added to give the goo a more interesting texture or appearance.
If you’re looking for other fun DIY projects with glue, check out our articles on how to make slime with baby powder and glue, how to make slime with shaving cream and glue, or how to make goo with cornstarch and glue.
Materials Needed

When it comes to making goo, the materials you use can greatly affect the final product. To achieve the best results, it’s important to choose the right glue, water, and additives. In this section, we’ll discuss the materials needed to make your own goo with glue and water. Whether you’re a beginner or an experienced crafter, this guide will help you create goo that’s perfect for sensory play, science experiments, and more. For other fun DIY projects with glue, check out our article on how to make goo with glue and soap.
Glue Options
There are a few glue options when it comes to making goo. The most popular choice is white school glue, commonly known as Elmer’s glue. This type of glue is easy to find, inexpensive, and dries clear. For those who prefer a more natural option, there are also non-toxic and eco-friendly options available. Some choices include:
- Clear Glue: This type of glue is a popular choice for making clear slime. It is typically more expensive than white glue but produces a translucent and glossy finish.
- Glitter Glue: Adding glitter glue to your goo mixture can add some extra sparkle and shine to your finished product.
- Colored Glue: If you want to make your goo in a specific color, using colored glue is a great option. It comes in a variety of colors, from basic primary colors to fun neon shades.
- Wood Glue: While it may not be the most common choice, it is possible to make goo with wood glue. This type of glue is typically stronger and thicker than regular white glue, so it may produce a more rubbery texture.
If you want to experiment with different types of glue, go ahead and try it out! Just keep in mind that the texture and consistency of your goo may vary depending on the glue you choose. For those interested in making homemade glue, check out our article on how to make wood glue at home.
Water Options
When it comes to making goo with glue and water, the type of water you use can affect the consistency of the final product. Distilled water and tap water are two options to consider.
| Water Option | Pros | Cons |
|---|---|---|
| Distilled Water | Contains no minerals or impurities, resulting in a more consistent goo | May not be readily available or may be more expensive than tap water |
| Tap Water | Readily available and cost-effective | May contain minerals or impurities that can affect the consistency of the goo |
It’s important to note that the amount of water used can also impact the consistency of the goo. Generally, a ratio of one part glue to one part water is used, but you can adjust the ratio depending on the desired consistency.
If you want to experiment with different types of goo, you can try using juice or vinegar instead of water. Adding juice can give the goo a fun color and scent, while adding vinegar can make the goo more rubbery. However, it’s important to note that using these alternatives may also impact the consistency of the goo, so be prepared to experiment.
If you’re interested in making other DIY projects with glue, check out our articles on how to make liquid latex with Elmer’s Glue, how to make glue for kids, how to make clay with bread and glue, and how to make a piñata with a balloon and glue. For those who love making slime, we also have an article on how to make slime out of glue and toothpaste.
Additives
Once you have your glue and water ready, it’s time to add some optional additives to your mixture for a different and fun texture. Here are some options to consider:
- Food coloring: If you want to add some color to your goo, add a few drops of food coloring to the glue mixture before adding water. Mix well to ensure the color is evenly distributed.
- Glitter: For some sparkle and shine, add a pinch of glitter to the glue mixture before adding water.
- Baking soda: Adding a small amount of baking soda to your mixture can create a firmer and more rubbery texture. Mix a small amount (about 1/4 teaspoon) of baking soda with the glue before adding water and mix well.
- Salt: Adding salt to your mixture can create a more stretchy and bouncy texture. Mix about 1/4 teaspoon of salt with the water before adding it to the glue mixture and stir well.
- Lotion: Adding a small amount of lotion to your goo can create a softer texture. Mix a small amount (about a pea-sized drop) of lotion with the glue before adding water and mix well.
Remember, these additives are optional and it’s perfectly fine to just stick with glue and water. However, if you decide to add any of these additives, make sure to mix them well with the glue before adding water for the best results.
Step-by-Step Instructions
Assemble your materials and get ready to create your very own batch of goo! Follow along with these step-by-step instructions to achieve the perfect consistency and texture. Don’t worry if you’re new to the process – each step is clearly outlined and easy to follow. Just make sure to take your time and enjoy the process of creating something with your own two hands. Let’s get started!
Step 1: Mix the Glue and Water
Step 1: To make goo with glue and water, the first step is to gather all the necessary materials. You will need one container to mix the ingredients and a measuring cup to get the exact proportions of glue and water.
- Begin by pouring clear or white school glue into the mixing container.
- Make sure to measure the amount of glue you use. A good rule of thumb is to use equal parts of glue and water. So, for example, if you use one cup of glue, you should add one cup of water.
- Adjust the amount of glue and water according to the consistency of the goo you want. If you want a thicker goo, add more glue. If you want a runnier goo, add more water.
- Stir the mixture with a spoon until the two substances are completely mixed.
Note: It’s important to use regular school glue for this recipe and not super glue or any other glue with special formulas, as they will not produce the desired consistency for this goo recipe. Do not use hot water, as it will cause the mixture to clump and coagulate, ruining the texture of the goo.
Step 2: Add Additives (Optional)
The beauty of making goo is that you can personalize it with different additives to create a unique sensory experience. Here are some additives you can add to your goo and how they can enhance the texture and feel of your DIY goo.
- Food Coloring: Add a few drops of food coloring to your glue and water mixture before adding in the activator for colorful goo. You can mix and match colors to create a tie-dye effect.
- Glitter: Add some sparkle to your goo with glitter. Mix in some craft glitter before adding in the activator for a glittery goo that shines in the light.
- Shaving Cream: For fluffy goo, mix in shaving cream before adding in the activator. The shaving cream will create a light and airy texture that is fun to play with. You can even add in some food coloring for colored fluffy goo.
- Essential Oils: Add a few drops of essential oils to your goo for a sensory experience. Lavender essential oil can provide a calming effect, while lemon essential oil can provide an energizing effect.
- Baking Soda: Mix in a little bit of baking soda to create a stretchier goo. This is a great additive to use if you want to create slime instead of goo.
Remember that these additives are optional, and you can adjust the amounts according to your preference. Have fun and get creative with your goo!
Step 3: Stir and Mix Well
Once you have added any desired additives to your glue and water mixture, it’s time to stir and mix well. This is a crucial step in creating the perfect goo consistency.
To effectively stir and mix the ingredients together, consider using a plastic spoon or stick. Avoid using metal utensils as they can react with the glue and cause clumping.
Table 1: Tips for Stirring and Mixing Goo
| Tip | Description |
|---|---|
| Slow and steady wins the race | Avoid mixing too quickly as this can cause air bubbles and a less smooth consistency. Instead, stir slowly and intentionally. |
| Watch for clumps | It’s important to watch carefully while mixing to ensure there are no clumps of glue or additives that haven’t been fully incorporated. |
| Test consistency | As you mix, periodically test the consistency of the goo. This will help you determine if you need to add more water or glue to achieve the desired consistency. |
Continue to stir and mix until the goo mixture is smooth and consistent throughout. This typically takes around 5-10 minutes of constant stirring. Once you’re confident that the goo is thoroughly mixed, it’s ready for play!
It’s also important to note that the goo will continue to thicken over time. If you notice the goo becoming too thick or difficult to manipulate, simply add a small amount of water and stir to re-incorporate. And don’t forget to have fun with your newly created goo!
Step 4: Ready to Play!
After following the previous steps, you should have a perfect batch of goo ready to play with. The final step is to get your hands dirty and enjoy the texture and stretch that this DIY project offers.
One tip before you start playing, make sure to wash your hands to avoid getting dirt or germs in your goo. Then, take a small amount of the goo and start squeezing, squishing, and stretching it. You’ll be amazed at how stretchy and malleable this mixture is!
To make the most out of your playtime, you can try some additives like glitter, food coloring or essential oils. Just a few drops of each can change the look and scent of your goo. Add more glue If your goo feels too sticky. Mix it thoughtfully until it’s firm and not messy.
One trick that you can do with your goo is to make “bubble pops”. To do this, take a small amount of goo and stretch it over the top of a cup or container. Then, blow on the center to create a bubble. Try to make the biggest bubble you can without it popping!
When you’re finished playing, you can store your goo in an airtight container to keep it fresh for future use. It’s important to remember that the texture and consistency of your goo may change over time, so keep an eye on it to make sure it doesn’t dry out.
Making goo with glue and water is a fun and easy DIY project that both kids and adults can enjoy. Remember to follow the steps carefully, use the right materials, and get creative with your additives to make the perfect goo every time.
Tips and Tricks
Now that you’ve successfully made your own goo with glue and water, it’s time to learn some tips and tricks to ensure that your goo-making experience is as smooth and mess-free as possible. Check out the following suggestions to make the most out of your DIY goo adventure. These tips cover everything from cleaning up after your goo session to storing the goo for future playtime. Keep on reading to learn how to maximize your goo-making experience!
Clean Up Tips
Cleaning up after playing with goo made from glue and water is an important step to ensure that your hands and surfaces stay clean. Here are some tips and tricks to help make cleaning up as easy as possible.
| Tip | Explanation |
|---|---|
| Use warm, soapy water | Warm water makes it easier to remove any goo residue from your hands and surfaces. Using soap helps break down the glue mixture, making it easier to clean. |
| Wipe surfaces with a damp cloth | Before using any cleaning solutions, try wiping surfaces with a damp cloth to remove as much residue as possible. This can prevent the need for harsher cleaning solutions. |
| Use vinegar for tougher stains | If warm, soapy water isn’t enough to remove stains, try using vinegar. Vinegar is a natural cleaning solution that can break down glue and goo residues. |
| Keep the area ventilated | If you’re using cleaning solutions, make sure the area is well-ventilated. This can help prevent breathing in any harsh fumes. |
| Don’t use hot water | While warm water is helpful, using hot water can actually make the goo residue more difficult to remove as it can cause it to become more sticky. |
| Wash your hands thoroughly | After playing with goo, make sure you wash your hands thoroughly with warm, soapy water. This will remove any residue and prevent it from transferring onto other surfaces. |
By following these tips, you can make cleaning up after playing with goo as easy and stress-free as possible.
Storage Tips
When it comes to storing your homemade goo, there are a few things to keep in mind to ensure its longevity and playability. Here are some storage tips for you:
- Use an airtight container: Goo can dry out quickly if exposed to air, so make sure to keep it in an airtight container. This can be a plastic container or a resealable bag.
- Store in a cool, dry place: Heat and moisture can also affect the consistency of your goo. Keep it in a cool, dry place, away from direct sunlight and extreme temperatures.
- Label the container: It’s always a good idea to label the container with the date you made the goo and any additives you included. This will help you keep track of how long it’s been since you made it and what ingredients you used.
- Check for mold: Although the goo should last a while without molding, it’s important to check for mold every so often. If you notice any mold, discard the goo and make a fresh batch.
- Add more water if it dries out: If your goo does start to dry out over time, you can revive it by adding a little bit of water and mixing it well. It should return to its original consistency.
By following these storage tips, you can ensure that your homemade goo stays fresh and fun to play with for as long as possible.
Conclusion
In conclusion, making goo with glue and water is a fun and simple DIY project that anyone can do. With just a few materials and easy-to-follow steps, you can create a squishy and entertaining concoction that can provide hours of playtime.
Not only is it a great activity for kids, but it can also be a stress-reliever for adults. The act of squishing and kneading the goo can help relieve tension and promote relaxation.
It’s important to note that while this project is fun, safety precautions should still be taken. Be sure to use non-toxic materials and keep the goo away from any young children or animals who may try to ingest it.
Additionally, clean-up is crucial when making goo. Be sure to clean any utensils and surfaces thoroughly to avoid any sticky messes or damage to your belongings. And when storing the goo, seal it tightly to avoid drying out or becoming too runny.
Overall, making goo with glue and water is a low-cost and entertaining project that can be customized with different additives and colors. Try making different types of goo to compare textures and enjoy the benefits of a stress-relieving DIY activity.
Frequently Asked Questions
Can I use any type of glue for making goo?
While white school glue is the most commonly used, other types of glue such as clear glue, glitter glue, and even wood glue can be used to make goo.
Can I make goo without water?
No, water is a crucial ingredient for making goo. It helps to create the desired slimy consistency and flow.
What type of water should I use?
You can use tap water or distilled water, but it’s recommended to use distilled water to avoid any impurities that may affect the quality of your goo.
What are some common additives that can be used?
Common additives include food coloring, glitter, essential oils, and shaving cream.
Is it safe for kids to play with goo?
As long as the ingredients used are non-toxic and the goo is not ingested, it is safe for kids to play with. However, it’s important to supervise young children during playtime.
Can I store goo after I’ve made it?
Yes, you can store goo in an airtight container and keep it in a cool, dry place. However, it’s important to note that goo may begin to dry out and lose its slimy consistency over time.
What are some common mistakes to avoid when making goo?
Avoid using too much glue or too little water, not stirring the mixture enough, and overloading the mixture with too many additives.
How can I clean up goo if it gets on surfaces?
Use a damp cloth or paper towel to wipe up any excess goo and then wash the area with soap and water.
Can I use goo for educational purposes?
Yes, goo can be a great educational tool for teaching children about science, chemistry, and even math concepts such as measuring and estimating quantities.
What are some fun activities to do with goo?
Kids can play with goo by stretching it, molding it, and even using it to create art. It can also be used for sensory play and stress relief.