Introduction
Painting can be a tedious task, especially when it comes to covering large surfaces. Fortunately, a paint sprayer can make the process quicker and more efficient. However, without the proper knowledge and precautions, using a paint sprayer can be unsafe and lead to unsatisfactory results. In this guide, we will take you through the steps necessary to use a paint sprayer safely and effectively. From preparing your work area to cleaning up afterwards, we have got you covered. Keep reading to learn how to achieve a flawless finish with a paint sprayer.
What is a Paint Sprayer?
A paint sprayer is a device that uses compressed air or high pressure to spray paint or other coating materials onto surfaces. Instead of manually applying paint with a brush or roller, a paint sprayer atomizes the paint into tiny droplets and evenly applies it onto the surface in a fine mist. This allows for faster and more efficient application, as well as a smoother and more uniform finish.
Paint sprayers come in a variety of types and sizes, ranging from handheld models for small DIY projects to larger professional-grade machines for commercial use. Some sprayers use airless technology, while others use compressed air or HVLP (high volume, low pressure) systems. Each type of sprayer has its own advantages and disadvantages, depending on the project and materials being used.
Using a paint sprayer can save time and effort when compared to using traditional painting methods like brushes and rollers. However, it does require a certain level of skill and knowledge to use effectively. It is important to choose the right type of sprayer for your project, properly prep the surface, and follow safety guidelines to prevent accidents or injuries. To learn more about the benefits of using a paint sprayer, check out our article on the benefits of paint sprayers for home projects.
Why Use a Paint Sprayer?
Using a paint sprayer instead of a brush or roller can save you time and give you a smoother finish. Below are some reasons why you might want to use a paint sprayer:
- Faster Application: If you have a large surface to cover, such as a fence or walls, using a paint sprayer can be much faster than a brush or roller. With a sprayer, you can cover a large area in a fraction of the time it would take using traditional methods.
- Smoothing the Surface: If your painting surface has a rough texture or is made of a material that is difficult to cover evenly, using a paint sprayer can help create a smoother surface. The fine mist of paint from the sprayer can more easily reach awkward angles and hard-to-reach spots.
- Even Coverage: A paint sprayer can provide even coverage across the entire surface, whereas a brush or roller may leave drips, uneven coverage, or a textured finish.
- Professional-Looking Finish: Many professionals use paint sprayers to achieve a smooth and seamless finish, making your DIY or professional project stand out.
- Cost-Effective: While the initial cost of a paint sprayer may be higher than brushes or rollers, it can be more cost-effective in the long run. You can save money on paint as using a sprayer typically requires less paint than traditional methods.
If you are new to using a paint sprayer, be sure to check out our Paint Sprayers 101 guide for more information on choosing the right sprayer for your needs and helpful tips and tricks.
Step 1: Preparation
Before you start painting with your sprayer, it’s important to properly prepare your work area and your equipment. This will help ensure that your painting project goes smoothly and produces the best results possible. In this section, we’ll go over the essential preparation steps to take before using your paint sprayer. These include cleaning your sprayer, choosing the right paint, and masking and covering your work area. If you’re not sure how to clean your paint sprayer, we recommend checking out our guide on cleaning your paint sprayer. Additionally, if you’re new to using a paint sprayer, you may want to review our article on DIY paint sprayer techniques or our comparison of paint sprayers versus rollers. Let’s get started with the first step: preparation.
Clean Your Sprayer
Cleaning your paint sprayer before use is essential to ensure proper functioning and prevent any potential issues during painting. Here are the steps to follow:
Step 1: Disassemble the sprayer. Carefully take apart each piece of the sprayer, including the nozzle, hose, and container. Refer to the manufacturer’s instructions for guidance on how to properly disassemble the sprayer.
Step 2: Wipe down the exterior parts. Using a clean cloth or rag, wipe down the exterior parts of the sprayer, including the hose and nozzle. This will help remove any dust or debris that may have accumulated on the sprayer.
Step 3: Clean the container. Fill the container halfway with warm water and add a few drops of dish soap. Replace the lid and shake vigorously for a few minutes while holding the lid tightly in place. Empty the contents of the container and rinse with warm water.
Step 4: Clean the nozzle. Using a nozzle cleaning tool or a small brush, clean the nozzle thoroughly to remove any dried-on paint or debris that may be clogging the sprayer.
Step 5: Flush the sprayer. Fill the container with warm water and attach the sprayer to the air compressor. Turn on the air compressor and spray the water through the sprayer for a few minutes to flush out any remaining debris.
Once you have thoroughly cleaned the sprayer, allow each component to dry completely before reassembling. This will prevent any water or moisture from damaging the sprayer or interfering with the paint application.
If you need more tips and tricks for choosing a paint sprayer, check out our guide on Choosing a Paint Spray Gun: Tips and Tricks. If you encounter any issues during painting or cleaning, our guide on Paint Sprayer Troubleshooting may be helpful.
Choose Your Paint
When it comes to choosing the right paint for your project, there are a few things to consider. Follow these steps to ensure you choose the appropriate paint for your sprayer:
- Type of Paint: The type of paint you choose for your project will depend on what you’re painting. Latex paints are a good choice for interior walls, while oil-based paints are better for exterior surfaces.
- Viscosity: Viscosity refers to how thick or thin the paint is. To determine if your paint is the correct viscosity for your sprayer, follow the manufacturer’s recommendations, and use a viscosity cup to measure the consistency of the paint.
- Primer: A primer can help provide a smooth surface for your topcoat and also helps the paint adhere to the surface. If you’re painting a surface that has never been painted before or has an uneven surface, use a primer.
- Color: Choose the color you want for your project.
- Quality: The quality of paint you choose will determine the durability and overall appearance of your finished project. Investing in a high-quality paint will save you money in the long run by requiring fewer coats and lasting longer.
Keep in mind that not all paints are compatible with paint sprayers, so be sure to check the manufacturer’s recommendations to ensure you choose a paint that can be used with your sprayer.
Mask and Cover Your Work Area
Before you start spraying, it’s important to mask and cover your work area to protect it from overspray. This step will not only save you time and effort during cleanup but also minimize the risk of accidental sprays on unwanted surfaces.
To mask and cover your work area, follow these simple steps:
| Step 1 | Remove all furniture and objects from the area that you don’t want to spray. This includes rugs, curtains, and other decorative items. You should also remove electrical covers and light fixtures to prevent them from getting coated in paint. |
| Step 2 | Cover the floors with drop cloths or plastic sheets to protect them from paint drips and overspray. Make sure that the entire surface (including corners and edges) is covered properly. You may also use tape or painter’s adhesive to secure the edges and prevent them from shifting during painting. |
| Step 3 | Mask the walls and ceiling with painter’s tape and plastic sheets or drop cloths to avoid getting paint on surfaces you don’t want to paint. You may also remove baseboards or trim and cover the gaps with tape or plastic sheets. |
| Step 4 | Cover any items that you can’t remove, such as countertops or backsplash with plastic sheets or painter’s tape. You can also use cardboard to cover specific areas or make protective shields around certain objects that you don’t want painted. |
By following these steps, you’ll be fully prepared to start spraying safely and effectively with minimal clean-up. Remember, masking and covering your work area properly can save you time, effort, and money in the long run.
Step 2: Setup
Now that you have prepared your paint sprayer for use, it’s time to move onto the setup phase. This is where you will connect your sprayer to the air compressor, adjust the nozzle, and test your equipment before you start painting. By completing these steps correctly, you can ensure that your spraying experience is optimized for both safety and efficiency. Let’s dive in and explore each step of the setup process in detail.
Attach the Sprayer to the Air Compressor
When you are ready to begin using your paint sprayer, it is important to properly attach it to the air compressor. Here are the steps to follow:
- Check the Manual: Before attaching anything, be sure to read your paint sprayer’s manual carefully to understand its specific air compressor requirements.
- Gather Your Components: You will need your paint sprayer, air compressor, and air hose. Be sure they are all clean and free of debris.
- Assemble the Air Hose: Attach one end of the air hose to the air compressor and the other end to the paint sprayer.
- Attach to the Sprayer: Find the air inlet valve on your paint sprayer and attach the other end of the air hose to it. Tighten the connection, but be careful not to over-tighten and risk damaging the components.
- Connect the Air Compressor: Now it’s time to turn on the air compressor. Follow the manual’s instructions to properly connect and turn on the compressor. You will want to adjust the power to ensure that it is supplying the proper amount of air pressure.
- Test the Setup: Before beginning to paint, test the setup to make sure everything is working properly. Turn on the paint sprayer and give it a few practice sprays to get comfortable with its operation.
Taking the time to properly attach your paint sprayer to the air compressor will ensure that it functions effectively and safely during use. Remember to refer to the manual for specific instructions and follow all safety guidelines.
Adjust the Nozzle
One important step in setting up your paint sprayer is adjusting the nozzle. The nozzle is what controls the flow and direction of the paint as it comes out of the sprayer. An improperly adjusted nozzle can lead to uneven or spotty coverage, wasting paint and ruining your project.
To adjust the nozzle, follow these steps:
- Refer to the manufacturer’s instructions: Different paint sprayer models may require different methods of adjusting the nozzle. It’s important to review the manufacturer’s instructions before attempting to adjust the nozzle.
- Choose the correct tip: Paint sprayer tips come in a variety of sizes, depending on the type of paint and the desired finish. Choose the correct size tip for your project.
- Adjust the fan pattern: The fan pattern controls the shape of the spray. Use the adjustment knob to customize the fan pattern to your needs.
- Adjust the flow rate: The flow rate determines how much paint comes out of the sprayer at once. Too much flow can result in drips and runs, while too little flow can leave gaps in coverage. Adjust the flow rate according to the manufacturer’s instructions.
Properly adjusting your paint sprayer nozzle is crucial to achieving a smooth and even finish. Take the time to refer to the manufacturer’s instructions and choose the correct tip size, adjust the fan pattern, and flow rate to ensure a successful painting project.
Test Your Sprayer
After attaching the sprayer to the air compressor and adjusting the nozzle, it is essential to test the sprayer to make sure it is working correctly. Here are some steps to follow when testing your paint sprayer:
Step 1: Fill the paint container with water and attach it to the sprayer.
Step 2: Turn on the air compressor and adjust the air pressure to the recommended level for your paint.
Step 3: Hold the sprayer at the recommended distance from the surface you will be painting and squeeze the trigger to start the flow of water.
Step 4: Move the sprayer around to make sure it covers the surface evenly and smoothly.
Step 5: Adjust the nozzle settings if necessary to achieve the desired paint flow and spray pattern.
Step 6: If you notice any issues with the spray, such as uneven coverage or sputtering, stop the test and check the sprayer for clogs or other problems.
By testing your sprayer before beginning your painting project, you can ensure that it is working correctly and avoid any potential problems or mistakes.
Step 3: Painting
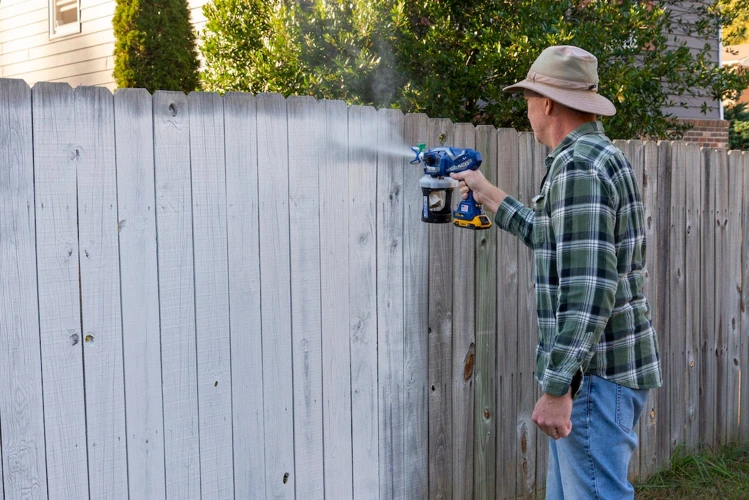
After you have properly prepared and set up your paint sprayer, it’s time to start painting! This is the step where you’ll see your hard work pay off as your project comes to life with a fresh coat of paint. Using a paint sprayer can help you achieve a professional finish in a shorter amount of time compared to using a paintbrush or roller. However, it’s important to follow the proper techniques for using a paint sprayer to ensure a smooth and even application. In this step-by-step guide, we’ll walk you through everything you need to know to safely and effectively paint with a sprayer.
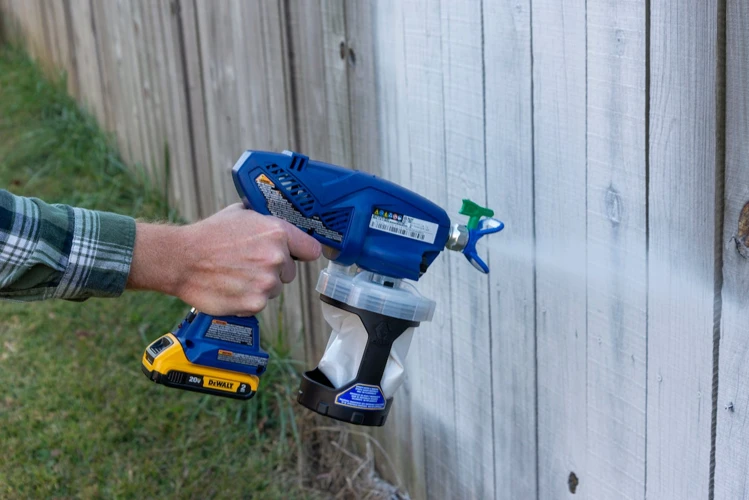
Hold the Sprayer Correctly
When using a paint sprayer, it’s important to hold the sprayer correctly to ensure a smooth and even application. Here are some tips for holding the sprayer properly:
| 1. Use Both Hands | Hold the sprayer with both hands to stabilize it and maintain control. |
| 2. Keep Your Wrist Straight | Avoid twisting your wrist or holding it at an angle. This can cause uneven spray patterns and wrist fatigue. |
| 3. Maintain a Comfortable Grip | Hold the sprayer with a grip that feels natural and comfortable for you. This will help you control the speed and direction of the spray. |
| 4. Keep the Sprayer Parallel to the Surface | Hold the sprayer parallel to the surface you’re painting to ensure an even coat. Keeping the sprayer at an angle can cause drips or uneven coverage. |
| 5. Move Your Whole Arm | Use your entire arm to move the sprayer, not just your wrist. This will help you maintain a consistent distance from the surface and prevent fatigue. |
By following these tips, you can ensure that you’re holding the sprayer correctly and applying the paint evenly and smoothly.
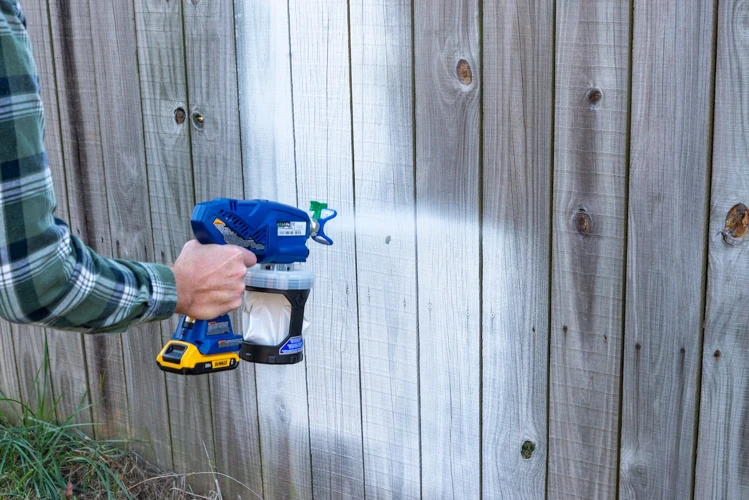
Maintain the Correct Distance and Speed
Maintaining the correct distance and speed is crucial for achieving a smooth and even paint job with a sprayer. Here are some tips to help you do it right:
- Keep the nozzle at the right distance: Make sure your sprayer’s nozzle is between 6 and 10 inches away from the surface you’re painting. Going too close can cause paint to pool or lead to drips, while holding it too far will produce a dry or uneven finish.
- Move at a consistent speed: Move your sprayer at a consistent speed to ensure an even coating of paint. Keep in mind that moving too slowly can create a heavy build-up, while moving too quickly can result in missed spots or an uneven coating.
- Overlap each pass: To avoid missed areas, overlap each pass of the sprayer by about 50%. This way, you’ll cover the surface more evenly with paint.
- Pay attention to the paint flow: Keep an eye on the paint flow as you work to ensure a steady supply of paint. A varied paint flow can cause streaks and uneven coverage.
- Practice: Using a paint sprayer takes practice, so don’t get discouraged if your first attempt isn’t perfect. Keep trying and adjusting your technique until you get the hang of it.
By maintaining the correct distance and speed, you’ll be able to produce a smooth and even finish, which is the ultimate goal when using a paint sprayer.
Overlap Each Pass
When using a paint sprayer, it’s important to apply the paint evenly and smoothly by overlapping each pass. To overlap each pass when using a paint sprayer, follow these steps:
- Slightly overlap each previous pass: When you make a pass with the sprayer, make sure to slightly overlap the previous pass to ensure an even coat of paint. This allows the paint to blend together and helps to prevent streaking or uneven coverage.
- Maintain consistent speed: To ensure consistent coverage, maintain a steady speed while using the paint sprayer. This will help you to overlap each pass evenly and to avoid missing any areas.
- Use a back-and-forth motion: Move the sprayer back and forth in a consistent motion, overlapping slightly with each pass. This will help to ensure that the paint is applied evenly and smoothly.
- Pay attention to overlap: Pay close attention to where you are overlapping with each pass to ensure that you are covering the entire surface evenly. If you notice any areas that are not being covered, make sure to go over them again to ensure a smooth, even coat of paint.
By overlapping each pass when using a paint sprayer, you can ensure that the final result is a smooth, even coat of paint that looks professional and aesthetically pleasing. Remember to maintain consistent speed and pay close attention to where you are overlapping with each pass to ensure the best possible results.
Step 4: Clean Up
After completing your paint job, it’s essential to clean up your equipment properly. Neglecting the cleaning process can cause permanent damage to your paint sprayer, resulting in costly repairs or replacements. To avoid this, follow these post-painting cleanup steps to keep your sprayer in top condition for your next project. Remember that proper cleaning will prolong the lifespan of your tool and also ensure its efficient operation when next you need it for a DIY paint project.
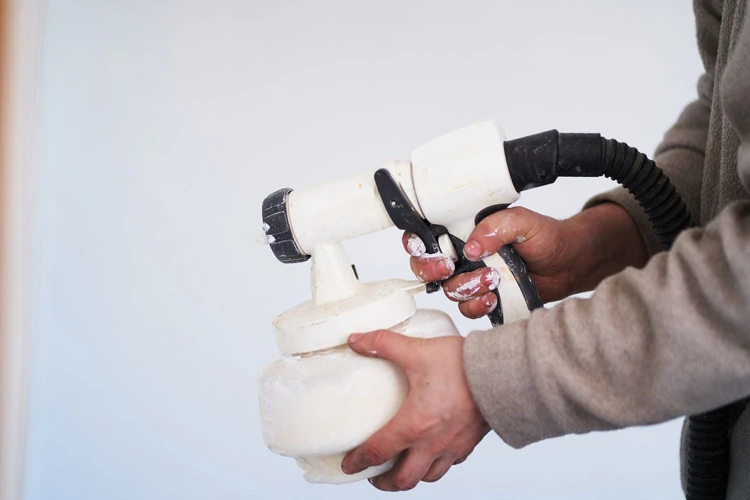
Detach and Clean the Sprayer Components
After you have finished using your paint sprayer, it is important to properly detach and clean its components to ensure that it continues to function effectively and lasts for a long time. Here are the steps for detaching and cleaning the sprayer components:
Step 1: Turn off the air compressor and unplug it from the power source. Release any remaining pressure from the sprayer by pressing the trigger until all the paint has been expelled.
Step 2: Remove the paint container or cup from the sprayer and empty any remaining paint into a suitable container for disposal. Follow the instructions for disposing of the type of paint you have used.
Step 3: Detach the nozzle, tip guard, and other removable parts from the sprayer. Rinse the parts thoroughly with water to remove any remaining paint or debris. If the paint has dried, you may need to soak the parts in warm soapy water for a few minutes before rinsing.
Step 4: Use a soft-bristled brush or toothbrush to gently scrub the parts, being careful not to scratch or damage them. Alternatively, you can use a sprayer cleaning solution designed for the type of paint you used.
Step 5: Dry the parts completely using a clean cloth or paper towel. Allow them to air dry if necessary.
Step 6: Reassemble the sprayer components according to the manufacturer’s instructions. Make sure that all the parts are secure and tightened properly.
Properly detaching and cleaning the sprayer components after use will help maintain the quality of your paint sprayer and ensure safe and effective painting in the future.
Clean the Work Area
After completing your painting project using a paint sprayer, it’s essential to clean up the work area carefully. This not only helps maintain proper hygiene but also prevents accidents and mishaps from happening. Below is a step-by-step guide on how to clean the work area after using a paint sprayer:
| Step | Action |
|---|---|
| 1 | Remove all unused paint: Collect all unused paint from the work area and store it in a proper container. This will prevent it from spilling and causing staining or damage to the surrounding environment. |
| 2 | Dispose of contaminated materials: Used or contaminated materials such as paint cans, rags, and paper towels should be disposed of in a proper trash container. Do not leave them in the work area as they can cause fire hazards. |
| 3 | Remove masking materials: Remove all masking tape, plastic sheets, or drop cloths used to cover the surrounding work area. Ensure that you do not rip or tear them as they can cause damage to the floors or surfaces they were protecting. |
| 4 | Clean the Work Area: Use a vacuum cleaner or a broom to sweep off any dust, debris, or remaining paint particles from floors, surfaces, and walls. You can also use a damp cloth or mop to wipe down any stains or spills. Finally, dispose of any remaining waste and store all painting tools and equipment properly. |
By following these simple steps and cleaning your work area properly, you can ensure that your paint sprayer remains effective and safe to use for future painting projects.
Safety Tips
It is essential to remember that using a paint sprayer involves certain safety risks. It is crucial to take the necessary precautions to minimize the chances of accidents and injuries.
Protective Gear: Prioritize your safety by wearing protective equipment such as goggles, respirators, gloves, and long-sleeved shirts. This clothing will shield your body and face from harmful paint particles.
Ventilation: Always use a well-ventilated work area when using a spray gun. Open windows, turn on ceiling fans, and use an industrial fan to clear out any fumes and ensure adequate airflow.
Avoid Flammable Materials: Do not use paint sprayers near flammable materials or open flames. Paint fumes can ignite and cause an explosion or fire.
Avoid Electrocution: Keep the cord and electrical components of your paint sprayer dry. Water can result in an electrical shock, which can cause severe injury or death.
Be Mindful of Your Surroundings: Watch for children or pets who may be playing in the vicinity of your work area. Ensure your workspace is well-lit and free of obstacles.
Stop if you experience irritation: If you begin experiencing difficulty breathing or notice skin irritation, discontinue use immediately and consult a medical professional.
By adhering to these safety tips, you can ensure a secure and productive experience with your paint sprayer.
Conclusion
In conclusion, using a paint sprayer can be a quick and efficient way to complete a painting project. However, it is important to follow proper safety guidelines to prevent any accidents or injuries. Always wear appropriate protective gear, such as a respirator and goggles, and make sure to properly prepare and clean the sprayer before and after use.
Remember to choose the right paint for your project and to test the sprayer before painting to ensure it is working properly. It is also important to maintain the correct distance and speed while painting and to overlap each pass for even coverage.
After finishing your project, take the time to properly clean the sprayer components and work area to prevent any paint buildup or damage. By following these steps and tips, you can use a paint sprayer safely and effectively for your next painting project. Happy painting!
Frequently Asked Questions
Can I use any type of paint with a paint sprayer?
No, not all paints are suitable for use with a paint sprayer. You should check the manufacturer’s recommendations for the types of paint that can be used with your specific model of sprayer.
Do I need to thin my paint before using a sprayer?
It depends on the type of paint and the sprayer you are using. Check the manufacturer’s instructions for the recommended viscosity or thinning instructions for the type of paint you are using.
Do I need to wear protective equipment when using a paint sprayer?
Yes, it is recommended to wear protective equipment including eye protection, a respirator, and gloves to protect against paint overspray and fumes.
How far should I hold the sprayer from the surface I am painting?
The distance will vary depending on the type of sprayer and the type of paint being used. Check the manufacturer’s instructions for recommended distances for your specific model and paint.
Should I paint in a well-ventilated area?
Yes, it is recommended to paint in a well-ventilated area to avoid inhaling hazardous fumes and ensure appropriate drying times.
Can a paint sprayer be used for small projects?
Yes, paint sprayers can be used for both small and large projects. However, it may be more time-efficient to use a brush or roller for very small projects.
Can a paint sprayer be used for outdoor painting projects?
Yes, paint sprayers are suitable for outdoor painting projects. However, it is important to be aware of the wind conditions and weather forecast to avoid overspray and ensure proper drying times.
Is it necessary to cover nearby surfaces when using a paint sprayer?
Yes, it is important to cover any nearby surfaces to prevent overspray and paint splatter from damaging surrounding surfaces.
Can I clean my paint sprayer with water?
It depends on the type of paint you are using. Some paints, particularly oil-based paints, require specialized solvents for cleaning. Check the manufacturer’s instructions for recommended cleaning materials.
How can I avoid clogging the sprayer nozzle?
To prevent clogs in the sprayer nozzle, be sure to strain the paint before pouring it into the sprayer and regularly check the filter on the sprayer for debris.