When autumn arrives, pumpkins take center stage in decorations and crafting projects. While carving may be a traditional approach, gluing allows for endless creative possibilities without the mess. However, not all adhesives are equal when it comes to sticking materials to pumpkins. In this post, we’ll explore the ins and outs of selecting and using the right glue for pumpkins to ensure your fall creations stand out and last.
Understanding the Pumpkin Surface
Pumpkins, with their hard, sometimes bumpy exteriors, present a unique challenge for adhesion. The surface can be waxy and may have a slight curve, factors that can affect how well adhesives bond. Knowing how to treat the pumpkin’s surface is crucial for a lasting hold.
Prepping Pumpkins for Adhesion
Preparation is key to successful pumpkin crafting. Start by cleaning the surface with a damp cloth to remove dirt and debris. For a stronger bond, lightly sanding the area can create a rougher texture that enhances grip. Ensure the surface is dry before applying any pumpkin decoration glue.
Choosing the Right Glue for Pumpkins
Selecting an appropriate adhesive for pumpkin crafts is not a one-size-fits-all situation. Factors such as the weight of the materials being adhered and the intended display location (indoors or outdoors) will influence your choice.
Types of Glue Suitable for Pumpkin Crafts
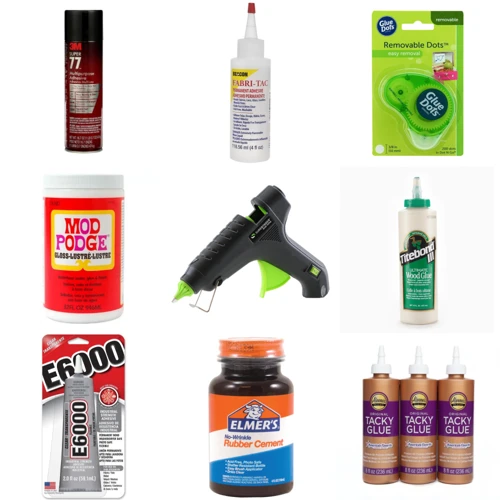
- Hot glue: Quick-drying and easy to handle, it’s ideal for lightweight items.
- Tacky glue: A thick, clear adhesive that works well for porous items.
- Permanent adhesive sprays: Great for covering large areas evenly.
Criteria for Selecting the Best Glue for Pumpkins
When choosing the best glue for pumpkins, consider drying time, ease of use, and durability against weather if displaying outdoors. The adhesive should be strong enough to hold your chosen materials without damaging the pumpkin’s skin.
Guidelines for Using Adhesive on Pumpkins
Applying glue for pumpkins can be a straightforward process if you follow some basic guidelines. The aim is to achieve a secure bond while preserving the appearance of your design.
How to Glue on Pumpkins
For effective adhesion, apply the glue directly to the pumpkin or onto the material you’re attaching. Press firmly and hold for a few seconds to ensure that the bond sets. Allow adequate time for the adhesive to cure completely.
Techniques for Sticking Materials to Pumpkins
Different materials require different approaches. For example, heavier items may need a stronger, epoxy-based glue, while lighter embellishments might only need a dab of hot glue. Experiment with various techniques to find what works for your project.
DIY Pumpkin Glue Recipes
If you prefer a more hands-on approach or are looking for a cost-effective solution, making your own pumpkin project adhesive can be rewarding.
Homemade Pumpkin Decoration Glue
A simple recipe involves mixing equal parts of flour and water to create a paste. This can be an excellent option for paper-based decorations.
Creating Your Own Pumpkin Project Adhesive
For a stronger DIY pumpkin glue, consider adding a bit of white glue to the flour-water mixture. This enhances the adhesive properties and is still safe for kids to use.
Waterproof and Outdoor Pumpkin Glue Options
If your pumpkins will brave the elements outside, you’ll need an adhesive that can withstand moisture and temperature changes.
Waterproof Glue for Pumpkins
Look for a waterproof glue for pumpkins that specifies outdoor use. These adhesives are designed to resist water and provide a secure hold despite weather conditions.
Outdoor Pumpkin Glue for Harsh Weather
For areas with extreme weather, an outdoor pumpkin glue with UV resistance and flexibility when dry can prevent cracking and ensure longevity.
Decorating Pumpkins with Glue
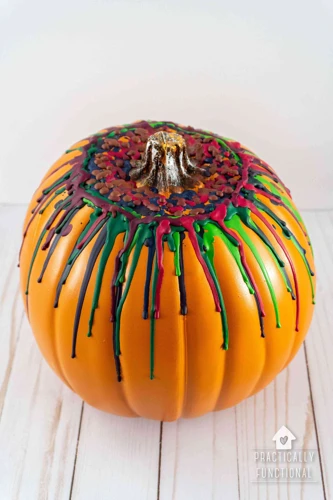
The versatility of glue allows for a broad range of decorative techniques. From simple designs to intricate artistry, adhesive can transform a humble pumpkin into a festive showpiece.
Ideas for Pumpkin Decoration Using Glue
Consider applying sequins, beads, or fabric cut-outs with tacky glue for detailed work. Adhesive sprays can help you attach larger elements like autumn leaves or lace.
Making Cute Pumpkin Creatures with Adhesive
Turn your pumpkins into adorable animals or fantasy creatures using felt, googly eyes, and pompoms, all secured with the right glue for pumpkins.
Advanced Pumpkin Adhesive Techniques
For those looking to push the boundaries of pumpkin crafting, advanced techniques can add a professional touch to your designs.
Securing Heavier Items with Strong Adhesive
When attaching heavy elements, such as wooden stems or large accessories, opt for a strong epoxy or construction adhesive for a reliable hold.
Innovative Uses of Glue in Pumpkin Decoration
Create textured surfaces by layering glue and adding sand or glitter. Use stencils with spray adhesives for precise patterns.
Safety Tips for Using Glue on Pumpkins
Working with adhesive requires caution, especially when crafting with children or using strong glues.
Non-Toxic Options for Pumpkin Crafts
Choose non-toxic, water-based glues when possible. These are safer for kids and for those with sensitivities to harsh chemicals.
Precautions While Using Strong Adhesives
Always work in a well-ventilated area, wear gloves, and read the manufacturer’s instructions when using strong adhesives to avoid harmful fumes and skin irritation.
Materials and Tools for Pumpkin Gluing Projects
Having the right supplies on hand can make your pumpkin decorating experience smoother and more enjoyable.
Essential Supplies for Gluing Pumpkins
- Adhesives: A selection based on your project’s needs.
- Cleaning materials: To prep the pumpkin surface.
- Decorative items: Whatever you plan to adhere to your pumpkin.
Specialty Tools for Advanced Adhesive Techniques
For more complex projects, consider investing in glue guns, precision nozzles, or clamps to hold items in place while the glue sets.
Troubleshooting Common Pumpkin Gluing Issues
Even with careful planning, you might encounter some hiccups when working with adhesive and pumpkins.
What to Do When Glue Doesn’t Stick
If the glue isn’t sticking, ensure the surface is clean and consider lightly sanding it for better adhesion. Reapply the glue and hold the item in place longer.
How to Remove Glue from Pumpkins
To remove unwanted glue, gently scrape it off with a plastic tool or apply a small amount of rubbing alcohol to soften the adhesive before wiping it away.
Conclusion and Final Thoughts
Whether you’re a seasoned crafter or new to pumpkin decorating, using the right adhesive is crucial for achieving beautiful and durable results.
Summarizing the Best Practices for Pumpkin Gluing
Choose the right glue based on your project’s needs, prep the pumpkin surface, apply adhesive carefully, and allow for proper drying time.
Are you getting ready for a festive craft or a unique decoration project involving pumpkins? Then you might be wondering about the best ways to stick materials to them. For helpful tips on how to securely attach pumpkins to each other, don’t miss our guide on how to glue pumpkins together. Additionally, if you’re incorporating materials like moss into your designs, our article on how to glue moss to cardboard can offer insights that could be applicable to your pumpkin project. And for those tricky moments when you’re dealing with adhesives, check out our piece on what melts nail glue for solutions to common glue mishaps.
Further Resources and Inspiration for Pumpkin Crafts
For more ideas and tips, check out crafting blogs, Pinterest boards, and DIY tutorials to inspire your next pumpkin project using glue for pumpkins.

