As a parent or teacher, you’ve probably heard about the ever-growing craze of making slime with glue. It’s a fun and engaging activity that’s sure to capture the attention of kids and adults alike. However, most slime recipes call for Borax, a common household cleaner that can be harmful if not handled properly. That’s why we’ve put together an easy slime recipe without Borax so that you can still enjoy the fun without any potential dangers. In this article, we’ll walk you through step-by-step instructions on how to make slime with glue and other easy-to-find ingredients. So, let’s get our hands dirty and dive into the world of slime making!
Ingredients
Looking to make some fun and gooey slime without using borax? Look no further than this easy recipe! In order to get started, you’ll need a few key ingredients. Don’t worry, you won’t need anything too fancy or hard to find. With just a few household items and some creativity, you’ll be making slime in no time. Let’s check out exactly what you’ll need. And if you’re feeling adventurous, you can also try some other variations, such as making slime with glycerin and glue or using just glue and water.
What You’ll Need
In order to make slime with glue without borax, you will need the following supplies:
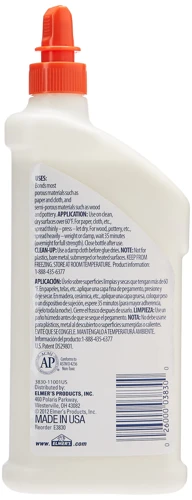
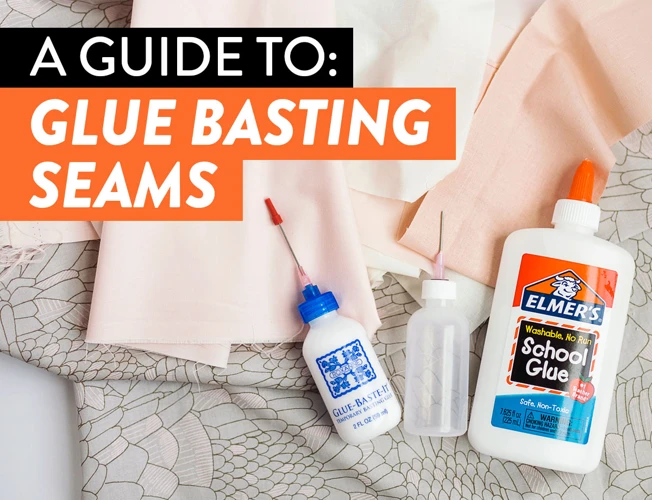
- Elmer’s white school glue: You’ll need a half cup of this popular craft glue for the recipe. You can also use clear glue if you prefer.
- Baking soda: This household staple is used to thicken the slime and create the right texture. You’ll need just 1/4 tablespoon.
- Contact lens solution: Look for a contact lens solution that contains boric acid in the ingredients list. This is what turns the glue into slime. You’ll need 2 tablespoons for the recipe.
- Food coloring: Optional, but adds color to your slime. Use a few drops to get your desired color.
- Glitter: Also optional, but can be added for some extra sparkle. Use as much or as little as you like.
- Bowl and spoon: You’ll need a mixing bowl and spoon to combine the ingredients.
Remember, these are the basic ingredients for making slime without borax. If you want to try different variations or want to learn more about glue as an art project ingredient, check out these articles for more tips and inspiration: how to make slime with glycerin and glue, what is glue wine, how to make a paper mache mask with glue, how to make slime with glue and salt, how to make black glue, how to glue glitter, how to make slime with PVA glue, how to make thick glossy slime with school glue, how to make slime with JOT glue, how to make slime with just glue and water.
Step-by-Step Guide
Are you ready to create your very own slime without using Borax? We’ve got you covered with this easy-to-follow step-by-step guide. Whether it’s for a fun craft with the kids or just to relieve stress, making slime is a popular activity that never gets old. In just a few simple steps, you’ll have a unique slime creation that you can be proud of. So let’s get started!
Step 1 – Measure and Pour Glue
To make slime with glue without borax, the first step is measuring and pouring glue into a mixing bowl or container. This is a crucial step, as it sets the foundation for the slime’s texture and consistency. It’s essential to measure the glue properly to avoid ending up with a lumpy or unstable slime.
What You’ll Need:
| Ingredients | Measurements |
|---|---|
| White school glue | 1/2 cup |
| Water | 1/4 cup |
Instructions:
- Start by measuring 1/2 cup of white school glue in a measuring cup.
- Pour the glue into a mixing bowl or container.
- Next, measure 1/4 cup of water in the same measuring cup used for the glue.
- Then, pour the water into the mixing bowl or container with the glue.
Note: You can use any brand of white school glue for this recipe. Just make sure that the glue is not clear or colored and doesn’t contain any additives like glitter or sparkles. Using anything other than white school glue may alter the texture, consistency, and look of the slime. Additionally, mix the water and glue thoroughly until they are well combined.
Step 2 – Add Color and Glitter
Now it’s time to add some color and sparkle to your slime! This step is optional, but it can make your slime extra special and unique. Here’s how to do it:
- Before you start mixing in color and glitter, make sure your glue mixture is well combined and smooth. Use a spoon or spatula to scrape the sides and bottom of the bowl to ensure there are no pockets of glue or cornstarch.
- Now, add a few drops of food coloring to the glue mixture. You can use any color you like, but remember that the more drops you add, the more intense and darker the color will be. Start with just a few drops and mix well.
- If you want to add glitter, now is the time to do it! You can use any type of glitter you like, but keep in mind that chunkier glitters may create a different texture and may require more mixing. Sprinkle a small amount of glitter over the glue and begin mixing it in. Again, use your spoon or spatula to scrape the sides and bottom of the bowl to ensure all the glitter is incorporated.
- If you’re not happy with the color or sparkle level, you can always add more. But remember, a little goes a long way! Stingy with the glitter and food coloring at first and add more as needed.
- Pro tip: If you want to create a fun texture in your slime, you can add in some small beads or sequins. Mix them in after the glitter and color is fully incorporated.
When you’re happy with the color and glitter level, move on to the next step.
Step 3 – Add Contact Lens Solution
Now it’s time to add some contact lens solution to the mixture. This will transform the glue and baking soda from a liquid to a slimy texture. It’s important to add the contact lens solution slowly, as adding too much can make the slime too tough or hard to work with.
Here’s a table to help guide you on how much of each ingredient to use for this step:
| Ingredients | Amount |
| Elmer’s Glue | 4 oz. |
| Baking Soda | 1/2 tsp. |
| Food Coloring | 1-2 drops |
| Glow in the Dark Paint or Glitter (optional) | A dash |
| Contact lens solution (with boric acid) | 1 tbsp. |
Once you have all the ingredients together, slowly pour the contact lens solution into the mixture while stirring constantly. Keep adding the solution until the ingredients start to come together and form a glob. If the slime is still too sticky, continue to add more contact lens solution until it takes on a slimy texture.
It’s important to use contact lens solution with boric acid, as this is the ingredient that will help activate the slime. If you can’t find any, look for an alternative that contains sodium borate.
Tip: If you don’t want to use contact lens solution, you can also use liquid starch or laundry detergent. Just be aware that different brands may require different amounts for the same result, so it may take some trial and error to find the perfect consistency.
Now on to the final step!
Step 4 – Mix and Knead
Now that you have added the contact lens solution to the glue mixture, it’s time to begin mixing and kneading the slime.
- Mix: Use a spoon to start stirring the mixture. At first, it may seem like your slime won’t come together, but keep stirring for a couple of minutes until it starts to come away from the sides of the bowl.
- Knead: Once your slime has come together and formed a clump, it’s time to knead it with your hands. The slime may still be sticky at first, but as you continue to knead it, it will become more solid and less sticky. Knead the slime for about 5 minutes to make sure that all the ingredients are well combined. If the slime is still too sticky after kneading, add a little more contact lens solution and knead again.
- Enjoy: Once your slime is the right consistency and no longer sticky, it’s ready to play with. Squish it, stretch it, and have fun exploring all the different textures and shapes that you can create with your homemade slime.
Remember, if you run into any issues with your slime, you can refer to the troubleshooting section of this article for tips on how to fix common problems.
Troubleshooting Slime
So, you’ve followed the steps and made your slime, but something went wrong? Don’t worry, troubleshooting slime is a common issue that most DIY slime makers face. Before throwing away your slime, let’s take a look at some tips and tricks to fix common problems. Here are some common issues that you may encounter when making slime, along with solutions to help you salvage your slime and achieve the perfect stretchy consistency.
Too Sticky or Watery
One of the most common problems that people encounter when making slime is ending up with a product that is either too sticky or too watery. Here are some troubleshooting tips to help you if you encounter the same issue.
| Problem | Solution |
|---|---|
| Problem: Your slime is too sticky and won’t hold its shape. | Solution: This is likely because you added too much contact lens solution. Try adding a small amount of glue to the mixture and kneading it in until it becomes less sticky. You can also add a little bit of lotion or baby oil to your hands to help reduce the stickiness as you work with the slime. |
| Problem: Your slime is too watery and won’t hold its shape. | Solution: This could be because you added too much water when mixing in the contact lens solution. Try adding a little bit more glue to the mixture and kneading it in until the texture becomes thicker. You can also try adding a pinch of baking soda to help absorb some of the excess moisture. |
It’s important to note that the texture of your slime will be influenced by many factors. Room temperature, humidity, the type of glue you use and the brand of contact lens solution can all affect the final outcome. If you’re having trouble with your slime, don’t get discouraged – just keep experimenting with the ingredients and ratios until you find the perfect formula for you.
Too Hard or Tough
If your slime turns out too hard or tough, don’t worry – there are a few things you can try to fix it! Here are some common reasons that your slime might be too hard:
| Possible Issue | Solution |
|---|---|
| You added too much contact lens solution. | If your slime is too hard, it may mean that you added too much contact lens solution. Try adding a small amount of glue to the mixture and knead it in until the slime softens up. |
| You used too much cornstarch or baking soda in your recipe. | If you added too much cornstarch or baking soda to your slime, it can make it tough or hard. You can try adding more glue to the mixture to soften it up. Additionally, if you have liquid fabric softener or baby oil on hand, you can try adding a few drops to the slime to make it more pliable. |
| You didn’t knead the slime enough. | If you don’t knead the slime enough after adding the contact lens solution, it may not mix in properly and make the slime hard. Try kneading the slime for a longer period of time, using both your hands to work it thoroughly. |
Make sure to follow the recipe carefully and measure out your ingredients accurately to avoid any issues with your slime texture. And remember, if your slime turns out too hard, don’t be afraid to experiment with different techniques to soften it up.
Color Fades or Changes
Have you noticed that the color of your slime has faded or changed over time? This can be due to a few different factors:
- Exposure to direct sunlight
- Using low-quality food coloring or pigment
- Using too much contact lens solution
Exposure to direct sunlight: If you leave your slime out in direct sunlight for extended periods of time, the UV rays can cause the color to fade. To avoid this, store your slime in a cool, dark place when not in use.
Low-quality food coloring or pigment: Using low-quality coloring agents can also cause the color of your slime to fade or change. Instead, opt for high-quality food coloring or pigments specifically designed for use in slime.
Using too much contact lens solution: Adding too much contact lens solution to your slime can also cause the color to change over time. This is because the borax in the contact lens solution can break down the pigments. To avoid this, measure the amount of contact lens solution carefully and only use the recommended amount.
If you’ve already noticed a change in color, don’t worry! You can try adding a bit more coloring or pigment to restore the original color. If the problem persists, you may need to start over with a fresh batch of slime. Remember to always follow the recipe carefully and use high-quality ingredients for best results.
Problems with Contact Lens Solution
Using contact lens solution to make slime is a common alternative to using borax as an activator, but it can sometimes lead to problems. Here are some common issues you may encounter and tips for solving them:
- Allergic reactions: Some people may have an allergic reaction to the preservatives or other ingredients in the contact lens solution. If you experience any symptoms such as itching, redness, or swelling, stop using the solution immediately and rinse your hands thoroughly with soap and water.
- Activator not working: Not all contact lens solutions are created equal, and some may not work well as an activator for slime. If your slime is not firming up or becoming less sticky, try switching to a different brand of contact lens solution or using a different activator such as liquid starch or saline solution.
- Over-activation: Adding too much contact lens solution can cause your slime to become too stiff or rubbery. If this happens, try adding a small amount of water or lotion to soften the slime up and make it more stretchy.
- Solution drying out: If your contact lens solution has been sitting out for too long or has expired, it may become too thick or dry to work well as an activator. Make sure to store your solution in a cool, dark place and check the expiration date before using.
Contact lens solution can be a great alternative to borax for making slime, but it’s important to be aware of these potential issues and take steps to avoid or resolve them as needed. As always, be sure to wash your hands thoroughly before and after making and playing with slime to avoid any potential irritation or other issues.
Safety Tips and Recommendations
When making slime with glue and contact lens solution, it is important to take certain safety precautions. Although the ingredients used to make slime are generally safe, mishandling them could pose a risk to your health or safety. Here are some safety tips and recommendations to keep in mind when making slime at home.
Wear Protective Gear: Although the ingredients used to make slime are generally safe, it is still recommended that you wear protective gear to protect yourself from any possible accidents. It is advisable to wear disposable gloves, goggles, and an apron to protect your hands, eyes, and clothing from coming into contact with any of the ingredients.
Don’t Ingest: Slime should never be ingested. While the ingredients may be safe for skin contact and play, they are not safe for consumption. If any slime accidentally gets in your mouth, spit it out immediately and rinse your mouth thoroughly with water. Additionally, if you have small children, supervise them while playing with slime and make sure they don’t put it in their mouth.
Don’t Use Unsafe Ingredients: When making slime, never use any harmful or toxic ingredients. Some commonly used items like borax, laundry detergent, or other cleaning products may be harmful if swallowed or inhaled. Always use safe and non-toxic ingredients.
Be Cautious with Colorants: When using colorants in your slime recipe, be cautious not to overuse them as some dyes may irritate the skin. It is usually best to use food coloring that is specifically made for play recipes to avoid any irritation to the skin or eyes.
Avoid Contact Lens Solution Contact: If you or anyone around you is allergic to contact lens solution, avoid making slime with this ingredient. Although most contact lens solutions are safe to use, some contain preservatives that could cause allergic reactions in some individuals.
By taking these safety tips and recommendations into account, you can make slime with glue and contact lens solution without worrying about health hazards. Remember to always handle the ingredients with care and check the labels of the products you use to ensure they are safe and non-toxic.
Clean up and Storage
Cleaning up after making slime is crucial to maintain proper hygiene and avoid any mess. Here are some tips to help you clean up and store your slime:
Clean up:
After your slime is made, be sure to clean up the utensils and work area thoroughly. Start by putting away any unused materials and discarding any waste properly. Remove any debris or leftover glue from the work area with a damp cloth or paper towel. Be sure to use warm water to clean the mixing bowl and utensils with soap to ensure there isn’t any slime residue left.
Storage:
To keep your slime fresh and usable for longer, ensure that it is stored properly. You can store your slime in an airtight container or a resealable bag to keep air from drying it out and making it hard. A plastic container with a tight-fitting lid is ideal for storing slime. Additionally, keeping the slime in the refrigerator can make it last longer. Be sure to label your container or bag with the date you made the slime for future reference.
What to do with leftover slime:
If you have leftover slime in your mixing bowl or container, don’t throw it away. Instead, you can save it for later use. Store it in an airtight container or bag and refrigerate it. You can also reuse slime that has been accidentally left out for a while by kneading it until it softens back up.
Disposal:
Once your slime reaches the end of its lifespan, it’s time to dispose of it properly. Do not dump it down the drain as the glue can clog your pipes. Instead, dispose of it in the garbage, making sure it’s in a closed container or wrapped securely.
Cleaning up and storing your slime properly can make it last longer and keep you from making a mess. Remember to use an airtight container to store it and refrigerate it if possible. Be safe and have fun making slime!
Conclusion
After following the step-by-step guide and creating your own slime without borax, you are now ready to enjoy your creation. Making slime can be a fun and exciting activity for both kids and adults alike. The best part of making your own slime is that you have complete control over the ingredients, colors, and textures – you can even add glitter or confetti to make it more fun.
Remember, safety always comes first, especially when dealing with chemicals and children. Always supervise your children while making slime and keep all ingredients out of reach from young children or pets. If any allergic reactions occur, stop using the slime immediately and seek medical attention.
In addition, you may encounter troubleshooting issues with your slime, but don’t worry – this is all part of the learning process. If your slime is too sticky, watery, hard, or if the color fades or changes, there are simple solutions that can fix these problems. Be patient and keep practicing – soon enough, you’ll become a slime-making pro.
Lastly, after you have finished playing with your slime, be sure to clean it up and store it in an airtight container to preserve its longevity. Making slime is a fun and creative way to spend time with your loved ones, so let your imagination run wild and get creative with your own unique recipes. Have fun and happy slime-making!
Frequently Asked Questions
Q: Can I make slime without Borax?
A: Yes, this recipe does not use Borax, instead, we will use contact lens solution as the activator.
Q: What glue is best for making slime?
A: We recommend using white PVA glue or clear glue for this recipe. Elmer’s glue is a popular choice.
Q: What if I don’t have contact lens solution?
A: You can use saline solution instead. Just make sure it contains boric acid and sodium borate in the ingredient list.
Q: Can I use food coloring instead of liquid watercolors?
A: Yes, you can use food coloring, but be aware that it may not give as vibrant of a color as liquid watercolors.
Q: Can I add essential oils to my slime?
A: Yes, you can add essential oils, just be aware that some oils may not mix well with the slime and could cause it to become too sticky or runny.
Q: How do I know when the slime is ready?
A: The slime is ready when it no longer sticks to your hands and has a stretchy, pliable texture.
Q: Can I store my slime in the fridge?
A: No, do not store the slime in the fridge as it can cause it to harden and lose its stretchy texture.
Q: What if my slime is too tough or hard?
A: Try adding a small amount of lotion or oil to the mixture and knead it in until you achieve the desired texture.
Q: How do I make my slime less sticky?
A: If your slime is too sticky, try adding a small amount of contact lens solution or lotion to the mixture and knead it in until you achieve the right consistency.
Q: Is slime safe for young children?
A: Adult supervision is recommended when making and playing with slime. Avoid using small or edible items in the slime that could be a choking hazard. Wash hands thoroughly after playing with slime.


