Transforming your living space doesn’t have to be a daunting task. With DIY wall stenciling, you can add a touch of elegance and personality to any room. It’s a creative and cost-effective way to spruce up your interior design without the commitment of wallpaper or the expense of professional art.
Why Choose Wall Stencils for Home Decor?
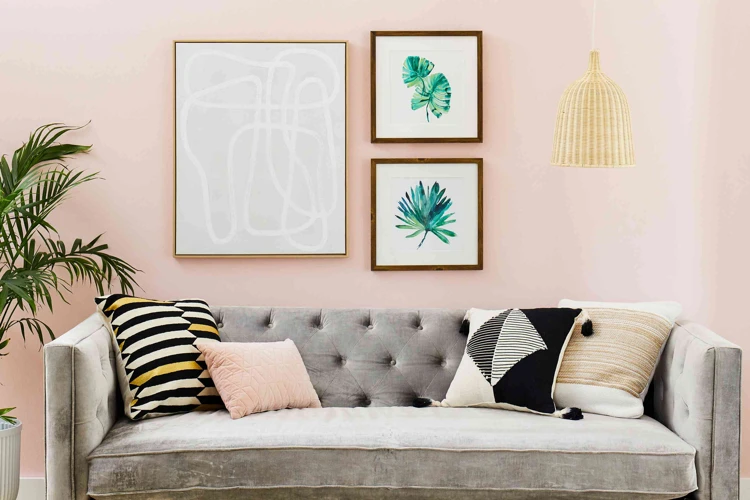
Wall stencils offer a unique blend of flexibility and style, allowing homeowners to customize patterns and colors to their taste. Unlike wallpaper, stencils can be used to create bespoke designs that can be changed as often as you like. They’re perfect for renters or those who love to update their decor regularly.
The Basics of How to Use Wall Stencils
Mastering the art of DIY wall stenciling is all about technique and patience. Before diving in, it’s essential to understand the process – from choosing the right stencil patterns to applying the paint correctly. With the right approach, achieving professional-looking wall art is entirely within reach.
Step 1: Select the Right Stencil Pattern
Understanding Different Stencil Patterns for Your Interior Design
Choosing the right stencil patterns is crucial in setting the tone for your room. Whether you’re after a modern geometric design, a romantic floral, or a bold Moroccan motif, the pattern you select will significantly influence the ambiance of the space. Take into consideration the existing decor and the mood you want to create.
Step 2: Gather Your Materials and Tools

Essential Materials for Wall Stenciling
- Quality stencils
- Acrylic or latex paint
- Stencil brush or roller
- Painter’s tape
- Level
Paint Stencils and Accessories for Easy Wall Decor
Equipping yourself with the right paint stencils and accessories can make all the difference. Opt for adhesive stencils if you’re a beginner, as they are easier to work with. A foam roller will ensure even coverage, while a stencil brush is perfect for dabbing on paint in harder-to-reach areas.
Step 3: Prepare Your Workspace and Wall Surface

Tips for Preparing Walls for Stenciling
Start with a clean, smooth surface for the paint to adhere properly. Any holes or bumps should be filled and sanded down. Protect your flooring and furniture with drop cloths, and use painter’s tape to mask off baseboards and moldings.
Home Improvement Stenciling: Ensuring a Smooth Process
Proper preparation extends to your environment as well. Ensure good ventilation and stable room temperature to facilitate drying. Organize your tools and materials for easy access to streamline the stenciling process.
Step 4: Position and Secure Your Wall Stencil
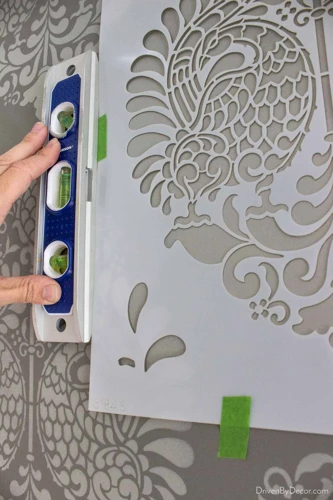
How to Securely Place Stencils for Perfect Patterns
Positioning your stencil is a pivotal step. Use a level to ensure your design is straight and even. Secure the stencil flat against the wall with painter’s tape, checking for any gaps that might cause the paint to bleed underneath.
Step 5: Apply Paint and Create Your Wall Art
Techniques for Applying Paint Through Stencils
When it comes to applying the paint, less is more. Load your brush or roller with a small amount of paint and remove the excess. Apply the paint with a gentle dabbing or rolling motion to prevent it from seeping under the edges of the stencil.
Cleaning and Reusing Stencils for Consistent Results
After each use, clean your stencils with warm, soapy water. This helps maintain a sharp edge for consistent results. Dry them flat to retain their shape and prolong their lifespan for future wall decorating projects.
Final Touches and Wall Decorating Ideas
Adding Personal Flair to Your Stenciled Wall Art
Once the paint is dry, you can add personal touches. This could include accents like metallics or glitter for a bit of sparkle. The beauty of DIY wall stenciling is the ability to create something uniquely yours.
Conclusion: Enjoying Your DIY Wall Stenciling Project
Reflecting on the Easy Wall Decor Transformation
As you step back to admire your handiwork, you’ll see how DIY wall stenciling can dramatically elevate a space. The satisfaction of personal achievement combined with a stunning visual impact makes the effort well worth it.
When it comes to wall stenciling, preparation is just as important as the actual painting. If you’re looking to achieve professional-looking results with your next DIY project, you’ll want to check out our comprehensive guide on 5 tips for prepping interior walls for painting. Proper preparation ensures that your stenciled designs will come out crisp and beautiful. And while you’re in the DIY spirit, don’t forget to take care of your tools. Our article on how to clean roller covers offers great tips to keep your painting tools in top shape. If you’re planning to extend your project to the exterior, you’ll also benefit from our 5 steps for exterior painting prep. With these resources, you’ll be well on your way to a successful wall stenciling project!
Next Steps in Your Interior Design Journey
With your newly stenciled wall as a backdrop, consider the next steps in your interior design journey. Perhaps new furnishings or accent pieces could complement your wall art. The possibilities are as limitless as your creativity.