Are you looking for a way to protect your important papers from wear and tear? Do you want to give your documents a professional look? If so, then lamination is the solution you need. While there are various methods for laminating paper, using glue is one of the easiest and most cost-effective options. However, if you’re not familiar with the process, it can be confusing and overwhelming. That’s where we come in! In this guide, we’ll provide you with a comprehensive step-by-step process for laminating paper with glue. We’ll also highlight the materials you’ll need and offer tips for successful lamination. So, don’t throw away those papers just yet. Continue reading to discover how to laminate paper with glue like a pro.
Materials Needed for Paper Lamination
Are you looking for a fun and easy DIY project? Laminating paper with glue is a great way to preserve important documents, artwork, or even just to make fun crafts. To get started, you’ll need a few key materials. We’ll walk you through the different types of glue to use, as well as other necessary materials you’ll want to have on hand. Be sure to check out our guide on how to make your own glue for an even more unique twist on this classic crafting activity. Let’s dive in and get started!
Glue Types
When it comes to laminating paper with glue, choosing the right type of glue is crucial. There are various types of glue available in the market, but not all types are suitable for laminating paper. The two most commonly used glues for paper lamination are PVA (polyvinyl acetate) glue and Mod Podge. Let’s take a closer look at each of them:
| Glue Type | Features |
|---|---|
| Polyvinyl Acetate (PVA) | PVA glue is water-based and dries clear, making it perfect for use in paper lamination. It is acid-free, dries quickly, and can be easily cleaned with water. It is also relatively inexpensive in comparison to other types of glue. PVA glue can be thinned with water to make it easier to spread, but adding too much water can weaken its adhesive properties. You can learn how to thin glue for crafts by checking out our guide. |
| Mod Podge | Mod Podge is a brand of PVA glue that has been specially formulated for use in decoupage and other paper crafts. It comes in various finishes, including matte, gloss, and satin, making it perfect for creating different effects on your laminated paper. Mod Podge is also water-based and easy to clean up with soap and water. However, it can be more expensive than regular PVA glue. You can also learn how to make glue at home by checking out our DIY glue guide. |
It is important to note that not all glues are suitable for laminating paper. For instance, super glue and rubber cement are not recommended for paper lamination as they can cause paper to wrinkle or lose its shape. Additionally, it is recommended to use non-toxic glue, especially if you will be working with children or pets. You can learn more about non-toxic glue by visiting our related article.
Other Materials
When it comes to laminating paper with glue, there are a few other materials you may need besides the glue itself. These materials will help you achieve the best results and make the process easier overall.
1. Scissors or Paper Cutter: To ensure that your lamination is seamless, you will need to cut your paper to the right size. A pair of scissors or a paper cutter will make this process much easier.
2. Measuring Tools: To measure the paper accurately, you can use a ruler or a measuring tape. This is important as it will help ensure that your paper is cut to the appropriate size.
3. Brushes or Rollers: To apply the glue to the paper, you will need a brush or roller. A brush will work for small jobs, but if you need to laminate large sheets of paper, you might want to consider using a roller.
4. Protection for your Work Surface: When laminating paper with glue, it is essential to protect your work surface from the glue. You can use a plastic tablecloth or a piece of wax paper to prevent the glue from getting on the table.
5. Optional: Super Glue or Tape: If you need to fix any areas of the paper that did not laminate properly, you can use super glue or tape to fix them. You can learn how to thicken your super glue with our tutorial.
As you can see, other materials besides glue are essential to the lamination process. Make sure you have all of these materials on hand before starting on your project. In case you have some questions about glue-making, you might check our tutorial on how to make glue from scratch.
Preparing Paper for Lamination
When it comes to lamination, the preparation of paper is crucial to achieving a smooth and successful outcome. In this section, we will discuss the steps you need to take to prepare your paper for lamination, including cleaning and cutting the paper, as well as arranging the materials. Proper preparation will help ensure that your laminated document lasts for a long time without any issues. But before we dive into the details, let’s talk about the materials you need, including glue types and other supplies. If you’re unsure about the type of glue to use for your lamination project, check out our comprehensive guide on how to make glue for some useful tips.
Cleaning and Cutting Paper
Before starting the lamination process, it is essential to clean and cut the paper. This ensures that the glue adheres to the paper evenly and thoroughly. Here are the steps for cleaning and cutting paper for lamination:
Cleaning the Paper:
1. Begin by wiping down the front and back of the paper with a clean, dry cloth to remove any dirt or dust particles that may interfere with the lamination process.
2. For stubborn stains or marks, use a damp cloth with a mild detergent solution to gently rub the affected area. Ensure that the paper does not get too wet as the moisture can warp or ruin the paper.
3. Dry the paper thoroughly with a clean, dry cloth before proceeding to the next step.
Cutting the Paper:
1. Use a straight-edge ruler and a sharp craft knife or scissors to make precise cuts to the paper.
2. Measure and mark the paper to the required size before cutting to ensure that it fits the project specifications.
3. Depending on the project, use a guillotine cutter for large batches of paper or a rotary cutter for intricate or curved cuts.
4. Be sure to cut the paper slightly larger than the required size to accommodate any shrinkage that may occur during the lamination process.
It is crucial to keep in mind that the success of lamination largely depends on how well the paper is prepared beforehand. Following the cleaning and cutting steps mentioned above will ensure that your paper is ready for a successful lamination process.
If you’re looking for other glue-related projects, check out our articles on how to glue vellum to paper or how to thicken super glue.
Arranging Materials
When it comes to paper lamination, arranging materials is an important step to ensure a successful lamination. First, prepare the surface where the lamination will be done. You can use a flat surface like a table and cover it with a plastic or vinyl sheet to avoid messing up the surface with glue.
Then, gather all the materials needed, including the paper, glue, and any additional materials like a roller or brayer. Make sure that you have enough glue to cover the paper entirely. You can choose to use a glue stick, a spray adhesive, or liquid glue.
Pro-tip: If you’re using a liquid glue, mix it with a small amount of water to thin it out a bit. This will make it easier to spread and prevent the paper from wrinkling.
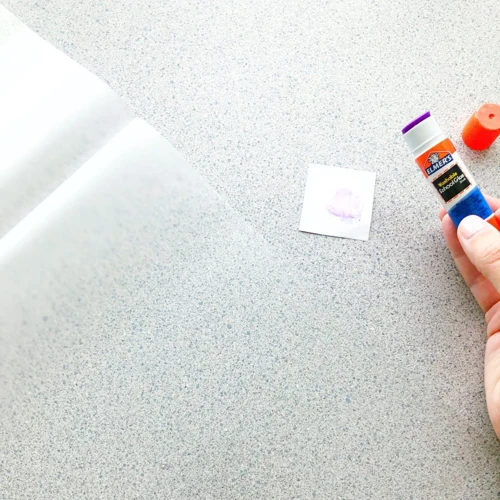
Arrange your paper on the prepared surface, making sure it’s flat and void of any wrinkles or bubbles. Apply the glue onto the paper, ensuring that it’s completely covered. You can use a brush, roller or your hands to spread the glue evenly if you’re using glue stick.
Pro-tip: It’s important to apply the glue thinly and evenly to avoid wrinkling or bubbling. If the glue is too thick, it will take longer to dry and may cause the paper to warp.
Once the glue is applied, carefully place the other sheet of paper on top. Gently press down on the paper to ensure that it sticks completely and that there are no air pockets between the papers. Use a roller or brayer to apply even pressure, starting from the center of the paper and working your way outwards to the edges.
Pro-tip: If you don’t have a roller or brayer, you can use a clean bottle or can to roll over the paper with the same pressure.
Once the papers are stuck together and no air pockets are present, wipe off any excess glue around the edges of the paper with a damp cloth. Let the paper completely dry before using it for any purposes.
Pro-tip: You can speed up the drying process by placing a heavy object like a book on top of the laminated paper. This will help the paper lay flat and dry much quicker.
With these simple steps on how to arrange materials for paper lamination, you can produce high-quality laminated paper with ease. Now that you have laminated paper, use it to create fun DIY projects or even make slime. For more tips on how to make slime without glue or starch, click here.
How to Laminate Paper with Glue
Now that we’ve covered the materials needed and preparation for paper lamination, it’s time to move on to the main event – how to laminate paper with glue. This process may seem intimidating, but with the right approach and materials, it can be an easy and effective way to protect and preserve your important documents and crafts. Follow these step-by-step instructions and helpful tips to achieve successful results every time. And if you’re feeling adventurous, we’ll also explore alternative methods for paper lamination later on in this article. But for now, let’s get started on the glue method. (No relevant anchor found for internal linking to another page)
Step-by-Step Process
The process of laminating paper with glue may seem daunting, but it is fairly simple. Here is a step-by-step guide to help you successfully laminate your paper with glue:
- Choose the right type of glue: As discussed earlier, PVA glue is the best option for paper lamination due to its strong hold and flexibility.
- Prepare your work area: Lay out your materials and cover your work surface with a protective layer to prevent glue from getting everywhere.
- Clean the paper: Use a clean, dry microfiber cloth to remove any dust, dirt, or debris from your paper. Any particles that are left on the paper can cause wrinkles or bubbles once it is laminated.
- Apply the glue: Use a small, flat brush to apply a thin layer of glue onto one side of the paper. Make sure the layer is even and covers the entire surface of the paper. Be careful not to apply too much glue, as it will cause the paper to wrinkle or warp.
- Stick the papers together: Carefully align the second piece of paper with the first one and press them together firmly. Use a roller or a flat, heavy object to smooth out any air bubbles or wrinkles in the paper.
- Let it dry: Allow the glue to dry completely before handling the laminated paper. For best results, let the paper dry for at least 24 hours under a flat, heavy object, like a book.
Following these steps will help you achieve a smooth and successful lamination process. Remember to use PVA glue, properly clean the paper before applying glue, apply an even layer of glue, and let the paper dry completely before handling it.
If you want to experiment with alternative methods for paper lamination and add some fun elements to your project, check out how to make slime without glue or starch or how to make goo out of glue and water for some ideas!
Tips for Successful Lamination
Successful lamination requires careful attention to detail. Here are some tips to help you achieve a high-quality, long-lasting lamination:
| Tip | Description |
| Use the right type of glue | Make sure you are using a glue that is appropriate for your project. Some glues may not work well with certain types of paper or may cause warping or bubbling. Refer to the product instructions or do some research to find the best glue for your needs. |
| Apply glue evenly | Uneven glue application can result in bubbles or warping. Use a brush or roller to apply the glue evenly, making sure to cover the entire surface of the paper. |
| Avoid using too much glue | Using too much glue can cause the paper to warp or cause bubbles to form. Apply a thin layer of glue to the paper, and then place the laminating material on top. |
| Press out air bubbles | While the glue is still wet, use a roller or your hands to press out any air bubbles that may have formed between the paper and the laminate. This will help ensure a smooth, flat lamination. |
| Allow the lamination to dry completely | After you have finished laminating the paper, allow the glue to dry completely before handling the paper. This will help prevent any smudging or damage to the paper. |
| Consider using alternative lamination methods | If you are having trouble getting a successful lamination using glue, consider using alternative methods such as tape or contact paper. These methods may be easier to work with and may produce better results for your project. Check out our article on how to glue intricate die cuts for more information. |
Keep in mind that a successful lamination can greatly enhance the durability and appearance of your paper projects. By following these tips and taking care to apply the glue evenly and allow it to dry completely, you can achieve a professional-looking lamination that will last for years to come. If you want to know how to glue wallpaper, check out our article on how to glue wallpaper. However, we do not condone or support the use of glue traps to catch birds, please do not use them.
Alternative Methods for Paper Lamination
If you do not have access to a laminating machine, do not fret! There are alternative methods for laminating your paper projects that are both budget-friendly and easy to do. These methods can be especially handy when you only need to laminate a few sheets of paper. Keep reading to discover two alternative methods for paper lamination – using tape and using contact paper. And while we’re on the topic of alternative uses for glue, check out this interesting article on how to trap birds with glue. But of course, we do not recommend using glue for such purposes!
Using Tape
An alternative to laminating paper with glue is to use tape. This method is a quick and easy way to protect documents or photos. Here’s how to do it:
- Choose the Right Tape: For this method, it is best to use clear tape, such as Scotch tape or packing tape. Avoid using colored or patterned tape as these may not provide an even finish.
- Prepare the Paper: Before starting, make sure the paper is clean and free of any debris. To do this, wipe the paper with a clean cloth or tissue. Also, make sure that the edges of the paper are straight and even.
- Cut the Tape: Cut the tape to the size of the paper. It is recommended to use two strips of tape per side of the paper to ensure adequate coverage. Place half of each strip of tape on the front of the paper, allowing the other half to hang off the edge. Repeat this process for the other side of the paper.
- Secure the Edges: Once the tape is in place, use a ruler or credit card to smooth out any air bubbles and ensure it sticks evenly to the paper. Then, fold the overhanging tape onto the back of the paper to secure the edges.
- Trim the Excess: Finally, use a pair of scissors to trim any excess tape from the edges of the paper. Be careful not to cut into the paper itself.
While this method may not provide the same level of protection as laminating with glue, it is a convenient alternative that can help preserve important documents or photos. It is especially useful when you need to laminate something quickly and don’t have access to a laminating machine.
Using Contact Paper
When it comes to laminating paper, using contact paper is another alternative method that you can consider. Unlike glue, contact paper involves a sticky adhesive that will hold the paper in place without the need for any additional materials. This method is popular for those who want a hassle-free and quick way to laminate their documents. Here’s what you need to know about using contact paper for paper lamination:
| Materials Needed: | Steps: |
|---|---|
| Contact paper | 1. Cut a piece of contact paper that is slightly larger than the document you want to laminate. |
| Scissors | 2. Peel the backing off the contact paper. |
| Clean, dry cloth | 3. Carefully place the document on the sticky side of the contact paper. |
| 4. Use the clean, dry cloth to smooth out any wrinkles or bubbles. | |
| 5. Cut away the excess contact paper around the edges of the document. |
Some Tips for Successful Contact Paper Lamination:
- Measure the document carefully to ensure that you cut the correct size of contact paper
- Start by peeling only a small part of the backing, so you can adjust and reposition the document if needed
- Work slowly and carefully to avoid wrinkles and bubbles
- Smooth out the document slowly, starting from the center and working towards the edges
- If there are any bubbles or wrinkles, use a needle to prick a tiny hole and press the air out with your finger
Using contact paper for paper lamination is an easy and efficient option. It can come particularly handy if you do not want to make a mess with glue and are in need of a quick solution. With the right materials and technique, you can easily laminate any important document with the help of contact paper.
Conclusion
In conclusion, lamination can be a useful technique for preserving and protecting important documents or creating durable and waterproof labels, signs or placards. By using glue as a laminating agent, this process can be a low-cost and accessible option for those who don’t have access to a laminating machine.
However, it is important to use the right materials, follow proper preparation techniques, and carefully follow the step-by-step process to ensure successful lamination. Remember to select the right type of glue for your needs, clean and cut your paper properly, and arrange your materials in a well-ventilated area.
Moreover, if you are looking for other alternatives for paper lamination, you can explore methods like using tape or contact paper, which are also great options for creating waterproof and durable documents.
In any case, always remember to handle the materials with care, follow safety guidelines, and experiment with different techniques to achieve the best results. Lamination with glue is a fun and creative process that can help you protect your valuable documents, create long-lasting crafts, and unleash your inner artist. So, take your time, practice your skills, and let the laminating adventures begin!
Frequently Asked Questions
What is paper lamination, and what are its benefits?
Paper lamination is the process of encasing paper between two layers of plastic to protect it from moisture, stains, and wear and tear. Lamination helps preserve important documents, photographs, and artwork, and makes them long-lasting and durable.
What kind of paper can be laminated?
Almost any paper can be laminated, including photographs, posters, certificates, maps, and more. It’s important to choose the right type of laminate for the paper to ensure the best results.
What types of glue are best for paper lamination?
PVA glue and rubber cement are two good types of glue for paper lamination. They are both easy to work with, dry clear, and are readily available at craft stores and online.
Do I need a laminating machine to laminate paper?
No, you can actually laminate paper with just glue and some plastic sheets. However, a laminating machine will make the process quicker and more efficient, especially if you’re laminating larger amounts of paper.
Can I remove the laminate from a laminated paper?
Yes, it is possible to remove the laminate from a laminated paper, but it can be time-consuming and may damage the paper. It’s best to avoid laminating paper that you may need to remove the lamination from later.
Can I laminate paper with double-sided tape?
While double-sided tape can be used to laminate paper, it’s not the most effective method. The tape may come loose over time, and the edges of the paper may not be fully sealed. Glue or a laminating machine is a better choice.
Can I laminate paper without plastic sheets?
No, a plastic sheet or film is required to laminate paper. The plastic serves as a protective layer over the paper, keeping out moisture and debris.
Can I laminate paper with contact paper?
Yes, contact paper can be used to laminate paper. However, it can be more difficult to work with than laminating sheets and may leave bubbles or wrinkles if not applied carefully.
Can I laminate paper with a glue stick?
While a glue stick may work for small paper items, it’s not a reliable method for larger projects. The adhesive may become too clumpy and uneven, and the laminate may not adhere properly.
How long will laminated paper last?
Laminated paper can last for many years, depending on the type of lamination used and the conditions it is kept in. Avoid exposing laminated paper to extreme heat or direct sunlight to help extend its lifespan.