As you prepare for a night of sleeping under the stars, the last thing you want to deal with is an uncomfortable, deflated air mattress. Unfortunately, with wear and tear, leaks can occur and leave you with a less than comfortable sleeping surface. That’s where the perplexity comes in; what type of glue is best for repairing a punctured air mattress? Luckily, there are several options to choose from. In this article, we will explore different types of glue and provide step-by-step instructions on how to fix a leak in your air mattress. Additionally, we’ll share some key considerations to keep in mind when deciding which type of glue to use. So, let’s dive in and get you back to sleeping soundly under the stars.
Types of Glue
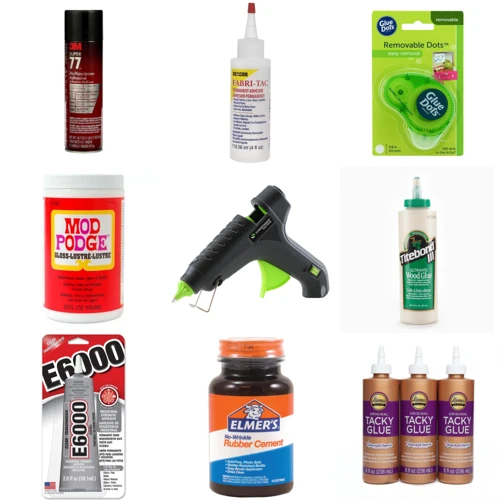
When it comes to repairing an air mattress, choosing the right glue can make all the difference. There are a variety of options available, each with its own set of pros and cons. It’s important to understand the differences between various types of glue before making a decision on which one to use. Here are some of the most widely used glues for repairing air mattresses: PVC glue, rubber cement, epoxy, super glue, and contact cement. Let’s take a closer look at each option and what makes it unique.
1. PVC Glue
PVC glue, also known as vinyl adhesive, is the go-to choice for repairing air mattresses made of PVC material. This type of glue is designed specifically to bond PVC plastic, making it perfect for air mattress leak repairs. Here’s a breakdown of the key information you need to know about using PVC glue for your air mattress repair:
| Pros | Cons |
|---|---|
| Strong bond: PVC glue creates a strong, durable bond that can last a long time. | Chemical smell: PVC glue can have a strong odor, so it’s important to use it in a well-ventilated area. |
| Waterproof: Once the glue sets, it creates a waterproof seal, which is ideal for air mattress repairs. | Drying time: PVC glue can take some time to dry completely, so it’s important to be patient and let the glue dry completely before inflating the air mattress. |
| Easy to apply: PVC glue is easy to apply with a brush or applicator. | Not ideal for all materials: PVC glue is designed specifically for use with PVC plastic, so it may not work as well on other materials. |
PVC glue is a great option for repairing air mattresses made of PVC material. It creates a strong, waterproof bond and is relatively easy to apply. However, it can have a strong odor and may not be ideal for use on other types of materials. When using PVC glue, be sure to work in a well-ventilated area and allow enough time for the glue to dry completely before inflating the air mattress.
2. Rubber Cement
Rubber cement is another popular glue option for repairing air mattresses. It is a versatile and reliable adhesive that is widely used for many different types of surfaces. The main advantage of rubber cement is that it forms a strong and flexible bond that can withstand pressure and movement without cracking or breaking. This makes it an excellent choice for air mattresses, which are often subjected to frequent use and abuse.
Here are some key points to keep in mind when using rubber cement for air mattress repair:
– Rubber cement is typically sold in small tubes or jars, which makes it easy to apply directly to the affected area.
– Before applying the glue, make sure the surface is clean and dry. Use a mild detergent and water to remove any dirt or debris, and then allow the surface to air-dry completely.
– Apply a thin, even layer of rubber cement to the affected area, using a small brush or spatula. Be careful not to apply too much glue, as this can cause clumping or uneven coverage.
– Allow the glue to dry completely before using the air mattress. This can take anywhere from a few minutes to several hours, depending on the temperature and humidity of the environment.
– Once the glue has dried, test the repair by inflating the air mattress and applying pressure to the affected area. If the repair holds up, the air mattress should be ready for use.
Rubber cement is a great choice for air mattress repair, as it is strong, flexible, and easy to apply. However, it is important to follow the application tips carefully to ensure a successful repair. Additionally, keep in mind that rubber cement may not be suitable for all types of air mattresses or leaks. If you have any doubts or concerns, consult the manufacturer’s recommendations or seek professional assistance.
3. Epoxy
When it comes to repairing an air mattress, one of the most effective types of glue is epoxy. Epoxy is a two-part adhesive that consists of a resin and a hardener. When mixed together, they create a strong and durable bond that is resistant to water, heat, and chemicals.
Why use epoxy?
Epoxy is a great choice for air mattress repair for a few reasons:
- It is incredibly strong: Epoxy creates a bond that is stronger than the materials it is bonding together, making it an ideal choice for repairing PVC air mattresses.
- It is waterproof: Because epoxy is resistant to water, it is perfect for repairing air mattresses that are used in wet environments, such as for camping or outdoor activities.
- It is heat-resistant: Epoxy can withstand high temperatures, which makes it a great choice for air mattresses that may be used in hotter climates.
How to use epoxy for air mattress repair:
To use epoxy to repair an air mattress, follow these steps:
- Clean the area: Before applying the epoxy, make sure the area around the leak is clean and free from any dirt or debris.
- Mix the epoxy: Follow the manufacturer’s instructions on how to mix the resin and hardener together. Typically, you will need to mix equal amounts of each component together.
- Apply the epoxy: Using a small paintbrush or cotton swab, apply a thin layer of epoxy to the leaking area on the air mattress. Be sure to apply the epoxy evenly over the entire area.
- Let the epoxy dry: Depending on the manufacturer’s instructions, the epoxy may need to dry for several hours or overnight. It is important to let the epoxy fully cure before using the air mattress again.
- Test the repair: Once the epoxy has fully cured, test the repair by inflating the air mattress and checking for any leaks. If there are no leaks, the repair was successful!
Important considerations:
While epoxy is a great choice for repairing air mattresses, there are a few important considerations to keep in mind:
- Use in a well-ventilated area: Epoxy can emit fumes that can be harmful if inhaled in large quantities. Make sure to use it in a well-ventilated area or wear a mask while working with it.
- Follow the manufacturer’s instructions: Different brands of epoxy may have different instructions for use, so make sure to read and follow the instructions carefully for the best results.
- Use on PVC air mattresses only: Epoxy is typically only recommended for use on PVC air mattresses. If your air mattress is made of a different material, such as rubber or vinyl, be sure to use a glue that is specifically designed for that material.
Epoxy is a great choice for repairing an air mattress because of its strength, water resistance, and heat resistance. By following the manufacturer’s instructions and taking the necessary safety precautions, you can easily and effectively repair your air mattress with epoxy.
4. Super Glue
Super glue is another option you can use for repairing your air mattress. This type of glue is also known as cyanoacrylate adhesive. It is a quick-drying and strong adhesive that is resistant to water.
Advantages
- Quick-drying
- Strong bonding capability
- Water-resistant
- Easy to use
Disadvantages
- Not flexible
- Can be brittle
- Can cause skin irritation
- May not adhere to all materials
When using super glue, it is important to follow the directions carefully and to use it in a well-ventilated area. The glue can create fumes and may cause irritation to the eyes and throat. It is recommended to wear safety goggles and a mask when working with super glue.
To use super glue, clean the area of the leak and apply a small amount of glue to the affected area. Hold the surfaces together for at least 30 seconds to allow the glue to bond. It is important to note that super glue is not flexible once it has dried, so it may not be the best option for larger tears or holes in your air mattress.
While super glue can provide a strong bond for small repairs, it may not work for all types of materials and repairs. Consider the material of your air mattress and the size of the repair needed before choosing to use super glue.
5. Contact Cement
When it comes to repairing your air mattress, contact cement is another glue option to consider. Contact cement is a type of adhesive that is applied to both surfaces being glued together and allowed to dry before being pressed together. This creates an incredibly strong bond that is resistant to heat and water, making it perfect for air mattress repairs.
Here are some key points to keep in mind when using contact cement for your air mattress repair project:
- Be mindful of fumes: Contact cement contains solvents that emit strong fumes. It is essential to work in a well-ventilated area and wear a mask to avoid inhaling the fumes.
- Prepare the surfaces: Like with any glue, it is crucial to clean and rough up the surface you plan to glue. Use sandpaper or a wire brush to create a rough surface for the contact cement to bond to effectively.
- Apply correctly: Apply a thin layer of contact cement to both surfaces using a brush. Be sure to follow the manufacturer’s instructions when applying and drying time. They vary by product, so read the packaging carefully.
- Align carefully: Once the cement is applied, carefully align the edges and press the surfaces together with firm pressure.
- Allow time to dry: Contact cement takes time to dry, typically around 15-20 minutes. Be sure to keep the surfaces pressed together during this time and avoid any movement that could shift the alignment.
Contact cement is an excellent option for air mattress repairs and can provide a long-lasting, strong bond. However, be sure to follow proper safety precautions when using it, such as working in a well-ventilated area and wearing a mask. Taking the time to properly prepare and apply the cement will ensure a successful repair that lasts for a long time.
Application Tips
When repairing an air mattress, applying glue is a crucial step that requires careful attention and precision. To ensure your air mattress stays leak-free and in optimal condition, it’s important to follow the proper application tips. By taking a few simple steps and using the right technique, you can effectively repair your air mattress and extend its lifespan. Here are some key tips to keep in mind when applying glue to your air mattress.
1. Clean the Area
Before applying any glue on an air mattress, it is essential to clean the area properly. This step is important because it eliminates dirt and oils from the surface, ensuring a strong bond between the glue and material. The first step in cleaning the area involves removing the mattress’s cover or patch that covers the leak.
Table: Steps to clean the area before applying glue
| Steps | Description |
|---|---|
| Step 1 | Remove the cover or patch |
| Step 2 | Clean the area with soap and water |
| Step 3 | Use sandpaper to rough up the surface |
| Step 4 | Wipe the area with rubbing alcohol |
After removing the cover or patch, use soap and water to clean the area around the leak. Make sure to remove any traces of dirt, grease, or oils that may be present on the surface. After cleaning with soap and water, it is best to use sandpaper to gently rough up the surface, which will improve the bond’s strength. However, be careful not to damage the mattress’s material while doing this.
Once the sanding process is complete, it is time to wipe the area around the leak with rubbing alcohol. This step is crucial because it helps to remove any remaining dirt or oils from the surface. It also helps to evaporate any moisture present, which could weaken the bond and affect the repair process.
Cleaning the area before applying the glue is vital to ensure a strong bond and successful repair. Follow these steps carefully, and you will be on your way to restoring your air mattress to its former glory.
2. Rough Up the Surface
Before applying any glue on the air mattress, it is essential to prepare the surface by roughing it up. This is an important step that ensures the glue sticks well and creates a strong bond. In this step, you need to create a surface that is rough enough for the glue to hold. Here are some pointers to consider in the process of roughing up the surface:
| Step | Description |
|---|---|
| Step 1: | Use a sandpaper to roughen up the surface. Make sure to use sandpaper that is rough enough for the task but not too rough as to create scratches or damage the material. |
| Step 2: | Apply pressure while sanding. This step is important as it ensures that the area is roughed up evenly. Apply light, even pressure with the sandpaper to create a smooth and consistent rough surface. |
| Step 3: | Clean the surface. Once you have completed roughening up the surface, make sure to clean it thoroughly with a dry cloth. This will ensure that no dirt or debris remains, which can hinder the bonding process of the glue. |
By roughing up the surface, you create microscopic crevices that allow the glue to penetrate and hold onto the material. Without this step, the glue will simply sit on the surface, making it easy to peel off. So, make sure to dedicate ample time to this step and do it properly.
Remember that while sanding, you might create some loose debris. Make sure to clean this up properly before applying the glue. In doing so, you ensure that the surface is clean, and the glue can adhere properly without any interference.
Roughing up the surface is an important step in the process of gluing an air mattress. This step ensures that the glue creates a strong bond, which can withstand regular use. By following the steps outlined above, you can make sure that the surface is rough enough to hold the glue and that the bond is strong enough to hold when the mattress is inflated.
3. Apply Glue
Once you have prepped the surface of your air mattress, it’s time to apply the glue. Here are the steps to follow:
- Step 1: Squeeze a small amount of glue onto a clean surface. Be sure not to overapply the glue, as this can cause it to spread beyond the area you are repairing.
- Step 2: Use a brush or applicator to spread the glue onto the affected area. Be sure to cover the entire surface evenly and avoid creating any bubbles or gaps.
- Step 3: Press down on the area to encourage the glue to adhere. You can use a roller or your fingers to apply pressure, but be sure not to move the air mattress too much, as this can cause the glue to spread or create a lumpy surface.
- Step 4: Let the glue dry according to the instructions on the package. This will usually take anywhere from 15 minutes to an hour.
- Step 5: Apply a second coat of glue if necessary, ensuring that you allow it to dry properly before testing the repair. If you are unsure whether the repair has been successful, check for leaks by applying some soapy water to the area and looking for bubbles.
Remember to wear gloves and work in a well-ventilated area, as some glues can be dangerous if inhaled or if they come into contact with skin.
4. Dry Time
Once you have applied the glue to the air mattress, it’s important to allow it to dry completely before inflating or using the mattress again. The dry time for each type of glue may vary, and it’s essential to follow the manufacturer’s recommendations to ensure a successful repair. Here is an approximate drying time for each type of glue:
| Type of Glue | Dry Time |
|---|---|
| PVC Glue | 24-48 hours |
| Rubber Cement | 10-15 minutes |
| Epoxy | 24 hours |
| Super Glue | 10-30 seconds |
| Contact Cement | 15-20 minutes |
It’s worth noting that drying time for glue can vary based on several factors, such as humidity and temperature. It’s advisable to give a little extra time for drying than the manufacturer’s recommended time. Rushing the drying process can result in a failed repair, and you may have to start the process again.
Once the glue has completely dried, you can inflate the air mattress and check for possible leaks. If there is still a leak, a repeat application with the same type of glue may be needed. If the second attempt at repairing the air mattress with the same type of glue is not successful, try another type of glue.
5. Test the Repair
After completing the repair process, it’s essential to test whether the glue has effectively sealed the leak. A leaky air mattress can be frustrating and spoil an otherwise comfortable night’s sleep. Testing the repair ensures that the mattress is no longer leaking, and you’re ready to enjoy a peaceful night’s sleep.
One simple way to test the repair is to inflate the mattress and apply pressure to the repaired area with your hand. If you don’t feel any air escaping from the repaired area, then it’s a good sign that the repair has been successful. However, if you can feel air leaking out, then you may need to apply more glue or repeat the entire repair process.
Here’s a table summarizing the steps to test the repair for each type of glue:
| Glue Type | Test the Repair Process |
|---|---|
| PVC glue | Inflate the mattress and apply pressure on the repaired area with your hand. Wait for a few minutes and then recheck if there is any air escaping from the repair. |
| Rubber cement | Spot-check the glue’s drying hardness. If it’s completely dry, inflate the mattress and apply pressure on the repaired area with your hand. Wait for a few minutes and then recheck if there is any air escaping from the repair. |
| Epoxy | Inflate the mattress and apply pressure on the repaired area with your hand. Wait for a few minutes and then recheck if there is any air escaping from the repair. |
| Super glue | Inflate the mattress and apply pressure on the repaired area with your hand. Wait for a few minutes and then recheck if there is any air escaping from the repair. |
| Contact cement | Inflate the mattress and apply pressure on the repaired area with your hand. Wait for a few minutes and then recheck if there is any air escaping from the repair. |
It’s important to note that some repairs may take longer to dry than others. It’s recommended to wait about 24 hours before inflating the mattress to its full capacity. In case you find that the repair is still not successful, it’s recommended to start the process from scratch before it’s too late. Testing the repair process ensures that you have a properly sealed air mattress, which will save you from sleepless nights and unnecessary headaches.
Key Considerations
When it comes to repairing an air mattress, selecting the right glue is crucial. However, the factors to consider don’t just stop at the type of glue to use. The material of the mattress and the location of the leak are also important for determining the best approach. Additionally, weather conditions and the level of repair needed can impact the durability of the fix. Let’s take a closer look at these key considerations to ensure a successful repair that lasts.
1. Material
The type of material that your air mattress is made of plays a big role in what glue would work best for repairs. Here are some materials commonly found in air mattresses and the glue that works best with them:
- PVC: For PVC air mattresses, PVC glue is the best option. This type of glue bonds well with the material and creates a strong hold. It’s important to note that not all PVC glues are created equal, so ensure you get one that is specifically meant for PVC air mattresses.
- Vinyl: Vinyl air mattresses require a different type of glue than those made of PVC. Rubber cement is the best glue option for repairing holes in vinyl air mattresses. It’s important to note that using PVC glue on vinyl can damage the material and cause the repair to fail.
- Fabric: For punctures or tears in the fabric portion of your air mattress, an epoxy or contact cement will work best. These types of glues are great for bonding fabrics and creating a strong hold. It’s important to note that these glues can be a bit messier to work with, so take extra care when applying to ensure it doesn’t get on any surrounding fabric.
- Nylon: Nylon air mattresses are known for being a bit harder to repair. High strength adhesives like epoxies or cyanoacrylate (super glue) can be used to bond nylon, but they may require a bit more time and patience to apply. It’s also important to ensure that the adhesive you choose is safe for use on nylon.
When selecting a glue for your air mattress repair, take time to assess the material and research which glue works best with that material. Using the wrong type of glue can result in a failed repair, or even damage the material further.
2. Location of Leak
When it comes to repairing an air mattress, the location of the leak is an important consideration. The location can affect the type of glue you use and the level of repair needed. Here are some key locations to keep in mind:
| Location | Considerations |
|---|---|
| Surface of the Mattress | Leaks on the surface of the mattress are typically easier to repair and can usually be fixed with a simple patch. |
| Seams/Edges | Leaks near the seams or edges of the mattress can be more difficult to repair and may require a stronger adhesive. It’s important to make sure the glue can bond to both materials and can withstand any stretching or pressure. |
| Valve/Inflation Port | Leaks at the valve or inflation port can be tricky to repair and may require replacement. If the valve is damaged, it may not be possible to repair the mattress and a replacement may be necessary. |
| Base/Foundation | If the leak is coming from the base or foundation of the mattress, it may be best to replace the mattress entirely. Repairing a leak in the base can be difficult and may not be a permanent solution. |
It’s important to carefully inspect the mattress to determine the location of the leak before attempting any repairs. If the location is not immediately obvious, try inflating the mattress and listening for the sound of escaping air or spraying it with soapy water to look for bubbles. Once you have identified the location of the leak, you can choose the appropriate type of glue and level of repair needed.
3. Weather Conditions
When it comes to repairing an air mattress, the weather conditions can play a significant role in determining which glue to use. Extreme temperatures, high humidity, and moisture can all affect the adhesive’s effectiveness and durability. Taking these factors into consideration can help you choose the best glue for the job.
Factors to Consider:
- Temperature: Extreme temperatures can affect the adhesive’s holding power. For example, if you’re repairing an air mattress in extremely hot or cold conditions, certain adhesives may not work as well. PVC glue, for example, which is great for repairing air mattresses, works best in temperatures between 40-100°F.
- Humidity: High humidity levels can cause the adhesive to take longer to dry, which can provide ample time for the glue to collect dirt and other particles, making the repair less effective. In high humidity conditions, it’s recommended to use a fast-drying adhesive like super glue or epoxy.
- Moisture: Moisture can have a negative impact on many types of adhesives, causing them to weaken and break down over time. If the location of the air mattress leak is in an area that is frequently exposed to moisture, like around a pool or in a damp basement, it’s important to use a waterproof and moisture-resistant glue such as rubber cement or contact cement.
Weather conditions can have a significant impact on the adhesive’s effectiveness and durability when repairing an air mattress. It’s important to take into account the temperature, humidity, and moisture levels in the environment when choosing which glue to use. By doing so, you can ensure a long-lasting and effective repair.
4. Level of Repair Needed
When determining which glue to use on an air mattress, it’s important to consider the level of repair needed. The size and severity of the leak will require different methods and types of glue. To help you determine which glue to use, take a look at the table below:
| Level of Repair Needed | Glue Type |
|---|---|
| Minor leak | Rubber Cement |
| Small puncture | Super Glue or PVC Glue |
| Larger hole or tear | Epoxy or Contact Cement |
For minor leaks, using rubber cement should do the trick. This glue is specifically designed for repairing inflatable items, and is a common go-to for air mattresses. However, for small punctures, super glue or PVC glue may be necessary for a more secure and long-lasting repair.
When it comes to larger holes or tears, using epoxy or contact cement is likely to be more effective. These types of glue are designed to provide a strong and durable bond, and can withstand the heavier stress caused by larger air leakages. Keep in mind that some contact cement may require a longer drying time, so pay attention to the manufacturer’s instructions.
It’s important to note that if the damage is more severe than anticipated or you’re unsure about the level of repair needed, it may be best to consider purchasing a new air mattress. Attempting to repair a severely damaged mattress may only result in further damage, and ultimately a waste of time and money.
5. Safety
It is important to consider safety when using glue on an air mattress. Here are some safety tips to follow:
- Read the label: Before using any glue, it is essential to read the label carefully to ensure that it is safe for use on PVC or rubber materials. Make sure to follow all the instructions on the label.
- Ventilation: When using the glue, make sure you are in a well-ventilated area. This will help prevent the inhalation of harmful fumes.
- Protect your skin: Glue can be irritating to the skin, so it is recommended to wear gloves when applying it. If you do get glue on your skin, wash it off immediately with soap and water.
- Dispose of properly: Once you have finished using the glue, make sure to dispose of it properly. Most glue containers can be recycled or thrown away in the trash. Do not pour unused glue down the sink or toilet.
Following these safety precautions will help ensure a successful and safe repair of your air mattress. Always remember to take proper precautions to protect yourself and the environment during the repair process.
Conclusion
In conclusion, repairing an air mattress can be a simple task with the right glue and application techniques. It’s important to consider the type of material the air mattress is made of, as well as the location and severity of the leak. Safety should always be a priority when using glue, especially in well-ventilated areas to avoid inhaling fumes. PVC glue, rubber cement, epoxy, super glue, and contact cement are all options to consider when choosing a glue. Each type has its own pros and cons, so it’s important to weigh them carefully before making a decision. When applying glue, it’s crucial to clean and rough up the surface and allow for adequate drying time. After the repair is made, testing the mattress is essential to ensure it holds up. With these key considerations and application tips in mind, fixing a leaky air mattress can be a simple and successful DIY project.
Frequently Asked Questions
1. Can any glue be used on an air mattress?
No, not all glue types are suitable for use on an air mattress. It is important to use a glue that is compatible with the material of the air mattress and can withstand the pressure of the air inside.
2. How do I know what type of material my air mattress is made of?
You can check the label or packaging that came with your air mattress for information on the material(s) used. If the label is missing or you are uncertain, you can do a burn test to determine the material. However, it is recommended to consult the manufacturer’s website or customer service hotline before conducting the burn test.
3. Can I use regular household glue on my air mattress?
No, regular household glue is not recommended for use on an air mattress as it is not strong enough to withstand the pressure and weight of your body.
4. What if I don’t have any of the recommended glues at home?
If you don’t have any of the recommended glue types, you can try using a vinyl repair kit specifically designed for air mattresses. These kits come with a patch and adhesive that are suitable for repairing air mattresses.
5. Is it safe to use glue on an air mattress?
Yes, it is safe to use glue on an air mattress as long as you follow the instructions carefully and take necessary precautions such as wearing gloves and working in a well-ventilated area.
6. How long does it take for the glue to dry?
The drying time varies depending on the type of glue used. Generally, it can take anywhere from a few minutes to several hours for the glue to fully dry and cure.
7. Can I still use my air mattress after it has been repaired?
Yes, you can still use your air mattress after it has been repaired. However, it is important to test the repair before using it to sleep on.
8. Can I use glue to repair a hole on the seam of my air mattress?
No, glues are not recommended for repairing holes on the seam of an air mattress. Instead, it is recommended to use a vinyl patch to cover the hole.
9. Do I need to rough up the surface before applying glue?
Yes, it is recommended to rough up the surface with sandpaper before applying glue. This will help create a better bond between the glue and the material of the air mattress.
10. Can I repair my air mattress outside in cold weather?
No, it is not recommended to repair your air mattress outside in cold weather as the glue may not cure properly and the repair may not hold up in low temperatures.