Have you ever started a painting project only to find that the paint didn’t stick properly, or the color didn’t look right? The problem might not be with the paint itself, but with the primer you used – or didn’t use. Choosing the right primer is a crucial step in any painting project, but with so many types and options available, it can be overwhelming to decide which one to use. In this article, we will guide you through the process of selecting the appropriate primer, preparing the surface, and applying it correctly to ensure a successful and long-lasting painting project.
Why Do You Need Primer?
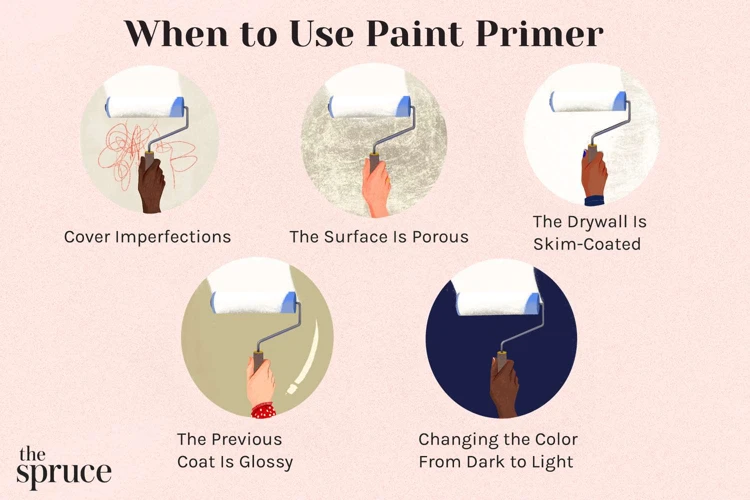
When it comes to painting a surface, many people often question the necessity of using primer. However, primer plays a crucial role in ensuring a successful painting project. Without primer, your paint job may not turn out as expected, potentially leading to issues such as peeling, cracking, or bubbling. In this section, we will explore the specific reasons why primer is essential for any painting project. For more information about primers and their types, you can check out this page.
Increases Adhesion
Primer plays an essential role in any painting project. One of the key benefits of using a primer is that it increases adhesion. This means that the primer helps the paint bond better to the surface, resulting in a smoother and long-lasting finish.
Without a primer, the surface can be too smooth or too porous, causing the paint to either slide off or be absorbed too quickly. In some cases, the paint may not stick at all, resulting in peeling or chipping. This is especially true for surfaces like metal, plastic, or ceramic that are often difficult to paint without a proper base.
A primer creates a layer between the surface and the paint, providing a smoother, more consistent and stable surface that the paint can adhere to easily. With a firmly adhered base, the paint is less likely to fade, peel, or crack over time.
Whether you are painting a small DIY project or an entire room, using a primer is crucial to ensure a successful outcome. It is important to apply the appropriate type of primer for the specific surface and coating, as well as following the proper preparation and application steps for the best results.
If you skip this step, you may not achieve the finish you want, and your paint may not last as long as it could have with a properly applied primer. So, be sure to give priming the attention it deserves for a successful project.
For more information on priming, check out our article on priming for painting, which includes additional tips and safety precautions to take when working with primers.
Protects the Surface
Primer is an essential part of any painting project as it serves several important purposes. One of the key roles of primer is to protect the surface.
Here are some ways that primer can protect the surface:
- Blocks Stains: Primer helps to prevent stains and discolouration from bleeding through the paint, especially when painting over surfaces that have been previously damaged by water or smoke. Using a stain-blocking primer can help to prevent unsightly stains from ruining your paint job.
- Prevents Rust: Metal surfaces need to be protected against rust, which can weaken the underlying material and cause unsightly discolouration. Applying a primer that is specifically designed to inhibit rust will help to slow down the oxidation process and prolong the life of the metal.
- Seals Porous Surfaces: Some surfaces, such as bare wood or drywall, can be quite porous and absorb paint unevenly. Instead of applying multiple coats of paint to compensate for this, using a primer can help to seal the surface and provide a consistent base for the paint to adhere to.
By protecting the surface with primer, you can ensure that your paint job looks great and lasts for as long as possible. To maximize the protective benefits of primer, it’s important to choose the right type of primer for your specific project and follow best practices for application. For more information on primer application tips, click here.
Improves Coverage and Durability
Primer improves coverage and durability of the paint as well. It creates a smooth and uniform surface for painting, which ultimately leads to better coverage. Without priming, the paint may require more coats to cover the surface properly.
Primer increases the bonding effectiveness of the paint. It prevents the paint from peeling, cracking or blistering in the future. It is important to select the right kind of primer, especially for surfaces that are prone to damage or weathering conditions.
Using primer also saves time and money. It reduces the number of paint coats you need to apply and extends the life of the paint job. By using tinted primer, you can further enhance the color of the topcoat, reducing the number of topcoats needed.
However, it is important to note that the coverage and durability of the paint job also depend on the quality of paint and surface preparation. Skipping the priming step might lead to a poor-quality paint job, requiring a higher number of paint coats. Primer is an essential step that should not be skipped for optimal results.
Tinted primer is another option that can improve coverage and durability. It is a highly useful product that combines the benefits of both paint and primer in one formula. The tinted primer delivers a smooth and even finish while allowing the paint to adhere better for long-lasting protection.
The use of primer not only improves the quality of the paint job but also saves time and money in the long run. To determine the number of coats of primer needed, one should carefully select the appropriate primer based on the surface type, finish, color, and other factors.
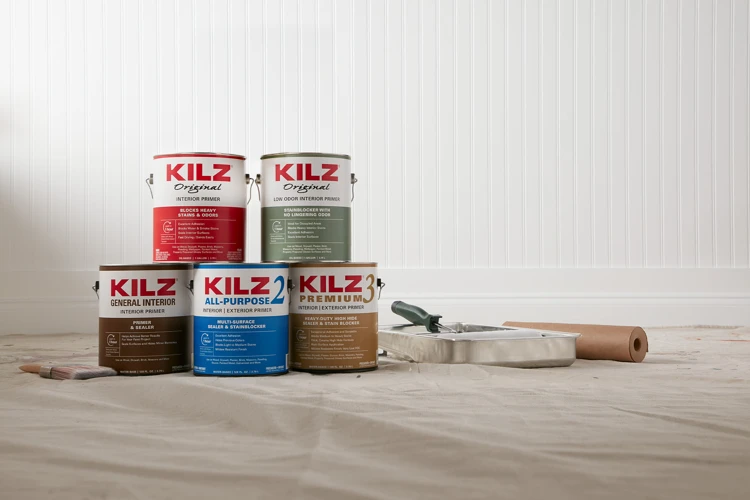
Types of Primer
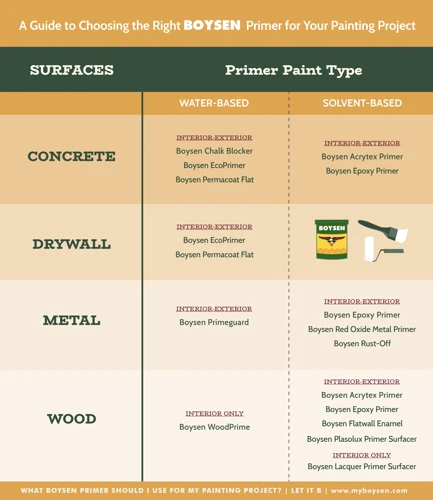
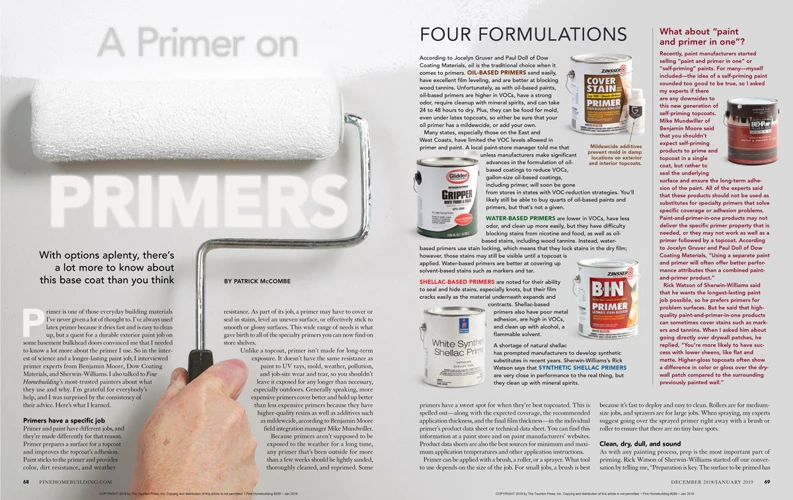
When it comes to choosing the right primer, it’s important to consider the different types available. Primers are available in various formulations, each with unique properties suited for specific surfaces and projects. The wrong primer can compromise the quality of the paint job or even damage the surface to be painted. Fortunately, you can avoid these issues by familiarizing yourself with the different types of primer available on the market today. From oil to water-based options to specialty primers, the variety of choices can be overwhelming. However, understanding the properties and application of each type can help you select the appropriate primer for your project. Let’s take a closer look at the different types of primer available and their specific uses to help you make an informed decision. But before that, if you don’t find it necessary to prime your surface, you can learn more about this topic by visiting our article “Do You Really Need to Prime Before Painting?“.
Oil-based Primer
Oil-based primer is a popular choice for many painting projects because of its durability and versatility. It is made with an oil base and is known for its ability to adhere to a variety of surfaces, including wood, metal, and previously painted surfaces.
Advantages:
| Advantages | Explanation |
|---|---|
| Better Adhesion | Oil-based primer has better adhesion compared to water-based primers. It works well on tough surfaces and creates a stronger bond between the surface and the topcoat. |
| Durability | Oil-based primer is more durable and provides better protection against weathering and moisture, making it a better choice for exterior painting projects. |
| Stain-blocking properties | It is known for its exceptional stain-blocking properties that prevent tannin, rust, and other stains from bleeding through after painting. |
| Good penetration | It penetrates deeply into the surface, filling up small gaps and imperfections to create a smooth and even surface for painting. |
Disadvantages:
While oil-based primer has many advantages, it also has some disadvantages to consider. These include:
| Disadvantages | Explanation |
|---|---|
| Strong odor | Oil-based primer has a strong and potent odor that can be overwhelming. It is important to use it in a well-ventilated area and to wear a mask while doing so. |
| Long drying time | Oil-based primer dries slowly, making it necessary to wait for a longer period before applying the topcoat. This can be inconvenient, especially for people who want to finish the project quickly. |
| Requires solvents for cleanup | Cleaning up oil-based primer requires the use of solvents like mineral spirits or paint thinner, which can be harmful to the environment and difficult to dispose of. |
Oil-based primer is a solid choice for many painting projects, especially those that require durability and adhesion. However, it’s important to weigh its advantages and disadvantages before choosing it for your project. Depending on the nature of the project and the surface you’re painting, you may want to consider other types of primer as well. Remember to also consider the number of coats of primer needed before applying the final coat.
Water-based Primer
Water-based primer is an excellent option for many painting projects due to its numerous benefits. Here are the key features of this type of primer to help you decide if it’s the right choice for your project:
1. Environmentally Friendly: Water-based primer contains fewer VOCs (volatile organic compounds) compared to oil-based primer, making it environmentally friendly and safer to use indoors.
2. Easy to Clean: Water-based primer can be cleaned up easily with just soap and water. This makes it less messy and convenient to work with compared to oil-based primer, which requires harsh solvents to clean up.
3. Quick Drying: Water-based primer dries faster than oil-based primer, allowing you to apply a second coat sooner. It’s an excellent choice if you’re on a tight schedule or if you’re painting multiple rooms and need to finish the project within a short timeframe.
4. Versatile: Water-based primer can be used on a wide range of surfaces, including wood, drywall, and masonry. It has excellent adhesion and provides a strong foundation for the topcoat.
5. Low Odor: Water-based primer has a mild and pleasant odor that dissipates quickly. It’s an ideal option if you or someone in your household is sensitive to strong smells.
6. Cost-effective: Water-based primer is usually less expensive than oil-based primer, making it a cost-effective choice for large painting projects.
When using water-based primer, it’s essential to ensure that the surface is clean, dry, and free of any loose paint or debris before application. Additionally, it’s recommended to apply two coats of primer for best results. For more information on coats of primer needed, check out our article on how many coats of primer are needed for a project.
Ultimately, whether you choose water-based primer will depend on the specific needs of your project. It’s important to consider the surface you’re painting, the desired finish, and your budget to make the best decision.
Shellac Primer
Shellac primer is another popular type of primer. This type of primer is ideal for use on wood, metal, and drywall surfaces. It is also a good choice for sealing in odors and stains.
| Pros | Cons |
|---|---|
| Excellent stain and odor blocker | Expensive |
| Fast-drying | Requires denatured alcohol for cleanup |
| Seals in tannins and sap on wood surfaces | Not recommended for exterior use |
| Provides a hard, durable finish | Requires ventilation during application |
Shellac primer is great at blocking stubborn stains and odors, making it a popular choice for projects involving smoke or water damage. However, it is typically more expensive than other types of primer and requires denatured alcohol for cleanup. It also should not be used on exterior surfaces, as it can break down in harsh weather conditions.
It is important to note that shellac primer has a strong odor and requires proper ventilation during application. Additionally, it is a fast-drying primer, so it is important to work quickly and in small sections to avoid lap marks.
Shellac primer is a great option for surfaces that require superior stain and odor blocking, such as water or smoke-damaged drywall or wood surfaces. It provides a hard, durable finish and can be a great choice for interior projects.
Specialty Primer
Specialty primers are designed to address specific concerns that may arise in a painting project. Here are some examples of specialty primers that you may encounter:
- Stain-blocking Primer: Ideal for covering water stains or smoke damage, this primer provides a barrier to prevent the stain from bleeding through to the topcoat.
- Rust-inhibiting Primer: For metal surfaces that are prone to rust, this primer helps prevent further corrosion and creates a smoother surface for the topcoat to adhere to.
- Mold and Mildew-resistant Primer: Perfect for high-moisture areas like bathrooms and kitchens, this primer helps prevent mold and mildew from growing on the surface.
- Multi-surface Primer: A versatile primer that can be used on a variety of surfaces, including metal, wood, and drywall. This saves you the trouble of having to buy and use multiple primers.
Using a specialty primer ensures that you’re addressing any specific issues with the surface you’re painting. It also ensures that you’re improving the performance of your topcoat, which will save you time and money in the long run. Before choosing a specialty primer, it’s important to identify the unique needs of your project and choose a product that is designed to meet those needs.
Selecting the Appropriate Primer
One of the most crucial parts of a successful painting project is selecting the appropriate primer. With so many options available in the market, it’s easy to get overwhelmed and confused about which one to use. However, choosing the right primer is essential to ensure proper adhesion, protection, coverage, and durability of your painted surface. In this section of the article, we will guide you through the steps to select the right primer and factors to consider before making the final decision.
Identify the Surface
Before selecting the appropriate primer, it is important to identify the surface you will be painting on. This is essential for ensuring that the primer adheres properly to the surface and creates a smooth base for your paint to adhere to. Here are the steps to identify the surface:
- Check the Material: Firstly, identify the material of the surface. It could be drywall, brick, wood, metal, or any other type of material.
- Check the Condition: Once you know the material, check the condition of the surface. Is it a new surface or an existing one that has been painted before? Is the surface in good condition or does it have cracks, holes, or other surface issues that need to be repaired?
- Check for Stains: Look for any stains or substances that may have been previously applied to the surface. For instance, if the surface is made of wood, it might have knots or tannin stains that need a special type of primer.
- Check for Moisture: Lastly, check for any signs of moisture or water damage on the surface. Some types of surfaces like drywall or plasterboard can easily get damaged by moisture. Assess whether you need a specialty primer like a moisture barrier primer in order to properly prepare the surface for painting.
Identifying the surface is crucial for selecting the right type of primer to use. Skipping this step can lead to peeling or blistering of the paint, which can ruin the project. By identifying the surface, you can make an informed decision on selecting the appropriate primer for your painting project.
Choose the Right Primer Color
When it comes to choosing the right primer for your painting project, the color of the primer may be a consideration that you haven’t thought about. Primer is available in a range of colors, including white, gray, and tinted colors. The color of the primer can affect the appearance of the topcoat, particularly when using colors that are deeper or richer. For example, using a gray primer under a light blue topcoat will result in a truer blue color, while using a white primer may result in a lighter, washed-out blue.
Here are some tips to help you choose the right primer color for your project:
| Topcoat Color | Recommended Primer Color |
|---|---|
| White | White |
| Light or Pastel | White or Tinted |
| Medium | Tinted Gray or Similar Color |
| Deep or Rich | Gray or Tinted Primer Similar to Topcoat Color |
In general, white primer is a safe option for most projects unless you are using a deep or rich color. Using a gray primer or a tinted primer similar to the topcoat color can help achieve a truer color while also reducing the number of coats needed for coverage. Remember to also consider the type of surface you are painting on and the type of primer you need for adhesion and protection. Taking the time to choose the right primer color can make a significant difference in the final appearance of your project.
Consider the Coating
When choosing the appropriate primer for your painting project, it’s essential to consider the coating that you will be applying over the primer. Not all coatings are compatible with all types of primers, so it’s crucial to understand the characteristics of the coating you will use. Here are a few things to keep in mind:
| Coating type | Recommended Primer Type |
| Latex paint | Water-based primer |
| Oil-based paint | Oil-based or shellac primer |
| Enamel paint | Oil-based or shellac primer |
| Epoxy paint | Epoxy primer |
| Stains and varnishes | Shellac or specialty primer |
If you use an incompatible primer or apply the wrong type of coating, you may encounter issues such as poor adhesion, cracking, or bubbling. Make sure to select the appropriate primer for the coating to ensure a long-lasting and durable finish.
Another important consideration is the thickness of the coating. A thicker coating may require a primer that can withstand higher levels of pressure and stress. For example, an industrial coating that requires a high level of protection may need an epoxy primer or a specialty primer with added durability. On the other hand, a thinner coating, such as a clear stain, may require a shellac primer to ensure proper adhesion.
Take the time to research and consult with a professional to ensure that you select the appropriate primer for the coating you plan on using. This attention to detail will result in a finished project you can be proud of.
Decide on the Gloss Level
One of the factors to consider when selecting the appropriate primer for your painting project is the gloss level. The gloss level refers to the amount of shine or reflectivity on the surface of the paint. There are generally three options to choose from:
- High Gloss: This type of primer is highly reflective and shiny, and it makes imperfections more visible. It is best used on surfaces that are in good condition and do not have any visible defects.
- Semi-Gloss: This type of primer has a moderate shine and is less reflective than high gloss. It is ideal for use on surfaces with some imperfections and can hide minor flaws better than high gloss.
- Matte/Flat: This type of primer has little to no reflectivity and provides a non-shiny finish. It is the best option for surfaces with significant imperfections, as it can easily disguise flaws and uneven texture.
When deciding on the gloss level of your primer, it is important to consider the overall look you want to achieve and the condition of the surface you are painting. A high gloss primer may be suitable for a sleek and modern finish, while a matte or flat primer may be better suited for an older or more rustic appearance.
It is also important to note that the higher the gloss level, the more durable the finish will be, as high gloss is more resistant to damage and can be easily cleaned. However, it is also more difficult to apply and requires more preparation work to achieve a flawless finish. Ultimately, your choice of primer gloss level will depend on your personal preference and the requirements of your painting project.
Preparation Before Priming
Before applying primer to any surface, it is important to prepare the area properly. Preparation is a crucial step in achieving a smooth and long-lasting finish. Taking the time to properly prepare the surface will ensure that the primer adheres properly and the final result is flawless. There are several important steps that should be taken before applying primer, including cleaning the surface, repairing any issues, sanding the surface, and masking or taping the edges. Let’s take a closer look at each of these steps.
Clean the Surface
One of the most important steps before applying any primer is to clean the surface thoroughly. Any dirt, grime, or old paint can impact the adhesion and overall quality of the primer and paint layers. Here are some steps to follow to effectively clean the surface:
- Remove any loose debris: Use a stiff bristle brush or scraper to remove any loose paint or debris on the surface. Make sure to wear appropriate protective gear such as gloves and a mask.
- Wash the surface: Use a solution of water and all-purpose cleaner to wash the surface. This will remove any dirt, stains, or grease that may be present. Rinse thoroughly with water and allow to dry completely.
- Scrub tough stains: For tougher stains or grease build-up, use a degreaser or a mixture of vinegar and water to scrub the surface clean. Rinse thoroughly and allow to dry completely.
- Sand the surface: After the surface is clean and dry, lightly sand the surface with sandpaper. This will provide a slightly rough surface to help the primer adhere better.
By taking the time to clean and prep the surface properly, you’ll ensure that the primer will adhere and provide a durable finish.
Repair Surface Issues
Before priming, it’s crucial to inspect the surface for any issues that need to be addressed. Repairing surface issues can be a time-consuming task but is essential for achieving a beautiful and smooth finish.
Here are some common surface problems that require repair before priming:
- Cracks and Holes: Check for any holes, cracks, or dents in the surface. Use a putty knife to fill the holes and cracks with spackle or joint compound. Once it dries, sand the surface to smooth it out.
- Water Stains and Discoloration: If there are water stains or areas of discoloration, they will show through the primer and paint. Use a stain-blocking primer to ensure that these stains don’t bleed through your paint job.
- Peeling Paint: If there is paint that is peeling or flaking off, it’s imperative to remove it before priming. Use a paint scraper or putty knife to remove any loose paint. Sand the surface to smooth out any rough patches.
- Mold and Mildew: If the surface has mold or mildew, it’s vital to address this problem before priming. Use a mixture of bleach and water to clean the affected area thoroughly. Allow the surface to dry completely before applying the primer.
Take time to inspect the surface and repair any issues before applying primer. These surface problems will show through the paint, and addressing them early will result in a smooth and professional-looking finish.
Sand the Surface
Before priming the surface, it is important to properly sand it to create a smooth and even base for the primer to adhere to. Sanding the surface removes any rough spots, bumps, or imperfections, allowing the primer to spread more evenly and bond more securely.
When sanding the surface, the grit of sandpaper used will depend on the condition of the surface. A rough or uneven surface may require a lower grit (60-80), while a smoother surface may only need a higher grit (120-150). It is important to use a fine grit sandpaper to avoid scratching the surface.
To sand the surface, follow these steps:
| Step | Action |
|---|---|
| 1 | Clean the surface with a damp cloth to remove any dirt or debris. |
| 2 | Choose the appropriate grit of sandpaper for the surface. |
| 3 | Wrap the sandpaper around a sanding block or use a power sander for larger surfaces. |
| 4 | Sand the surface in a back-and-forth motion with light pressure. |
| 5 | Be sure to sand any edges or corners carefully to avoid creating sharp edges or angles. |
| 6 | Wipe the surface with a clean, dry cloth to remove any dust or debris. |
After sanding, it is important to thoroughly clean the surface to remove any dust or debris that may have been created during the sanding process. This will ensure a clean surface for proper primer adhesion.
Mask or Tape the Edges
It’s important to mask or tape the edges of the surface before applying primer to prevent getting primer on areas where you don’t want it. This step not only ensures that you have clean and precise edges but also saves you time and effort when it comes to cleaning up after the project.
To do this, you will need painter’s tape and a steady hand. It’s best to use high-quality painter’s tape to ensure that it sticks properly and doesn’t leave any adhesive residue behind. Before applying the tape, make sure the surface is dry and clean.
Here are some tips for masking or taping the edges:
| Tips | Description |
|---|---|
| Start with a clean surface | Remove any dirt, dust, or debris from the surface before applying the tape |
| Use a straight edge | Use a straight edge to ensure that the tape is applied in a straight line |
| Apply the tape carefully | Make sure the tape is applied evenly and that there are no wrinkles or bubbles |
| Press down firmly | Press down firmly on the tape to ensure that it sticks properly |
| Remove the tape carefully | Remove the tape carefully and slowly at a 45-degree angle to avoid damaging the surface or leaving adhesive residue behind |
By taking the time to mask or tape the edges, you can ensure that your priming project looks neat and professional. It may take a few extra minutes, but the end result will be well worth the effort.
Applying Primer
Now that you have chosen the appropriate primer for your painting project and have prepared the surface properly, it is time to apply the primer. This step is crucial to achieving a successful finished product. The application method you choose and how you apply the primer can greatly impact the coverage, adhesion, and overall quality of your paint job. In this part of the article, we will discuss the different methods of applying primer, key tips for success, and how to avoid common mistakes. So, let’s dive into the application process to ensure your painting project turns out beautifully.
Using a Brush
When using a brush to apply primer, it’s important to choose the right type of brush to ensure that the primer goes on smoothly and evenly. Synthetic bristle brushes are a good choice for water-based primer, while natural bristle brushes work well with oil-based primer. Here are some steps to follow when using a brush to apply primer:
| Step | Description |
| 1 | Begin in the corner farthest from the door and work your way towards it. This will prevent you from accidentally painting yourself into a corner. |
| 2 | Dip the brush into the primer and tap off the excess on the side of the paint can. |
| 3 | Apply the primer in long, even strokes. Be sure to smooth out any drips or pools of primer as you go. |
| 4 | Re-dip the brush as needed, tapping off excess primer before each application. |
| 5 | Work in small sections, blending each section into the next to create a seamless finish. |
| 6 | Allow the primer to dry completely before applying a second coat, if necessary. |
| 7 | Clean the brush thoroughly with soap and water or the appropriate cleaning solvent for the type of primer you used. |
By following these steps and using the appropriate brush, you can achieve a smooth and even coat of primer that will ensure a successful painting project.
Using a Roller
When it comes to applying primer, using a roller can offer quick and efficient coverage. Here are some key steps to follow when using a roller for your primer application:
| Using a Roller for Primer Application | |
|---|---|
| Step 1: | Choose a roller cover with the appropriate nap for your surface. For rough surfaces, use a roller cover with a longer nap, while smoother surfaces require a shorter nap. |
| Step 2: | Fill the paint tray with your primer and dip the roller into the primer, making sure it is fully coated. |
| Step 3: | Roll off excess primer on the textured part of the paint tray to evenly distribute the paint on the roller. |
| Step 4: | Starting in the upper corner of your surface, use the roller to apply primer in a “W” pattern. Roll the primer on in overlapping strokes to ensure complete coverage. |
| Step 5: | Work in small sections, roughly 3 feet by 3 feet, and continue to apply primer with your roller until the surface is fully covered. |
| Step 6: | Take care not to apply too much pressure on the roller or it may create drips or uneven coverage. |
| Step 7: | Clean your roller cover thoroughly with soap and water immediately after use to ensure it is ready for your next painting project. |
Remember to take your time when applying primer with a roller and work in a consistent manner to ensure even coverage. Following these steps can help you achieve a successful painting project with professional-looking results.
Using a Sprayer
Using a Sprayer
Using a sprayer is another option for applying primer. This method provides a smooth and even application, but requires some additional equipment and preparation.
| Step 1 | Prepare the sprayer according to the manufacturer’s instructions. This may involve attaching hoses and filling the paint reservoir with primer. |
| Step 2 | Adjust the sprayer’s settings to control the spray pattern and amount of primer applied. Test the sprayer on a scrap piece of material to ensure it’s properly adjusted before starting on the actual surface to be primed. |
| Step 3 | Start spraying at the top of the surface and work your way down, holding the sprayer parallel to the surface and keeping it at a consistent distance for the entire application. |
| Step 4 | Overlap each spray pass slightly, and try to maintain a wet edge to avoid lap marks or dry spots. |
| Step 5 | Clean the sprayer thoroughly immediately after use and follow the manufacturer’s instructions for care and maintenance to keep it in good working order. |
When using a sprayer, it’s important to wear appropriate protective equipment, such as a mask and goggles, to avoid inhaling fumes or getting primer in your eyes. Also, make sure to cover nearby surfaces and objects that you don’t want to get primer on with a drop cloth or tarp.
Key Tips for a Successful Project
As you prepare to start your painting project, it’s important to keep in mind that applying primer is a crucial step in achieving a successful and long-lasting finish. To ensure the best results, there are a few key tips to keep in mind. By following these tips, you can avoid common mistakes and achieve a professional-looking finish that will stand the test of time. Let’s take a closer look at some of the most important tips to keep in mind for a successful project.
Apply the Right Amount
When it comes to applying primer, it is crucial to apply the right amount. Too little and the primer will not fully cover the surface, leaving it vulnerable to damage. Too much and the primer will take longer to dry and could even crack. To help ensure that you are applying the right amount of primer, consider the following tips:
| Tip | Description |
|---|---|
| Read the Label | Before applying primer, it is essential to read the label to determine the recommended coverage rate. This will help you determine how much primer to apply and how many coats are necessary to achieve the desired result. |
| Use a Measuring Cup | If you are unsure of how much primer to apply, consider using a measuring cup to help ensure that you are applying the right amount. This will help you avoid wasting primer and ensure that you have enough to cover the entire surface. |
| Apply Thin Coats | When applying primer, it is best to apply thin coats rather than thick ones. Thin coats dry faster and are less likely to crack or peel, leading to a smoother and more durable finish. |
| Work in Small Sections | To ensure that you are applying the right amount of primer, consider working in small sections. This will help you keep track of how much primer you have applied and ensure that every inch of the surface is covered. |
By following these tips, you can help ensure that you are applying the right amount of primer for your painting project. This will help you achieve a professional-looking finish that will last for years to come.
Allow Proper Drying Time
Allowing proper drying time is crucial for a successful painting project. It is important to follow the manufacturer’s instructions on the primer can for the recommended drying time before applying a topcoat.
Table 1: Recommended Drying Time for Common Primer Types
| Primer Type | Recommended Drying Time |
|---|---|
| Oil-Based Primer | 24 Hours |
| Water-Based Primer | 1 Hour |
| Shellac Primer | 1 Hour |
| Specialty Primer | Varies by Type |
Table 1 provides the recommended drying times for common primer types. It is important to note that drying times may vary depending on the humidity, temperature, and ventilation of the painting area.
Skipping the recommended drying time can lead to several problems, including poor adhesion, wrinkling, and an uneven finish. Rushing the project and applying a topcoat too soon can also cause the primer to pull up and mix with the fresh coat of paint, creating a messy finish.
Avoid applying multiple coats of primer in a single day, as this can also cause problems with drying and adhesion. It is better to wait for the recommended drying time between coats or to apply one thin coat of primer and let it dry completely before proceeding with the next step.
It is better to be patient and allow the primer to dry completely and thoroughly between coats and before applying the topcoat. This will ensure a better finish and a more durable and long-lasting paint job.
Avoid Applying too Thick or Thin Coat
One of the key tips for a successful painting project is to avoid applying too thick or thin coat of primer. Applying too thick of a coat can lead to drips or uneven coverage, while applying too thin of a coat may not provide enough protection or adhesion.
To ensure that you apply the correct amount of primer, it is important to follow the manufacturer’s instructions for application. This may include recommended coverage rates for the specific primer you are using.
You can also use a paint gauge to measure the thickness of the coat as you apply it. This tool can help you achieve a uniform thickness across the surface you are priming.
It is also important to avoid overworking the primer as you apply it. This can cause the primer to dry too quickly or not adhere properly to the surface. Instead, apply the primer in smooth, consistent strokes and let it dry completely before applying additional layers.
By avoiding applying too thick or thin of a coat of primer, you can help ensure a successful painting project that provides excellent coverage and durability.
Conclusion
In conclusion, choosing the right primer is crucial for a successful painting project. A primer increases adhesion, protects the surface, and improves coverage and durability. There are various types of primer available, such as oil-based, water-based, shellac, and specialty primer. It is important to select the appropriate primer based on the surface, primer color, coating, and gloss level.
Before applying primer, proper preparation is necessary. The surface must be thoroughly cleaned, surface issues must be repaired, and the surface must be sanded. Masking or taping the edges is also important before applying primer. When it comes to applying primer, it can be done using a brush, roller or sprayer. However, it is important to apply the right amount, allow proper drying time, and avoid applying too thick or thin coat to achieve a smooth finish.
In order to have a successful project, it is important to follow key tips such as applying the right amount of primer, allowing proper drying time, and avoiding applying too thick or thin coat. By following these tips, the end results will be a durable and high-quality finish that will last for years to come.
In conclusion, taking the time to choose the right primer and properly applying it with the appropriate technique will help to ensure a successful painting project. With these guidelines in mind, your project is sure to be a success.
Frequently Asked Questions
What happens if I don’t use primer?
If you skip the primer, the paint may not adhere well to your surface, and you may need to use extra coats of paint to achieve the desired look. The paint may also wear off more easily over time.
Can I use any type of primer on any surface?
No, different surfaces require different types of primers. Using the wrong type of primer may cause the paint to not adhere well or peel off.
Do I have to use a tinted primer?
No, you can use a white primer, but using a tinted primer can reduce the number of paint coats needed and improve the final color.
How should I clean the surface before applying primer?
Use a gentle cleanser or degreaser, and make sure the surface is completely dry before applying primer.
Can I prime over existing paint?
Yes, as long as the existing paint is in good condition and properly prepared. You may need to use a special bonding primer to help the new paint adhere well to the old paint.
Can I skip sanding the surface before priming?
No, sanding the surface helps the primer adhere better. Skipping sanding can cause the primer to not stick properly and result in paint peeling and chipping over time.
Can I use primers and paint from different brands?
Yes, you can usually use primer and paint from different brands. However, if you are concerned about compatibility or want to avoid potential issues, using products from the same brand is a good practice.
What tools do I need to apply primer?
You can use a brush, roller, or sprayer to apply primer. Choose the tool based on your preferences and the size and type of surface.
How long should I let the primer dry before painting?
Check the product label for the recommended drying time. In most cases, you should wait at least 24 hours before painting on top of the primer.
Can I skip masking or taping the edges before priming?
No, masking or taping the edges helps to ensure a clean and neat paint job. Skipping this step can result in primer and paint getting on unintended areas.