Have you ever tried to achieve a smooth, flawless paint finish with a brush, only to end up with streaks and drips? It can be frustrating, to say the least. But fear not, with a few simple tips and tricks, you can achieve that perfect finish you’ve been dreaming of. In this article, we’ll guide you through the steps of preparing your surface, choosing the right brush, using the proper technique, and cleaning up afterwards. By the end, you’ll be ready to tackle any painting project with confidence and skill. So let’s dive in and discover the secrets to achieving a smooth finish with a paintbrush.
Preparing Your Surface

Before you start painting any surface, it’s essential to properly prepare it. Preparing your surface will ensure that your finish is smooth and flawless, and will help your paint last longer. This includes cleaning the walls, repairing any imperfections, and applying a primer. These steps may seem like a lot of work, but they are crucial for achieving a professional-looking finish. So, let’s dive into the details of each step to ensure you are properly prepared. For more tips on choosing the right brush for your project, check out our article on how to choose the right brush for your paint project.
Clean the Walls
Cleaning the walls is an essential step to achieving a smooth finish with a paintbrush. Before starting the painting process, it is important to prepare the surface in order to get the best finish result. Below are some important steps to consider when cleaning the walls:
| Step | Description |
|---|---|
| 1 | Remove dust and debris from the walls using a soft-bristle brush or a vacuum cleaner. It is important to get rid of any loose particles that can interfere with the quality of the paint job. |
| 2 | Wipe the walls with a damp cloth or sponge to remove any dirt, grime or grease. Use a mild detergent and warm water solution to remove any stubborn stains. Allow the walls to dry completely before continuing. |
| 3 | Inspect the walls for any cracks, holes, or other imperfections. If any are found, repair them using a spackling compound and a putty knife. Once the compound is dry, sand it smoothly to make the wall surface even. |
Taking time to clean the walls thoroughly and make any necessary repairs is crucial to ensure an even-looking paint job. Not doing so could cause the paint to adhere poorly to the surface, potentially leading to an unprofessional-looking finish. After completing this step, move on to the next step, applying a primer.
Repair Any Imperfections
When it comes to achieving a smooth finish with a paintbrush, it is important to repair any imperfections on the surface you plan to paint. Whether it be cracks, holes, or rough patches, these blemishes can create an uneven and unprofessional-looking finish. To ensure a smooth surface for painting, follow these steps:
- Inspect the surface: Begin by inspecting the surface for any cracks, holes or rough patches. Run your hands across the surface to feel for any imperfections that may not be visible to the eye.
- Seal the cracks: If you find any cracks, use a spackling compound to fill them in. Apply the compound with a putty knife and allow it to dry completely. Sand it smooth with a sanding block.
- Fill holes: To fill any holes, use a patching compound. Follow the manufacturer’s instructions to properly mix and apply the compound. Allow it to dry completely and sand it smooth with a sanding block.
- Sand rough patches: Sand any rough patches with a sanding block or sandpaper until they are smooth to the touch. Be careful not to sand too aggressively as this can create an uneven surface.
By taking the time to properly repair any imperfections on the surface, you will be creating a clean canvas for your paint job. Once you have prepared the surface, you can move on to the next step of applying a primer.
Apply a Primer
Before painting, it’s important to apply a primer to your surface. A primer helps to prep the surface so that the paint will adhere better, and it also helps to create a more even finish. Here are the steps to follow when applying a primer:
- Clean the surface: Make sure the surface is clean and dry before applying the primer. Use a damp cloth to wipe away any dust or debris, and allow the surface to dry completely.
- Choose the right primer: There are different types of primers available, depending on the surface you are painting. For example, if you’re painting a metal surface, you’ll want to use a metal primer. If you’re painting a wooden surface, you’ll want to use a wood primer. Choose a primer that is designed for your surface type.
- Prime the surface: Apply the primer to the surface using a paintbrush or roller. Start at the top of the surface and work your way down, making sure to apply an even coat. If you’re using a roller, be sure not to apply too much pressure, as this can cause bubbles and roller marks. Allow the primer to dry completely before painting.
By taking the time to apply a primer, you’ll be setting yourself up for success with your painting project. The finished product will look much smoother and more even, and the paint will adhere much better to the surface. For more tips on brush techniques and maintaining your brushes, check out this article on the importance of brush cleaning and maintenance.
Choosing the Right Brush
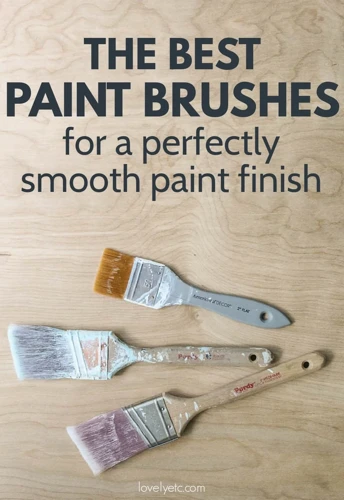
When it comes to achieving a smooth finish with a paintbrush, choosing the right brush is just as important as using the proper technique. With so many different types and sizes of brushes available, it can be perplexing to determine which one is right for your project. Fortunately, by considering a few key factors, you can select a brush that will help you achieve the desired results. Let’s take a closer look at some of the things you should keep in mind when choosing a brush.
Consider the Size of Your Project
When considering the size of your project, it’s important to choose a brush that is appropriate for the task at hand. Using the wrong size brush can make the job more difficult and result in a less smooth finish.
Table 1: Brush sizes and their suitable project sizes
| Brush Size | Suitable Project Size |
|---|---|
| 1 inch | Small areas, touch-ups, and trim work |
| 2 inch | Medium-sized areas, such as doors and cabinets |
| 3 inch | Large areas, like walls and ceilings |
For smaller projects or areas that require more intricate details, you may want to consider using specialty brushes, such as a stencil brush or a fan brush. These brushes are designed for more specific purposes and can help achieve a professional look for your project. You can read more about different brush techniques and their uses at /stencil-brush-professional-look/.
It’s also important to keep in mind that the size of the brush should match the size of the surface being painted. For example, a 1 inch brush may be suitable for small touch-ups on a wall, but using it to paint an entire room will be time-consuming and result in an uneven finish.
Ultimately, choosing the right size brush for your project will make the job easier and help achieve a smoother finish. If you’re unsure about what brush to use, speak to a professional at your local hardware store. They can provide advice based on your specific needs and budget.
Look for Quality Brushes
When it comes to achieving a smooth finish with a paintbrush, it’s important to use quality brushes. Here are some tips for selecting the right ones:
- Choose brushes with smooth, even bristles: Look for brushes that have bristles that are evenly cut and don’t have any stray hairs. This will help you achieve a smooth, even finish on your surface.
- Consider the handle: The handle of the brush should be comfortable to hold and provide good control. Look for brushes with a non-slip grip or ergonomic design if you’re planning on a large painting project.
- Check the bristle type: Different bristle types are suitable for different paints and finishes. Synthetic bristles are good for water-based paints, while natural bristles work well with oil-based paints.
- Invest in high-quality brushes: It’s worth investing in a high-quality brush that will last for a long time and give you good results. Better brushes usually have more bristles, and the bristles themselves are made of higher-quality materials.
- Try different brush shapes and sizes: Different brush shapes and sizes are good for different applications. For example, a round brush is good for detail work, while a flat brush is good for covering large areas quickly.
- Read reviews: Check online reviews for different brands and models of brushes. Other painters can give you good insight into which brushes are best for certain projects or techniques.
When choosing quality brushes for painting, make sure to consider the bristle type and quality, handle design, and the specific requirements of your project. By selecting the right brushes, you will be able to achieve a smooth, professional-looking finish on your surface.
Layering brush techniques can help you learn to use different types of brushes for different applications.
Select the Right Bristle Type
When selecting the right brush for your project, it’s important to also consider the bristle type. Natural bristle brushes are made from animal hair and are ideal for use with oil-based paints. They are soft and flexible, which allows them to hold and spread the paint evenly. However, natural bristle brushes should not be used with water-based paints as they can become damaged and lose their shape.
Synthetic bristle brushes, on the other hand, are ideal for use with water-based paints such as latex and acrylics. They are durable and easy to clean, making them a great choice for many types of projects. Additionally, synthetic brushes are often less expensive than natural bristle brushes.
Another option to consider is a blend of natural and synthetic bristles. This type of brush combines the best qualities of both types of bristles to create a versatile tool that can be used with a variety of paint types.
It’s important to choose the right bristle type for your specific project to ensure a smooth and even finish. Whether you’re using oil-based paints or water-based paints, selecting the appropriate bristle type can make a big difference in the outcome of your project.
If you want to learn more about different brush techniques for painting, you can check out our article on brush techniques for intricate designs or dry brushing painting. If you want to improve your color blending skills, read our article on blend paint colors techniques. And, if you want to experiment with textured painting, try our swag textured painting technique or learn about the versatility of the fan brush in our article on fan brush versatility painting.
Using the Proper Technique
Achieving a smooth finish with a paintbrush requires more than just having the right tools. You must also use the proper technique to ensure that your paint goes on evenly and creates a flawless look. In this section, we will discuss the key steps to using the proper technique when painting with a brush. From loading your brush correctly to using the right strokes, these tips will help you get the results you’re looking for. So, let’s dive in and learn how to use the proper technique for achieving a smooth finish with your paintbrush.
Load Your Brush Correctly
To achieve a smooth finish with a paintbrush, it’s crucial to load the brush correctly. This means having the right amount of paint on the brush without overloading it. Here are some tips to help you load your brush correctly:
- Dip the Brush: Start by dipping your paintbrush about 1/3 of the way into the paint. Avoid dipping it too far as it may overload the brush with paint.
- Tap the Brush: Gently tap the brush against the sides of the paint can to remove any excess paint. This will also help distribute the paint throughout the bristles evenly.
- Apply Paint: Apply the paint with gentle strokes in the direction of the grain or flow of the surface. This will help prevent streaks and create a smooth finish.
- Reload Brush: Reload your brush as needed, remembering not to overload it with paint. Reload it only about 1/3 of the way each time to ensure an even paint application.
Loading your brush correctly will save you time and ensure a professional-looking finish. Remember to take your time and practice this technique to master it.
Apply Paint Evenly
To achieve a smooth finish with a paintbrush, it is crucial to apply the paint evenly. Uneven application can result in drips, runs, and visible brushstrokes. Here are a few tips to help you apply paint evenly:
| Tip | Description |
| 1 | Use light pressure: Apply gentle, even pressure to the brush as you paint to avoid leaving behind heavy brushstrokes. |
| 2 | Overlap strokes: Overlap each stroke slightly with the previous stroke to ensure consistent coverage and a smooth finish. |
| 3 | Paint in sections: Divide the surface you’re painting into smaller sections and paint each one at a time, working the paint evenly into the surface. |
| 4 | Follow a consistent pattern: Whether you’re painting horizontally, vertically, or in a circular motion, be sure to follow a consistent pattern to keep the paint even. |
| 5 | Use the right amount of paint: Don’t overload your brush with too much paint, as this can lead to drips and runs. Instead, use a small amount of paint and work it into the surface gradually. |
By following these tips and taking your time, you can ensure that the paint is applied evenly and smoothly for a professional-looking finish.
Use the Right Strokes
When it comes to using the proper technique to achieve a smooth finish with a paintbrush, using the right strokes is crucial. Different strokes can create different effects on your surface, and it is essential to choose the right one for your project. Here is a table of different brush strokes and the effect they create:
| Stroke | Effect |
|---|---|
| Horizontal stroke | A horizontal stroke is ideal for painting long, flat surfaces like walls or ceilings. This stroke creates a smooth and even finish. |
| Vertical stroke | A vertical stroke is ideal for painting tall, narrow surfaces like door frames or window sashes. Using this stroke will help you to avoid drips and achieve a clean finish. |
| Diagonal stroke | A diagonal stroke is ideal for painting corners or edges. This stroke helps to ensure that you cover the surface completely and avoid leaving any gaps. |
| Criss-cross stroke | A criss-cross stroke is ideal for painting textured surfaces or areas with uneven coverage. This stroke helps to work the paint into all the crevices and get a more even finish. |
Remember to use long, smooth strokes to avoid brush marks and ensure that the paint is applied evenly. It is also important to use consistent pressure throughout your strokes to avoid variations in the finish. By using the right brush stroke technique, you can achieve a professional-looking finish with your paintbrush.
Don’t Overwork the Paint
When working with a paintbrush, it’s essential to avoid overworking the paint. Overworking the paint can lead to various problems, such as uneven texture, roller marks, and brush marks. In order to prevent overworking the paint, follow these tips:
- Work efficiently: When applying the paint, work efficiently and quickly. Avoid going back over areas that have already been painted unless it’s necessary to correct an area.
- Avoid adding layers: Adding layer upon layer of paint can lead to a buildup of paint that will eventually start to crack and peel.
- Use proper brush technique: Use proper brush technique when applying the paint. Make sure your strokes are even and in the same direction. Don’t press down on the brush too hard, as this can cause the bristles to splay out and create an uneven finish.
- Let the paint dry: Let each coat of paint dry completely before applying an additional coat. Applying a coat of paint before the previous coat has dried can lead to clumps and unevenness.
- Know when to stop: It’s important to know when to stop brushing the paint. If you keep brushing over the same area repeatedly, it can cause the paint to dry unevenly and ruin the finish.
By following these tips, you can avoid overworking the paint and achieve a smooth, even finish for your project. Remember to work efficiently, apply the right number of coats, use proper brush technique, let the paint dry, and know when to stop.
Cleaning Up
After completing a painting project, it’s important to properly clean up to maintain the quality of your tools and ensure that they are ready for the next use. This step is often overlooked or rushed, but it can make a significant difference in the longevity of your brushes and the overall outcome of your future painting projects. In this section, we will go over some tips for cleaning your brushes and storing them correctly. Let’s dive in!
Clean Your Brushes Properly
Properly cleaning your brushes after use is essential to maintaining their quality and ensuring they last for many future projects. Below are some tips for cleaning your brushes properly:
- Remove excess paint: Before cleaning your brush, remove any excess paint by wiping it on the lip of the paint can or a rag. This will make cleaning the brush easier and prevent excess paint from going down the drain.
- Use warm, soapy water: Fill a container with warm, soapy water and gently swirl the brush around to loosen any remaining paint. Avoid hot water as it can damage the bristles.
- Rinse thoroughly: Rinse the brush thoroughly under running water, gently squeezing the bristles to remove any leftover soap or paint.
- Dry the brush: After rinsing, gently shake the brush to remove excess water, reshape the bristles with your fingers, and lay it flat to dry. Avoid drying your brushes upright, as water can seep into the ferrule and cause rust or damage to the bristles.
- Condition the brush: For extra care, you can condition your brushes after cleaning them. Use a small amount of hair conditioner or brush conditioner and gently rub it into the bristles, then rinse with water and let dry. This will keep the bristles soft and supple for your next project.
By following these steps, you can ensure that your brushes are properly cleaned and maintained, allowing them to deliver a smooth finish for years to come. Don’t forget to clean your brushes right after use, as leaving paint on the bristles for an extended period of time can cause them to stiffen and degrade.
Store Your Brushes Correctly
It’s important to store your paintbrushes correctly to ensure their longevity and maintain their quality. Here are some tips for properly storing your brushes:
| Tip | Description |
|---|---|
| Remove Excess Paint | Before storing your brush, make sure to remove any excess paint by wiping it off with a cloth or paper towel. This will prevent the paint from hardening on the bristles and ruining the brush. |
| Shape the Brush | Shape the brush back to its original form by reshaping the bristles with your fingertips. This will help maintain the brush’s shape and prevent the bristles from splaying out over time. |
| Protect the Brush Head | Protect the brush head by placing a brush cover or wrapping the bristles in paper or plastic. This will prevent any dust or debris from settling on the bristles and keep them clean. |
| Store Vertically | Store the brushes vertically with the bristles facing up. This will prevent any paint that may have been left on the brush from settling at the base of the bristles and hardening them. |
| Keep in a Dry Place | Store your brushes in a dry place to prevent moisture from seeping into the bristles and causing them to mold or mildew. |
By following these tips, you can be sure that your paintbrushes will be in top condition for your next painting project.
Conclusion
In conclusion, achieving a smooth finish with a paintbrush requires careful preparation, choosing the right brush, and using the proper technique. Properly preparing your surface by cleaning the walls, repairing any imperfections, and applying a primer is crucial to achieving a flawless finish. When choosing the right brush, consider the size of your project, look for quality brushes, and select the right bristle type. Using the proper technique involves loading your brush correctly, applying paint evenly, using the right strokes, and knowing when to stop working the paint. After you’ve completed your project, it’s important to clean up properly by cleaning your brushes correctly and storing them in a dry place. By following these tips, you can achieve a professional-looking finish with your paintbrush. Remember that practice makes perfect, so don’t be discouraged if your first attempt doesn’t turn out perfect. With practice and attention to detail, you’ll soon become a skilled painter.
Frequently Asked Questions
Can I paint without preparing my surface?
No, preparing your surface is essential for achieving a smooth finish. It helps the paint adhere properly and prevents imperfections from showing through.
Do I need to clean the walls before painting?
Yes, cleaning the walls is important for removing any dirt, grime or grease that could affect the quality of the paint job.
What should I do if there are imperfections on my surface?
You should repair any imperfections before painting to ensure a smooth finish. This can include filling in holes and cracks, sanding rough spots, and smoothing out textured areas.
Is it necessary to use a primer?
Using a primer is highly recommended as it helps the paint adhere properly and provides a smooth surface for painting.
What factors should I consider when choosing a brush?
You should consider the size of your project, look for quality brushes, and consider the type of bristles that will work best for the type of paint you’re using.
What size brush should I use?
The size of your brush will depend on the size of your project. For larger areas, use a larger brush, and for smaller details, use a small brush.
Does the quality of the brush really matter?
Yes, investing in a high-quality brush will help you achieve a smoother finish and will make the painting process easier overall.
What type of bristles should I look for?
The type of bristles you use will depend on the type of paint you’re using. Synthetic bristles work well for water-based paints, while natural bristles are better for oil-based paints.
What is the correct way to load my brush?
Dip your brush into the paint about a third of the way up the bristles, tap it on the side of the can to remove excess paint, and then spread the paint evenly across the bristles.
Why is it important not to overwork the paint?
Overworking the paint can lead to a streaky finish and make the paint look uneven. It’s important to use the proper technique and avoid going over the same area too many times.