Woodworking can be a satisfying and rewarding hobby or profession, and one key element of successful woodworking is using the right glue. A good wood glue can help ensure a sturdy, long-lasting bond that will stand the test of time. But with so many types of wood glue available, it can be overwhelming to know which one to choose and how to use it properly. In this article, we’ll explore the benefits of using wood glue, the different types of wood glue available, and provide step-by-step instructions for successfully applying and using wood glue to create a strong bond between pieces of wood. Whether you’re a beginner or a seasoned woodworker, mastering the use of wood glue will help you take your woodworking projects to the next level.
Benefits of Using Wood Glue
When it comes to woodworking projects, using the right adhesive can make all the difference in the final product. One of the most popular options is wood glue. Not only is it easy to work with, but it also offers a strong bond and dries clear. In this section, we’ll explore the various benefits of using wood glue and why it’s a go-to option for many woodworkers. Whether you’re a professional or a DIY enthusiast, understanding the advantages of wood glue can help take your projects to the next level.
Strong Bond
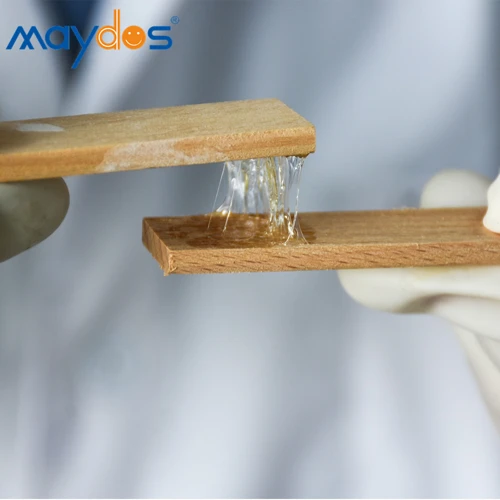
Wood glue is a popular adhesive used by DIYers and carpenters alike due to its numerous benefits, including its strong bonding capability. When applied properly, wood glue creates a bond that is often stronger than the wood itself. This is because the glue penetrates the wood fibers, creating a molecular bond that holds the pieces together. A strong bond is essential for any woodworking project, as it ensures the longevity and durability of the finished product.
To achieve a strong bond, it is important to choose the right type of wood glue for the job. There are three main types of wood glue: PVA glue, polyurethane glue, and epoxy glue. PVA glue is the most commonly used type of wood glue and is ideal for most woodworking projects. Polyurethane glue is best suited for projects that require a waterproof bond, such as outdoor furniture or boatbuilding. Epoxy glue is perfect for projects that require a very strong bond, such as in the construction of guitars or other musical instruments.
It is important to properly prepare the wood surface before applying wood glue. This includes cleaning and drying the wood to ensure that there is no dust or debris on the surface that could prevent a strong bond from forming. Sanding the wood, if necessary, can also help to create a better bond by creating a rough surface that the glue can adhere to.
When applying the glue, it is important to do so liberally and evenly to ensure that every area is adequately covered. However, it is important to avoid over-gluing, as too much glue can result in a weak bond. Clamping the wood pieces together is also an important step in achieving a strong bond. Proper clamping technique and the appropriate length of time to keep the wood clamped together will depend on the type of glue being used. For details on how long to keep wood glue clamped, click [internal link to “/how-long-to-keep-wood-glue-clamped/”]here.
Once the glue has been applied and the wood has been clamped, it is important to allow sufficient drying time before removing the clamps. The drying time for wood glue can vary depending on the type of glue and the humidity level in the room. For information on how long adhesive glue takes to dry, click [internal link to “/how-long-does-adhesive-glue-take-to-dry/”]here. Once the glue has dried, any excess glue should be wiped away before finishing the project.
Using wood glue provides numerous benefits, most notably the strong bond it creates. By choosing the right type of wood glue, properly preparing the wood surface, applying the glue liberally and evenly, clamping the wood together, and allowing sufficient drying time, you can achieve a bond that is sure to last.
Easy to Use
Wood glue is a popular adhesive used by woodworkers for its ease of use. It can easily bind and hold pieces of wood together, even with irregular shapes. This is especially useful for various woodworking projects that would otherwise seem impossible without the use of screws or nails.
One of the great benefits of wood glue is its user-friendliness. It does not require any special equipment or expertise to apply, making it ideal for DIY projects. You can use a brush, roller, or even your finger to apply the glue.
Unlike other types of adhesive that require specific conditions to properly set, wood glue is more forgiving. You can apply wood glue under a variety of temperatures and humidity levels, and it will still bond the pieces of wood efficiently.
To make it even easier to understand, here is a table showing the ease of use of wood glue compared to other popular adhesives:
| Adhesive | Equipment Needed | Expertise Required | Application Conditions |
|---|---|---|---|
| Wood glue | Brush, roller or finger | None | Various |
| Epoxy | Two-part mixture (resin and hardener) | Medium | Specific (temperature and humidity) |
| Super glue | Dispenser or dropper | High | Very specific (clean and dry surfaces) |
| Cyanoacrylate | Dispenser or brush | High | Very specific (clean and dry surfaces) |
It’s clear that wood glue is the easiest and most versatile adhesive to use, making it a go-to choice for woodworkers and DIY enthusiasts.
If you’re new to woodworking, use wood glue together with clamps for best results. In case you’re unfamiliar with how to clamp wood using wood glue, refer to the section on ‘Clamping the Wood’.
Now that you know the benefits of using wood glue and how easy it is to use, you’re ready to take on your next woodworking project.
Dries Clear
One of the advantages of using wood glue is that it dries clear, creating an aesthetically pleasing finish. This is particularly important when working on furniture and decorative pieces where the bond needs to be strong but also invisible to the eye.
Tips for achieving a clear result when using wood glue:
- Choose a high-quality wood glue that is specifically designed to dry clear.
- Apply the glue evenly and avoid over-gluing, as excess glue can ruin the finish.
- Use clamps to hold the wood in place until the glue dries, ensuring a tight joint.
- Allow sufficient drying time before removing the clamps and sanding the surface.
To ensure the glue dries clear, it is important to prepare the wood properly beforehand. Make sure the wood is clean and free from any debris that could affect the finish. Sand the surface if necessary to create a smooth and even surface for gluing.
PVA glue is a popular type of adhesive for woodworking projects and is known for its ability to dry clear. It is easy to apply and cleans up easily with water. You can learn more about how to apply PVA glue by checking out our article on “How to Apply PVA Glue.”
Polyurethane glue and epoxy glue are also known for drying clear and creating a strong bond, but they can be more challenging to work with. Polyurethane glue requires moisture to cure, so it is important to dampen the wood before applying the glue. Epoxy glue typically comes in two parts that need to be mixed together before use.
Using wood glue that dries clear is a great way to achieve a strong and seamless bond between pieces of wood. Make sure to follow proper preparation and application techniques for the best results.
Types of Wood Glue
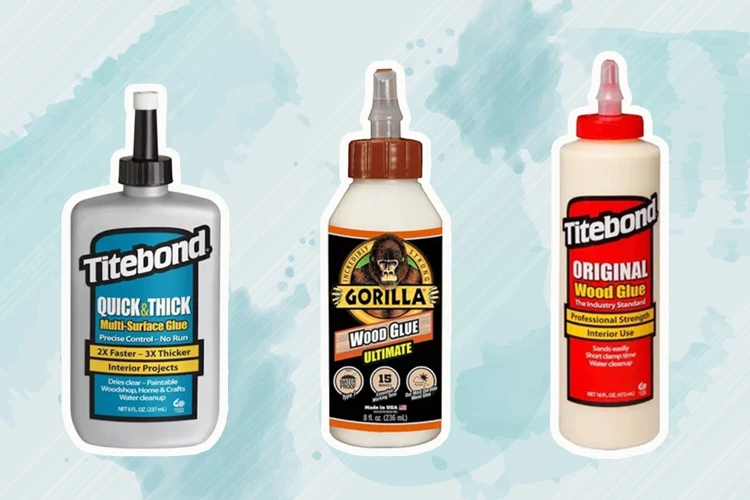
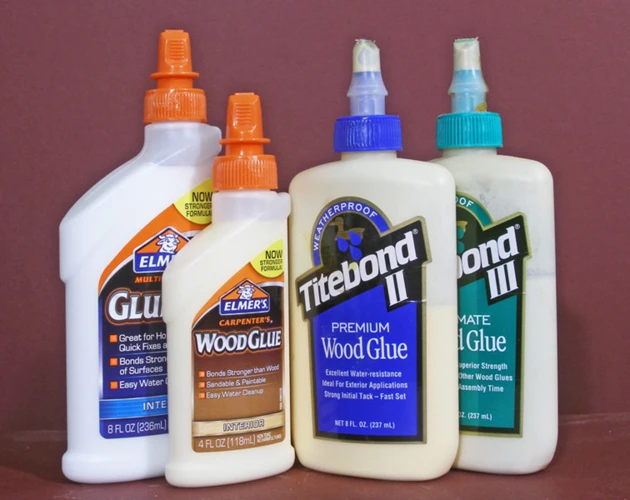
With the various types of wood glue available in hardware stores, choosing the right one for your project can be overwhelming. Understanding the differences between PVA glue, polyurethane glue, and epoxy glue can help to determine which type of glue is best suited for your project needs. Each type of glue has its specific benefits and can provide a strong bond between wood pieces. Let’s take a closer look at each type of wood glue and understand their unique properties.
PVA Glue
PVA glue, or polyvinyl acetate glue, is a popular type of wood glue that is used for a wide variety of applications. It is commonly used in woodworking projects because it is easy to use and dries clear. Here are some of the benefits of using PVA glue:
– Water-resistant: PVA glue is water-resistant, which means that it can be used for projects that will be exposed to moisture. This makes it a great choice for outdoor furniture or other projects that will be used outside.
– Fast-drying: PVA glue dries quickly, which means that you can move on to the next step of your project without having to wait long periods of time for the glue to dry. This is especially useful if you are working on a project with tight deadlines.
– Easy to clean up: PVA glue can be easily cleaned up with water. This makes it a great choice for projects that involve children or messy workspaces.
– Non-toxic: PVA glue is non-toxic, which makes it safe for use in projects that involve food or other applications where toxic fumes might be a concern.
To use PVA glue, start by making sure that your wood is clean and dry. Sand the wood if necessary to provide a smooth surface for the glue to adhere to. Apply the glue liberally, spreading it evenly over the surface of the wood. Be careful not to over-glue, as this can cause the wood to warp or bend.
After applying the glue, use clamps to hold the wood in place while the glue dries. Tighten the clamps gradually, making sure that the wood stays in position. Allow sufficient drying time before removing the clamps. Once the glue has dried, sand the wood and apply the desired finish.
PVA glue is a versatile and easy-to-use option for woodworking projects. It is a cost-effective choice that can be used for a variety of applications. To learn more about other types of glue and their uses, check out our article on what materials white glue bonds well with.
Polyurethane Glue
Polyurethane glue, commonly referred to as “PU glue,” is a versatile adhesive that offers numerous benefits. This type of glue is waterproof, making it ideal for outdoor projects and items that will be exposed to moisture. PU glue also creates a strong bond that is resistant to impact and shock, making it a great option for items that will undergo wear and tear.
One of the unique properties of polyurethane glue is that it expands as it dries, which can help fill in gaps and create a tight seal. However, it’s important to note that this expansion can also lead to excess glue oozing out of the joints, so it’s essential to use it sparingly.
Polyurethane glue is also heat and solvent resistant, making it ideal for applications that will be exposed to extreme temperatures or chemicals. It can also be sanded and painted over once dry, allowing for a seamless finish.
When working with polyurethane glue, it’s important to keep in mind that it has a longer drying time compared to other types of wood glue. This can range from several hours to overnight depending on the temperature and humidity levels. Once it has dried, however, it forms an incredibly strong bond that can last for years.
To use polyurethane glue, apply a thin layer to one surface and press the surfaces together. Clamp the joint to ensure a tight fit and wipe away any excess glue that may have oozed out. Allow sufficient drying time before removing the clamps and sanding the joint to a smooth finish.
Polyurethane glue is an excellent option for projects that require a waterproof and strong adhesive. While it may have a longer drying time, it offers numerous benefits and can be used for a wide range of projects. If you’re looking for a versatile and durable adhesive, give polyurethane glue a try.
Note: If you’re looking for information on curing UV glue without a lamp, check out our article on the topic.
Epoxy Glue
When it comes to strong bonds and tough adhesive properties, epoxy glue is hard to beat. This type of glue is incredibly strong, durable, and resistant to a wide range of environmental factors. Epoxy works by combining a hardener with a resin, forming a strong chemical bond when applied to surfaces.
One significant benefit of epoxy glue is that it can be used on various materials, including wood, metal, and plastic. It’s often used for heavy-duty industrial applications, including automotive repairs and construction.
Before using epoxy glue, it’s crucial to read the manufacturer’s instructions carefully. Epoxy typically comes in two parts – a hardener and a resin – that have to be mixed in a specific ratio to create a strong bond. Be sure to mix the two parts together thoroughly, following the recommended ratio, to get good results.
Another critical factor to keep in mind is the drying time required for epoxy glue. Epoxy can take anywhere from several hours to several days to cure fully, depending on the brand and the ambient temperature where it is used. It’s essential to allow the glue sufficient drying time to reach its full strength and ensure a robust bond.
When using epoxy, it’s essential to wear gloves, as the glue can be difficult to remove from skin. Eye protection is also recommended, as the glue can cause eye irritation.
Epoxy glue is an excellent option for anyone looking to achieve a strong and durable bond between surfaces. Its versatility and impressive strength make it a go-to choice for industrial and home projects alike.
If you’re interested in learning more about different types of glue, check out this informative article on glue ear.
Preparing the Wood
Before applying wood glue, it’s important to properly prepare the wood to ensure the strongest bond possible. Preparing the wood involves cleaning and drying it thoroughly, sanding it if necessary, and using clamps for best results. These steps will improve the quality of the bond and help your project last longer. Let’s take a closer look at how to prepare the wood for gluing.
Clean and Dry
Before applying wood glue, it’s important to ensure that the surface of the wood is clean and dry. Any dirt, dust, or previous coatings can interfere with the bond of the glue. To properly clean and dry the wood, follow these steps:
- Remove any dirt or debris: Use a soft-bristled brush or a damp cloth to remove any dirt or debris on the surface of the wood. Pay attention to edges and corners where debris can get trapped.
- Scrape off any old glue: If there is old glue on the wood, use a scraper or sandpaper to remove it. Old glue can interfere with the bond of the new glue you’re applying.
- Dry the surface: Moisture can interfere with the bonding process and weaken the hold of the glue. Use a clean, dry cloth to wipe down the surface of the wood and allow it to air dry if necessary.
- Protect other surfaces: If you’re working on a larger project and applying glue to multiple pieces of wood, it’s important to protect any surfaces that may come into contact with the glue. Cover the surface with a drop cloth or plastic sheeting to protect it.
Keeping the wood clean and dry before applying the glue will ensure a strong bond and minimize the risk of the wood pieces slipping or pulling apart. Remember that proper preparation is key to a successful glue up, and taking the extra time to clean and dry the wood can make all the difference in the final outcome.
Sand if Necessary
Sandpaper is a crucial tool when preparing wood for glueing. Before you apply any glue, inspect the surfaces that will be joined. If there are any bumps, rough spots, or old glue residue, you may need to sand the wood down to create a uniformly flat and smooth surface. It’s best to use fine-grit sandpaper to avoid roughing up the wood and creating an uneven surface that will affect the bond between the pieces.
When sanding the wood, follow the grain to prevent splintering or creating scratches. Start with coarse sandpaper, then move on to a finer grit to achieve a smoother finish. Use a sanding block to ensure that you are applying even pressure across the wood’s surface, and wear a dust mask to avoid inhaling sawdust.
Remember, not all wood needs to be sanded before glueing. If the pieces are already smooth and clean, sanding might not be necessary. The main idea is to create a surface that will promote a strong bond between the pieces of wood.
Once you have sanded the wood, use a brush or vacuum to remove any residual sawdust. Sawdust can compromise the bond between the pieces, so remove any remaining sawdust with a slightly damp cloth or rag.
Please note that sandpaper should only be used on wood surfaces, and not on any other materials. If you are uncertain about whether to sand the wood or not, consult the instructions that came with your glue or seek expert advice before proceeding with the project.
Anchor: /how-to-make-satisfying-slime-without-glue/
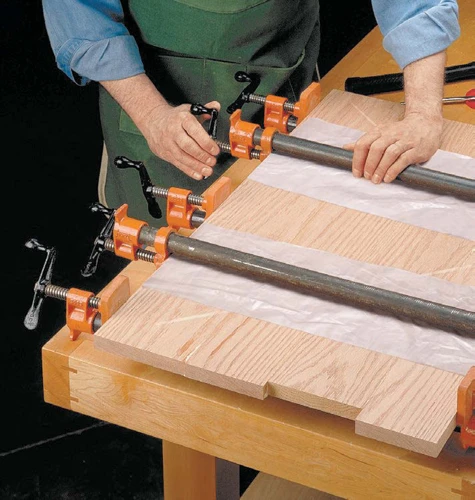
Clamp for Best Results
When it comes to using wood glue, clamping is an essential step for achieving the best results. Proper clamping ensures that the pieces of wood are held together securely while the glue dries. This is especially important for achieving a strong bond that can withstand pressure and movement. Here are some tips for clamping your wood project:
- Choose the right type of clamp: There are various types of clamps to choose from, including C-clamps, bar clamps, and pipe clamps. Choose the type that is appropriate for the size and shape of your project.
- Position the clamps correctly: Clamps should be positioned so that they apply even pressure across the joint. Avoid placing a clamp directly over the glue line, as this can cause the glue to squeeze out and create a weak bond.
- Tighten the clamps enough: The clamps should be tightened enough to bring the joint together snugly, but not so tight that they cause the joint to buckle or the wood to split.
- Wipe off excess glue: After clamping the wood, use a damp cloth to wipe off any excess glue that has squeezed out of the joint. This will prevent the glue from hardening and interfering with the finishing process.
Remember that clamping time can vary depending on the type of wood glue you are using. Read the manufacturer’s instructions to determine how long you need to keep the clamps in place. When the glue is dry, carefully remove the clamps by loosening them gradually and wiping off any remaining glue. With these clamping tips, you can ensure that your wood project is strong, sturdy, and ready for finishing.
Note: If you’re looking for other adhesive techniques beyond wood glue, check out our other articles, such as “What Glue to Use for Twine on Glass”, “How to Glue Floral Foam Together”, or “How to Use Glue for Diamond Painting.”
Applying the Glue
When it comes to woodworking, applying glue properly is a crucial step for a strong and durable end result. Whether you are a beginner or an experienced woodworker, the process of applying glue requires attention to detail and some helpful tips and techniques to achieve success. In the following sections, we will guide you step-by-step through the process of applying wood glue, from the proper amount of glue to use to spreading it evenly and avoiding over-gluing. So, let’s get started!
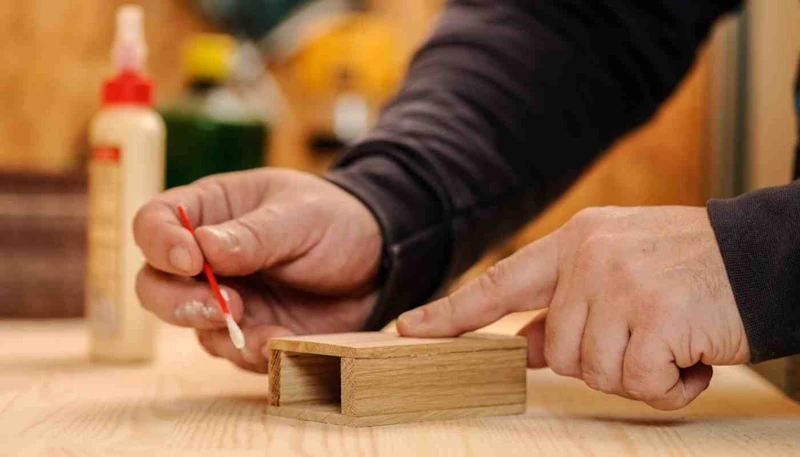
Apply Liberally
When applying wood glue, it’s important to apply it liberally. This means that you should apply enough glue to ensure a strong bond between the pieces of wood. Here are some tips for applying wood glue liberally:
- Use a clean applicator: Before applying the glue, make sure that your applicator is clean and free of any debris or old glue. This will ensure that you apply a smooth, even coat of glue.
- Squeeze out enough glue: It’s important to make sure that you squeeze out enough glue to cover the entire surface that you want to bond. Don’t be afraid to use a generous amount of glue.
- Apply glue evenly: Once you have enough glue on the surface, use your applicator to spread the glue evenly over the entire surface. This will help ensure that the glue dries evenly and the bond is strong.
- Avoid applying too much: While it’s important to apply enough glue, be careful not to overdo it. Applying too much glue can cause the wood to warp or bend as the glue dries.
By applying wood glue liberally, you can ensure a strong bond between your pieces of wood. Remember to use a clean applicator, squeeze out enough glue, apply it evenly, and avoid applying too much. These tips will help you achieve the best results and ensure your project turns out the way you want it to.
Spread Evenly
To ensure a strong bond between the pieces of wood, it’s important to spread the glue evenly. Here are some tips to keep in mind when applying the glue:
- Use a brush or spreader: A brush or spreader can help you to get an even coat of glue over the entire surface of the wood. This is especially important if you’re working with a large surface area or multiple pieces of wood.
- Avoid thick spots: When spreading the glue, make sure to avoid thick spots. These areas will take longer to dry and could create a weak point in the bond.
- Pay attention to edges and corners: It’s important to get good coverage on the edges and corners of your wood pieces. These areas are typically the first to come apart if the glue bond fails.
- Don’t rush: While it may be tempting to hurry through the application process, taking your time can help ensure a more even spread of glue.
By spreading the glue evenly, you can help ensure a strong bond between your pieces of wood. This step is critical to the success of your project, so take the time to do it carefully and thoroughly.
Avoid Over-gluing
When it comes to using wood glue, it’s important to remember that less is often more. Over-gluing can actually weaken the bond between the wood pieces, as the excess glue can create a barrier between the two surfaces. Excess glue can be difficult to clean up and can detract from the overall appearance of the finished project.
To avoid over-gluing, it’s important to apply the glue liberally but not excessively. A good rule of thumb is to apply just enough glue to create a thin, even layer on both surfaces. This will allow the glue to spread evenly and create a strong bond without excess buildup.
To help you ensure that you are applying the right amount of glue, consider using a dropper or glue spreader. These tools can help you control the amount of glue you are applying and ensure that you are spreading it evenly over the surfaces.
Table: Tips for Avoiding Over-Gluing
| # | Tip |
|---|---|
| 1 | Apply the glue liberally but not excessively to create a thin, even layer on both surfaces. |
| 2 | Consider using a dropper or glue spreader to control the amount of glue you are applying. |
| 3 | Wipe off any excess glue immediately with a damp cloth. |
| 4 | Remember that over-gluing can weaken the bond between the wood pieces and detract from the appearance of the finished project. |
In addition to applying the right amount of glue, it’s also important to wipe off any excess glue immediately with a damp cloth. This will help prevent buildup and ensure that the glue dries clear and evenly.
By following these tips and avoiding over-gluing, you can create a strong and attractive bond between your wood pieces without any unsightly glue buildup.
Clamping the Wood
Now that you’ve carefully applied the wood glue to your project, it’s time to clamp the pieces together. While this step can seem daunting, it’s essential for a strong and secure bond. Don’t worry, with the right preparation and technique, it’s easier than it looks. Below we’ll cover the key steps for successfully clamping your wood project. So, let’s dive in and explore the world of clamping with confidence!
Position the Clamps
When positioning your clamps for optimal results, there are several key things to keep in mind. Here are some tips to ensure you get the most out of your clamps:
- Don’t position clamps too far from the glue line: Clamps should be placed as close to the glue joint as possible in order to generate the most force and ensure the tightest bond.
- Use enough clamps for the project: Depending on the size and shape of your project, you may need multiple clamps to distribute pressure evenly.
- Distribute clamps evenly: When you have several clamps in use, you’ll want to distribute them evenly along the length of the project to avoid uneven pressure points.
- Protect the wood: When placing your clamps, be sure to use scraps of wood between the clamp and your project to prevent dents, scratches, or other damage.
- Consider pressure points: Clamping pressure should be applied at intervals along the project so that there are no gaps between the glue and the wood. Stress points and pressure points should be analyzed to ensure even pressure distribution.
By following these clamp positioning tips along with proper clamping and gluing techniques, you can achieve a strong and durable bond that will last for years to come. Remember to wipe off any excess glue while positioning your clamps, as this will help achieve a cleaner finish.
Tighten the Clamps
When tightening the clamps, it’s important to do so evenly and gradually. This ensures that the wood doesn’t warp or bow under too much pressure. Here’s how to do it step-by-step:
- Start at the center: Begin tightening the clamps at the center of the project, and work your way out towards the edges. This will help distribute the pressure evenly across the wood.
- Check alignment: As you tighten the clamps, check to make sure that the wood pieces remain properly aligned. Adjust the clamps as needed to prevent any shifting or slippage.
- Apply pressure: Slowly increase the pressure on the clamps, applying even pressure on both sides of the wood. Avoid tightening one side much more than the other, as this can warp the wood.
- Use a caul: If you’re using multiple clamps, consider using a caul – a flat, straight piece of wood – between the clamp and the project to help distribute pressure evenly.
- Don’t overtighten: Be cautious not to over-tighten the clamps, which can crush the fibers of the wood and lead to weakened bonding strength.
By following these tips, you can ensure that your clamps are tightened correctly and your wood project is secure.
Wipe off Excess Glue
Once you have applied wood glue and clamped the pieces together, it’s important to wipe off any excess glue before it dries. This will prevent any unsightly glue residue that can interfere with the finishing process. Here are some steps you can follow to wipe off excess glue:
- Use a damp cloth: Once you have clamped the pieces of wood together, take a damp cloth and gently wipe off any excess glue. Be sure to wring out the cloth before wiping to prevent water from seeping into the glued joint.
- Check corners and edges: Use a clean, damp cloth to carefully check the corners and edges of the glued pieces to ensure that there is no glue residue left behind. These areas tend to collect more glue, so it’s important to be thorough.
- Avoid over-wiping: Although it’s important to remove excess glue, be careful not to over-wipe, as this can push glue into the wood grain and cause discoloration. Wipe just enough to remove the excess glue, but not too much that you’re pushing glue too far down.
- Let the glue dry: After wiping off any excess glue, let the glue dry for the recommended amount of time on the glue’s instructions or the packaging for the brand you are using.
By taking the time to effectively wipe off any excess glue, you can ensure that your final product looks neat and polished. This important step will make the finishing process go much smoother and the final product will look professionally crafted.
Drying Time and Cleanup
As much as applying wood glue is essential to ensure a strong bond, it’s crucial to handle the drying time and cleanup with utmost care. Skipping or rushing through this step can lead to a failed project or a messy outcome. Once you’ve properly clamped the wood, it’s time to be patient and allow the glue to dry. In this segment, we will delve into the significance of allowing sufficient drying time, removing the clamps properly, and cleaning up any excess glue, so you can finish your project with pride. Let’s jump right in.
Allow Sufficient Drying Time
One of the most crucial steps in using wood glue is allowing sufficient drying time before moving onto the next step. This can vary depending on the type of wood glue you are using, so it is essential to read the manufacturer’s instructions carefully and follow them to ensure the best results.
Typically, PVA glue will dry within 30 minutes to an hour, while polyurethane glue can take up to 24 hours to fully cure. Epoxy glue should be left to dry for at least four hours before it can be sanded or drilled.
Table: Drying Times for Different Types of Wood Glue
| Type of Wood Glue | Drying Time |
|---|---|
| PVA Glue | 30 minutes to 1 hour |
| Polyurethane Glue | Up to 24 hours |
| Epoxy Glue | At least 4 hours |
It is important to give the glue ample time to dry, as rushing the process can result in a weak bond that may not hold up over time. Factors like humidity and temperature can affect the drying process, so it is essential to ensure that the environment is optimal for drying.
Once the glue has dried, it’s time to move onto the next step. However, you should always check to make sure the glue is completely dry before removing the clamps or moving the wood project. If the glue is still damp or sticky, leave it to dry for a little longer.
Allowing sufficient drying time is crucial in ensuring a strong and secure bond when using wood glue. Take into account the type of glue you’re using and follow the manufacturer’s instructions for drying time. And remember to always check that the glue is completely dry before proceeding to the next step of your project.
Remove Clamps Carefully
After allowing the sufficient drying time for your wood glue to set, it is time to remove the clamps and clean up any excess glue. Removing the clamps carefully is essential to not damage the newly bonded joint.
Step 1: Loosen the clamps by turning them counterclockwise. Do not remove the clamps completely yet.
Step 2: Gently tap the wood with a mallet or hammer to loosen any remaining bond. Use a scraper or chisel for stubborn glue.
Step 3: Once the clamps are fully loosened, remove them from the wood. Be careful not to pull or twist the wood in the process, as this can cause damage to the joint.
Step 4: Inspect the newly glued joint for any signs of weakness or gaps. If necessary, apply additional wood glue and clamp the joint again.
Step 5: Clean any excess glue with a damp cloth or paper towel. Be sure to wipe gently to avoid damaging the wood.
By following these simple yet important steps, you can ensure that your newly bonded joint remains strong and durable. Remember to take your time and handle the wood with care to achieve the best results.
Clean Excess Glue
After allowing the sufficient drying time and removing the clamps carefully, it’s time to clean up any excess glue that may have seeped out during the clamping process. Cleaning up excess glue is important because it can interfere with the finishing process and leave unsightly marks on the wood. Here are some steps for cleaning up excess glue:
- Scrape off any excess glue: You can use a putty knife, a chisel, or a scraper to remove excess glue. Be careful not to gouge or scratch the wood while doing this.
- Use a damp cloth: Dampen a cloth with warm water and wring it out well. Use the damp cloth to wipe away any remaining glue residue. You may need to apply some pressure to remove stubborn glue marks.
- Don’t forget the corners: Excess glue tends to accumulate in the corners, so be sure to pay extra attention to those areas. Use a toothbrush or a cotton swab to get into tight spaces.
- Sand the wood: Once the glue has been removed, it’s a good idea to sand the wood to ensure a smooth and even surface. Use a fine-grit sandpaper and sand with the grain of the wood.
- Check for any remaining glue: After sanding, check the wood carefully to ensure that all the glue residue has been removed. Any leftover glue can interfere with the finishing process.
By following these steps, you can ensure that your project looks neat and professional. Cleaning up excess glue may seem like a small detail, but it can make a big difference in the final outcome.
Finishing the Project
After successfully applying and clamping the wood glue, the next step is to finish the project. This is where the true transformation happens, as the wood begins to take on its final shape and color. It can be an exciting and rewarding stage, but it’s important to take your time and follow the necessary steps for a polished end result. By indulging in some sanding and applying a suitable finish, you can elevate a simple piece of woodwork into a work of art that will last for generations to come. So, let’s dive into the finishing process and explore the best techniques for achieving those professional-looking results.
Sand the Wood
After the wood glue has dried and the clamps have been removed, it’s time to prepare the surface for finishing. This step involves sanding the wood to achieve a smooth and even surface. Here are some tips to consider when sanding the wood:
- Use the Right Sandpaper Grit: Different types of wood require different sandpaper grits. Use a coarse grit, such as 80 or 120, for rough surfaces and a finer grit, such as 180 or 220, for smoother surfaces.
- Sand with the Grain: Sanding against the grain can leave scratches and marks that are difficult to remove. Always sand with the grain of the wood for the best results.
- Avoid Over-sanding: Sanding too much can damage the wood and change its shape. Use light pressure and stop sanding once the surface is smooth and even.
- Wear Protective Gear: Sanding can create a lot of dust and debris, which can be harmful if inhaled. Wear a mask, goggles and gloves to protect yourself during this process.
Once the sanding is complete, wipe the surface with a damp cloth to remove any remaining dust. The wood is now ready for finishing.
Apply Finish
When it comes to woodworking projects, applying a finish is the final touch that can really make the project pop. Depending on the type of wood glue used, certain finishes may be more effective. For example, polyurethane glue can be difficult to stain, so a clear finish may be the way to go.
Before applying any finish, ensure that the glue is completely dry. Once the glue has dried, it’s time to sand the wood surface to prepare it for the finish. Sanding is a crucial step in the finishing process as it not only smooths out the surface but also helps open up the wood pores to allow for better absorption of the finish.
Table 1: Sanding Grit Guide
| Grit Number | Surface Type | Usage |
|---|---|---|
| 60-80 | Coarse | Removal of deep scratches or paint |
| 100-150 | Medium | Prep for staining or smoothing rough wood |
| 180-220 | Fine | Final sanding for bare wood or prep for sealer |
| 320-400 | Extra Fine | Final sanding before applying finish |
After sanding, use a tack cloth to remove any dust from the surface of the wood. The next step is to apply the finish. There are many different finishes available, including stains, polyurethane, lacquer, and shellac, just to name a few.
Table 2: Types of Finishes
| Type of Finish | Description | Usage |
|---|---|---|
| Stain | Tints the wood but does not add protection | For color variation or adding depth |
| Polyurethane | Plastic-like coating that is durable and water-resistant | For high traffic areas or outdoor use |
| Lacquer | Hard, durable, and dries quickly | For adding gloss or protection |
| Shellac | Natural finish made from the secretions of the lac bug | For sealing and adding a natural look |
Whatever type of finish you decide to use, always follow the manufacturer’s instructions for application and drying times. It’s important to apply the finish in thin, even coats, and to allow ample drying time between coats. Once the final coat has dried, you can sit back and admire your finished project.
The proper application of wood glue is crucial to creating a strong and beautiful woodworking project. By following these tips and techniques for using wood glue, you can ensure that your project will last for many years. Remember to always take your time, and to use the proper materials and tools for the job. Happy woodworking!
Enjoy the Results
After completing your woodworking project, it’s time to sit back and admire the results of your hard work. Before enjoying the final outcome, ensure that all glue has dried and any excess glue has been fully wiped away. Once this is done, you can move on to the final steps of your project.
Firstly, sand the wood to ensure a smooth and even surface. Use a fine-grain sandpaper and sand lightly, moving in the direction of the grain to avoid creating scratches. This will help to prepare the surface for any finishing touches you may want to apply.
Next, choose a suitable finish for your project. There are many options to choose from, including oil, stain, varnish, and wax. Consider the color, texture, and durability you desire when selecting a finish. Once you have made a decision, apply it according to the manufacturer’s instructions.
Finally, once the finish has dried, take the time to appreciate your completed project. If you’re happy with the results, display it proudly or give it as a gift to a loved one. If there are areas for improvement, consider the lessons learned and apply them to your next project.
Using wood glue properly and following these steps will help you achieve a strong and reliable bond between pieces of wood for your project. Taking the necessary steps in sanding, applying finish, and displaying your design will give you the satisfaction of completing a project while also enjoying the benefits of your hard work.
Conclusion
After following the tips and techniques outlined in this article, you should be well on your way to successfully using wood glue for your projects. Remember that using wood glue can provide a strong bond that is easy to use, and dries clear.
When selecting a type of wood glue, be sure to consider the project requirements. PVA glue is a great all-purpose option, while polyurethane and epoxy glues offer special benefits such as water resistance and gap filling capabilities.
Before applying the glue, prepare the wood by cleaning and drying it, and sanding if necessary. And when applying the glue, be sure to apply it liberally, spread it evenly, and avoid over-gluing.
Once the glue has been applied, it’s time to clamp the wood together for the best results. Position the clamps and tighten them, then wipe off excess glue. Allow the sufficient drying time before removing the clamps and cleaning up any excess glue.
Finally, finish the project by sanding the wood and applying a finish, then sit back and enjoy your results. Using wood glue can be a fun and rewarding part of any woodworking project, and by following these tips and techniques, you can ensure your success.
Frequently Asked Questions
1. What is the best wood glue for outdoor projects?
Polyurethane glue is the best choice for outdoor projects due to its weather-resistant properties.
2. Can wood glue be used on painted or finished surfaces?
No, it is important to use wood glue only on clean and unfinished wood surfaces to ensure a strong bond.
3. Is it necessary to use clamps when using wood glue?
Yes, clamping the wood is essential to ensure a strong bond and prevent the wood from shifting during drying.
4. How long does wood glue take to dry?
The drying time can vary depending on the type of glue and humidity levels, but typically it takes around 24 hours to fully dry.
5. Can wood glue be sanded after it dries?
Yes, wood glue can be sanded after it dries, but it’s important to ensure that the glue is fully dry before sanding to avoid damaging the wood.
6. Can wood glue be used for repairing furniture?
Yes, wood glue is great for repairing furniture and can also be used to reinforce joints or fix cracks.
7. Is wood glue toxic?
Most wood glues are non-toxic, but it’s important to read the label and follow safety precautions such as wearing gloves and avoiding ingestion.
8. Can wood glue be stained or painted over?
Yes, once the glue is fully dry it can be painted or stained over to blend in with the surrounding wood.
9. How can excess glue be removed?
Excess glue can be wiped away with a damp cloth before it dries or scraped off carefully with a chisel or razor blade after it dries.
10. Can wood glue be used for bonding different types of wood?
Yes, wood glue is great for bonding different types of wood such as softwood and hardwood or even for bonding wood to other materials like metal or plastic.