Have you ever tried to remove vinyl flooring glue from concrete? If so, you know how frustrating and time-consuming the process can be. The good news is, with the right tools and materials, along with a bit of patience and elbow grease, it is possible to remove the glue completely and restore your concrete surface. In this comprehensive guide, we will take you through the step-by-step process of removing vinyl flooring glue from concrete, from preparation to post-removal care. So, grab your tools and let’s get started!
Tools and Materials

Looking to remove vinyl flooring glue from concrete? Before we get started with the steps, let’s make sure we have all the necessary tools and materials. Having the right equipment on hand will make the removal process much smoother and more efficient. So, grab your scraper, solvent, sandpaper, and more – let’s get started! No need to worry about getting stuck like a fly in a trap or having your surface end up resembling gluey potato soup, as we have you covered with this comprehensive guide.
Tools
When it comes to removing vinyl flooring glue from concrete, you’re going to need a few specific tools to get the job done. Here is a comprehensive list of what you will need:
- Putty knife: A putty knife is a must-have tool for removing glue from concrete. It’s important to have a variety of sizes and shapes to fit different areas.
- Scraper: A scraper may be required for areas where the glue is thick and difficult to remove with a putty knife. Make sure to choose a scraper with a sharp blade.
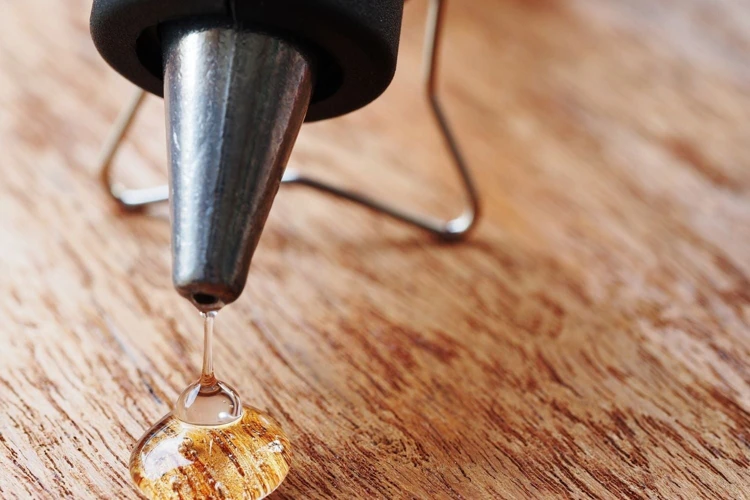
- Heat gun: Although not required for every job, a heat gun can be very useful in softening the glue and making it easier to remove. This tool is particularly helpful if the glue has been on the concrete for a long time.
- Solvent-resistant gloves: When working with solvents, it’s important to protect your hands. Make sure to use gloves that are resistant to the solvents that you will be working with.
- Safety glasses: Safety glasses are essential for protecting your eyes from debris and chemicals.
- Respirator mask: Some solvents can release harmful fumes. It’s important to use a respirator mask when working with these chemicals to protect your lungs.
- Bucket: You’ll need a bucket to hold the solvent and any debris or residue that you scrape off the floor.
- Clean rags or towels: You’ll need plenty of clean rags or towels to wipe up any solvent, residue, or debris that comes off the floor.
Remember to be cautious when working with solvents. Ensure proper ventilation and follow all safety precautions. If you need more information on removing different types of glue from various surfaces, check out how to remove super glue from metal lock or how to get decal glue off car for other helpful guides.
Materials
When it comes to removing vinyl flooring glue from concrete, having the right materials is crucial. Here are the materials that you will need to make this job easier:
- Plastic scraper: A plastic scraper is used to scrape away the bulk of the glue. Unlike a metal scraper, it won’t scratch the surface of the concrete.
- Solvent: You’ll need a solvent that is specially designed to remove vinyl glue. Acetone, lacquer thinner, and mineral spirits are among the solvents that can be effective in this process.
- Putty knife: A putty knife will come in handy in removing any remaining glue residue after scraping the bulk.
- Protective equipment: Gloves, safety glasses, and a respirator mask are essential as the solvent used may be harmful if exposed to the skin or inhaled.
- Sanding paper: If there’s still some residue leftover after scraping, sandpaper can be used to finish off the job.
- Clean cloth: Use a clean cloth to wipe down the surface of the concrete after removing the glue.
Note that some of these materials can also be useful in removing other types of adhesives as well. For instance, if you want to know how to remove tape glue from a car, you can follow a similar process and use a plastic scraper, solvent, and putty knife. If you need to remove super glue from plastic and metal, lacquer thinner or acetone might be useful. However, be careful not to use the wrong type of solvent, as some adhesives can be resistant and may require other methods.
Preparation

Before you start removing the vinyl flooring glue from concrete, it is essential to prepare the area thoroughly. Proper preparation ensures that the removal process is efficient and effective. Following the preparation steps helps avoid potential damage to the concrete surface and saves time. In this section, we will discuss the preparation process, which involves clearing the room, removing baseboards and thresholds, and preparing the surface for glue removal.
If you need to remove Bostik glue from your hands after preparation, you can follow our guide on How to Remove Bostik Glue from Hands.
Step 1: Clear the Room
To effectively remove vinyl flooring glue from concrete, it is essential to start with a clean, empty room. This will give you ample space to move around and access all areas of the floor. Additionally, it will prevent furniture and other items from getting damaged or covered in glue in the process.
Step 1: Clear the room completely. Remove all furniture, rugs, and other items from the space. Put them in another room for safekeeping. If you have items that are too large to move, cover them with a protective plastic sheet or tarp to prevent any damage.
To further protect the room, you may want to cover the windows and doorways with plastic sheets as well. This will prevent any dust or debris from spreading to other parts of the house. Finally, make sure to wear protective gear such as gloves, goggles, and a mask to avoid inhaling any dust or fumes.
Now that the room is clean and ready, you can move on to the next steps. Removing super glue from plastic and metal may be an entirely different task, but it’s always good to be prepared for any future challenges.
Step 2: Remove Baseboards and Thresholds
Removing the baseboards and thresholds is an essential step in removing vinyl flooring glue from concrete. Baseboards and thresholds are designed to cover the gaps between the flooring and the walls or between two different types of flooring. Removing them will give you more working space and prevent them from getting damaged during glue removal. Here’s how to remove the baseboards and thresholds:
| Tools | Materials |
| – Pry bar – Hammer – Flathead screwdriver – Pliers |
– Drop cloth – Painter’s tape |
Note: Before removing the baseboards and thresholds, make sure to take pictures and label them accordingly, so it would be easier and quicker to reinstall them once the process is done.
1. Protect the walls. Place a drop cloth to cover the floor and use painter’s tape to protect the wall from scratches.
2. Remove the baseboards. Wedge the flathead screwdriver between the baseboard and the wall and use a pry bar to gently loosen the board. Take your time and repeat the process along the whole length of the board. Once it’s loose enough, gently pull it away from the wall.
3. Remove any nails or screws. Using pliers, remove any nails or screws that are still attached to the baseboard.
4. Repeat the process for the thresholds. If you have thresholds, remove them using the same process.
Now that you have removed the baseboards and thresholds, you are ready to proceed with the next step of preparing the surface. If you encounter any difficulty removing the baseboards or thresholds, try using a hammer to loosen them up. If you need guidance on removing glue from different surfaces, check out our guide on removing Bostik glue from hands, or our guide on removing tape glue from a car.
Step 3: Prep the Surface
Prepping the surface is key to ensuring the glue removal process is successful. It involves getting the concrete as smooth as possible and clearing any debris that could hinder the rest of the process.
| Tools | Materials |
|---|---|
| Dustpan and Broom | Cleaning Solution |
| Vacuum | Water Bucket |
| Paint Scraper or Floor Scraper | Protective Gear (Mask, Gloves, Goggles) |
Before starting with the actual glue removal process, it’s important to clear the room of any furniture or debris that could obstruct the work. To do that, use a vacuum, broom, and dustpan to clean the room thoroughly. Any small debris left behind could hinder the effectiveness of the next steps.
It’s also crucial to take the time to remove baseboards and thresholds (the molding between rooms and entrances). Doing so will not only protect the baseboards from being damaged during the process but also make the glue removal job much easier.
Once the room is debris-free, make a cleaning solution to ensure the surface is clear of any remaining dust or dirt. Simply mix hot water with any household cleaner that doesn’t contain ammonia. Then, use a mop or a cloth to wet the surface thoroughly. This should help to loosen up any dirt or grime.
Now is the time to put on protective gear before tackling the next step. Using either a paint scraper or a floor scraper, begin to remove any debris and large chunks of glue that you can safely remove. Be careful not to gouge or damage the concrete surface.
To prepare for the next step, wet a cloth with the cleaning solution and wipe the surface to remove any remaining glue dust, debris, or adhesive residues. Allow the surface to dry completely before proceeding further.
Note: If there are still stubborn glue spots, you can go through the scraping process or apply a solvent to the area. Applying a solvent to the surface will be covered in the next step.
Now that the surface is cleaned and fully prepped, it’s time to move on to the next step in the process of removing vinyl flooring glue from concrete.
If you’re interested in other articles related to getting rid of adhesive residues, check out How to Get Glue Dots off Wall or How to Remove Super Glue from Ceramic Sink.
Removing the Glue
Now that you have prepped the surface, it’s time to tackle the main task of removing the vinyl flooring glue from the concrete. This can be a daunting process, but with the right tools and techniques, you can make it much easier. In the following steps, we’ll show you exactly how to remove the glue without damaging your concrete floors. From scraping to solvents, we’ve got you covered. So let’s get started and say goodbye to that pesky glue. And if you’re dealing with a different kind of sticky situation, like a snake on a glue trap, check out our guide on how to get a snake off a glue trap.
Step 4: Scrape the Glue
Before you begin scraping the vinyl flooring glue, put on some thick gloves to protect your hands. Make sure to select a scraper that is appropriate for the job. A floor scraper with a long handle will make the task much easier and more efficient. Additionally, you may want to use a putty knife or a paint scraper as well.
Start by manually lifting as much glue as possible with the scraper. Try to lift it in large chunks, if possible, to make the job quicker. If you encounter any particularly difficult spots, try using a putty knife or paint scraper to work the glue loose.
Continue scraping the surface until you’ve removed as much glue as you can. Be careful not to use too much force as it may damage the concrete underneath. If there are any small pieces of glue left, don’t worry – they will come off when you apply the solvent in the next step.
If there is a lot of glue left on the surface after scraping, consider using a buffer with an abrasive pad to remove the rest. This will help to smooth out any bumps or rough spots, making it easier to apply the solvent and complete the process. Once you’ve finished scraping, it’s time to move on to applying the solvent.
Step 5: Apply Solvent
When it comes to removing vinyl flooring glue from concrete, applying a solvent is an effective method. Solvents are chemical substances that can dissolve the glue, making it easier to remove. Below is a table with information on the various solvents you can use:
| Solvent | Advantages | Disadvantages |
|---|---|---|
| Acetone | Fast-acting | Can be harmful if inhaled or ingested; flammable |
| Mineral Spirits | Easily available; low toxicity | Takes longer to work than acetone; may leave residue |
| Methyl Ethyl Ketone (MEK) | Fast-acting | Can be harmful if inhaled or ingested; flammable |
| Citrus Solvent | Non-toxic; pleasant odor | Takes longer to work than acetone or MEK; may not be effective on all types of glue |
Caution: When using solvents, always wear gloves and work in a well-ventilated area. Follow the manufacturer’s instructions and dispose of the solvent properly. If you have children or pets at home, keep them away from the work area while using solvents.
Step 6: Let the Solvent Work
To effectively remove the vinyl flooring glue from the concrete, it’s important to let the solvent work its magic. This step is crucial in ensuring that the glue is fully dissolved and easier to remove.
Step 6: Leaving the Solvent to Work its Magic
| Duration: | 30 minutes to 2 hours |
|---|---|
| What You’ll Need: | Timer or Stopwatch |
Once the solvent is applied, it’s important to wait for a specified duration before continuing with the next step for optimal results. This is because the glue needs sufficient time to dissolve and loosen from the concrete surface. The duration recommended by the solvent manufacturer is usually indicated on the label and varies depending on the product.
During this waiting period, it’s recommended to keep the room well-ventilated by opening windows and turning on a fan. This helps to prevent inhalation of fumes from the solvent.
It’s also essential to keep pets and children away from the area to prevent injury or respiratory issues. Once the specified duration elapses, move on to the next step, which involves scraping the glue off the surface.
Step 7: Scrape Again
After allowing the solvent to work its magic, it’s time to scrape the remaining glue again. This step is crucial in ensuring that all of the adhesive is removed. To do this, you’ll need a scraper tool, such as a handheld scraper or a floor scraper with a long handle. The scraper should have a sharp edge to make the process easier.
Here’s a step-by-step guide on how to scrape off the remaining glue:
| 1. Start at a corner or edge of the surface. Position the scraper at a 45-degree angle to the surface. |
| 2. Push the scraper forward with firm pressure. Use a combination of pushing and pulling motions to remove as much glue as possible. |
| 3. Continue scraping until you’ve removed all the glue. Be sure to check for any areas that you might have missed. |
| 4. If the scraper becomes dull or clogged with glue, stop and clean or sharpen the blade. |
Once you have removed as much glue as possible, it’s time to move on to the next step.
Step 8: Clean the Surface
Once you have scraped away the majority of the vinyl flooring glue using the solvent, it’s important to clean the surface thoroughly to remove any remaining residue. This will ensure that the surface is completely free of any leftover glue, dirt, or debris, creating a clean base for any future flooring.
To clean the surface, gather the necessary materials:
| Materials | Quantity |
|---|---|
| Bucket | 1 |
| Water | Enough to fill bucket |
| Mop or sponge | 1 |
| Heavy-duty cleaner | As directed on the product |
Begin by filling the bucket with water and adding the heavy-duty cleaner, following the instructions stated on the product. Dip your mop or sponge into the solution and use it to cover the entire surface area, ensuring that every inch is covered.
Note: Be sure to use heavy-duty cleaner that is safe to use on concrete surfaces, as certain cleaners can be harsh and cause damage.
Afterward, rinse the mop or sponge with clean water and use it to wipe away any remaining residue. Be sure to rinse the surface several times with fresh water to ensure that all cleaning solution residue has been removed.
Next, dry the surface using a clean, dry towel or mop. Be sure to thoroughly dry the surface before moving onto the next step.
Tip: You can also use a fan or heater to help speed up the drying process.
Once the surface is completely dry, inspect it carefully for any remaining glue residue. If there is any leftover residue, repeat Steps 4-7 of the process. If the surface is free of glue residue, move on to Step 9.
By following these simple steps, you can successfully remove vinyl flooring glue from concrete surfaces and prepare the area for any future flooring installations.
Step 9: Allow Surface to Dry
Once you have successfully removed the vinyl flooring glue from the concrete surface, it is essential to let it dry thoroughly before proceeding with any further steps. Allowing the surface to dry completely ensures that any residual solvent or moisture is removed, and the concrete is ready for the next stage of the process.
The Importance of Drying the Surface
Drying the concrete surface is crucial for various reasons, including:
- Preventing the growth of mold and mildew: When moisture lingers on the surface, it can promote the growth of mold and mildew. Drying the surface eliminates any traces of moisture, which helps to prevent fungal growth.
- Ensuring proper adhesion: If you plan to apply an adhesive or a concrete sealer, it is essential to dry the surface thoroughly to avoid trapping any moisture that could interfere with the bonding process.
- Avoiding damage: Failing to dry the surface may lead to the development of cracks, chips, or other types of damage. Drying ensures the surface is ready for the next stage, preventing further damage down the line.
How Long Should You Allow the Surface to Dry?
The amount of time you should allow the surface to dry mainly depends on the level of moisture present in the room. On average, it takes between 24 and 48 hours for the concrete surface to dry entirely. However, environmental factors such as humidity, temperature, and airflow can influence drying time.
To ensure the surface is dry completely, you can use a moisture meter or perform a simple moisture test. The test involves placing a plastic sheet or aluminum foil on the surface and sealing the edges firmly. Leave the sheet in place for four to six hours and then remove it. Check for any moisture droplets under the sheet or foil. If there are no signs of moisture, your concrete surface is ready for the next stage.
Conclusion
Allowing the surface to dry is a crucial step in removing vinyl flooring glue from concrete surfaces. It ensures that the surface is dry, free from moisture, and ready for the next stage of the process. Remember to keep an eye on environmental factors that may affect drying time, and test for any residual moisture before proceeding with the next steps.
Step 10: Sand the Surface (if necessary)
After completing the previous steps, you should have a clean concrete surface that is free of vinyl flooring glue. However, in some cases, you may notice that the surface is not completely smooth. To fix this issue, you may need to sand the surface.
Step 10: Sand the Surface (if necessary)
Here’s how to sand the surface:
- Choose a sanding tool – You can use either a floor buffer with a sanding screen or a handheld rotary sander. Make sure to choose a coarse grit sandpaper.
- Attach sandpaper – If you’re using a rotary sander, attach the coarse grit sandpaper to the sander. If you’re using a floor buffer, attach the sanding screen.
- Sand the surface – Use the sanding tool to go over the concrete surface. Start from one corner and move systematically to the other end. Pay attention and be careful not to press too hard on the sanding tool since this can cause damage to the concrete.
- Clean the Surface – After sanding, the surface will have a lot of debris, so make sure to clean it well with a vacuum cleaner or broom and dustpan.
If you’re sanding a large area, it’s essential to monitor the sandpaper. When it becomes worn, change it for another piece of sandpaper. Also, keep in mind that sanding can create a lot of dust, so wear a dust mask, safety goggles, and earplugs.
After sanding the surface, check to see if it is smooth enough. If not, repeat the sanding process with a finer grit sandpaper. If the surface starts to look too smooth, you can stop sanding and move to the next step.
Sanding the concrete surface may not be necessary in all cases. However, if you notice any bumps or rough spots on the surface after removing the vinyl flooring glue, this step can help you achieve a smooth finish.
Post-Removal Care
Now that the hard work of removing vinyl flooring glue from your concrete surface is done, it’s important to take the necessary post-removal care steps to ensure that your floor is looking its best and protected against future damage. By following these tips and taking care of your concrete surface, you can keep your floors looking sleek and polished for years to come. Let’s dive into the post-removal care steps that will ensure the long-term beauty and durability of your concrete floor.
Step 11: Apply Concrete Sealer (optional)
After successfully removing the glue from the concrete surface, it’s time to protect it from future damage by applying a concrete sealer. The sealer acts as a barrier against moisture, stains, and dust, making the surface easier to clean and maintain. Applying a sealer is optional, but highly recommended, especially if the concrete surface is in a high-traffic area. Here are the steps to apply a concrete sealer:
First, choose the right sealer for your concrete surface. There are two types of sealers: penetrating sealers and film-forming sealers. Penetrating sealers soak into the concrete and create a chemical barrier, whereas film-forming sealers sit on top of the surface and create a protective layer. You can consult with a hardware store expert to help you choose the proper sealant for your floor.
Next, gather the necessary tools and materials for the job. These include a paint roller, a paintbrush, a paint tray, a stirring stick, and the sealer. Make sure your work area is clean and clear of debris.
Table of Tools and Materials:
| Tools | Materials |
|---|---|
| Paint roller | Concrete sealer |
| Paintbrush | Stirring stick |
| Paint tray |
Now it’s time to mix the sealer according to the manufacturer’s instructions. Some sealers need to be diluted with water before use, while others can be used straight out of the container. Use a stirring stick to ensure the sealer is well-mixed.
Note: Always follow the manufacturer’s instructions when handling sealants.
Once the sealer is ready, pour it into the paint tray and using the paint roller, apply a light coat of sealer onto the concrete surface. Be sure to cover the entire area, including the edges. Use a paintbrush to apply the sealer in hard-to-reach spots.
Allow the first coat to dry according to the manufacturer’s instructions, then apply a second coat using the same method. Let the sealer dry completely before walking on the surface.
Tip: Apply the sealer in a well-ventilated area and wear a face mask and gloves to avoid inhaling fumes.
Applying a concrete sealer is an optional but beneficial step in protecting your concrete surface from damage. Follow the steps above and your floor will be well protected and easier to maintain.
Step 12: Reinstall Baseboards and Thresholds
After removing the vinyl flooring glue from the concrete surface, you should now focus on reinstalling the baseboards and thresholds. This will help give your room a finished look and prevent any damage to the walls and floors. Here are some steps to follow:
- Measure the length of the baseboards: Before installing the baseboards, measure the length of each wall to ensure that you have enough material. Cut the baseboards to size, using a saw if necessary.
- Reattach the baseboards: Once the baseboards are ready, reattach them to the wall using a nail gun or adhesive glue. Pay attention to the spacing of the nails to ensure that the baseboards are firmly attached.
- Reinstall the thresholds: If there were any thresholds that you removed during the preparation phase, now is the time to reinstall them. Measure the length of each doorway and cut the thresholds to size, if needed. Attach them to the floor using screws or adhesive glue.
- Fill the nail holes: If you used nails to attach the baseboards, you might notice small holes in the wood. Use wood filler to cover them up and sand it down until it’s flush with the surface. You can then paint or stain the baseboards to match the rest of the room.
By following these steps, you can ensure that the baseboards and thresholds are properly reinstalled and your room looks polished and complete.
Conclusion
After following the steps outlined in this comprehensive guide, you should have successfully removed vinyl flooring glue from your concrete surface. As you may have realized, however, this process is tedious and time-consuming. It requires careful preparation and the use of specific tools and materials.
It’s important to note that safety is a top priority when working with solvents and other chemicals. Make sure to follow all safety precautions indicated on the product labels, including wearing protective gear such as gloves, eye protection, and a respirator if necessary.
Once the glue has been removed, you may also consider applying a concrete sealer to protect the surface from future damage and make it easier to clean. This is optional, but it can provide additional benefits over time.
Remember that each situation may be different, and the steps outlined in this guide may not work for every case. If you encounter stubborn glue or encounter any issues, it may be best to seek professional help from a flooring specialist or contractor.
Overall, while removing vinyl flooring glue from concrete may be challenging, following these steps can make the process easier and more manageable. By being prepared and taking your time, you can successfully restore your concrete surface to its former glory.
Frequently Asked Questions
1. Can I remove vinyl flooring glue without using a solvent?
Yes, you can try using a floor scraper or a heat gun to remove the glue without using a solvent.
2. Can I use any type of solvent to remove the glue?
No, you should use a solvent that is specifically designed for removing vinyl flooring glue. Examples include mineral spirits, paint thinner, and adhesive remover.
3. Is it necessary to sand the surface after removing the glue?
It depends on the condition of the concrete surface. If there are any remaining glue residue or rough spots, then sanding may be necessary to smooth out the surface.
4. How long should I let the solvent work before scraping?
The length of time can vary depending on the type of solvent and the amount of glue on the surface. Generally, you should wait at least 30 minutes for the solvent to fully penetrate the glue.
5. Will removing the glue damage my concrete floor?
No, if you follow the steps carefully, removing the glue should not cause any damage to your concrete floor. However, using improper techniques or tools can cause scratches or other damage.
6. Can I use a pressure washer to remove the glue?
No, pressure washing can potentially cause damage to the concrete surface and may not effectively remove all the glue.
7. Do I need to wear protective gear when working with solvents?
Yes, it is recommended that you wear gloves, eye goggles, and a respirator mask to protect yourself from any fumes or skin irritation from the solvents.
8. Can I reuse the solvent for multiple applications?
No, it is not recommended to reuse the solvent as it can become contaminated with glue residue and lose its effectiveness.
9. Should I apply the solvent to the whole floor or just a small section at a time?
It is best to work on small sections at a time, as applying the solvent to the entire floor can cause it to evaporate too quickly and become less effective.
10. Does the temperature and humidity affect the glue removal process?
Yes, higher temperatures and humidity levels can speed up the evaporation of the solvent, while lower temperatures and humidity levels can slow down the process. It is best to work in moderate conditions for optimal results.