Have you ever found yourself staring at a stubborn layer of tile glue and wondering how to remove it? It can be an intimidating task, but fear not! With the right tools and materials, as well as proper preparation and technique, removing tile glue can be done easily and efficiently. In this comprehensive guide, we’ll walk you through the step-by-step process of removing tile glue, from surface preparation to final touches. Whether you’re renovating your home or simply need to replace a few tiles, this guide will provide you with all the information and resources you need to get the job done right. So, let’s get started!
Tools & Materials
Tools & Materials: What You Need to Remove Tile Glue
Removing tile glue can be a challenging task, but having the right tools and materials can make the process much easier. Before getting started, you’ll need to gather a few essential items. Some tools can be found in your toolbox, while others can be bought at your local hardware shop. In this section, we’ll explain what tools and materials you’ll need to remove tile glue. Additionally, if you’re dealing with dried super glue residue, Mitre Bond glue, or 3M glue, we have guides to assist you.
Tools
When it comes to removing tile glue, having the right tools for the job is crucial. Here are the tools you will need:
- Heavy-Duty Gloves: Protect your hands from any potential hazards while working.
- Safety Goggles: Prevent any adhesive remover from getting into your eyes.
- Dust Mask: Protect your lungs from any dust kicked up during the process.
- Putty Knife: Used to scrape off any excess adhesive.
- Scraper: Helps to remove tough glue residue.
- Bucket: Used for mixing adhesive remover and water or for holding debris.
- Sponge: Used for applying adhesive remover and wiping down surfaces.
- Scrub Brush: Helps to remove stubborn glue residue.
- Razor Blade: Useful for scraping off small areas of glue residue.
Remember to use each tool properly and with caution. For example, to avoid any potential accidents, it’s recommended to use a razor blade with extreme care. If you need to sharpen your razor blade, you can learn how to fix dried super glue to reuse it. After you finish the glue removal process, you can get rid of the adhesive odor by following these simple steps.
Materials
To remove tile glue effectively, you need to gather the necessary materials. Having the right tools and materials can make the process go smoothly and ensure excellent results.
Here are the materials you will need:
- Adhesive Remover: Choose an adhesive remover that’s suitable for your specific type of glue. You can check the label or manufacturer website for a list of compatible adhesives. One of the best adhesive removers for tile glue is 3M Adhesive Remover.
- Protective Gloves: Wear gloves to protect your hands from the chemicals in the adhesive remover. You can use rubber or latex gloves.
- Protective Eyewear: Wear eye protection to prevent the adhesive remover from splashing into your eyes. Choose safety goggles or glasses.
- Respirator Mask: Wear a respirator mask to avoid inhaling the fumes produced by the adhesive remover. The mask should be rated P100 or N95.
- Utility Knife or Scraper: Use a utility knife or scraper to remove any large chunks of adhesive before applying the adhesive remover. You can also use these tools after application to scrape off the softened glue.
- Scrubbing Sponge or Brush: Use a scrubbing sponge or brush to remove any leftover adhesive residue. The sponge or brush should be gentle enough to avoid damaging the surface but also strong enough to get rid of the glue.
- Bucket of Water: Use a bucket of water to rinse the surface after applying the adhesive remover. You can also mix in some mild detergent to clean the surface more thoroughly.
- Clean Rags or Towels: Use clean rags or towels to wipe the surface dry after rinsing. You can also use them to wipe away any residue left after scraping.
Make sure to have all necessary materials on hand before beginning the process of removing tile glue. With the right tools and materials, you can achieve excellent results.
Preparation
Before you begin the process of removing tile glue, it is important to properly prepare the surface and yourself. Proper preparation makes the process smoother and safer, while ensuring that the final result is satisfactory. Take a look at the following steps to make sure you are ready to tackle the task at hand.
Surface Preparation: Before removing the tile glue, make sure to clear the room of any unnecessary objects that may obstruct your progress. Cover any fixtures or furniture with a protective plastic sheet. Additionally, ensure that the surface you are working on is clean and dry. Any loose debris or dirt can interfere with the adhesive remover’s effectiveness.
Personal Preparation: Removing tile glue can be a messy and potentially hazardous process. It is important to protect yourself by wearing long pants, a long-sleeved shirt, gloves, and goggles or safety glasses. Keep in mind that some adhesive removers can emit strong fumes, so it is also important to wear a respirator mask. By taking the right precautions, you can ensure a safe and successful tile glue removal.
Internal link: What neutralizes super glue?
Surface Preparation
Before removing tile glue, it’s crucial to prepare the surface properly. Any dust, debris, or loose tiles can affect the adhesive remover’s efficacy and create a mess. To prepare the surface, follow these steps:
- Remove any loose tiles: To ensure that the surface is flat and even, remove any loose tiles using a chisel and hammer. Put on safety goggles and work carefully to avoid damaging the surrounding tiles.
- Clean the area: Thoroughly clean the surface to remove any dirt, dust, or debris that can prevent the adhesive remover from penetrating the glue. Sweep or vacuum the area, then mop with a mild detergent and warm water.
- Fill gaps and cracks: If there are any gaps or cracks in the surface, fill them with a suitable filler and wait for the filler to dry completely. This ensures that the surface is level and smooth.
- Protect adjoining surfaces: Cover any adjoining surface like walls or countertops with masking tape or paper to prevent the adhesive remover from damaging them.
By thoroughly preparing the surface, you can ensure the tile glue removal process is effective and the final result is satisfying. If you encounter any stubborn glue residue, check out our guide on /how-to-remove-glue-from-engineered-wood-floor/ for additional tips.
Personal Preparation
When it comes to personal preparation, there are a few things to keep in mind to ensure both your safety and effectiveness when removing tile glue. Here are some steps you can follow:
- Protective Gear: Always prioritize your safety first and wear gloves and protective eyewear. This can prevent any accidental injuries from harsh chemicals or flying debris.
- Ventilation: Adequate ventilation is crucial when working with adhesive removers as fumes can be harmful to inhale. Make sure to open windows or doors and use fans if necessary.
- Read Instructions: It is important to read the instructions on the adhesive remover you’re using to understand the potential hazards and the recommended method of application.
- Prepare the Area: Prepare your workspace before applying the adhesive remover. Cover any surrounding items as the chemicals can damage them.
Following these personal preparation steps will not only ensure your safety but also lead to a smoother experience when removing tile glue. For more information on removing different types of glue, check out our articles on removing hot glue off a brick wall or removing glass glue.
Applying Adhesive Remover
As you move on to the next step in removing tile glue, it’s essential to understand how to apply adhesive remover properly. This is where the real work begins, and you want to ensure you are following the right steps to get the job done correctly. First, you need to gather the necessary tools and materials listed in the previous section. Once you have everything prepared, you can start applying the adhesive remover. But before you start, consider taking some safety precautions, which we will discuss in more detail below. If you’re unsure about how to get a certain type of glue out, check out our guide on how to get glue out.
Safety Precautions
When using adhesive remover, it’s important to take safety precautions to protect yourself and others around you. Here are a few safety tips to keep in mind:
- Ventilation: Before starting the process, make sure to have proper ventilation in the room. Open windows and turn on a fan to prevent inhaling toxic fumes.
- Protective Gear: Wear protective gloves, goggles, and a mask to avoid any contact with the adhesive remover or its fumes.
- Read the Label: Read the instructions on the adhesive remover label thoroughly and follow the precautions. Avoid using more than the specified amount of the adhesive remover, as it may damage the surface or create other safety issues.
- Keep Children and Pets Away: Keep children and pets away from the area as they may accidentally inhale fumes or come into contact with the adhesive remover.
By following these safety precautions you can remove tile glue without harming yourself or those around you. It’s always better to be safe than sorry, and taking these steps will ensure that the process goes smoothly and without incident.
Application Process
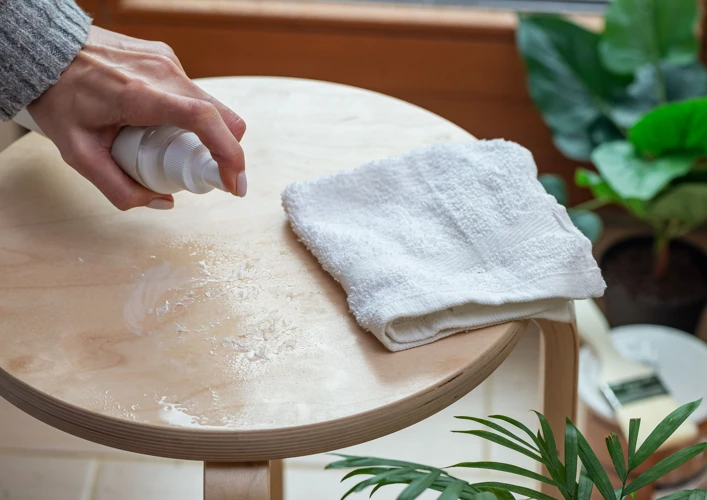
When you’re ready to begin, carefully pour the adhesive remover onto the glue. Ensure that the entire surface area is covered. The amount of adhesive remover needed will depend on the size of the glue area. Allow the adhesive remover to soak in for the recommended amount of time listed on the product container. This will normally be between 15-30 minutes.
Tip: Cover the adhesive remover with plastic wrap to keep it from evaporating too quickly.
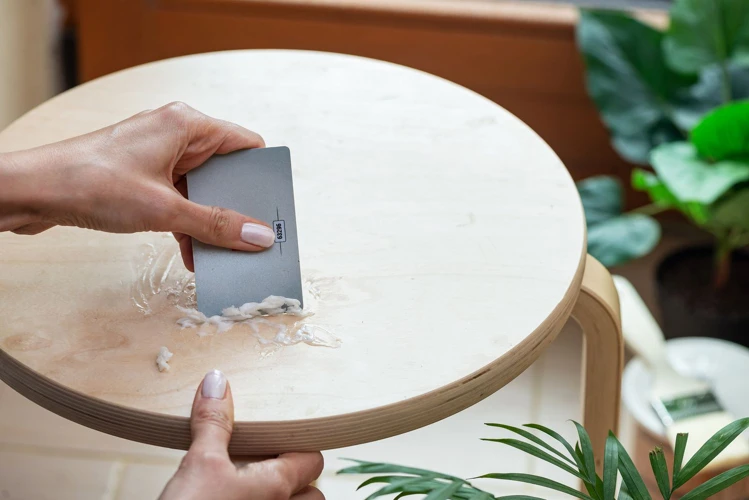
Once the adhesive has been soaked, gently scrape it away with a putty knife or scraper. Work carefully to avoid damaging the surface beneath the glue. If the glue isn’t coming off easily, apply more adhesive remover and wait a little longer.
Important: Use a respirator and gloves to protect yourself from the fumes and chemicals in the adhesive remover.
Keep applying and scraping the glue until it’s completely removed, and the surface underneath is smooth. Be persistent and take your time for the best results.
Tip: If you’re faced with really stubborn glue that still refuses to budge, try using a heat gun or a hair dryer to warm it up. This can help break the bond and make it easier to scrape away.
Once you’ve removed as much of the glue as possible, use steel wool or a scouring pad to give the surface a final clean. Rinse the surface thoroughly with warm water and allow it time to dry completely.
Note: If you’re struggling with the adhesive remover drying out too rapidly, consider using a glue bottle tip remover tool. It’s a simple tool that helps regulate the amount of adhesive released and helps prevent the adhesive from drying out too quickly.
Click here, if you’re wondering how to get nail glue out of a bottle. If you need to remove Mitre Bond Glue, check out our guide here.
Scraping Off the Glue
Now that the adhesive remover has had time to do its job, it’s time to move on to the next step – scraping off the glue. This can be a challenging and time-consuming task, but with the right tools and techniques, you can get it done efficiently and effectively. Make sure to follow the best practices outlined below to ensure that you avoid damaging your surface and get rid of all the remaining residue. Let’s get ready to say goodbye to that stubborn tile glue once and for all!
Tools & Techniques
To scrape off the tile glue, you need the right tools and techniques to ensure that you get the job done correctly. Here is a list of recommended tools and techniques that you can use:
- Utility Knife: A sharp knife can come in handy for cutting through thick layers of glue and removing any stubborn sections. Make sure the blade is sharp enough to avoid any accidents.
- Wall Scraper: A wall scraper is a tool that can help remove larger sections of glue from the tile surface. You’ll need to apply some pressure while using it to get rid of any remaining glue residues.
- Heat Gun: If the adhesive is particularly stubborn, use a heat gun to soften the glue. Once the glue is soft enough, it can be scraped off more easily with a wall scraper.
- Chisel: A chisel is another tool that can come in handy for removing thicker layers of adhesive. It is particularly useful for stubborn areas where other tools have not been effective.
When it comes to techniques, there are a few things to keep in mind. First, always wear protective gear, including gloves and safety goggles, to avoid any injuries. Secondly, work in small sections and avoid rushing the job. This will increase your chances of removing all the glue without damaging the surface of the tiles or the walls. Finally, use a combination of different tools and techniques for more effective results.
Best Practices
When it comes to removing tile glue, there are certain best practices that can make the process more efficient and effective. Here are some tips to keep in mind:
- Wear protective gear: As mentioned earlier, make sure to wear gloves, a mask, and safety goggles to protect yourself from the fumes and debris.
- Work in small sections: It’s recommended to work on removing the glue in small sections rather than trying to tackle the entire area at once. This will help ensure that you’re able to remove the glue thoroughly without it drying out and becoming harder to remove.
- Use the right technique: The scraping technique may vary depending on the tool being used. For instance, if you’re using a handheld scraper, use short and quick strokes, while a floor scraper requires longer strokes and more pressure.
- Be patient: Removing tile glue can be a tedious process, and it’s important to be patient and persistent. Taking your time and using the right tools and materials will ultimately yield better results.
- Inspect your progress: Each time you finish scraping a small section, take a break to inspect the area for any residue or glue that might have been left behind. If you notice any residue, simply apply more adhesive remover and repeat the scraping process.
By following these best practices, you’ll be able to remove tile glue more efficiently and effectively, leaving a clean and smooth surface for your next flooring project.
Final Touches
As you remove the tile glue, there may be leftover residue or marks that need to be cleaned up. This is where the final touches come in. Taking the time to properly clean and inspect the surface will ensure a smooth and flawless finish. Let’s dive into the essential steps that will bring your project to completion.
Cleaning the Surface
After removing the old tile glue, it’s important to thoroughly clean the surface to prepare for new flooring or tiling. Here are the steps to follow:
| Step | Description |
|---|---|
| 1 | Use a scraper to remove any large debris or chunks of glue. |
| 2 | Wipe the surface down with a damp rag or sponge to remove any remaining residue or dust. |
| 3 | For any stubborn glue residue, mix a solution of warm water and vinegar (1:1 ratio) and apply it to the affected area. Let it sit for a few minutes, then scrub with a nylon brush or abrasive sponge. |
| 4 | Rinse the surface with clean water and dry thoroughly with a clean towel. |
Note: if the surface is wood or any other porous material, be sure to avoid soaking the surface with water, as it may cause damage. Use a damp cloth to clean and immediately dry the surface after cleaning to prevent water damage. Additionally, if some residue remains after cleaning, it’s important to remove it before proceeding with new flooring or tiling. Any leftover residue may affect the adhesion of new materials, resulting in a subpar result.
Inspecting for Residue
After you have successfully removed the tile glue, it is essential to inspect the surface for any remaining residue. Here are the steps you can follow to inspect for residue:
- Step 1: Use a flashlight to shine on the surface to ensure all residue is visible.
- Step 2: Run your hand over the cleaned surface to detect any unevenness or stickiness due to leftover residue.
- Step 3: If you notice any leftover adhesive, remove it by using a scraper or sandpaper, depending on the surface type.
- Step 4: For stubborn residue, apply adhesive remover once again and let it sit for recommended time.
- Step 5: After removing the leftover residue, clean the surface again with a wet cloth and let it dry completely before reapplying tiles or any other flooring material.
Ignoring leftover adhesive residue can cause issues in the long run, as the new tile or flooring material may not stick to the surface properly. It’s essential to carefully inspect the surface for any leftover residue and ensure that it is completely removed before reapplying any flooring material.
Conclusion
In conclusion, removing tile glue can be a tedious task, but with the right tools, materials, and techniques, it can be done successfully. It’s important to properly prepare the surface and yourself before applying the adhesive remover. Always prioritize safety and wear protective gear such as gloves and eye goggles.
When scraping off the glue, take your time and use the proper tools to avoid damaging the surface underneath. It’s also crucial to inspect the surface afterward to ensure that all residue has been removed.
Remember, different types of adhesive removers work better on certain types of glue, so it’s important to choose the right one for the job. Don’t hesitate to seek professional help if you’re unsure or uncomfortable with the process.
By following these guidelines and best practices, you can effectively remove tile glue and achieve a clean surface for your next home improvement project. Good luck!
Frequently Asked Questions
1. Can glue residue be removed without using a chemical adhesive remover?
Yes, there are some alternative methods for removing glue residue such as using hot water or vinegar, scraping with a razor blade, or using a heat gun.
2. What is the best adhesive remover for removing tile glue?
The best adhesive remover for removing tile glue will depend on the specific type of glue that was used. Some popular options include Citristrip, Krud Kutter, and Goof Off.
3. Is it necessary to wear protective clothing when removing tile glue?
Yes, it is important to wear protective clothing such as gloves, eye protection, and a respirator mask to avoid any harmful effects from the chemical adhesive remover.
4. Can a hairdryer be used to heat up the glue for easier removal?
No, using a hairdryer to heat up the glue is not recommended as it can release toxic fumes and it can also be a fire hazard.
5. Is it necessary to remove all the adhesive residue before tiling again?
Yes, it is important to remove all the adhesive residue to ensure the new tiles will adhere properly to the surface and prevent any future damage or premature tile failure.
6. Is it safe to use a chemical adhesive remover on all types of surfaces?
No, chemical adhesive removers can cause damage to certain surfaces such as painted walls, wooden floors, or natural stone surfaces.
7. Are there any environmental concerns when using chemical adhesive removers?
Yes, many chemical adhesive removers contain harmful chemicals that can be harmful to the environment and should be disposed of properly according to local regulations.
8. How long should the adhesive remover be left on the surface before scraping off?
This will depend on the specific adhesive remover being used. Most adhesive removers will require a minimum of 30 minutes to an hour to work effectively.
9. Can a pressure washer be used to remove adhesive residue?
No, pressure washers are not recommended for removing adhesive residue as the high pressure can damage the surface and spread the residue around causing further damage.
10. Can a regular household sponge be used for cleaning the surface after removing the glue?
No, it is not recommended to use a regular household sponge as it may not be strong enough to remove any remaining residue. It is best to use a scrub brush or a scouring pad to ensure the surface is completely clean.