Introduction

Silicone glue can be a useful adhesive for a variety of DIY projects, from sealing a bathtub to repairing electronics. However, if not handled correctly, it can also create a sticky mess that can be difficult to remove. Knowing how to properly remove silicone glue can save you time, money, and frustration. In this article, we’ll provide you with tips and tricks for successfully removing silicone glue, as well as how to prevent future mishaps. So, let’s get started!
The Importance of Knowing How to Remove Silicone Glue
The Importance of Knowing How to Remove Silicone Glue
Silicone glue is a popular adhesive used for a variety of DIY projects and repairs. However, while silicone glue is a great choice for many purposes, sometimes it can get messy and difficult to clean up. Knowing how to remove silicone glue is important for a few reasons:
- It helps you avoid damaging the surfaces you’re working on. Improperly removing silicone glue can cause damage to the underlying material. Knowing the proper techniques on how to remove it can prevent scratches and other damages to your surfaces.
- It allows you to correct mistakes in your project. If you’ve made a mistake or need to reposition something, being able to remove the silicone glue will make it a lot easier to make fixes without starting from scratch.
- It keeps your tools clean and in good condition. If you’re working with silicone glue regularly, you definitely don’t want it building up on your tools and equipment. Knowing how to remove it will help keep your tools clean and in good condition for future use.
In the following sections, we’ll cover techniques on how to remove silicone glue, as well as methods for removing it from different types of surfaces. It’s important to note that while some of these methods can be effective on other types of glue, not all of them will work. If you find yourself needing to remove other types of adhesives, such as Kiss glue, sticker glue, or shoe glue, check out our articles on how to use Kiss glue off, how to get sticker glue off shirt, or how to remove shoe glue for more targeted advice.
Getting Started: Preparations You Need to Make

Before diving into the methods of removing silicone glue, it’s important to properly prepare yourself and your workspace. Taking the time to gather the necessary materials and protect your surroundings will make the process smoother and less hazardous. Additionally, different methods may be better suited for different surfaces and circumstances, so it’s necessary to evaluate what would work best for your situation. By following these simple preparation steps, you’ll be able to remove silicone glue with ease.
Gathering Materials
Gathering Materials: Before starting the process of removing silicone glue, it is important to gather all necessary materials. Here is a list of materials and tools you may need:
- Gloves: It is advisable to wear gloves to avoid any harm to your skin while removing silicone glue. You can use latex gloves or rubber gloves.
- Protective goggles: The removal process involves using solvents that can splash and may harm your eyes. You can use protective goggles or glasses during the removal.
- Heat gun: For Method 1 of removing silicone glue, you will need a heat gun. It is an essential tool to apply heat where necessary
- Scraper: A scraper is needed to remove the silicone after it has been softened by heat. You can use a plastic scraper or a metal scraper depending on the surface you are working on.
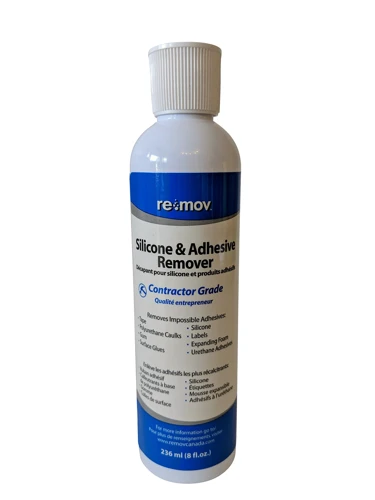
- Solvent: For Method 2 of removing silicone glue, you will need a solvent. There are various solvents available in the market, and it is important to select the appropriate solvent for the surface you are working on.
- Abrasive tool: For Method 3 of removing silicone glue, you will need an abrasive tool. The abrasive tool can be sandpaper, a wire brush, or a scouring pad.
- Clean cloth: A clean cloth is required to wipe the excess glue and solvent.
It is important to have all the necessary materials before starting the removal process. You can find these materials in any hardware or home improvement store. Make sure you select the appropriate materials for the surface you are working on to avoid causing damage.
Protecting Yourself and Your Work Area
When it comes to removing silicone glue, it’s crucial to protect yourself and your work area. Here are some steps you can take to ensure safety:
- Wear gloves: Since solvents can be harsh on the skin, it’s important to wear protective gloves. Latex or nitrile gloves are best for this task as they provide sufficient resistance to solvents and thus prevent any skin irritation or burns.
- Use protective eyewear: Chemicals from solvents or abrasion can also cause eye irritation. Wearing protective goggles is a wise choice.
- Work in a well-ventilated area: Certain solvents can produce toxic fumes, so it’s best to work in an area with open windows or good ventilation. This will also help prevent you from inhaling the fumes.
- Cover your work area: Keep the work area clean and free of any clutter to minimize the risk of accidents. Cover the surface with newspaper or plastic sheeting to protect it from staining or damage from the solvents.
- Do not use open flames: Avoid using heat or open flames near solvents, as they can cause a fire. Refer to articles that explain how to remove hair bonding glue or how to remove hot glue from ceramic, to see additional precautions.
By following these steps, you can ensure that the process of removing silicone glue is as safe and smooth as possible. Don’t forget to refer to other articles, such as how to remove pinstripe glue, how to remove i-Envy lash glue, how to remove waterproof lace glue, and how to clean CA glue, to learn more about the different types of glue and how to remove them safely and effectively.
Methods of Removing Silicone Glue
Removing silicone glue can seem like a daunting task, but fortunately there are several methods that can make the process much easier. These methods involve using heat, solvents, or abrasion to break down the glue and remove it from surfaces. Depending on the surface you are working with, one method may be more effective than others. Keep reading to learn more about each method and which one might work best for your specific situation. And if you’re interested in learning more about other types of glue, be sure to check out our articles on what loosens glue, hair bonding glue, hot glue from ceramic, pinstripe glue, i-envy lash glue, waterproof lace glue, and CA glue.
Method 1: Using Heat
When it comes to removing silicone glue, using heat can be a helpful method. Here’s how to do it:
Step 1: Heat the silicone glue with a heat gun or hair dryer. Hold the tool over the glue, moving it back and forth until the glue softens.
- Note: Be careful not to heat the glue too much or it may become flammable.
- Caution: Always wear heat-resistant gloves to protect your hands.
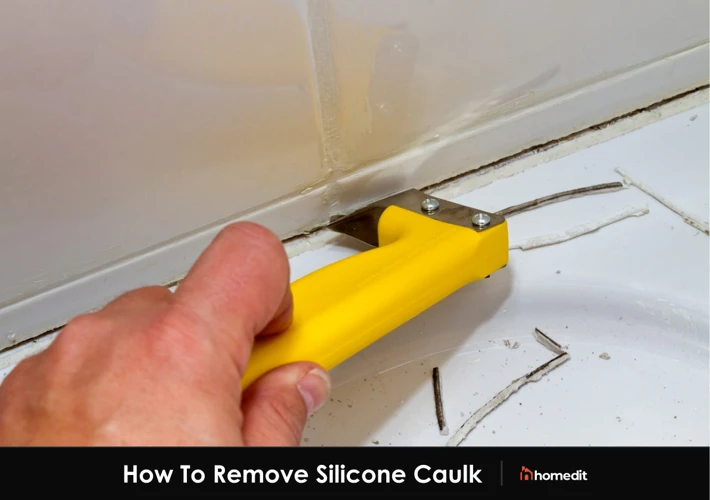
Step 2: Use a scraper or a putty knife to gently scrape the softened silicone glue away.
- Note: Be careful not to scratch or damage the surface you’re working on.
- Tip: If the glue is not soft enough to be scraped away, you can heat it again and repeat this step.
Step 3: Remove any residue with rubbing alcohol.
- Note: Make sure the surface is completely clean before using any solvents or adhesive removers.
- Caution: Always wear gloves when using rubbing alcohol or any other solvent.
Using heat to remove silicone glue can be an effective method, particularly if the glue is stubborn and difficult to remove. However, it is important to take the necessary safety precautions before attempting this method.
Method 2: Using Solvents
Using solvents is another effective method for removing silicone glue, especially if the adhesive has cured for a long time. Here are the steps to follow:
- Step 1: Choose a solvent
- Step 2: Apply the solvent
- Step 3: Scrape off the glue
- Step 4: Repeat the process
- Step 5: Clean the surface
Choose a solvent that is compatible with the surface where the silicone glue is adhered. Common solvents include acetone, methyl ethyl ketone (MEK), mineral spirits, and rubbing alcohol.
Wear gloves and apply the solvent to the silicone glue using a clean cloth or cotton swab. Make sure to saturate the glue with the solvent and let it sit for a few minutes to allow the solvent to penetrate the glue.
After the solvent has had time to work, use a plastic scraper or putty knife to gently scrape off the softened silicone glue. Be careful not to scratch or damage the surface beneath the glue.
If there is still some silicone glue left, repeat the previous steps until all the glue has been removed.
Once all the silicone glue has been removed, clean the surface with a solution of soap and water or a solvent that is appropriate for the surface. Dry the area with a clean cloth.
Remember to always test the solvent on a small, inconspicuous area first to ensure that it does not damage or discolor the surface. Always wear gloves and work in a well-ventilated area when using solvents to remove silicone glue.
Method 3: Using Abrasion
When all else fails, abrasive methods can be used as an effective last resort for removing silicone glue. This method involves removing the adhesive by physical force through the use of abrasives. Here are some commonly used materials for this method:
| Abrasive Material | Type of Surface |
|---|---|
| Sandpaper | Wood, Metal, Plastic |
| Abrasive Sponge | Kitchen and Bathroom Surfaces |
| Steel Wool | Metal, Glass |
To use an abrasive method, it’s important to wear gloves and protective eyewear to avoid injury. Before starting, test your chosen abrasive material on a small, inconspicuous area to ensure that it doesn’t damage the surface.
Take the abrasive material and gently rub it over the silicone glue until it starts to lift and peel away. Apply more pressure if needed, but be cautious not to scratch or damage the surface underneath.
Once the glue has been successfully removed, it’s important to clean the surface thoroughly and remove any leftover abrasive residue. This can be done using a damp cloth and a cleaning solution appropriate for the surface.
While abrasive methods can be effective, they should always be used as a last resort and with caution. Always test a small patch of the surface first and be careful not to cause damage.
Removing Silicone Glue from Different Surfaces
When it comes to removing silicone glue, the challenge not only lies in the strength of the glue but also the type of surface it has been applied to. Different materials require different methods of removal without causing damage. Whether it’s glass, metal, fabric, or wood, there are specific techniques to safely lift silicone glue without leaving a trace. In this section, we explore the best practices for removing silicone glue from various surfaces. Let’s get started!
Removing Silicone Glue from Glass
Removing silicone glue from glass can be a bit tricky, but with the right tools and technique, it can be done easily. Here are some steps you can follow to remove silicone glue from glass:
- First, try to peel off as much of the silicone glue as possible using your fingers or a scraper.
- Apply a small amount of rubbing alcohol to the remaining silicone glue. Be sure to wear gloves to protect your skin from the alcohol.
- Let the alcohol sit on the silicone glue for at least 10 minutes, to give it time to dissolve the glue.
- Using a razor blade scraper, carefully scrape off the remaining silicone glue from the glass surface.
- Once you have removed as much of the silicone glue as possible, use a glass cleaner and a clean cloth to clean the glass surface thoroughly.
It’s important to note that when removing silicone glue from glass, you should avoid using harsh chemicals or abrasive tools that can scratch or damage the glass surface. Instead, opt for gentle solvents and tools.
If the silicone glue has been on the glass surface for a long time and is very stubborn, you may need to repeat the process several times to completely remove it. Patience is key when removing silicone glue from glass.
By following these steps, you can effectively remove silicone glue from glass without damaging the surface.
Removing Silicone Glue from Metal
When it comes to removing silicone glue from metal surfaces, there are a few things to keep in mind to ensure the job is done effectively without causing damage to the metal. Here are some steps you can take:
- Gently scrape the surface: Using a plastic scraper, carefully scrape away any excess silicone glue on the metal surface. Be sure to avoid using a metal scraper as this can cause damage to the surface of the metal.
- Apply heat: Using a heat gun or hair dryer, apply heat directly to the silicone glue on the metal surface. This will soften the glue, making it easier to remove without causing any damage to the metal. Carefully peel away the softened glue with a plastic scraper.
- Use a solvent: If heat alone is not enough to remove all the silicone glue, you can use a solvent such as rubbing alcohol or acetone. Take care to apply the solvent to a small, inconspicuous area of the metal surface first to ensure it does not cause damage or discoloration. Once you have confirmed it is safe to use, apply the solvent to the glue and gently scrape away.
- Clean the surface: Once you have removed all the silicone glue from the metal surface, use a soft, clean cloth and a mild detergent to clean the surface thoroughly. This will help remove any remaining residue or debris and restore the shine of the metal.
By following these simple steps, you can effectively remove silicone glue from metal surfaces without causing any damage or leaving behind unsightly residue. Remember to always take care when working with metal surfaces and use protective equipment where necessary to ensure your safety.
Removing Silicone Glue from Fabric
When it comes to removing Silicone Glue from fabric, it can be a tricky task to accomplish. However, there are some methods you can use to make the process a bit easier. The methods discussed below will help you remove silicone glue from different types of fabric.
| Method | Materials Needed | Steps to Follow |
|---|---|---|
| Method 1: Using Rubbing Alcohol | Rubbing alcohol, cotton balls, warm water, mild detergent |
|
| Method 2: Using Vinegar | White vinegar, warm water, clean cloth, mild detergent |
|
| Method 3: Using Acetone | Acetone, cotton balls, warm water, mild detergent |
|
Note: Before using any of these methods, make sure to test the solution on a small, inconspicuous area of the fabric to make sure there is no damage.
Removing silicone glue from fabric can be done with the right materials and techniques. Whether you use rubbing alcohol, vinegar, or acetone, be sure to follow the steps carefully to avoid damaging the fabric.
Removing Silicone Glue from Wood
Removing Silicone Glue from Wood requires a bit of finesse to avoid damaging the wood surface. Follow these simple steps to safely remove silicone glue from wood surfaces.
- Step 1: Begin by scraping off any excess silicone glue from the wood surface with a plastic scraper or a blunt knife. Be gentle to avoid causing any scratches on the wood surface, which can make it easy for dirt and grime to collect in the future.
- Step 2: Next, apply rubbing alcohol on the silicone glue left on the wood surface. You can use a cotton ball, a piece of cloth or an old toothbrush to apply the rubbing alcohol evenly. Rubbing alcohol acts as a solvent, and helps to weaken the silicone glue, making it easier to remove. Let the rubbing alcohol sit on the silicone glue for a few minutes.
- Step 3: Once the silicone glue has softened, use a clean, dry cloth to wipe off the glue. Repeat this process until all the silicone glue has been completely removed. If you still notice some glue residue, repeat the process or move to the next step.
- Step 4: In case the silicone glue is still stubborn and refuses to come off completely, apply a mixture of warm water and dish soap on the wood surface. Scrub the mixture gently onto the glue with an old toothbrush until it comes off. Be careful not to scrub so hard that you damage the wood.
- Step 5: Use a clean, damp cloth to wipe off any remaining soap residue. Allow the wood surface to air dry completely before using it again.
Remember to be patient during the removal process, as rushing can cause more harm than good. When removing silicone glue from wood, gentle and slow motions are key to preserving the quality and appearance of the wood surface.
Preventing Future Silicone Glue Mishaps
Now that you’ve successfully removed the silicone glue, it’s important to take steps to prevent future mishaps. Here are some tips to keep in mind:
Avoid Overusing Silicone Glue
Prevention is always better than cure. To avoid having to deal with removing silicone glue, it’s best to avoid using it excessively. Use only the required amount to get the job done. This can also help you save money and reduce the chances of making a mistake.
Read the Instructions Carefully
Before applying silicone glue, read the instructions carefully. Make sure you understand how to use it properly and follow the manufacturer’s recommendations. This will give you the best chance of achieving a successful bond and avoiding any potential problems.
Consider Using Masking Tape
One way to prevent silicone glue mishaps is to use masking tape. When applying silicone glue, cover the surrounding area with masking tape first. This will protect the surrounding area from getting stained in case of glue overflow.
Wear Protective Gear
When using silicone glue, it’s important to protect yourself. Wear gloves and safety glasses to avoid getting glue on your skin or in your eyes.
Store Silicone Glue Properly
After use, reseal the silicone glue container tightly. Store it in a cool and dry place, away from children and pets. This will help prevent it from drying up or going bad prematurely, which could lead to a weakened bond.
By taking these preventive measures, you can minimize the chances of future silicone glue mishaps and ensure that your projects go smoothly. Remember, prevention is always better than cure.
Conclusion
In conclusion, removing silicone glue can be a daunting task, but with the right materials and methods, it can be done effectively. It is important to gather all the necessary materials before getting started and to protect yourself and your work area from any potential harm.
Using heat, solvents, or abrasion are all viable methods for removing silicone glue, but it is important to use them carefully and follow the instructions closely to avoid any damage to the surface being cleaned. Additionally, different surfaces may require different methods for removal, so be sure to research the best approach for the specific material.
Prevention is always the best approach, so take care when using silicone glue and make sure to apply it correctly to avoid future mishaps. Regular maintenance and inspection of any surfaces where silicone glue has been used can also detect any issues early on before they become more difficult to address.
Overall, knowing how to remove silicone glue is an important skill for any DIY or home improvement project, and with the right knowledge and approach, it can be achieved without any major difficulties. So, the next time you find yourself in a sticky situation with silicone glue, follow these tips and tricks for a successful removal process.
Frequently Asked Questions
How long does it take for silicone glue to dry?
It can take anywhere from 24 hours to 72 hours for silicone glue to completely dry, depending on the temperature and humidity of the area.
Can silicone glue be reused?
No, once silicone glue has been applied and dried, it cannot be reused.
Is silicone glue waterproof?
Yes, silicone glue is waterproof and can be used on surfaces that will be exposed to water.
What safety precautions should I take when removing silicone glue?
You should wear protective gloves, goggles, and a mask to avoid contact with the chemicals in the solvents.
Is it safe to use heat to remove silicone glue?
Yes, as long as the heat source is not too hot and you take proper safety precautions, such as wearing gloves and avoiding contact with the heat source.
What’s the best solvent to use for removing silicone glue?
The best solvent to use for removing silicone glue depends on the surface it is being removed from. For example, acetone can be used for glass and metal, while rubbing alcohol can be used for fabric.
Can I use a knife or razor blade to remove silicone glue?
Yes, but you should use caution and avoid scraping too hard or cutting into the surface below the glue.
Will silicone glue leave a residue after it’s been removed?
It can leave a residue, especially if it has been applied thickly. You may need to use a solvent or abrasion method to completely remove the residue.
Can silicone glue be painted over?
Yes, silicone glue can be painted over once it has completely dried.
How can I prevent silicone glue from drying out before I can use it all?
Store silicone glue in a cool, dry place and make sure the cap is tightly sealed after each use. You can also add a small amount of petroleum jelly around the threads of the cap to create a better seal.