Have you ever found yourself in the middle of a project, only to realize you need to melt some glue sticks but have no idea how? Don’t worry, you’re not alone! Melted glue sticks can be incredibly useful for all sorts of crafts and DIY projects. Whether you’re a professional crafter or a novice DIY enthusiast, this complete guide will give you detailed step-by-step instructions for melting glue sticks with ease. In this guide, you’ll learn how to prepare your glue gun, melt the glue stick, troubleshoot common issues, take necessary safety precautions and clean up after yourself. So, if you’re ready to take your crafting and DIY skills to the next level, let’s dive in!
Materials Needed
As we begin our complete guide on how to melt glue sticks, let’s first take a look at the materials that you will need to have on hand. These items will be necessary to successfully melt and apply hot glue to your desired surface. To start melting glue like a pro, you will need a glue gun, glue sticks, and a heat source. Having these materials ready will help streamline the process and make for a successful project. Let’s dive into each of these items in more detail.
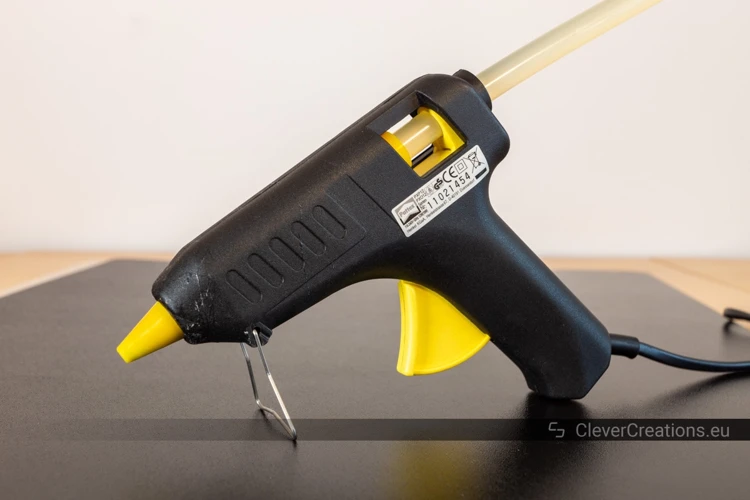
Glue Gun
When it comes to melting glue sticks, having the right glue gun is crucial. Without a good glue gun, it can be difficult to properly melt the glue sticks and create a strong bond.
Types of Glue Guns
There are two main types of glue guns: high-temperature and low-temperature. High-temperature glue guns are ideal for melting glue sticks quickly and for use on materials such as metal and plastics. Low-temperature glue guns, on the other hand, are best for delicate materials like foam and lace.
Choosing the Right Glue Gun
When deciding on a glue gun, consider what type of materials you will be using it on and whether you need a high-temperature or low-temperature gun. It’s also important to look for a glue gun with a comfortable grip, as melting glue sticks can take some time and can be tiring on the hands.
Here is a comparison table of two popular glue guns on the market:
| Glue Gun | Features | Price |
|---|---|---|
| AdTech High-Temp Mini | – High-temperature for strong bonds – Comfortable grip – Lightweight and easy to use |
$5-10 |
| CCbetter Mini | – Dual-temperature for versatility – Ergonomic handle – Quick-heating |
$10-20 |
Remember, having a good glue gun is essential for melting glue sticks effectively. Choose a glue gun that fits your needs and budget, and you’ll be well on your way to creating strong bonds for all your crafting needs.
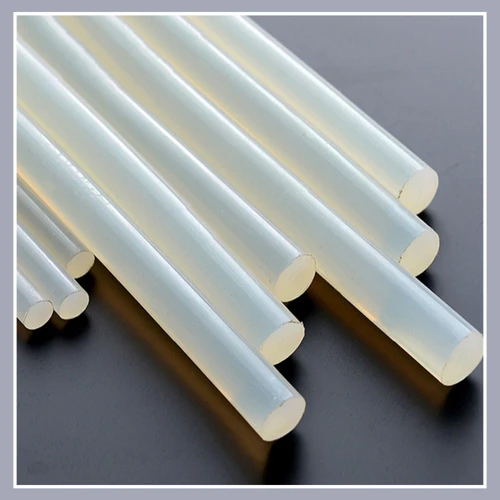
Glue Sticks
When it comes to choosing glue sticks, there are several factors to consider. The most important factor is the size of the glue stick, which should fit the glue gun being used. It is important to note that glue sticks come in different diameters ranging from 7 mm to 15 mm. It is important to select the right glue stick diameter to avoid any complications during the melting process.
Another crucial factor to consider is the glue stick composition. Various types of glues sticks are available in the market such as low-temperature glue sticks, high-temperature glue sticks, all-purpose glue sticks, and colored glue sticks. It is important to select the right glue stick composition according to the project requirements as different types of glue sticks are used for different materials such as Styrofoam, paper, wood, and metal.
It is important to choose good quality glue sticks for the best results. A better quality glue stick will melt evenly and bond strongly, resulting in a long-lasting bond. Cheap glue sticks may not melt evenly and could result in a weak bond, which may not be suitable for the intended purpose.
To ensure safety during the glue melting process, one must always check the expiration date of glue sticks and avoid using expired ones. Expired glue sticks may not melt correctly and may cause damage to the glue gun and the project.
Selecting the right glue stick is as important as choosing the right glue gun and heat source for melting glue sticks. Considering the size, composition, and quality of the glue stick is crucial to achieve a successful glue melting process.
Heat Source
Heat Source: Another important item needed for melting glue sticks is a heat source. The heat source is what heats up the glue gun and ultimately melts the glue stick. There are different types of heat sources: electric, butane, and battery operated.
| Heat Source | Pros | Cons |
|---|---|---|
| Electric | Easy to use, consistent heat source, no refilling needed | Need to be near an electrical outlet |
| Butane | Portable, can be used anywhere, no cords needed | Need to refill butane, flame can be dangerous |
| Battery Operated | Portable, no cords needed, easy to use | Batteries need to be replaced, inconsistent heat source |
It’s important to choose the right type of heat source depending on your needs. If you are using the glue gun for a long period of time, an electric one may be the best option as it doesn’t require refilling. If you need the ability to move around without a cord, a butane glue gun may be ideal. And if you need a portable option that doesn’t require an outlet, a battery-operated glue gun could be your best bet. Whatever type of heat source you choose, it’s important to follow the manufacturer’s instructions for safe use.
If you want to learn more about how to melt glue sticks, check out our article on how to melt glue sticks.
Preparing the Glue Gun
Getting ready to melt glue sticks requires some preparation of your glue gun. Before starting to melt the glue, it’s important to ensure your glue gun is ready to use. This step is essential to ensure that the glue melts to the right consistency, making it easier to use and apply. The following steps will guide you on preparing the glue gun for use. Make sure to follow them carefully to prevent any accidents or damages to the glue gun or the surface you are using it on. Once you’ve completed the preparations, you can proceed to melting the glue stick.
Unplug the Glue Gun
Before starting any work on the glue gun, unplug the device from the power source. This is an important safety precaution to avoid any potential accidents or injuries. Unplugging the gun will prevent it from accidentally turning on while you work on it or while handling the glue sticks. It will also prevent the gun from overheating and causing damage to itself or any surrounding objects.
If you have just finished using the glue gun, let it cool down completely before unplugging it. This will prevent any residual heat from causing burns or damage to the surrounding area. Once the gun has cooled down, you can unplug it and safely store it away until the next use.
Remember to always handle the glue gun with care and treat it as a potentially dangerous tool. Accidents can happen, even with the most careful handling, so it’s important to take all the necessary precautions to avoid any mishaps.
For more information on how to use glue in various crafting or DIY projects, check out our other articles on how to use glue, how to glue styrofoam, and how to glue bottle caps to a picture frame.
Insert the Glue Stick
Inserting the glue stick into the gun properly is essential for melting glue effectively. Firstly, it’s critical to choose the right type of glue stick that matches the glue gun. Most glue guns are designed to function with specific glue stick diameters, so refer to the manufacturer’s guidelines before buying the sticks.
Once the right glue sticks have been obtained, remove any old glue residue from the gun’s feeding area before inserting the new glue stick. Then, insert one end of the glue stick into the opening of the feeding area, making sure the other end rests against the back stop. Never force the stick into the feeding area as that can damage the gun and cause blockages.
After achieving a snug fit, and ensuring that the glue gun is safely plugged in, turn on the glue gun to preheat it. Then, it’s crucial to let the glue gun heat up for a few minutes before trying to melt glue to allow the glue stick to melt effectively without getting stuck in the gun. If the glue gun model has an indicator light, wait for it to stop blinking, indicating that the glue gun is hot enough for use.
It’s important to note that some glue guns do not come with the feeding area to insert a glue stick. Instead, they are designed with a cartridge or pod that can be easily replaced once the glue has finished. Again, follow the guidelines as stated by the manufacturer for the specific model of the glue gun that you are using.
After successfully inserting the glue stick properly, you can start melting glue.
Heat Up the Gun
Before inserting the glue stick, it’s important to heat up the glue gun so the glue will melt properly. Here’s how to do it:
| Step | Description |
|---|---|
| 1 | Plug in the glue gun: Make sure the glue gun is plugged into an electrical outlet. |
| 2 | Turn on the glue gun: Flip the switch to turn on the glue gun. |
| 3 | Wait for the glue gun to heat up: Depending on the gun, it can take anywhere from a few minutes to 10 minutes for the gun to heat up. The glue should start to soften and become more pliable. |
| 4 | Check the glue temperature: It’s important to make sure that the glue isn’t too hot or too cold. Most glue guns will have an indicator light that lets you know when the glue is at the right temperature. If not, test a small amount of glue on a scrap piece of paper before using it on your project. |
Once the glue gun is heated up and the glue is at the right temperature, you can begin to melt the glue stick and use it for your project. If you’re looking for inspiration for your next glue gun project, check out our article on how to make hot glue mushrooms.
Melting the Glue Stick
Once the glue gun is properly heated, it’s time to start melting the glue stick to make it ready for application. This step is crucial to ensure the glue is at its maximum adhesive potential. To make sure you’re doing it right, follow these simple steps. And if you’re feeling creative, check out our guide on how to make icicles with hot glue or learn how to glue pumpkins together for a cute fall decor!
Choose Your Surface
Before melting your glue stick, it’s important to choose the right surface to work on. This will help you avoid any damage to your project and ensure that the glue adheres properly. Choose a surface that is heat-resistant and flat, like a silicone mat or a sheet of aluminum foil. These surfaces will allow the glue to cool evenly and prevent it from sticking to anything else.
Avoid working on surfaces that could warp or melt from the heat of the glue gun, like plastic or wood. This can also cause the glue to dry and cool unevenly, resulting in a weaker bond.
For best results, make sure the surface is clean and dry before applying the glue. This will prevent any dirt or debris from interfering with the bond. It’s a good idea to work in a well-ventilated area to avoid inhaling any fumes from the melted glue.
Remember: choosing the right surface is an important step in the glue melting process, so take your time and make sure you have the right surface before starting.
Hold the Glue Gun Steady
When it comes to melting glue sticks, it’s important to hold the glue gun steady in order to ensure that the glue is applied evenly. A wobbly hand can easily lead to a messy, inconsistent application that could ruin your project. To avoid this, find a comfortable position and grip for holding the glue gun. It’s best to use your dominant hand to maneuver the gun while using your other hand to guide the object you’re applying the glue to.
When holding the glue gun, make sure to apply pressure to the trigger to release the glue. You don’t want to press too hard as this can cause excess glue to come out too quickly leading to a mess. On the other hand, if you don’t apply enough pressure, the glue won’t come out at all. The key is to find just the right amount of pressure to apply to the trigger while holding the gun steady.
One helpful tip is to keep the glue gun perpendicular to the surface you’re applying the glue to. This ensures that the glue is evenly distributed and not applied at an angle. You can use a ruler or other straight edge to help guide the glue gun and keep it level.
Remember to take breaks if you feel your hand getting tired, as an unsteady hand can lead to errors in your application.
Whether you’re working on a DIY project, repairing household items, or doing some crafting, holding the glue gun steady is essential for achieving a clean and accurate result. So take your time, find a comfortable position, and focus on applying pressure evenly in order to melt and distribute the glue smoothly.
Keep in mind, the type of glue stick you use can also affect the consistency and melting process of the glue. If you’re unsure about which type of glue to use for your project, check out our article on “what glue to use on redneck wine glasses” for some helpful tips.
Compress the Trigger
Compressing the trigger is the final step in melting the glue stick and requires a steady hand to create a neat and even adhesive line. Before you begin, make sure you have chosen your surface and positioned the glue gun at the correct angle. Once the glue is melted, take a deep breath and gently squeeze the trigger.
Be Gentle
When compressing the trigger, it is important to be gentle to avoid applying too much glue at once. The amount of pressure required will depend on the type of glue gun you are using, so start slowly and apply more pressure as needed. Aim to apply the glue in a smooth and even line, slowly moving the gun along the surface as you go.
Release Slowly
Once you have applied the amount of glue needed, release the trigger slowly to avoid any unwanted drips. Pull the gun away from the surface in one smooth motion, keeping the glue in line as you go. If there is any residual glue left in the gun, allow it to cool before removing the glue stick and storing the gun.
To create different shapes or patterns with the glue, you can quickly move the gun in different directions while compressing the trigger. This technique requires a lot of practice to master, but can create beautiful and unique designs in your projects.
Remember, the glue will dry quickly, so work fast to achieve your desired results. If you make a mistake, don’t worry – you can always scrape off excess glue and try again.
Make sure to wear protective gear and always unplug the glue gun when finished. For more creative ideas using glue, check out our article on how to make a volcano out of newspaper and glue or learn how to glue aluminum foil to paper in our step-by-step guide here.
Troubleshooting

When working with glue guns, occasional mishaps can occur that can hinder your progress in completing a project. However, fear not, as troubleshooting these issues is simpler than you may think. Here are a few common problems that you may come across when melting glue sticks and the best ways to rectify them. Read on to find out more.
Glue Not Melting
If you’re having trouble getting your glue sticks to melt, there could be a few different issues at play. Don’t panic, there are solutions to each of them. Below is a table outlining some possible causes for glue not melting and what you can do to fix it.
| Possible Cause | Solution |
|---|---|
| The glue gun is not heated up enough | Wait for the glue gun to reach its optimal temperature before attempting to melt a glue stick. This process can take a few minutes, so be patient. |
| The glue stick is too old | Try using a newer glue stick. Over time, old glue sticks can become brittle and more resistant to melting. |
| The glue gun is clogged | Turn off the glue gun and wait for it to cool down completely. Once cool, gently use a toothpick or wooden skewer to unclog the nozzle. Sometimes, debris can accumulate in the nozzle and block the glue from coming out. |
| The glue gun is defective | If none of the above solutions work, the glue gun itself may be defective. Try using a different glue gun to see if the issue persists. |
Make sure to troubleshoot the issue before attempting to melt your glue sticks. With these solutions in mind, you should now be able to melt your glue sticks with ease.
Glue Dripping Too Fast
If you find that the glue is dripping too fast from the glue gun, don’t panic. Here are some possible solutions to this problem:
- Adjust the temperature: If the glue is too hot, it may become too liquid and fall out of the glue gun too fast. Try lowering the temperature of the glue gun to prevent this from happening.
- Use a slower trigger compression: This could also be the reason that the glue is dripping too fast. Try pressing the trigger more slowly to slow down the flow of glue.
- Check the size of the glue stick: If the glue stick is too small for the glue gun, it may melt too quickly and cause the glue to drip too fast. Make sure that you are using the correct size of glue stick for your gun.
- Use a stand: If the glue gun is lying flat on its side, the glue is more likely to drip fast. Use a stand to keep the glue gun upright and prevent this from happening.
Remember, it’s important to solve this issue as quickly as possible to prevent any mess and ensure that your project turns out perfectly. By following these tips, you should be able to stop the glue from dripping too fast and achieving the desired result for your project.
Glue Drying Too Quickly
When it comes to melting glue sticks, the drying time can be another common issue. Glue drying too quickly can affect the quality of the bond you’re trying to make, and it can be frustrating to have to constantly reapply glue. Here are some potential causes of glue drying too quickly and how to fix them:
| Potential Causes | Solutions |
|---|---|
| Low humidity: In dry environments, glue can dry faster than it should. | Try adding moisture to the air with a humidifier or spraying a light mist of water over the surface you’re bonding. |
| High temperature: If the area you’re working in is very warm, the glue can dry faster than it should. | Try moving to a cooler area or turning on a fan to circulate the air and cool things down. |
| Using too much glue: If you apply too much glue, it can dry more quickly than if you use a moderate amount. | Try using a thinner layer of glue and making sure that you’re applying firm, even pressure to the surfaces you’re bonding. |
| Using an older glue stick: Over time, glue sticks can dry out or lose their adhesive properties, which can lead to faster drying times. | Make sure you’re using a fresh, high-quality glue stick and storing your extras in a cool, dry place. |
By diagnosing the cause of your glue drying too quickly and using the appropriate solution, you can achieve a stronger, longer-lasting bond between your materials.
Safety Precautions
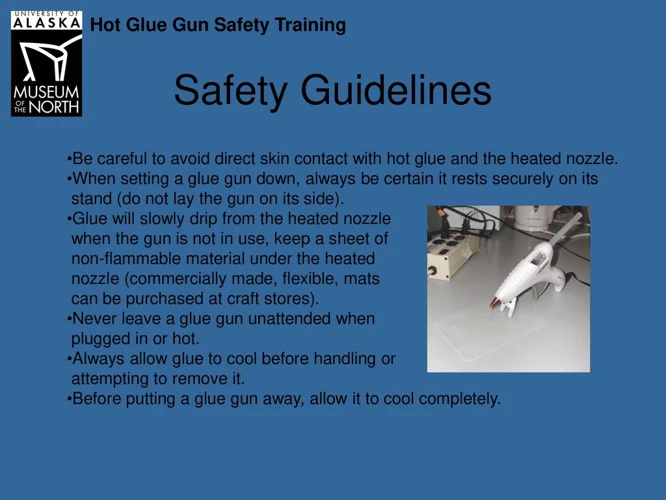
When it comes to working with a glue gun, safety should always be a top priority. The high temperatures involved in melting glue sticks can be dangerous if not handled with care. As such, it’s important to take the necessary precautions to protect yourself and those around you. In this section, we’ll discuss some essential safety tips to keep in mind when working with a glue gun.
Protective Gear
When melting glue sticks, it is important to prioritize safety and take precautionary measures. Protective gear is necessary to avoid accidents and burns. In this section, we will discuss the essential protective gear needed for melting glue sticks.
| Protective Gear | Description |
|---|---|
| Gloves | Wearing heat-resistant gloves will not only protect your hands from hot glue but can also offer better grip while handling the glue gun. |
| Eye Protection | Wearing goggles or any protective eyewear can ensures that hot glue will not accidentally come in contact with your eyes. |
| Apron | Wearing an apron or a smock can protect your clothes from getting damaged by glue drips and spills. |
| Footwear | Wearing closed-toed shoes can prevent any hot glue from falling on your bare feet. |
It is important to note that protective gear is not optional when working with hot glue guns. Wearing gloves, eye protection, apron, and closed-toed shoes can minimize the risk of injuries and burns. It is also important to take note that children must not use hot glue guns without adult supervision. By taking these safety precautions, you can have a safe and successful glue melting experience.
Unplug the Glue Gun
When you’re finished using your glue gun to melt glue sticks, it’s essential to take proper safety precautions and clean up any excess glue. One of the first steps you should take is to unplug the glue gun. This ensures that the gun won’t accidentally turn on while you’re cleaning it, which can be hazardous.
To unplug the glue gun, follow these steps:
- Make sure the gun is turned off and cool to the touch.
- Locate the power cord and trace it back to the outlet.
- Gently pull the plug out of the outlet, being careful not to damage the cord.
- Wrap the cord up neatly, so it doesn’t get tangled or in the way while you’re cleaning.
Taking the time to properly unplug your glue gun can prevent accidents and injuries. Keep in mind that if you have multiple glue guns in use, unplug them all before you start cleaning up. Never leave a glue gun plugged in and unattended, as it can pose a fire hazard. By following these safety guidelines, you can enjoy your crafting projects without any mishaps.
Proper Ventilation
When using a glue gun, it is essential to have proper ventilation in your work area. Fumes from the melting glue sticks can be harmful if inhaled for an extended period. Here are some steps you can take to ensure proper ventilation:
- Open windows and doors: If possible, open windows and doors to allow fresh air to circulate in the room.
- Use a fan: Set up a fan to blow the fumes away from you while you work.
- Avoid confined spaces: Do not use a glue gun in a small, enclosed area without proper ventilation.
- Consider a respirator: If you plan on using a glue gun for an extended period, consider wearing a respirator to protect your lungs from harmful fumes.
- Take breaks: If you start to feel lightheaded or dizzy, take a break and step outside for some fresh air.
Remember, taking the necessary precautions will ensure you can safely and enjoyably melt glue sticks without any adverse health effects.
Clean-Up
After successfully melting the glue stick and completing your project, it’s time for cleaning up. No matter how careful you are, there will always be excess glue and residues left on your glue gun. Leaving them behind can cause problems in the long run, so it’s essential to clean your gun after each use. In this section, we will go through the necessary steps to clean your glue gun properly. Make sure to follow the steps carefully, and you’ll have your glue gun squeaky clean in no time.
Unplug the Glue Gun
Before you begin preparing the glue gun, it’s very important to unplug it to ensure your own safety. This step can prevent any accidental burns or electrocution. Here are the steps to unplug the glue gun safely:
Steps to Unplug the Glue Gun:
- Locate the Glue Gun’s cord
- Follow the cord from the gun until you reach the electrical outlet or power strip that it is plugged into
- Grasp the plug with your fingers and gently pull it out of the outlet or power strip
It’s important to make sure you unplug the gun every time you finish working with it. This ensures that the glue gun is turned off and there won’t be any accidents related to it.
Scrape Off Excess Glue
Once you have finished using the glue gun, it is time to clean up any excess glue that may be left behind. To do this, grab a scraping tool, such as a putty knife or an old credit card, and gently scrape any excess glue off the surface. Be sure to work slowly and carefully to avoid damaging the surface.
Pro Tip: If the excess glue is hard and difficult to scrape off, you can use a heat gun or a hair dryer to soften it first. Once the glue has softened, you can easily scrape it away.
To prevent any damage to the surface, it is important to use a scraping tool with a blunt edge. Avoid using sharp objects that can scratch the surface.
Another Pro Tip: If you are working on a delicate surface, such as a piece of furniture, you can use a small amount of rubbing alcohol on a soft cloth to gently remove the excess glue. Just be sure to test a small, inconspicuous area first to make sure the alcohol doesn’t damage the surface.
Once you have scraped off all the excess glue, it’s time to move on to the next step: wiping down the glue gun. By properly cleaning your glue gun after each use, you can ensure that it will continue to work effectively in all of your future projects.
Wipe Down the Gun
After you have scraped off any excess glue from the glue gun and wiped it down with a damp cloth, it’s important to thoroughly wipe down the gun with a dry cloth. This will ensure that no moisture is left behind, which can cause damage to the glue gun over time.
To wipe down the glue gun, follow these simple steps:
- Unplug the glue gun: Before wiping down the gun, make sure that it is unplugged and has had time to cool down. This will prevent any accidental burns or injuries.
- Prepare a dry cloth: Get a clean, dry cloth ready to wipe down the glue gun.
- Wipe the entire gun: Carefully wipe down the entire glue gun, making sure to get into all of the grooves and crevices. This will remove any remaining debris or adhesive residue that may have accumulated.
- Inspect the gun: After wiping down the glue gun, inspect it to make sure that there is no remaining glue or debris. If there is, repeat the wiping process until the gun is completely clean.
Remember to always be cautious and patient when working with glue guns. They can easily cause burns or injuries if not handled properly. By following these steps to wipe down your glue gun after use, you can help ensure that it remains in good condition and lasts for a long time.
Conclusion
In conclusion, melting glue sticks may seem like a simple task, but it requires attention to detail and following proper safety procedures. With the right materials and knowledge, however, anyone can successfully melt glue sticks at home. Remember to always protect yourself with personal protective equipment, unplug the glue gun when not in use, and properly clean up any excess glue.
One important aspect to consider is that the quality of the glue stick can greatly affect the melting process. Using low-quality glue sticks may result in issues such as the glue not melting properly or drying too quickly.
Another important factor is the surface on which the glue is being applied. Choosing a suitable surface, free from any dirt or debris, will ensure a smooth and successful glue application.
When it comes to troubleshooting, don’t be discouraged if you encounter difficulties. Common issues such as the glue not melting or dripping too fast can typically be resolved by adjusting the heat source or the amount of pressure used on the trigger.
Overall, melting glue sticks requires patience, practice, and attention to detail. By following the steps outlined in this guide, you can confidently tackle any project that requires the use of a glue gun and melted glue.
Frequently Asked Questions
Can any glue gun melt glue sticks?
No, only glue guns specifically designed for glue sticks can melt them effectively.
How hot should the glue gun be?
The glue gun should heat up to around 380°F (193°C) for effective melting.
Can I use different types of glue sticks with my glue gun?
No, it is important to ensure you are using the correct type of glue stick for your glue gun. Using the wrong type can cause the glue gun to malfunction or not melt the glue at all.
How can I tell if my glue gun is ready to use?
The glue gun should be fully heated and the glue stick should be melted and flowing steadily before use.
What surfaces can I use melted glue sticks on?
Most basic craft materials like paper, fabric, and cardboard can be used with melted glue sticks. However, more delicate surfaces like foam or plastic should be approached with caution.
What should I do if the glue is not melting properly?
Check to make sure the glue gun is fully heated and the glue stick is the correct type for your gun. If the issue persists, consider checking the glue gun’s inner components for damage or contacting the manufacturer.
Can melted glue sticks be easily removed from surfaces?
It depends on the surface and the amount of glue used. In general, glue sticks can be removed with some effort using a scraper or rubbing alcohol.
What protective gear should I wear when using a glue gun?
It is recommended to wear gloves and safety goggles to protect your hands and eyes from hot glue.
Can melted glue sticks be used for outdoor projects?
It depends on the specific type of glue stick being used. Some glue sticks are waterproof and can withstand outdoor elements, while others are not suitable for outdoor use.
How long does it take for melted glue sticks to dry?
Drying time depends on the amount of glue used and the surface it is applied to. Typically, melted glue sticks dry within a few minutes to an hour.