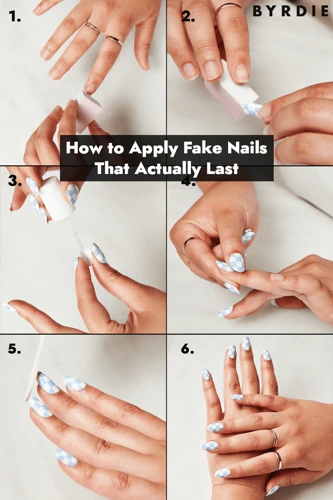
Embracing the trend of immaculate manicures doesn’t always require a trip to the salon. Perfecting DIY acrylic nails at home can be a rewarding and creative endeavor. With the right tools and techniques, you can achieve professional-looking nails on your own schedule. This guide will walk you through the process of a proper acrylic nail application, ensuring that your home manicure is both stunning and durable.
Nail Preparation for Acrylics
Cleaning and Buffing
Before diving into the world of acrylics, nail preparation is crucial. Start by thoroughly cleaning your nails with a non-moisturizing soap to remove any oils or residue. After drying them, proceed with buffing the surface to create an ideal base for the glue-on acrylic nail tips. A gently roughened surface will enhance the bond between your natural nail and the acrylic.
Assessing Nail Health
It’s essential to evaluate the health of your nails before applying any enhancements. Look for signs of damage or fungal infections. If your nails are brittle or weak, consider treating them before proceeding with acrylics. Healthy nails will ensure a smoother application and a more enduring set of DIY acrylic nails.
Acrylic Nail Application
Selecting the Right Size for Glue-On Acrylic Nail Tips
Choosing the correct size for your acrylic tips is a pivotal step in the fake nail application. Each tip should fit snugly from sidewall to sidewall at the nail’s free edge. Avoid choosing tips that are too wide or too narrow, as this can lead to lifting or breakage.
Applying the Best Glues for Acrylic Nails
Securing your acrylic tips with the best glues for acrylic nails will contribute to their longevity. Apply a small bead of glue to the tip and press it firmly onto your nail, holding it in place until it sets. Quality long-lasting nail adhesive is the secret to avoiding premature pop-offs or lifting.
DIY Acrylic Nails Tutorial
Step-by-Step Fake Nail Application
- Push back your cuticles to expose the full nail bed.
- Clean and buff your nails as previously described.
- Select the appropriate size tips and set them aside.
- Apply glue to the tips and press them onto your nails.
- Once set, trim the tips to your desired length and shape them.
- Prepare the acrylic mixture and apply it carefully over the tips.
- Allow the acrylic to dry and then file and buff the nails to a smooth finish.
Finishing Touches and Decorating the Nails
After the acrylic has set, you can unleash your creativity. Paint your nails with your chosen polish, apply designs, or add embellishments. Finish with a top coat for extra shine and protection. This final touch not only beautifies your acrylic nail tutorial results but also adds an additional layer of strength.
Acrylic Nail Maintenance
Daily Care Tips
To maintain your DIY acrylic nails, it’s imperative to protect them from harsh chemicals and avoid using them as tools. Daily moisturizing of the cuticles and wearing gloves when cleaning can help in preserving the integrity of your manicure.
Long-Lasting Nail Adhesive Tips
For ensuring the longevity of your nails, reapply a top coat every few days and be mindful of the products you use. Oil-based lotions and removers can weaken the adhesive bond, so opt for non-oily formulas when possible.
At-Home Acrylic Nail Kit Essentials
- Acrylic nail tips and glue
- Nail file and buffer
- Acrylic liquid and powder
- Nail clippers
- Top coat and polish
Gathering your at-home acrylic nail kit with these essentials will prepare you for a full range of nail art possibilities. Having everything in one place makes the process efficient and enjoyable.
How to Remove Acrylic Nails Safely
When it’s time to remove your acrylic nails, do so safely to prevent damage. Soak your nails in acetone until the acrylic dissolves. Avoid prying or forcing the acrylic off, as this can harm your natural nails.
Troubleshooting Common Acrylic Nail Issues
If you encounter lifting or breakage, assess your application method to ensure you’re using the correct size tips and applying the glue and acrylic properly. Filling in gaps and reapplying the top coat can often fix minor issues.
Are you looking to perfect your at-home manicure skills? Our step-by-step guide on how to glue acrylic nails back on can help you fix a nail in a pinch. If you’re having trouble with nail glue, our article about how to open Ardell nail glue is a must-read to avoid any sticky situations. And for the eco-conscious fashionistas, we also have tips on how to reuse glue-on nails, so you can keep your nails looking fabulous without waste. Whether you’re a beginner or a seasoned pro, these articles will ensure your nails always look salon-fresh.
Conclusion and Additional Resources
Mastering DIY acrylic nails can be a fulfilling and cost-effective alternative to salon visits. With practice, the right tools, and attention to detail, you can achieve a salon-worthy manicure from the comfort of your home. For further learning, consider online tutorials, nail art blogs, and community forums for tips and inspiration.


