Introduction
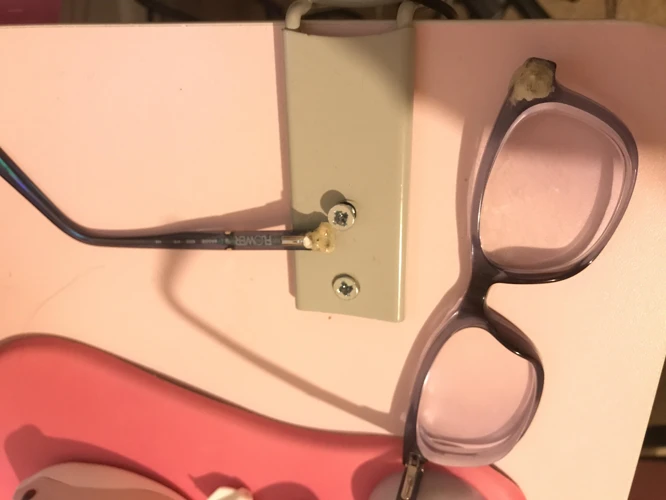
For anyone who wears glasses, accidentally breaking them can be a frustrating and costly situation. Perhaps you’ve dropped them, stepped on them, or had them snap due to wear and tear. Whatever the cause, the good news is that you can often fix them with glue. However, the process can be a bit tricky and requires some know-how to get it right. In this article, we will provide expert tips and a step-by-step guide for how to glue glasses successfully. We’ll also discuss choosing the best glue for the job, prepping your glasses, and tips for making your repair last longer. So, let’s get started!
Why Glueing Glasses Can Be Tricky
Glueing glasses can be tricky due to a few factors that need to be taken into consideration. Firstly, glasses are delicate and can break easily. Secondly, there are different types of glasses made of various materials, which can affect the type of glue that will work best. Thirdly, the position and type of break will determine the success of the repair as well.
Additionally, glueing glasses also require precision and attention to detail as a misplaced drop or smear of glue can affect the lenses or leave permanent residue. Moreover, some glues are not suitable for glasses and could cause damage, so it is vital to choose the right adhesive.
The right glue for glasses also needs to be able to withstand everyday wear and tear such as exposure to heat, moisture, and friction. It should also provide a strong, long-lasting bond that will keep the glasses together even with daily use.
It is essential to note that glueing glasses is not a permanent solution, and it might not work for some types of breaks. It is also advisable to seek professional help for extensive damage instead of attempting to fix it with glue.
Glueing glasses can be tricky due to the delicate and precise nature of the process. Understanding the right type of glue to use, the position of the break and being mindful of the glue application process can help with a successful repair.
Our Expert Tips for a Successful Repair
When it comes to successfully repairing your glasses, our team of experts have some highly useful tips that are worth noting to ensure a job well done.
Use the Right Amount of Glue: While it may be tempting to use a lot of glue to get the job done, it’s important to remember that less is more in this case. Using too much glue can result in a messy and ineffective repair.
Choose the Right Kind of Glue: Not all glues are created equal, and this is especially true when it comes to repairing glasses. Opt for a glue that is specifically designed for glasses repair, rather than a generic glue.
Prep the Glasses Before Applying Glue: A successful repair relies heavily on proper preparation. Before applying glue, it’s important to thoroughly clean the glasses and determine the exact position of the break.
Let the Glue Dry Completely: It’s crucial to allow the glue to dry completely before testing the repair or wearing the glasses again. Rushing the drying process can result in a less effective repair.
Test the Repair Before Wearing: Once the glue has dried completely, it’s important to test the repair before wearing the glasses again. This will help you determine if the repair was successful or if any adjustments need to be made.
By following these tips, your glasses should be back in good condition in no time. For more tips on specific kinds of glue, such as eyelash glue or vampire fang glue, we recommend checking out our other articles for further advice.
Choosing the Best Glue for Glasses

When it comes to fixing your glasses, choosing the right type of glue is essential for a successful repair. Not all glues are created equal and choosing the wrong one can lead to further damage. In this section, we’ll discuss the different types of glue that work best for glasses, and how to select the right one for your specific needs. From super glue to epoxy, we’ll cover it all. So, whether you’re dealing with a small crack or a complete break, keep reading to learn how to choose the best glue for repairing your glasses.
Why Not All Glues Are Created Equal
When it comes to repairing glasses, it’s important to understand that not all glues are created equal. Using the wrong type of glue can result in weakened bonds, temporary fixes, or even damage to your glasses. That’s why it’s crucial to choose the right kind of glue for the job.
Super Glue: Often the go-to glue for quick fixes, super glue or cyanoacrylate adhesive can create a strong bond on glass. However, it can also be brittle and may not hold up well over time. Additionally, it can be difficult to remove, and excess glue can cause damage to your glasses.
Epoxy: Epoxy is a two-part adhesive that creates a very strong bond. It’s often used for industrial applications and can withstand heavy use. However, it can also be messy and difficult to apply, and may not be the best option for small, delicate repairs.
Silicone: Unlike super glue or epoxy, silicone adhesive is flexible and can move with your glasses, making it a good choice for repairs that need to withstand some wear and tear. It’s also easy to apply and dries clear. However, it may not create as strong of a bond as other types of glue, and may not be the best choice for larger repairs.
It’s important to read the labels carefully and choose a glue that is specifically designed for use on glass or plastic. And, as with any glue, always follow the manufacturer’s instructions and safety precautions.
The Top Glues for Glasses on the Market
When it comes to choosing the right glue for glasses, not all options are created equal. Here are some of the top glues for glasses on the market, their features, and which specific needs they suit.
| Glue | Features | Suitable for |
|---|---|---|
| Aleene’s Original Tacky Glue | – Non-toxic– Dries clear– Suitable for various materials including glass, metal, and plastic | Those who want a versatile glue for multiple types of glasses and materials |
| Gorilla Super Glue Gel | – Dries in seconds– Strong adhesive bond– Resistant to impact and shock | Those who need a quick and strong fix for their glasses, especially high-impact and sports glasses |
| Loctite Liquid Professional Super Glue | – Bonds almost instantly– Resistant to water and extreme temperatures– Long-lasting bond | Those looking for a reliable and strong adhesive for their glasses, especially in extreme environmental conditions |
| EZ Bond Clear Gel | – Dries clear– Water-resistant– Bonds to multiple surfaces | Those needing a strong and clear adhesive for their glasses, particularly if subjected to water exposure |
Aleene’s Original Tacky Glue is a great multipurpose glue that works well with glasses made of various materials. It’s a non-toxic glue that dries clear, making it suitable for all types of glasses, including prescription ones.
If you need a quick fix, Gorilla Super Glue Gel is a suitable option. It’s an instant-drying glue that creates a strong adhesive bond that is resistant to impacts and shocks. This makes it ideal for sports glasses that experience a lot of wear and tear.
For those who are looking for a more reliable and long-lasting adhesive for their glasses, Loctite Liquid Professional Super Glue may be a good choice. This glue bonds quickly, resists water, and can withstand high temperatures.
If you’re looking for a strong and clear adhesive for glasses that may be exposed to water, EZ Bond Clear Gel is a suitable choice. It’s water-resistant and bonds to multiple surfaces, making it perfect for fixing water goggles or glasses.
Make sure you choose the glue that best suits your specific needs to ensure a successful repair.
Our Recommendations for Your Specific Needs
When it comes to choosing the right glue for your glasses, it’s important to consider your specific needs. There are many factors to take into account, such as the type of material your glasses are made of, the type of break you’re dealing with, and how quickly you need the repair done. Here are our recommendations for different situations:
| Type of Glasses | Type of Break | Recommended Glue |
|---|---|---|
| Metal Frame Glasses | Small Breaks or Cracks | Ardell’s Precision Tip Adhesive |
| Plastic Frame Glasses | Large Breaks or Cracks | Gel Super Glue |
| Scratch-Resistant Coated Lenses | Small Breaks or Scratches | Cyanoacrylate Glue |
| Polarized Lenses | Any Type of Break | Any High-Quality Epoxy Glue |
Remember, no matter what type of glue you choose, make sure to follow the instructions carefully and allow ample time for the glue to dry.
Prepping Your Glasses for Glueing
Before you can glue your broken glasses, you need to properly prep them to ensure the best possible repair. It may seem like a simple task, but prepping your glasses for glueing requires attention to detail and careful handling. To help you get started, we’ve outlined the key steps below.
The first step in preparing your glasses for glueing is to clean them thoroughly. This ensures that there is no dirt, oil, or debris on the surface that could interfere with the bonding process. Next, you need to determine the exact position of the break before applying the glue. This will prevent mistakes and misalignments that could hinder your repair. Let’s dive into these steps in more detail.
Cleaning Your Glasses
Cleaning your glasses before gluing them is an essential step in the repair process. This will ensure that there is no dirt, oil, or residue left on the surface that could hinder the effectiveness of the glue. Here are the steps you should follow to clean your glasses before gluing them:
- Use a clean microfiber cloth: Start by wiping your glasses with a clean microfiber cloth. This will remove any dust or debris that could scratch the lens.
- Apply a small amount of dish soap: Apply a small amount of dish soap to the lenses and frames. You can use your fingers to rub the soap gently on the surface of the glasses. Be careful not to use too much force or you could damage the glasses.
- Rinse with warm water: Rinse the glasses with warm water to remove the soap residue. Make sure to get rid of all the soap from the frames, temples, and lenses.
- Dry with a clean, lint-free cloth: Gently dry the glasses with a clean, lint-free cloth. Avoid using tissues or paper towels because they can leave fibers on the lenses.
It’s important to note that you should never use alcohol or ammonia-based cleaners to clean your glasses. These products can damage the lens coatings or the frames. Also, avoid using hot water as it can damage the lens coatings as well. Stick to the steps mentioned above to ensure a safe and effective cleaning process.
Pro tip: If you have stubborn dirt or grime on your glasses, you can use a mixture of equal parts water and vinegar to clean them. This will help dissolve the dirt and grime without damaging your glasses.
By following these cleaning steps, you will remove any debris or dirt that could prevent the glue from bonding correctly and ensure a good repair. Now that your glasses are clean and prepped, it’s time to move on to the next step in the repair process.
Determining the Exact Position of the Break
When it comes to repairing your glasses, determining the exact position of the break is a crucial step. Without identifying where the break is, you can end up gluing the wrong parts together, making the repair useless. To avoid this, follow these steps to determine the exact position of the break:
Step 1: Clean the glasses: Before you start inspecting your glasses, it’s important to clean them thoroughly. This will help you to see the break more clearly. Use a microfiber cloth and lens cleaner to remove any grease, dust, or fingerprints from your glasses.
Step 2: Inspect your glasses: Once your glasses are clean, inspect them carefully to find where the break is. Hold them up to the light and look closely. Look for any cracks, chips, or other damage. If you can’t see the break, try feeling around with your fingertips for any rough edges or jagged parts.
Step 3: Use a marker: Once you’ve identified the exact location of the break, use a marker to mark the spot. This will help you see exactly where to apply the glue when you repair the glasses.
Step 4: Make sure the glasses are dry: Before you apply any glue, make sure that the glasses are completely dry. This will help the glue to adhere better and ensure a stronger repair. Use a clean, dry cloth to remove any excess moisture.
Following these simple steps will ensure that you are gluing the right parts of your glasses together and making an effective repair. Remember that in order for the glue to work properly, the surface of the glasses needs to be completely free of any oil, grease, or dirt. If you’re having trouble cleaning your glasses, check out our article on what is in lash glue for some helpful tips on cleaning the lenses.
Step-by-Step Guide to Glueing Your Glasses
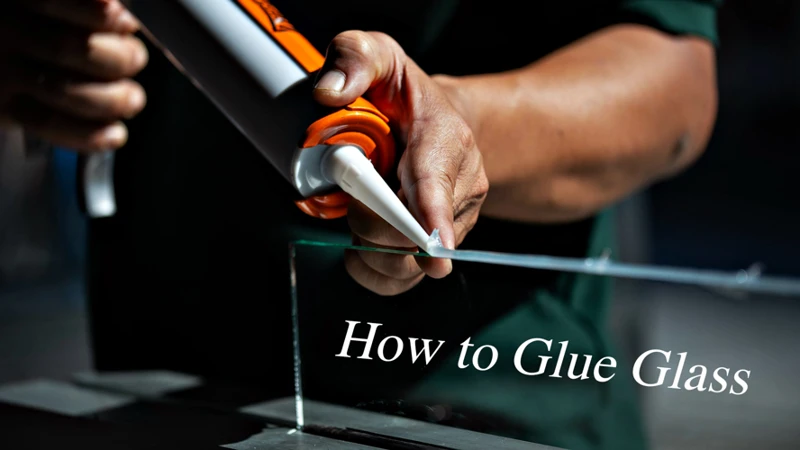
Now that you’ve chosen the best glue for your glasses and prepped them properly, it’s time to move on to the step-by-step guide for gluing your glasses. This can be a delicate process, as applying too much glue or placing your glasses in the wrong position can result in a failed repair or even further damage. However, don’t worry – with our expert tips and guidance, you’ll be able to successfully glue your glasses back together in no time! Let’s get started.
Applying the Glue
Before applying glue to your glasses, ensure that you are working in a well-ventilated area and that you have selected the appropriate glue for the job. Now, let’s start applying the glue to your glasses!
Step 1: Squeeze a small amount of glue onto a clean surface. You can use a toothpick, a needle, or a small brush to apply the glue to the glasses.
Step 2: Apply the glue to one side of the broken area, making sure to spread it evenly and thinly.
Step 3: Next, apply the glue to the other side of the broken area. Make sure the two sides are correctly aligned before pressing them together.
Step 4: Gently press the two sides of the glasses together, using a clamp or your fingers. Apply some pressure to ensure that the glue bonds both parts together properly.
Step 5: Wipe off the excess glue around the repaired area using a cotton swab or a piece of clean cloth.
Remember, use only a small amount of glue to avoid ending up with a mess. After applying the glue, hold the two sides of the glasses together for about a minute or two. Be careful not to move the glasses before the glue dries, or you may end up with a crooked repair.
If you’re using super glue, check to see #internal link=”/why-is-my-eyelash-glue-clumpy/”# for any signs of clumping or drying up. If you encounter issues, it may be necessary to open a fresh bottle or make sure the lid is tightly sealed.
Once the glue is dry, you can proceed to #internal link=”/how-long-does-eyelash-glue-last-on-skin/”# test your repair and see if it holds up well.
Fixing the Position of the Glasses
Once you have applied the glue to the break on your glasses, it’s important to fix the position of the glasses to ensure that they are aligned properly. This step is crucial to ensuring that your glasses are comfortable to wear and that the repair is effective.
Step 1: First, use your fingers to gently press the two broken pieces of your glasses together. Make sure that they are aligned as closely as possible to their original position.
Step 2: Next, use a piece of tape to hold the glasses in place. Simply wrap the tape around the glasses, ensuring that it holds the broken pieces together tightly. Be sure not to use too much pressure when applying the tape, as this can cause the glue to squeeze out from the break and create a mess.
Step 3: If you have access to a clamp or a similar tool, you can use that to hold the glasses in place instead of tape. This can be particularly helpful if you need to apply a significant amount of pressure to hold the glasses together.
Step 4: It’s important to be patient and allow the glue to dry completely before removing the tape or clamp. This will usually take several hours or overnight, depending on the specific type of glue that you used.
Step 5: Once the glue is completely dry, carefully remove the tape or clamp. Be sure to do this slowly and gently, as excessive force can cause the glasses to break again.
By taking the time to properly fix the position of your glasses while the glue is drying, you can ensure that your glasses are comfortable to wear and that the repair is effective. If you’re unsure about the best way to hold your glasses in place, consider reaching out to a professional for guidance.
Also, keep in mind that it’s important to use the right type of glue for your glasses, as different types of glasses require different types of adhesives. Refer back to the section on ‘Choosing the Best Glue for Glasses’ for more information on selecting the right adhesive for your needs.
Pro tip: If you need to apply glue to a small area of your glasses, and you’re worried about making a mess, try using a precise lash glue applicator. You can learn how to use one by reading our article on How to Open Lash Glue: Tips and Tricks.
Letting the Glue Dry
Once you have applied the glue and fixed the position of your glasses, it’s important to allow the glue to dry fully. Patience is key during this step, as rushing the process may result in an incomplete repair or a weakened bond.
Here are some tips for letting the glue dry effectively:
- Find a clean, dry surface to place your glasses on while they dry. This will prevent any debris or moisture from interfering with the glue bond.
- Avoid touching the glasses while the glue is drying. Any movement could shift the glasses and compromise the bond.
- Check the drying time on the specific glue you are using. Some will dry within minutes, while others may take a few hours. Follow the manufacturer’s instructions to ensure you allow enough time for the glue to fully dry.
- Consider using a clamp to hold the glasses in place while they dry. This can help ensure that they stay in position and the bond is strong.
- Avoid disturbing the drying glue by keeping pets or children away from the glasses.
Remember, the longer you allow the glue to dry, the stronger the bond will be. Don’t rush the process, as you may end up having to repeat the repair if the bond is weak. Once the glue is fully dry, you can move on to testing your repair and enjoying your newly repaired glasses.
Testing Your Repair
Once you’ve allowed the glue to dry completely, it’s time to test your repair to ensure that it’s strong and secure. Here are the steps to follow for testing your repair:
Step 1: Hold the glasses gently by the bridge or arms, depending on where the break was located.
Step 2: Slowly move the glasses around, shifting them from side to side and up and down to simulate regular use.
Step 3: Listen for any clicking or cracking sounds, which could indicate that the repair didn’t hold.
Step 4: Look carefully at the area where the repair was made. Is there any glue residue or bubbling? If so, the repair may not be successful.
Step 5: Put the glasses on and adjust them to your face. Does the frame feel loose or wobble in any way?
If you notice any issues during the testing process, it’s important to address them right away. Depending on the severity of the problem, you may need to reapply the glue or seek professional assistance. Keep in mind that a temporary fix may not be suitable for long-term use, so it’s always best to take care of repairs as soon as possible to prevent further damage to your glasses.
Tips for Making Your Repair Last Longer
Now that you’ve successfully glued your glasses back together, you want to make sure your repair lasts as long as possible. Nobody wants to go through the hassle of repairing their glasses over and over again. Here are some key tips to make your repair last for the long haul. We’ll cover how to prevent your glasses from breaking again and how to ensure your glue stays in place. These easy steps will help keep your glasses in tip-top shape for even longer.
How to Keep Your Glasses from Breaking Again
After repairing your glasses with the right glue, you may be wondering how to prevent them from breaking again. Here are some helpful tips:
- Handle them with care: Be gentle when putting on and taking off your glasses, as rough handling can put stress on the frames and cause them to break again.
- Store them properly: When you’re not wearing your glasses, place them in a protective case to keep them from getting scratched or damaged.
- Adjust them properly: Make sure your glasses fit properly and are adjusted correctly. Glasses that are too tight can put pressure on the frames, causing them to bend or break.
- Avoid extreme temperatures: Avoid exposing your glasses to extreme heat or cold, as this can weaken the frames over time.
- Regular maintenance: Get your glasses checked regularly by an optician to make sure everything is in good, working order. A small adjustment made early on can prevent larger issues later down the road.
By following these simple tips, you can help keep your glasses in good condition and prevent them from breaking again. Remember to always handle your glasses with care and take steps to protect them when not in use.
How to Make Sure Your Glue Stays in Place
After going through the process of glueing your glasses, you want to ensure that the repair lasts as long as possible. To achieve this, here are some tips to make sure your glue stays in place:
| Avoid Water Exposure | It’s important to avoid exposing your glasses to water immediately after the repair. This is because some types of glue require time to fully cure and water may interfere with this process. Keep your glasses away from water for at least 24 hours. |
|---|---|
| Store Your Glasses Carefully | When not in use, store your glasses in a safe place. Avoid placing them in areas where they might get damaged. By keeping them in a protective case or pouch, you can prevent accidental dropping or bumping. |
| Handle Your Glasses with Care | Be sure to handle your glasses gently, especially in the area where they were repaired. This will help to avoid any undue stress on the glue, which could cause it to fail. |
| Avoid Chemicals | When cleaning your glasses, stay away from harsh or abrasive chemicals. These can damage the glue and cause it to loosen. Use a soft, microfiber cloth to gently clean them instead. |
| Regularly Check Your Repair | It’s important to periodically check the condition of your repair to see if it’s holding up. Look for any signs of weakness, cracks, or movement. If you notice any issues, reapply the glue as necessary or seek professional help. |
By following these tips, you can ensure that your glasses stay in good condition for a longer period of time. Remember to always handle them with care, avoid exposing them to water, and check your repair regularly.
Conclusion
In conclusion, repairing broken glasses can be a tricky task, but it is definitely achievable. The key is to choose the right type of glue for the job and to properly prep your glasses before applying the glue. Make sure to clean your glasses thoroughly and determine the exact position of the break before starting the repair process.
Our expert tips will help you achieve a successful repair and make your glasses last longer. Additionally, it is important to take preventive measures to keep your glasses from breaking again in the future. Be careful when handling them and store them properly when not in use.
Overall, gluing glasses back together can be a cost-effective solution to a common issue. By following our step-by-step guide and using the recommended products, you can easily repair your glasses at home. However, if the break is more severe or you’re not comfortable doing it yourself, it’s always recommended to seek professional help. With a little patience and the right tools, you can make your glasses look and function like new again.
Frequently Asked Questions
Can I use any glue to fix my glasses?
No, not all glues are suitable for fixing glasses. Some may damage the material or not be strong enough to hold the frames together. It’s essential to choose a glue that is specifically designed for glasses repairs.
How long does it take for the glue to dry?
It depends on the type of glue you use. Some glues may take only a few minutes to dry, while others may take several hours. Be sure to read the instructions on the product label carefully.
Can I fix my glasses myself, or do I need professional help?
It’s possible to fix minor breaks yourself with the right tools and materials. However, if the damage is severe or the frames are made of delicate materials, it’s best to take them to a professional for repair.
What if the break is in a hard-to-reach area?
You can use a toothpick or a craft stick to apply the glue in hard-to-reach areas. However, be careful not to apply too much or get glue on the lenses.
How do I prepare my glasses for glueing?
You’ll need to clean your glasses thoroughly and determine the exact position of the break. Use rubbing alcohol or acetone to remove any dirt or oils on the frame that could weaken the glue bond.
Can I wear my glasses during the drying process?
No, it’s essential to keep your glasses still and avoid putting pressure on the frames while the glue is drying. You’ll need to set them aside and allow them to dry completely before wearing them again.
What if I use too much glue?
Using too much glue can create a mess and weaken the bond. Use a small amount of glue and apply it carefully to avoid excess adhesive. If you do use too much glue, wipe it away with a cloth before it dries.
How long will my repair last?
The lifespan of a repair depends on various factors such as the glue used, the severity of the break, and how well the repair was done. However, a good repair done with the right glue can last for months or even years.
How do I keep my glasses from breaking again?
Avoid bending or twisting your frames, and handle them carefully when taking them on and off. If possible, invest in a protective case to keep them safe when not in use.
What if my frames are too damaged to repair?
If your frames are beyond repair, you may need to invest in a new pair of glasses. It’s better to replace them than suffer from headaches or eye strain due to poorly fitted or damaged frames.