You’ve just purchased some plush carpeting and you’re excited to install it in your home. However, you’re not sure how to properly glue the carpet to the plywood floor. Don’t worry, you’ve come to the right place! Gluing carpet to plywood is a relatively simple process that can be done with just a few tools and supplies. In this step-by-step guide, we’ll take you through the entire process, from preparing the plywood surface to finishing touches. So, grab your tools and let’s get started!
Materials Needed
Gathering the necessary materials is an essential step when it comes to gluing carpet to plywood. Before starting this project, you will need to have a variety of tools and supplies on hand to ensure that the process goes smoothly and successfully. From choosing the right type of glue to trimming excess carpet, each item serves an important purpose in creating a durable and attractive carpeted surface.
Tools
Some of the tools needed to glue carpet to plywood include:
- Utility knife: This will be needed to cut the carpet to the right size.
- Measuring tape: Before cutting the carpet, measurements need to be taken to ensure it fits the space correctly.
- Safety gloves: These will protect your hands from any sharp edges or potential glue spills.
- Notched trowel: This tool helps evenly spread the glue on the plywood.
- Glue roller: This tool assists in pressing the carpet into the glue.
- Utility brush: In case of any excess glue, a utility brush will come in handy to help spread the glue out evenly.
It’s important to have all of these tools on hand before beginning the process of gluing the carpet to the plywood. Having the right tools not only saves time, but also ensures a smooth and successful installation.
Supplies
To successfully glue carpet to plywood, you will need certain supplies to get the job done right. Here are the essential supplies needed to glue carpet to plywood:
- Carpet padding: This will help ensure that your carpet stays in place and also protect it from wear and tear.
- Tape measure: You will need to take accurate measurements of your floor to ensure that you purchase enough carpet.
- Quality indoor-outdoor carpet adhesive: This type of adhesive is specifically designed for carpet and will ensure that your carpet stays in place. (source)
- Utility knife: You will need this to cut the carpet into the desired shape and size.
- Straight edge: This will help with cutting straight lines.
- Roller: You will need a carpet roller to press the carpet into the glue. This will ensure that the carpet is evenly distributed and secured in place.
- Notched trowel: This tool will help you apply the glue evenly onto the plywood.
- Bucket: You will need a bucket to mix the glue in.
Having the right supplies is essential to achieving a professional-looking finished product. Additionally, be sure to read the manufacturer’s instructions and recommendations for both the carpet adhesive and any tools you might be using.
Preparing the Plywood for Gluing
In order for the carpet to be properly installed on the plywood, it is important to prepare the surface beforehand. This step is crucial for ensuring the carpet adheres properly and looks its best once it’s installed. Cleaning the surface is the first step in preparing the plywood. This removes any dirt, dust, or debris that may interfere with the glue’s effectiveness. After cleaning, leveling the surface is also important, as any imperfections can cause bumps or unevenness in the carpet after it has been installed. Let’s explore each of these steps in detail below.
Clean the Surface
Cleaning the surface of plywood is an essential step in preparing it for gluing the carpet. The surface of the plywood should be clean, dry, and free of any debris that could interfere with the adhesive bond. Here is a quick checklist of how to clean the surface before gluing:
- Remove any loose dirt or dust using a vacuum cleaner or broom. If there are any remaining debris, use a putty knife to gently scrape it off the surface.
- Thoroughly clean the surface of the plywood using a rag or sponge with warm, soapy water. We recommend using a mild detergent to avoid damaging the surface of the plywood.
- Rinse the surface of the plywood using a clean, damp rag. Make sure there is no residual soap left on the surface.
- Allow the surface to fully dry before proceeding with the next step. This may take several hours depending on the climate and humidity, but it is crucial to avoid any moisture getting trapped between the plywood and the carpet. You may use a fan or dehumidifier to speed up the drying process.
Remember that the adhesive bond is only as good as the surface it is applied to, so taking the time to prepare the surface properly is essential for a long-lasting and successful installation.
Level Any Imperfections
Before gluing the carpet to the plywood, make sure that the surface is level and smooth. Any imperfections will affect the final appearance of the carpet, so it’s important to take the time to properly prepare the plywood. This step will also ensure that the carpet adheres well and doesn’t start to peel or come off with usage.
To level any imperfections in the plywood, you will need self-leveling compound. Self-leveling compound is a cement-based product that can be used to level out uneven surfaces. Here’s how to prepare the plywood:
| Step | Description |
|---|---|
| 1 | Clean the surface of the plywood to remove any debris, dust, or dirt that may interfere with the self-leveling compound. |
| 2 | Mix the self-leveling compound according to the manufacturer’s instructions. |
| 3 | Pour the self-leveling compound onto the plywood and use a trowel to spread it out evenly over the surface. Make sure that the entire surface is covered, including any low points or depressions. |
| 4 | Allow the self-leveling compound to dry completely. The drying time can vary depending on the product and ambient temperature, so refer to the manufacturer’s instructions. |
Once the self-leveling compound is dry, sand the surface to remove any roughness. This will create a smooth and level surface on which to glue the carpet.
It’s important to note that using self-leveling compound can add some time to the overall installation process. However, taking the extra time to level the plywood will result in a more durable, long-lasting carpet installation that looks great and is easy to maintain.
If you need more information on gluing other types of flooring materials, such as laminate, vinyl plank, or carpet tiles, check out our related articles “How to Glue Laminate” and “How to Glue Carpet Tiles”.
Applying the Glue
Applying the Glue: The quality of the glue you use when installing carpet on plywood is crucial. It determines how long your carpet will last and the level of adhesive strength between the carpet and the wood. For this project, you’d want to use the recommended carpet glue, which is readily available in online stores and hardware shops. It’s essential to apply the glue correctly and evenly to have the best results. Let’s go over the steps you need to follow to apply the glue correctly. For more information about glue, check out how long does lvt glue take to dry.
Choose the Right Glue
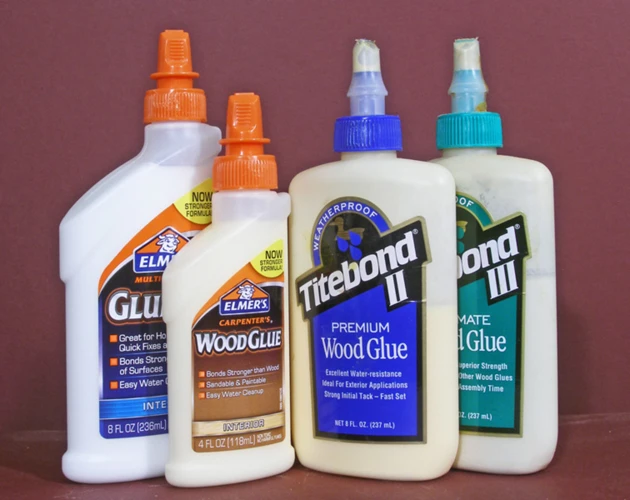
Choosing the right glue is essential when gluing carpet to plywood. The type of glue you use will determine the strength of the bond between the carpet and the plywood. Here are some options for glues to use:
- Contact cement: This type of glue is a popular adhesive for carpet installation. It creates a strong bond, dries quickly, and is waterproof, making it an excellent choice for areas that may be exposed to moisture or humidity. It is essential to use a solvent-based contact cement for gluing carpet to plywood. Some recommended brands are Barge All-Purpose Cement and DAP Weldwood Contact Cement.
- High-tack adhesive: This type of glue is designed for bonding heavy-duty materials like carpet and is perfect for carpet installation on stairs. When choosing a high-tack adhesive, look for one specifically designed for use with carpet. A popular option is Roberts 3095.
- Hot melt adhesive: This type of glue is melted using a glue gun and, when applied, quickly cools to form a solid bond. It is a popular option for small carpet installation projects. The main advantage of using a hot melt adhesive is that it dries quickly and creates a flexible bond. However, it is not recommended for large carpet installations.
It’s important to note that not all adhesives will work for all types of floor and carpet materials. Make sure to follow the manufacturer’s instructions when choosing and applying the glue. Additionally, it’s always a good idea to test the glue on a small section of the carpet and plywood before completing the full installation to ensure that it works well.
If you want to learn more about which type of glue is best for different flooring materials, check out our article on What Is Glue Down Flooring?
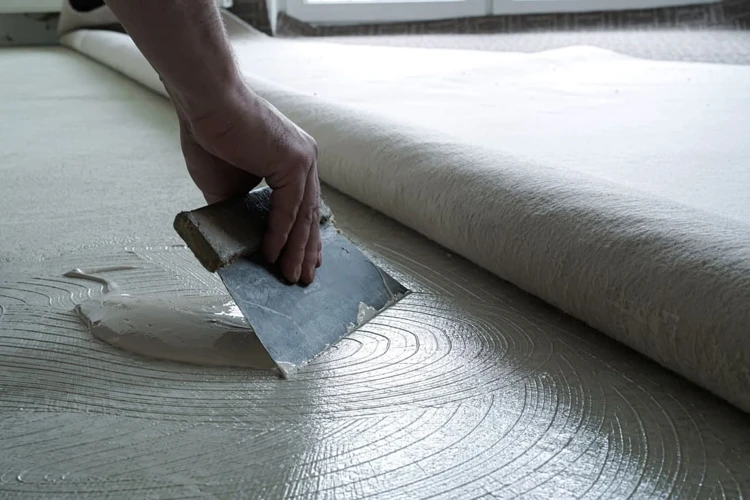
Apply the Glue Evenly
When it comes to gluing carpet to plywood, it is important to apply the glue evenly to ensure a proper bond. Unevenly applied glue can create lumps or bubbles under the carpet, leading to an unsightly and uneven installation. Here are some tips for applying glue evenly:
- Divide the plywood surface into sections: It can be helpful to divide the plywood surface into smaller sections and apply the glue one section at a time. This can make it easier to ensure that the glue is applied smoothly and evenly.
- Use a notched trowel: A notched trowel can help to spread the glue evenly over the surface of the plywood. Be sure to choose a trowel with the right size notches for the type of glue being used, and use it to apply the glue in consistent, parallel lines.
- Don’t overapply: It may be tempting to apply extra glue to areas that seem like they may need it, but too much glue can actually be harmful to the installation process. Over-applying the glue can lead to extended drying times and even impact the carpet’s backing or underlayment.
In order to get more information about which glue to use, check out our guide on what is the best glue down vinyl plank flooring. Remember that proper glue application can ensure a smooth and even installation on your plywood surface.
Installing the Carpet
As exciting as it may be to have finally reached the step of installing the carpet, it can also be nerve-wracking. But have no fear! With the right tools and techniques, you can get the job done smoothly and efficiently. Before jumping right in, make sure you have everything you need and have adequately prepared the plywood. Now, let’s dive into the nitty-gritty of laying down that plush carpet!
Measure and Cut the Carpet
Measure and Cut the Carpet: After ensuring that the plywood is prepared for gluing, it’s time to start working with the carpet. Begin by measuring the dimensions of the plywood to determine the amount of carpet needed. Remember to account for any extra material needed for wrapping the carpet around the edges of the plywood and cutting off any excess. Use a measuring tape to take the measurements and mark them down on the back of the carpet with a white chalk or a washable marker.
Once the measurements are taken, it’s time to cut the carpet according to the marks made earlier. Lay the carpet on a flat surface and use a sharp utility knife and a straight edge to cut it along the marks. Keep the blade sharp to ensure a clean cut and avoid damaging the carpet.
Be sure to cut the carpet slightly larger than the dimensions of the plywood to account for any discrepancies. If the carpet is cut too small, it may not cover the entire surface of the plywood, leaving gaps. On the other hand, cutting the carpet too large can lead to bunching and wrinkles during installation.
Pro tip: Before cutting the carpet, test fit it on the plywood to make sure it is the correct size and shape. This will save you time and trouble later on if any adjustments are needed.
After cutting the carpet to size, it’s important to trim off any frayed edges and remove any loose fibers. This will give the finished product a neat and professional appearance. Use sharp scissors to trim the edges, taking care not to cut too much off.
Internal link: If you’re interested in learning about gluing down vinyl tiles, check out our article on How to Glue Down Vinyl Tile: A Complete Guide.
Position the Carpet on the Plywood
Once the carpet is cut to the appropriate size and shape, it is time to position it onto the plywood. Start by laying the carpet in place on top of the plywood. Make sure to position it correctly and allow for any necessary adjustments. Next, use a carpet roller or a wooden brayer to press the carpet firmly into the glue, starting from the center of the plywood and working outwards. This will help to remove any air pockets and ensure that the carpet is securely attached to the plywood.
It is important to take your time during this step, as any mistakes or misalignment can be difficult to fix once the glue has dried. Working in small sections at a time can help to ensure that the carpet is laid down smoothly and evenly. You may need to lift and adjust the carpet slightly as you work to ensure that it is aligned properly.
When positioning the carpet, be sure to consider any seams or patterns in the carpet that need to be matched up. You may need to cut extra slits in the carpet to allow for corners or other protrusions, allowing the carpet to lay flat against the plywood. The positioning of the carpet can make a significant difference in the final outcome of your project.
Now that the carpet is positioned correctly, use a utility knife to carefully trim any excess carpet from the edges of the plywood. Be sure to leave a little extra material around the edges to allow for any future adjustments, but cut away any significant overhangs.
Choosing the right glue is key in ensuring that the carpet is properly secured to the plywood. Once the carpet is pressed firmly into the glue, it can take several hours to dry completely. This can vary depending on the type of glue you choose, as well as temperature and humidity levels in the room. Be sure to wait until the glue is completely dry before walking on or using the newly carpeted surface.
Next, move on to the final steps of the project, which involve finishing touches such as trimming excess carpet and cleaning up any glue residue that may be left behind.
Press the Carpet into the Glue
After positioning the carpet on the plywood, it’s time to press it into the glue. This step is crucial to ensure that the carpet is securely attached. Use a carpet roller or a rental floor roller to gently press the carpet into the glue. Start in the center of the plywood and work your way out to the edges. Be sure to apply enough pressure to create a firm bond between the carpet fibers and the plywood.
Note: If you don’t have a carpet roller or a rental floor roller, you can also use a wide plywood board to roll over the carpet. Make sure that the board’s width is enough to cover the entire area of the carpet.
To ensure that the carpet is evenly pressed into the glue, divide the area to be covered with the carpet into sections. Apply the glue to one section at a time, and then press the carpet into the glue before moving on to the next section.
Pro Tip: Don’t rush this step! Take your time to ensure that the carpet is pressed firmly into the glue. If you hurry, you may end up with air pockets or bubbles under the surface of the carpet that can compromise the integrity of the installation.
Once you’ve pressed the carpet into the glue, leave the carpet to dry for at least 24 hours. This will give the glue enough time to set and create a strong bond between the carpet and the plywood.
Note: If you plan to install stair treads, check out our article on how to glue stair treads. If you need to install carpet on aluminum, we also have an article for that: how to glue carpet to aluminum.
| Pros | Cons |
|---|---|
| Pressing the carpet into the glue ensures a secure bond between the fibers and the plywood. | If you rush this process, you may end up with air pockets or bubbles under the surface of the carpet. |
| Dividing the area into sections helps to ensure that the carpet is evenly applied. | You need to have a carpet roller or a rental floor roller to achieve the best results. |
| It’s important to give the glue enough time to set and dry to ensure a strong bond. | Rolling the carpet takes a lot of physical effort and can be a time-consuming process. |
Finishing Touches
As you wrap up the carpet installation process, it’s important not to overlook the small details that can make a big difference in the final outcome. In this section, we will cover the final touches you need to complete to ensure that your carpet looks flawless once it’s in place. From trimming excess carpet to cleaning up glue residue, every step is critical to getting the results you desire. Let’s get started!
Trim Excess Carpet
Once the carpet has been successfully glued to the plywood, it’s time to trim the excess carpet along the edges. This step requires precision and careful attention to detail in order to achieve a neat and professional-looking finish. Here are the steps to follow for trimming the excess carpet:
| Step | Description |
|---|---|
| 1 | Start by using a sharp utility knife with a new blade. Blunt blades can cause the carpet to fray or tear, leading to an unprofessional-looking finish. |
| 2 | Use a straightedge or ruler to mark a straight line along the edge of the plywood, where you want to cut the excess carpet. Make sure the line is straight and even. |
| 3 | Hold the carpet away from the edge of the plywood and use the utility knife to cut along the marked line. Be sure to apply enough pressure to cut through all layers of the carpet. |
| 4 | Repeat this process along all edges of the plywood where there is excess carpet. |
| 5 | Once all excess carpet has been trimmed, use a stiff-bristled brush to brush the edges of the carpet and help blend them with the rest of the carpet surface. |
| 6 | Take a step back and inspect the carpet to make sure all edges are nicely trimmed and there are no frayed or uneven areas. If necessary, go back and trim any areas that need improvement. |
Note: Cutting the carpet too close to the edge of the plywood can leave the edges vulnerable to fraying. On the other hand, leaving too much excess carpet can cause the carpet to buckle or wrinkle over time. Strive for a precise and even cut to ensure a durable and seamless finish.
Clean Up Glue Residue
Cleaning up any glue residue after installing carpet on a plywood surface is an important step to ensure a polished finish. Here are some steps to follow for effective glue residue removal:
- Scrape the excess glue: With the help of a putty knife, scrape off any excess glue from the surface of the carpet. Make sure to be gentle while scraping so as to not damage the carpet or the plywood surface.
- Use a carpet cleaner or vinegar: Dampen a clean rag or sponge in a carpet cleaner solution or vinegar and rub gently on the glue residue. Alternatively, you can mix equal parts of water and vinegar in a spray bottle and spray the solution directly onto the glue residue. Let the solution sit for a few minutes before you begin scrubbing, to soften the glue.
- Scrub the glue: Scrub the glue residue gently using a scrub brush. Be careful not to rub too hard as this may damage the carpet fibers. Instead, use a circular motion to rub off the glue residue.
- Use hot water: Rinse the cleaned area with hot water to remove any remaining glue residue. Be sure to use a clean rag or sponge while rinsing.
- Dry the area: Use a clean towel or rag to dry the area thoroughly.
It is important to note that different types of glue may require different methods of cleanup. Always read the label on the glue to find specific cleanup instructions. By following these steps, you can ensure that your carpet is clean and that any glue residue is removed from the plywood surface.
Conclusion
After following this step-by-step guide, you should now have successfully glued your carpet to plywood. Congratulations! But before you call it a day, make sure to take note of these important things.
Check for Any Visible Imperfections
Take a look at the carpet and the plywood, and inspect for visible imperfections. While it won’t be perfect, there should be limited bumps or wrinkles, or worse, areas where the carpet hasn’t adhered properly.
Allow the Glue to Dry Thoroughly
Depending on the type of glue used, drying times can vary. Make sure to read the manufacturer’s instructions before moving any furniture or walking on the newly installed carpet. The last thing you want is to ruin your hard work by walking on the carpet before the glue has dried.
Regularly Clean and Maintain Your Carpet
After glueing the carpet to plywood, it is important to regularly clean and maintain it. This will not only keep it looking great, but it will also help prolong its lifespan. Be sure to vacuum regularly and clean up any spills or stains as soon as possible.
Consider Hiring a Professional for More Complex Projects
While the steps outlined in this guide should be enough for most basic projects, more complex projects may require the help of a professional. If you are unsure of your ability to complete a glueing job, or if you encounter unexpected issues during the process, seek the help of a professional to ensure the best possible outcome.
By following these tips, you should be able to successfully glue carpet to plywood. Remember to take your time, choose the right materials, and be patient during the process. Good luck and enjoy your newly installed carpet!
Frequently Asked Questions
How long does it take for the glue to dry?
Drying times vary based on the type of glue used and the humidity in the room. It is best to refer to the manufacturer’s instructions for specific drying times.
Can I glue the carpet without removing the old carpet?
It is not recommended to glue new carpet over old carpet. The old carpet should be removed to ensure a clean and level surface for the new carpet.
What is the best type of glue to use for carpeting?
There are several types of glue that are suitable for carpeting, including latex adhesive, pressure-sensitive adhesive, and resin glue. It is important to choose a glue that is appropriate for the specific type of carpet being installed.
Do I need to use a sealer on the plywood before gluing the carpet?
It is not necessary to use a sealer on the plywood before gluing the carpet, but some professionals recommend it as an extra precaution to prevent any moisture from seeping into the wood.
Can I use carpet tape instead of glue?
Carpet tape can be used instead of glue, but it is not recommended for high-traffic areas or areas where the carpet may be subject to moisture.
How do I remove excess glue from the carpet?
Excess glue can be removed from the carpet using a damp cloth, or with a solvent recommended by the glue manufacturer. It is important to clean up any excess glue as soon as possible to prevent it from permanently bonding to the carpet fibers.
Can I install carpet on uneven plywood?
It is not recommended to install carpet on uneven plywood. Any significant unevenness should be leveled with a floor leveling compound before beginning the installation process.
Is it necessary to use a carpet pad?
A carpet pad is not necessary, but it is recommended for added cushioning and to prolong the life of the carpet.
How do I cut the carpet to fit the plywood exactly?
To cut the carpet to fit the plywood exactly, measure the dimensions of the plywood and add a few extra inches on all sides for trimming. Use a utility knife and a straight edge to make the cuts along the measurements.
Do I need to hire a professional to glue the carpet to the plywood?
While it is possible to glue carpet to plywood on your own, it can be a difficult and time-consuming process. Hiring a professional can ensure that the job is done correctly and efficiently.