Embracing the versatility of painting methods, the dry brushing paint technique stands out for its unique ability to add dimension and texture to artwork. This approach, revered for its simplicity and stunning results, involves using a brush with minimal paint and no water to accentuate details on a textured surface. It’s a staple in the world of arts and crafts, enabling artists to create a myriad of effects from weathered looks on miniatures to soft, feathery strokes on canvas.
Essential Supplies for Dry Brushing Painting Technique
Before embarking on your creative journey, it’s crucial to gather the right tools to ensure the best outcomes.
Choosing the Right Brushes
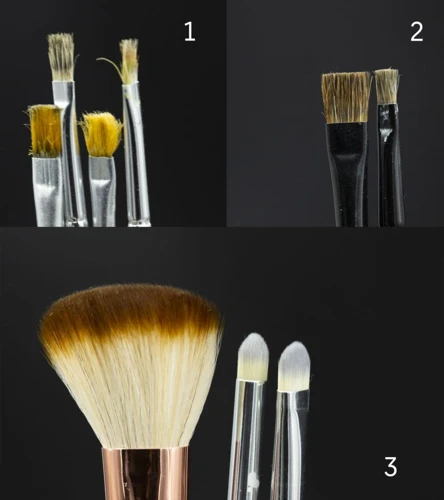
- Stiff-bristled brushes: Ideal for creating sharp textures.
- Soft-bristled brushes: Better for smooth, subtle highlights.
- Angled brushes: Useful for reaching tight spaces and corners.
Selecting the Best Paints for Dry Brushing
- Acrylics: Quick-drying and versatile, perfect for beginners.
- Oils: Longer drying times allow for extended workability.
- Watercolors: Can be used sparingly for a delicate touch.
Step-by-Step Guide: How to Dry Brush Paint
With your supplies at hand, it’s time to delve into the process and master how to dry brush paint with finesse.
Preparing Your Painting Surface
Begin by ensuring your canvas or model is clean, dry, and primed if necessary. A smooth surface will make the dry brushing technique painting more effective.
Applying the Base Coat
Apply an even base coat and allow it to dry completely. This foundational layer sets the stage for the subsequent dry brushing effects.
Mastering the Dry Brushing Technique Painting
- Dip your brush lightly in paint, then wipe off the excess until the brush seems almost dry.
- Gently skim the surface with your brush, letting the bristles catch only the raised areas.
Blending Colors with the Dry Brushing Technique
Layer different colors using the dry brush method for rich, complex color schemes. The key is to use a light touch and build the color gradually.
Finishing Touches and Sealing the Paint
Once satisfied with the texture and depth, seal your work with a varnish to protect it from wear and tear.
Advanced Dry Brushing Techniques
For those looking to push the boundaries, these advanced methods can elevate your art.
Creating Texture and Depth
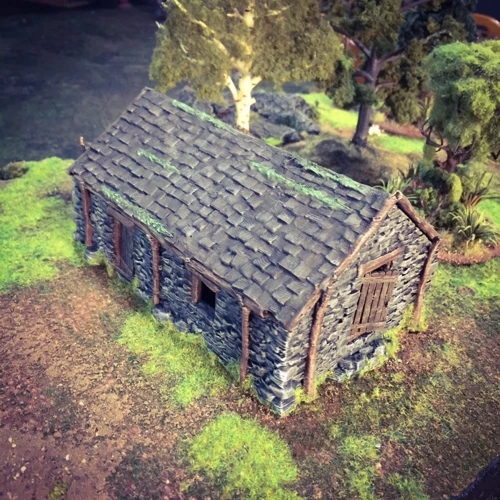
By varying the pressure and amount of paint on your brush, you can simulate different textures, from rough stone to soft fur.
Working with Multiple Colors
Introduce additional colors by layering them with the dry brush. This technique can produce a vibrant interplay of shades and tones.
Common Mistakes and Solutions in Dry Brushing
Avoid common pitfalls to keep your work looking professional and polished.
Managing Brush Moisture Levels
Ensure your brush is dry to the touch before applying it to your surface. Too much moisture can result in an undesired, heavy application of paint.
Avoiding Overbrushing
Be patient and build up the effect gradually. Overbrushing can lead to a muddied appearance, losing the fine details you’re aiming to highlight.
Troubleshooting Paint Adhesion Issues
If paint isn’t adhering well, check if your base layer is too glossy or oily. A matte surface is more conducive to the dry brushing painting technique.
Gallery of Dry Brushing Examples
Visual examples can inspire and guide artists. Observing the work of others offers insight into the potential of the dry brushing technique.
Conclusion: Perfecting Your Dry Brushing Paint Technique
Practice and experimentation are the pillars of mastering the dry brushing technique. Each project comes with its own set of challenges and learning opportunities.
Dry brushing is a unique painting technique that can add texture and depth to your artwork. If you’re looking to explore this method, it’s important to prepare your surfaces correctly to achieve the best results. We have a couple of guides that can help you with this process. Before you start your dry brushing project, read our article on cleaning surfaces for painting to ensure your canvas or material is pristine. Additionally, understanding the importance of a clean starting point is crucial, so check out our insights on surface cleaning before painting. And don’t forget to protect your workspace; our guide on choosing the right size drop cloth for painting will help you cover and protect your area effectively. With these preparatory steps, you’ll be ready to dive into the world of dry brushing painting with confidence.
Additional Resources and Tutorials
Expand your knowledge by exploring tutorials, attending workshops, and engaging with the artist community. The journey to perfecting the dry brushing paint technique is an enriching one.


