Trim molding is an essential aspect of giving your home that polished look, but it’s the brushing techniques that can truly make or break the finish. Whether you’re a DIY enthusiast or a professional looking to refine your skills, understanding how to effectively apply paint to trim molding is crucial. This guide will provide you with a comprehensive approach to mastering precision brushing and ensuring that your trims stand out with a professional-grade finish.
The Importance of Precision Brushing in Home Improvement Painting
Home improvement painting is more than just slapping a coat of paint on a wall. It’s about the meticulous details that elevate the overall aesthetic. Precision brushing plays a pivotal role, especially when it comes to trims molding. A steady hand and the right technique can ensure sharp lines and a smooth finish, distinguishing a high-quality job from a mediocre effort. Delve into the significance of precision brushing and discover how it can enhance the value and beauty of your home.
Understanding the Basics of Trim Molding Techniques
Types of Trim Molding
- Baseboards
- Crown molding
- Door and window casings
- Chair rails
There are several types of trim molding, each requiring a specific approach to achieve the best results. The intricacies of trim molding techniques will be determined by the style and complexity of the molding you choose.
Preparation for Painting Moldings
Before embarking on painting moldings, it’s vital to prepare the surface. This means cleaning, sanding, and ensuring that any gaps or imperfections are filled and smoothed out. Proper preparation lays the groundwork for superior paint adhesion and a flawless finish.
Choosing the Right Paint Brush Methods
Brush Types for Interior Trim Painting
- Synthetic brushes for water-based paints
- Natural-bristle brushes for oil-based paints
Selecting the appropriate brush type is a cornerstone of effective interior trim painting. The choice between synthetic and natural bristles can significantly impact the ease of application and the quality of the finish.
Brush Sizes and Shapes
The size and shape of the paintbrush are equally important. A smaller angled sash brush, for example, allows for greater control and is ideal for tight spaces and detailed work. In contrast, larger brushes can speed up the process on broader surfaces.
Step-by-Step Trim Painting Guide
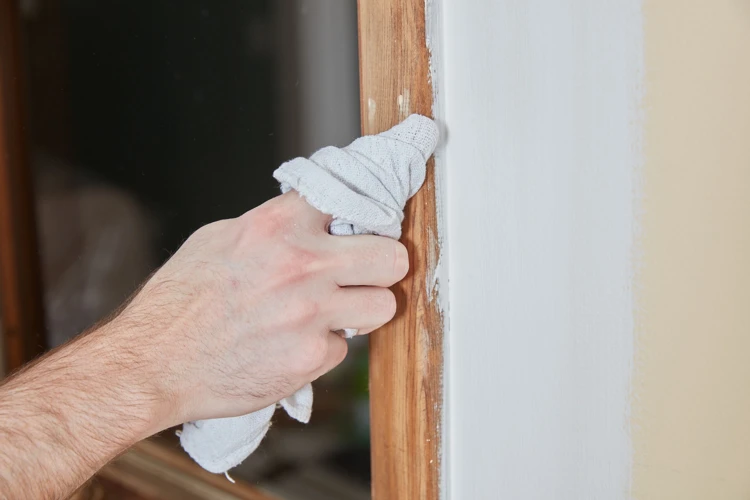
Cleaning and Priming the Trim
Commencing with a clean slate is imperative. Dust, oils, and previous paint can all interfere with the new coat. After cleaning, apply a quality primer to seal the surface and provide a uniform base for the paint.
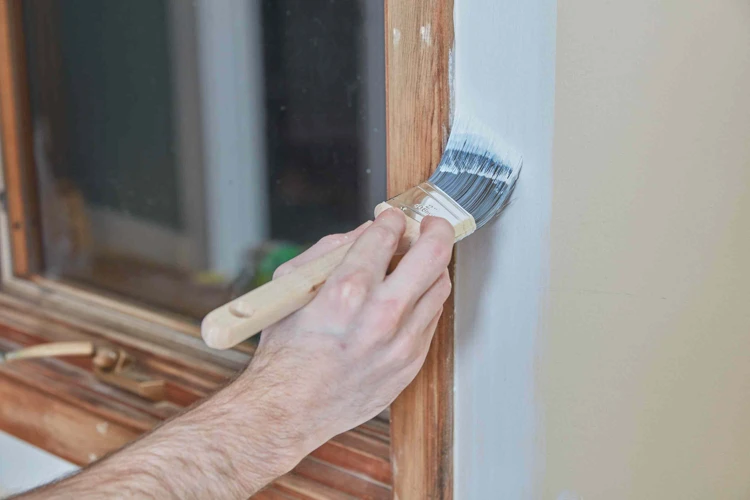
Applying the Paint
When the time comes to apply the paint, doing so with finesse and patience is key. Use long, even strokes to avoid brush marks and achieve an even coat. Allow ample drying time between coats for the best outcome.
Molding Painting Tips for a Flawless Finish
Painting Techniques for Smooth Surfaces
For smooth surfaces, maintain a wet edge to avoid overlap marks. This involves painting in small sections and brushing back into the wet paint to ensure a smooth, seamless appearance.
Techniques for Detailed and Ornate Moldings
Detailed and ornate moldings call for a delicate touch and perhaps a smaller brush to navigate the intricate designs. Patience and attention to detail are your allies in transforming complex trims into works of art.
Advanced Brushing Techniques for Enhanced Precision
The Art of Cutting-In
Cutting-in is a technique used to achieve clean lines where the trim meets the wall. This involves painting a straight line without the aid of tape, requiring a steady hand and a good deal of practice to master.
Using Painter’s Tape for Clean Edges
For those less confident in their freehand abilities, painter’s tape can be a useful tool. When applied correctly, it creates a barrier that ensures crisp, clean edges once the paint has dried and the tape is removed.
Maintenance and Touch-Ups for Painted Trim
Maintenance is the final, ongoing step in the trim painting process. Over time, painted trim can chip or become dingy. Regular cleaning and timely touch-ups will help maintain the fresh, crisp look of your trims molding for years to come.
If you’re delving into the world of art or beauty, mastering the tools of the trade is crucial. For the artists out there, understanding the variety of paintbrush sizes and shapes can greatly enhance your technique, so be sure to check out our beginner’s guide to paint brush sizes and shapes. On the other hand, if you’re exploring the realm of hair extensions, you might be interested in our articles on how to glue hair extensions and how glue-in hair extensions work to achieve that perfect look. Both artistry in painting and hairstyling require attention to detail and the right methods, much like the various brushing techniques and trims in molding.
Conclusion: Mastering Trim Molding Painting
Mastering the art of trim molding painting is a journey of learning and refining various brushing techniques. By choosing the correct paint brush methods, preparing surfaces diligently, and applying molding painting tips, you can achieve a professional and enduring finish. Precision brushing is not just a skill but an essential component of home improvement painting that can dramatically enhance the character and appeal of your living space.