The art of woodworking often requires precise and strong connections between pieces of wood. One of the most common and challenging types of joints is the 90-degree angle join. This blog post will explore the various techniques and tips to master the application of woodworking glue techniques for creating robust and durable 90-degree wood joinery.
Understanding the Basics of 90-Degree Wood Joinery
The cornerstone of creating furniture and other wooden structures is often the 90-degree joint. Whether it’s for frames, boxes, or cabinets, achieving a seamless and strong corner is essential. Understanding how to properly apply glue and align the wood pieces is crucial for the integrity of the finished product.
Choosing the Best Glue for Wood
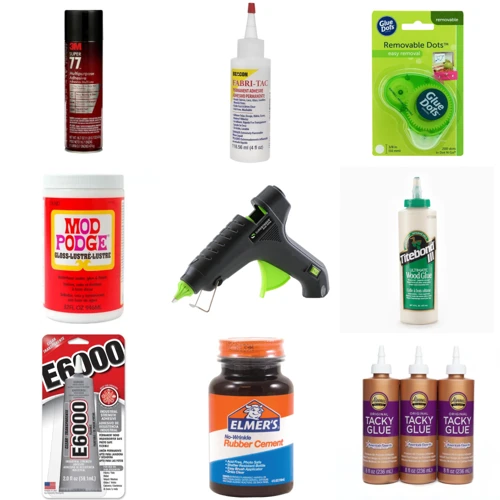
Selecting the best glue for wood is paramount in ensuring strong wood bonds. Various types of adhesives are available, each with its own strengths and suitability for different projects. PVA glues, epoxy, and polyurethane adhesives are some options to consider, depending on the wood types and the end use of the joint.
Preparation for Gluing Wood at a 90-Degree Angle
Materials and Tools Needed for Angle Gluing Wood
- Wood adhesive
- Clamps
- Square tool
- Sandpaper or a planer
- Clean cloths
Surface Preparation for Strong Wood Bonds
A successful glue-up starts with proper surface preparation. Ensuring that the edges of the wood pieces are flat and smooth is essential for a tight fit. Using sandpaper or a planer can help create an even surface that will allow the adhesive to form a solid bond.
Step-by-Step Guide to Glue Wood Corners
Applying Wood Adhesive Tips for Precision
When it comes to applying the glue, less is often more. An even spread of adhesive on the joining edges will prevent excess from squeezing out and creating a mess. Using a small brush or a glue applicator can help in achieving an even coat.
Aligning the Wood Pieces at 90 Degrees
Once the adhesive is applied, it’s time to align the wood pieces. Using a square tool is crucial to ensure the pieces meet at an exact 90-degree angle. Take the time to adjust the positioning before the glue starts to set.
Clamping Methods for Wood During Gluing
Using the Right Clamps for Woodworking Corner Joints
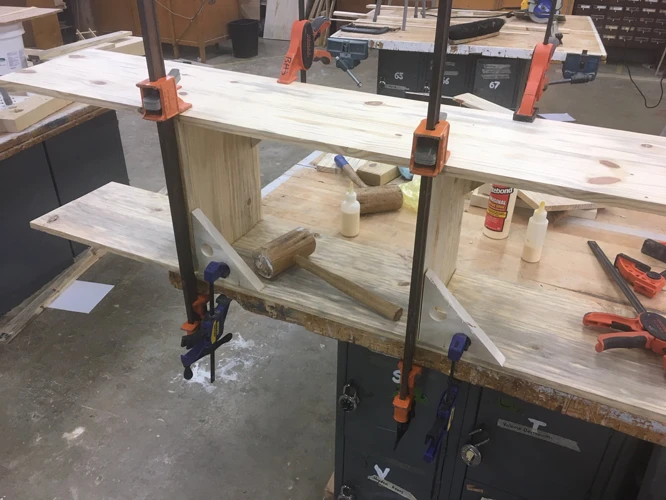
Clamping is a vital step in the gluing process. The type and size of the clamps used can affect the outcome of the joint. Bar clamps, corner clamps, or a clamping jig can be used to apply even pressure across the joint while the glue dries.
Techniques for Maintaining a Perfect Angle
To maintain the desired angle, adjusting the clamps for even pressure is key. Use additional squares to check the angle as you tighten the clamps. Avoid over-tightening, as this can cause the wood to warp or the joint to become misaligned.
DIY Wood Angle Gluing Tips and Tricks
Enhancing the Strength of the Joint
For added durability, consider using biscuits or dowels in your joint. These can help align the pieces and provide additional strength. Pre-drilling the holes for these reinforcements ensures a clean fit that won’t split the wood.
Common Mistakes to Avoid in Angle Gluing
One common mistake is rushing the process. Take your time to properly align and clamp the wood. Additionally, ensure the glue is suitable for the wood type and the joint’s intended use. Using too much glue can also lead to a weaker bond, as it can prevent the wood from making a solid connection.
Finishing Touches and Curing Time
Final Adjustments Before the Glue Sets
Before the adhesive fully sets, check the alignment one last time and wipe away any excess glue with a damp cloth. This will save time during the finishing process and result in a cleaner look.
How Long to Wait for the Glue to Cure
The curing time can vary depending on the type of glue used and the environmental conditions. Typically, a minimum of 24 hours is recommended before removing clamps and stress-testing the joint. Consult the manufacturer’s instructions for the best results.
Troubleshooting Common Issues with Gluing Wood at 90 Degrees
If your joint is not square after clamping, it’s often possible to adjust it slightly before the glue sets. However, if the glue has dried and the joint is misaligned, you may need to disassemble and re-glue. If the wood has splintered or cracked, using wood filler or epoxy resin can repair the area before attempting to glue again.
If you’re working on a woodworking project that involves joining pieces of wood at right angles, you might be wondering about the best adhesive techniques to ensure a strong bond. Our comprehensive guides can help you with various gluing procedures. For insights on laminating, check out our article on how to glue laminate to wood. If you’re interested in nail glue gels for woodworking purposes, our tutorial on how to use 6-in-1 nail glue gel is a great resource. And for those challenging end-grain joints, don’t miss our tips on how to glue end grain wood. Each of these articles is designed to help you achieve the best results when gluing wood, especially at a 90-degree angle.
Conclusion and Additional Resources for Woodworking Projects
Mastering the technique of angle gluing wood is a fundamental skill that will enhance your woodworking projects. With the right preparation, tools, and attention to detail, you can achieve strong, square corners every time. For further learning, consider joining woodworking forums, attending workshops, and practicing on scrap pieces to perfect your technique.


