Introduction
Crafting is a fun and creative activity that allows us to make something from scratch. Whether for personal use or as a gift, creating things on our own gives us satisfaction and pride. One material that is commonly used in crafting is Elmer’s glue, known for its strong adhesive properties. While buying Elmer’s glue from the store is convenient, making your own can be a fulfilling experience. In this article, we will walk you through the steps on how to make Elmer’s glue on your own, using simple ingredients you can find at home. Get ready to discover how easy and fun it is to create your own Elmer’s glue!
What is Elmer’s Glue?
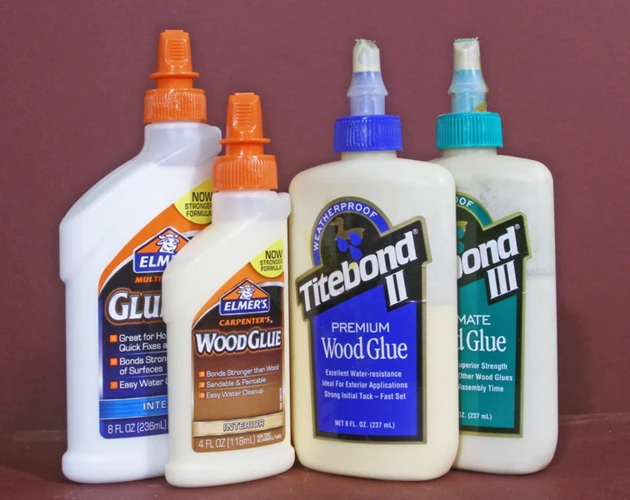
Elmer’s Glue is a widely used type of glue that is known for its strong adhesive properties and versatility. This glue is made from polyvinyl acetate (PVA) and is often used in a variety of arts and crafts projects, as well as for general household repairs. Elmer’s Glue is also a popular choice for children’s art projects due to its non-toxic nature.
Elmer’s Glue has a number of different uses:
- It is commonly used as an adhesive for paper-based projects, such as scrapbooking and card-making.
- It can be used as a sealant or topcoat for various materials, including wood, plastic, and even fabric.
- Elmer’s Glue is also a popular choice for creating various types of slime and other homemade craft projects.
Elmer’s Glue is available in a variety of different forms, including glue sticks, liquid glue, and even glitter glue. While there are many different brands and varieties of glue available on the market, Elmer’s Glue remains a popular choice for its reliability and versatility.
If you are interested in making your own homemade glue, check out our tutorial on How to Make Simple Glue.
Materials Needed
Before you start making your own Elmer’s glue, you will need to gather the necessary materials. Here are the items you will need:
1. Water – You will need one cup of water to start the recipe.
2. Corn syrup – Corn syrup is a key ingredient in making homemade Elmer’s glue. You will need half a cup of corn syrup.
3. White vinegar – White vinegar helps to preserve the glue and prevent it from going bad. You will need one tablespoon of vinegar.
4. Baking soda – Baking soda helps to thicken the glue. You will need half a teaspoon of baking soda.
5. Gelatin – Gelatin is what gives the glue its stickiness. You will need one and a half tablespoons of unflavored gelatin.
6. Saucepan – You will need a small saucepan to heat and mix the ingredients.
7. Strainer – A strainer will help you remove any clumps from the mixture and ensure that the glue is smooth.
8. Container – You will need a container to store your homemade glue.
Once you have all the necessary materials, you can begin making your own Elmer’s glue using the recipe and tutorial. Don’t worry if you don’t have all of the materials in your kitchen- they can be found at most grocery stores and are easy to obtain.
Recipe
Are you ready to make your own Elmer’s glue? This DIY recipe is easy to follow and will allow you to create a high-quality adhesive that you can use for a variety of arts and crafts projects. All you need are a few simple ingredients and some basic kitchen tools. Follow the steps below and you’ll be amazed at how simple it is to create your own glue from scratch. Let’s get started!
Step 1: Pour the Water Into a Saucepan
To get started with making your own Elmer’s glue, you’ll first need to gather the necessary materials and follow these simple steps:
- Step 1: Begin by pouring two cups of water into a saucepan or small pot.
When selecting a saucepan for this process, it’s important to choose one that is non-reactive, meaning it won’t interact with the ingredients and affect the final outcome of the glue. Stainless steel or enamel-coated pans are good options.
Once the water is in the saucepan, you can move onto the next steps for making the glue. It’s important to closely follow each step in order to create a successful batch of glue that is the right consistency and texture for your needs. But don’t worry – with a bit of practice, you’ll soon become an expert at making your own Elmer’s glue from scratch!
Step 2: Add Corn Syrup and White Vinegar
To proceed with making Elmer’s glue in your own kitchen, the next step is to add corn syrup and white vinegar to the water in the saucepan. These ingredients are crucial in achieving the perfect consistency and texture of the glue.
Corn Syrup: It is a sweet liquid made from corn starch. This ingredient is added to provide the glue with the right amount of thickness. It also helps in increasing the adhesive abilities of the glue.
White Vinegar: This ingredient is a type of acetic acid that brings an acidic balance to the glue. It works together with the corn syrup and baking soda to make the mixture more viscous. It also contributes to the preservation of the glue, lengthening its shelf life.
Pro Tip: Be sure to use clear corn syrup and white vinegar for a better outcome.
Here’s a table summarizing the ingredients needed in this stage:
| Ingredients | Amount |
|---|---|
| Water | 1 cup |
| Corn Syrup | 1/2 cup |
| White Vinegar | 1/4 cup |
Mix these ingredients until they are blended well in the saucepan. Next, proceed to the third step of the recipe.
Step 3: Add Baking Soda and Stir
Now that you have added corn syrup and white vinegar to the saucepan, it’s time to add baking soda to the mixture. This will help in creating a thick and adhesive consistency for the glue. Here’s how to do it:
- Using a measuring spoon, add 1/4 teaspoon of baking soda to the saucepan.
- Stir the mixture thoroughly until the baking soda is completely dissolved and evenly distributed throughout the mixture.
It is essential to mix the baking soda thoroughly and make sure that it gets well-dissolved in the mixture. Otherwise, it could form lumps and make the consistency of the glue rough.
Be sure to add the baking soda gradually, as adding too much baking soda can cause the mixture to become too thick. Adding just the right amount will help you achieve the desired consistency and texture for your glue.
After the baking soda is well mixed in, you can proceed to the next step in the process.
Step 4: Heat and Mix the Ingredients
Now that you have added all the ingredients to the saucepan, it’s time to start heating and mixing them. This step is crucial in making sure that all the ingredients are mixed together properly and the glue is smooth and consistent. Follow the steps below for best results:
| Steps | Description |
|---|---|
| Step 1: | Place the saucepan on the stove and turn on the heat to medium-low. You want the mixture to heat up slowly and not boil. |
| Step 2: | Start stirring the mixture with a whisk or a spoon. This will ensure that all the ingredients are mixed together properly and the glue doesn’t burn at the bottom. |
| Step 3: | Continue stirring the mixture for 10-15 minutes or until it starts to thicken. The mixture should be smooth and glossy in appearance. |
| Step 4: | Once the mixture has thickened, reduce the heat to low and continue to stir for another 5-10 minutes. This will allow the mixture to cook properly and the glue to become more consistent. |
| Step 5: | Remove the saucepan from the heat and let it cool for a few minutes before adding the gelatin. It’s important not to add the gelatin while the mixture is too hot, as this can cause it to clump together. |
Remember to stir the mixture continuously throughout this step to prevent any clumping or burning. Once you have completed this step, you are ready to move on to the next step in the process.
Step 5: Add the Gelatin
Before adding the gelatin, be sure that the mixture is just about to boil. Adding the gelatin will ensure that the glue mixture becomes thick and sticky, just like conventional Elmer’s glue.
Here’s how to add the gelatin:
| Step | Ingredients | Instructions |
|---|---|---|
| Step 5: | Gelatin | Slowly sprinkle the gelatin into the mixture while stirring constantly. Keep stirring until the gelatin is completely dissolved. Make sure there are no clumps of gelatin left in the mixture. |
Gelatin is an essential ingredient that adds the sticky consistency to the glue. It should be added slowly while stirring continuously to avoid any clumps from forming.
It’s also important to ensure that the gelatin is completely dissolved. Failure to dissolve it fully may cause clumps to form within the glue mixture. These clumps may prevent the glue from working effectively.
After adding the gelatin, stir it for a few more minutes to ensure that it blends well with the other ingredients. Once the gelatin is fully dissolved, you’re now ready to move on to the next step and strain the mixture before pouring it into a container.
Step 6: Strain the Mixture and Pour into a Container
Once all the ingredients are properly mixed, the next step is to strain the mixture and pour it into a container. Straining the mixture is important, as it ensures that any lumps or impurities are removed before pouring.
To strain the mixture, you’ll need a fine-mesh sieve or cheesecloth. Place the sieve or cheesecloth over a bowl or container and carefully pour the mixture through it. Use a spatula to push the mixture through the sieve or cheesecloth to ensure that all of the mixture is strained.
Pro Tip: If you’re using cheesecloth, be sure to wet it with water first. This will help it catch more of the impurities and ensure a smoother consistency for your homemade Elmer’s glue.
Once the mixture is strained, pour it into a container. A Mason jar or plastic storage container with a lid works well for this. The mixture will need to cool down and set for several hours before it’s ready to use.
Note: Homemade Elmer’s glue may not be as strong as commercial-grade glue, so be sure to test it on a small area before using it on a larger project. Store the glue in a cool, dry place for up to two weeks. If the mixture starts to separate or develop a strange odor, discard it and make a fresh batch.
Usage and Storage
Once you have successfully made your DIY Elmer’s glue, it’s important to know how to use and store it properly to maximize its longevity and usefulness. Firstly, make sure to store your homemade glue in an airtight container to prevent it from drying out or becoming contaminated with dust and debris. A mason jar or plastic container with a tight-fitting lid would be ideal for storing your glue.
When using your homemade glue, keep in mind that it may not have the same level of adhesive strength as store-bought glue. However, it can still be used for a variety of crafting and household projects. One important tip to keep in mind is to apply the glue thinly and evenly to the surface you are adhering. This will help ensure a strong hold and prevent the glue from drying too thick and causing paper or other materials to warp or wrinkle.
It’s also important to allow the glue to dry completely before handling or using the object you have glued. Depending on the temperature and humidity of the room, your glue may take several hours to dry completely. You can speed up the drying process by placing the glued item in a warm, dry spot with good ventilation.
If you need to thin out your homemade glue, you can do so by mixing in a small amount of warm water, little by little, until you reach your desired consistency. Be careful not to add too much water, as this can weaken the strength of the adhesive.
Finally, keep your glue out of reach of young children and pets, as it can be harmful if ingested or inhaled. If you accidentally get glue on your skin or in your eyes, rinse with cool water immediately and seek medical attention if necessary.
By following these usage and storage tips, you can get the most out of your DIY Elmer’s glue and create all kinds of fun and functional projects.
Troubleshooting Tips
Even though making Elmer’s glue is a fun and easy DIY project, there are still some common problems that might arise. Don’t panic if your mixture isn’t turning out the way it should – most issues can be easily fixed! Let’s take a look at some troubleshooting tips to help you get the perfect consistency and texture for your homemade glue. Keep reading to find out how to troubleshoot common issues so that you can get back to crafting in no time.
The Mixture is Too Thick
If the mixture turns out to be too thick, don’t worry, there are ways to fix it. Here are some tips:
- Heat it up: One way to thin the mixture is by heating it up. Place the container with the mixture in a warm water bath and allow it to sit for a few minutes. This should help it to melt and become thinner.
- Add more water: You can also add more water to the mixture. Start by adding a small amount of water and mix it in thoroughly. Keep adding water until you reach the desired consistency. Just be careful not to add too much water, or the glue may become too watery and lose its adhesive properties.
- Add more baking soda: Baking soda is a natural leavening agent, and adding more of it to the mixture can help to loosen it up. Start by adding a small amount of baking soda at a time and mix it in thoroughly until the mixture reaches the desired consistency.
- Store it differently: If you’ve already made the glue and it’s too thick, you can try storing it differently. Place the container in a warm area and let it sit for a few hours. This will help the glue to become thinner over time. Alternatively, you can add a small amount of warm water to it and stir until you get the desired consistency.
Remember to take your time and be patient. Thick glue may be frustrating to work with, but there are easy ways to correct the consistency.
The Mixture is Too Thin and Runny
If the mixture turns out to be too thin and runny, don’t panic! There are a few reasons why this might have happened and ways to fix it.
Possible reasons for a thin and runny mixture:
| Reason | Solution |
|---|---|
| You added too much water or didn’t let the mixture cook long enough | Next time, be sure to measure your ingredients accurately and follow the recipe instructions closely. Also, let the mixture simmer on low heat for a longer period of time to allow it to thicken. |
| You didn’t add enough gelatin | Add more gelatin to the mixture and stir until it thickens. You can also try heating the mixture again and letting it cool to see if it thickens up on its own. |
| The mixture was not strained properly | Strain the mixture again through a fine mesh strainer to remove any lumps or clumps. This will help thicken the mixture and make it less runny. |
| You used the wrong type of gelatin | Make sure to use unflavored gelatin in the recipe. Flavored gelatin may alter the consistency of the glue and make it too thin and runny. You can also try using a different brand of gelatin to see if it makes a difference. |
Quick fix for a thin and runny mixture:
If you need to use the glue right away and it’s too thin and runny, try adding a small amount of flour or cornstarch to the mixture to thicken it up. Add a little at a time and stir the mixture until it reaches the desired consistency. However, keep in mind that this quick fix may affect the overall quality and effectiveness of the glue. It’s better to follow the recipe instructions carefully to avoid this issue in the first place.
The Mixture has a Strange Smell
If the DIY Elmer’s glue mixture has a strange smell, it could be an indication of a few issues that need to be examined. Firstly, before delving into the root cause of the smell, it’s important to ensure that all the ingredients used are fresh and have not expired.
Once you’ve established that all the ingredients are fresh and the strange smell still persists, you may want to consider the following potential issues:
| Potential Issue | Solution |
|---|---|
| The vinegar has gone bad | Discard the vinegar and use a fresh batch |
| The gelatin has gone bad | Discard the gelatin and use a fresh batch |
| The mixture has been overheated | Reduce the heat and gently stir until the glue reaches the desired consistency |
| Mold or bacteria has formed in the mixture | Discard the entire mixture and start again with fresh ingredients, making sure to keep all surfaces and utensils clean and sanitized throughout the process |
It’s important to note that if the strange smell persists even after trying these solutions, it may be best to discontinue the use of the glue and make a fresh batch. In general, a strange smell from any homemade concoction might indicate that something has gone wrong in the process, and it’s always better to err on the side of caution when it comes to using homemade products.
Conclusion
In conclusion, making your own Elmer’s glue is a fun and easy DIY project that can save you money in the long run. By using simple ingredients that are readily available at most grocery stores, you can create a high-quality glue that works just as well as the store-bought options. Plus, you can customize the recipe to fit your desired consistency.
Whether you’re using the glue for arts and crafts projects, school assignments, or household repairs, knowing how to make your own Elmer’s glue gives you more control over the quality and cost of your supplies. With a little bit of practice, you’ll be able to whip up a batch of homemade glue in no time.
Remember to store your glue in an airtight container, and keep it in a cool, dry place to extend its shelf life. And, if you run into any issues with the consistency or smell of your glue, refer back to our troubleshooting tips to solve the problem.
So why not give it a try? Making your own Elmer’s glue is a great way to exercise your creativity, save money, and have fun all at the same time. So gather your materials, follow the recipe, and get ready to enjoy the benefits of this versatile adhesive.
Frequently Asked Questions
What can I use Elmer’s glue for?
Elmer’s glue is a versatile adhesive that can be used for school projects, crafting, and even household repairs.
Can I substitute corn syrup with other sweeteners?
No, corn syrup is the best sweetener to use in this recipe as it helps to create the desired texture of the glue.
Can I use apple cider vinegar instead of white vinegar?
While you can use apple cider vinegar, it may change the color and scent of the glue. White vinegar is recommended for the best results.
What type of gelatin should I use?
Unflavored gelatin is the best option to use in this recipe as it does not affect the color or scent of the glue.
Can I add food coloring to the glue?
Yes, you can add food coloring to the glue for a fun and colorful touch. Add it before straining the mixture in step 6.
How long does the glue last for?
The glue can last for several months when stored properly in an airtight container. Discard if it becomes moldy or has a foul odor.
Can I double or triple the recipe?
Yes, you can double or triple the recipe as needed. Just make sure to use a larger saucepan and container for storage.
What is the consistency of the glue?
The consistency of the glue will be similar to that of store-bought Elmer’s glue, but it may be slightly more runny.
Is this recipe safe for children?
Yes, this recipe is safe for children to use as it is made with non-toxic and food-safe ingredients. However, adult supervision is still recommended when using any type of glue.
Can I use this glue for slime?
Yes, this glue can be used for making slime. Just mix it with other ingredients such as borax or contact lens solution to create the desired texture.