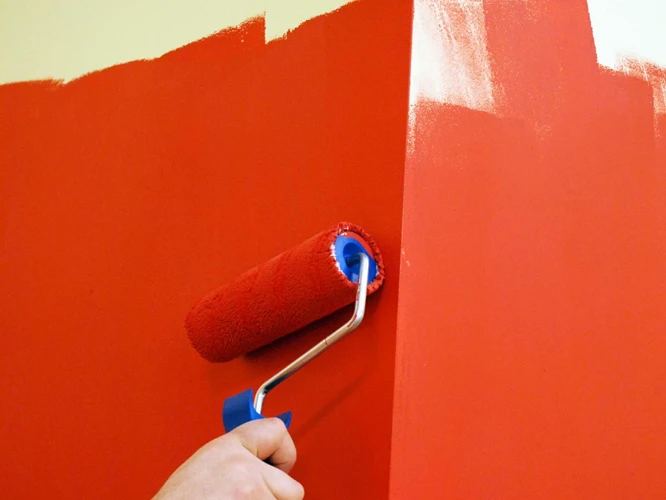
As a beginner in the world of interior design, you may be overwhelmed with the many painting techniques available. If you’re looking for a simple yet stylish option, consider sponge painting. This technique involves using a sponge to apply paint to walls, furniture, or decor, creating a unique textured effect. However, getting started with sponge painting can be daunting with so many choices to make. Fear not! In this article, we will cover the dos and don’ts of sponge painting, as well as tips for success, to help you confidently achieve a stunning and professional-looking finish.
Dos
When it comes to sponge painting, there are certain dos and don’ts to keep in mind in order to achieve the best results. These tips will help beginners create a beautiful, textured finish on their walls, furniture, or even ceiling. By following these dos, you can ensure a successful project that you’ll be proud of for years to come. Remember, if you’re looking for more information or inspiration, be sure to check out our ultimate guide to sponge painting walls or our sponging techniques for faux finishes.
Choose the Right Sponge
Choosing the right sponge is crucial for achieving the desired sponge painting effect. If you don’t use the right sponge, you may end up with a splotchy and uneven finish. Here are some factors to consider when choosing a sponge for sponge painting:
| Factor | Description |
|---|---|
| Shape | The shape of the sponge will affect the type of texture you can create. A natural sea sponge is best for achieving a mottled, irregular texture, while a synthetic sponge is better for creating a more uniform pattern. |
| Texture | The texture of the sponge will also influence the final result. A coarse sponge will create larger, more defined texture, while a fine sponge will create a softer, subtler texture. |
| Size | The size of the sponge will determine the size of the pattern. A small sponge is best for creating small, intricate patterns, while a larger sponge is better for larger surfaces. |
| Quality | Investing in a high-quality sponge can make a difference in the final result. A cheap sponge may not hold up well during the painting process and can break apart or leave debris behind, resulting in an uneven finish. |
It is also important to note that using different types of sponges together can create a unique, layered effect. For example, using a coarse sponge followed by a fine sponge can create a dimensional, layered texture. Experiment with different sponge combinations to find the effect you like best.
If you want more information on sponge painting, check out our related articles: “Sponge Painting Furniture: Tips and Tricks”, “Sponge Painting vs Rag Rolling”, “Creating Texture with Sponge Painting: Ideas and Inspiration”, and “Sponge Painting a Ceiling: Pros and Cons”.
Use the Right Paint Consistency
Using the right paint consistency is essential when sponge painting. If the paint is too thick, the texture will not come out as desired, and if the paint is too thin, the color will not show up as much. Here are some tips for achieving the perfect paint consistency for your sponge painting project:
| Do | Don’t |
|---|---|
| Mix your paint with water or a medium to thin it out | Use paint straight from the container without thinning it out |
| Test your paint consistency on a small area before starting the project | Assume that the paint consistency will be the same across all colors and brands |
| Use a paintbrush or stir stick to mix the paint and water/medium thoroughly | Shake the paint container vigorously to mix the paint with the water/medium |
| Gradually add small amounts of water/medium to the paint until you reach the desired consistency | Add too much water/medium all at once, which can ruin the paint and cause it to be too thin |
By following these dos and don’ts, you can ensure that your paint consistency is just right for sponge painting. Remember, it’s always better to start with a paint that is too thick and gradually thin it out as needed rather than making it too thin from the start.
Practice the Technique
One important aspect of sponge painting to keep in mind is that it requires practice to perfect the technique. Here are some tips to help you practice effectively:
- Start with a small area: It’s best to begin with a small area, like a test board or a section of wall in a less visible location, before working on a larger surface. This will give you a chance to test out different sponges and paint consistencies without committing to a whole room.
- Experiment with different techniques: There are many different techniques you can use with sponge painting, so don’t be afraid to experiment with different patterns and textures. For example, you can try dabbing the sponge lightly and quickly for a more muted look, or pressing the sponge down firmly and moving it in a circular motion for a more dramatic effect.
- Blend colors carefully: One of the most important things to keep in mind when sponge painting is the art of blending colors. To do this, you’ll need to use more than one paint color and blend them together where they meet. Start by dabbing one color on the wall, then dab the second color near it, overlapping slightly. Then, blend the two colors together with the sponge using a light circular motion until you achieve the desired look.
- Be patient and work in sections: Sponge painting can be a time-consuming process, but it’s important to take your time and work in small sections. Rushing through the process can lead to uneven results or paint drips. Take breaks if you need to, and tackle one section at a time.
- Step back to assess your work: It’s important to step back from your work regularly to assess your progress and make sure you’re happy with how the colors and patterns are blending together. If you notice any areas that need touching up, wait until the paint is dry before going back over them with the sponge.
By practicing these techniques and taking your time, you’ll be able to create a beautiful sponge-painted surface that you’ll be proud to show off in your home.
Blend the Colors
One key aspect of sponge painting is achieving a seamless blend of colors. To do this, you should:
- Start with a base color: Choose a base color and paint the entire surface with it. This will serve as the foundation for your sponge painting and help the other colors blend smoothly.
- Mix your colors: Use a palette or paper plate to mix your colors. Experiment with different combinations to find what you like best. You can mix the paint by dipping your sponge in different colors one at a time, or by blending them together on the palette.
- Dab the sponge: Before applying the paint to the wall, dab the sponge lightly on a paper towel to remove excess paint. This will prevent clumps of paint from ruining your blend.
- Sponge paint: Once you have your colors mixed and your sponge ready, start dabbing the sponge onto the wall. Use a light touch and a random pattern to create a natural look. Remember to blend the colors by overlapping them slightly.
- Step back: After each section, step back and look at the overall effect. If you see any harsh lines or uneven patches, use your sponge to blend them in.
- Layer your colors: To create depth and dimension, layer your colors. Start with the lightest color and work your way up to the darkest. You can also use different size sponges to add variety to your pattern.
By following these steps, you can achieve a beautiful, blended look with your sponge painting. Remember that practice makes perfect, so don’t be afraid to experiment and try new techniques.
Create a Focal Point
When sponge painting, it’s important to create a focal point in your design. This will be the area that draws the eye and adds interest to your finished piece. Here are some tips for creating a focal point:
- Choose a prominent location: Think about where you want your focal point to be. It could be a central area on the wall, such as above a fireplace or bed, or a smaller section that you want to highlight.
- Use contrasting colors: To make your focal point stand out, use contrasting colors. This could mean using a darker hue on the sponge for that section, or adding a brighter color on top of the base coat.
- Add texture: Another way to create a focal point is to add texture. This could be achieved by using a different sponge, or by layering colors with a dabbing motion. Experiment with different techniques to bring more interest to your design.
- Create a pattern: If you’re feeling confident in your sponge painting skills, you could try creating a pattern in your focal point area. This could be a geometric design or a series of organic shapes.
By following these tips, you can create a focal point that enhances the overall look of your sponge painted wall. Remember, the goal is to add interest and draw the eye, so be bold and experiment with different techniques.
Experiment with Different Textures
Creating different textures with sponge painting is a great way to add depth and interest to your walls. Experimenting with various textures can also help you achieve the desired look for your space. Here are some ideas for textures to try:
| Texture | Technique |
| Soft and Smooth | Use a natural sea sponge to apply the paint in a circular motion. Use a light touch to create a velvety texture. |
| Speckled | Dab a dry sponge onto wet paint to create a spotty, speckled look. |
| Clouds | Apply a base coat, then use a sea sponge to lightly dab on a different color in a cloud-like pattern. |
| Brick | Create a brick-like texture by using a rectangular sponge to create evenly spaced, vertical and horizontal lines. |
| Marbled | Dab two or three complementary colors onto a paint tray, but don’t mix them. Dip the sponge into the different colors and use a gentle rocking motion to apply the paint to the wall. |
By experimenting with different textures, you can create a unique and visually appealing look for your space. Just remember to use a light touch and allow each layer to dry before adding additional texture.
Don’ts
As much as it is important to know what to do while sponge painting, it is just as crucial to understand what not to do. If you’re a beginner, it’s common to make mistakes while attempting a new technique. However, it’s important to remember a few don’ts to avoid making any permanent errors on your walls. Here are some essential tips that you should follow to avoid any mishaps while sponge painting.
Don’t Overload the Sponge
When sponge painting, it can be tempting to load up the sponge with paint in order to create a bold statement. However, overloading the sponge can actually have the opposite effect, resulting in a messy and uncontrolled look. Here are some guidelines to follow to avoid overloading your sponge:
| Do: | Don’t: |
|---|---|
| Use a small amount of paint at a time | Load up the sponge with too much paint |
| Start with a light layer and build up as needed | Saturate the sponge with paint from the beginning |
| Use a separate sheet of paper or cardboard to offload excess paint before applying to your surface | Apply paint directly from the paint can or palette without removing excess |
By following these guidelines and avoiding overloading your sponge, you can achieve a more controlled and visually appealing sponge painting technique. Remember, you can always add more paint to your sponge as needed, but it’s much harder to remove excess paint once it’s been applied.
Don’t Press Too Hard
When sponge painting, it’s important to remember not to press too hard. This can be a common mistake for beginners who may think that using more force will lead to better coverage or more distinct patterns. However, pressing too hard can lead to paint seeping underneath the sponge and uneven application.
To avoid this mistake, try using a light touch when applying the sponge to the surface. Remember that sponge painting is meant to create a subtle, textured effect, so there’s no need for heavy pressure. Use a light dabbing motion and let the sponge do the work.
Another benefit of not pressing too hard is that it allows for better control of the paint. When using a light touch, it’s easier to see where the paint is being applied and make adjustments as needed. This can help create a more precise and intentional design.
Here are some tips for avoiding pressing too hard:
- Hold the sponge with a relaxed grip
- Use a dabbing motion with moderate pressure
- Step back periodically to assess the overall pattern and adjust as needed
- Practice on a smaller, less visible area before tackling a larger space
Remember, patience and a light touch are key to successful sponge painting. Don’t rush the process or apply too much pressure in an attempt to speed things up. With practice and a gentle touch, you can create beautiful, textured designs on any surface.
Don’t Use Too Much Paint
When sponge painting, it can be tempting to use a lot of paint to try and create a bold effect. However, using too much paint can actually ruin your project. Here are some reasons why you should be careful not to use too much paint:
- It can make the colors appear muddy: When you use too much paint, the colors become saturated and can blend together in a way that makes the painting look muddy and unclear. This can detract from the overall effect you are trying to achieve.
- It can cause the paint to drip: When you use too much paint, it can start to drip down the wall or surface you are painting on. This can create mess and ruin the project. It’s important to use just enough paint to achieve the effect you want.
- It can make the surface sticky: When you use too much paint, the surface you are painting on can become sticky and difficult to work with. This can make it hard to achieve the desired result and can make the project look messy and unprofessional.
- It can create an uneven surface: Using too much paint can create an uneven surface that is bumpy or lumpy. This can make it difficult to achieve the desired effect, especially if you are trying to create a smooth or textured finish.
To avoid these problems, it’s important to use just enough paint to create the effect you want. This may take some practice, so don’t be discouraged if your first few attempts don’t turn out perfectly. With some experimentation and patience, you will be able to achieve beautiful sponge painting effects without using too much paint.
Don’t Overdo It
When it comes to sponge painting, less is often more. It can be tempting to keep adding more paint and texture to your surface, but it’s important to know when to stop. Overdoing the technique can result in a messy and cluttered finish, which can detract from the overall look of the room. Here are some things to keep in mind to avoid overdoing it:
| Tip | Description |
| Limit the Number of Colors | Using too many colors can lead to a busy and overwhelming finish. Stick to a few complementary colors and blend them together seamlessly for a cohesive look. |
| Know When to Stop | Don’t keep adding more texture and paint just because you think it’s not enough. Step back from your work and evaluate whether more is truly necessary. |
| Avoid Creating a Patchwork Look | Sponge painting in different areas of the room can give it a disjointed and patchwork look. Instead, focus on creating one cohesive look throughout the space. |
| Consider the Room’s Style | Be mindful of the overall style of the room. Overdoing the sponge painting technique can clash with other design elements and make the room feel chaotic. |
By following these tips, you can avoid overdoing the sponge painting technique and achieve a beautiful, polished finish that enhances the overall look and feel of your space.
Tips for Success
As a beginner in sponge painting, you might feel unsure about how to achieve the desired results. Fortunately, by following the dos and don’ts we’ve discussed, you can feel confident in your technique. However, there are a few additional tips that can help you achieve success with sponge painting. In this section, we’ll explore some helpful tips that will increase your chances of achieving the desired effect and will ensure that your project is a success.
Prepare the Room
Before starting your sponge painting project, it’s important to prepare the room properly to ensure a successful outcome. Follow these tips to ensure everything is set up properly:
| Clear the Area | Make sure the area where you’ll be painting is clear. Remove all furniture, decorations, and other items that could get in the way or be damaged by paint splatters. |
| Protect the Floor | Next, protect the floor with drop cloths or newspapers to catch any paint drips or spills. |
| Mask the Trim | Use painter’s tape to mask off the trim, baseboards, and other areas you don’t want to get paint on. Make sure the tape is securely in place to prevent bleeding. |
| Open the Windows | Make sure the room is well-ventilated by opening windows and doors for fresh air. This will help the paint dry faster and reduce the fumes. |
Taking these precautions will not only protect your surroundings, but also increase your comfort and safety while painting. By preparing the room beforehand, you can focus on perfecting your sponge painting technique without worrying about potential mishaps or hazards.
Test the Technique
Before beginning any sponge painting project, it is important to test the technique first. This helps you get familiar with the tools and paint and ensures that you achieve the desired results.
Here are some tips for testing the technique:
- Prepare a sample board: Use a piece of cardboard or scrap wood to create a sample board. This will give you a surface to test your sponge painting technique on and will help you get an idea of what the finished product will look like.
- Choose the colors: Select the colors you will be using for your project and apply them to the sample board. This will help you test how the colors look together and how they blend when using the sponge.
- Practice different techniques: Try different techniques on the sample board, such as stippling, dragging, or swirling the sponge. This will help you find the technique that works best for your project and gives you the desired effect.
- Observe the drying time: Allow the paint to dry on the sample board and observe how the colors change as they dry. This will give you an idea of how the finished product will look when it is completely dry.
- Make adjustments: If the results are not what you expected, make adjustments. You may need to experiment with the amount of paint on the sponge, the pressure you apply, or the technique you are using.
Testing the sponge painting technique before starting your project can save you time and frustration in the long run. It allows you to make any necessary adjustments and ensures that you achieve the desired results.
Have a Plan
One of the most important things to keep in mind when starting your sponge painting project is to have a clear plan in place before you begin. This plan should include what materials you will need, what colors you will use, and what design you are going to create. Here are some tips to help you create a successful plan.
- Research different techniques: First, research different sponge painting techniques to get inspiration and ideas for your project. Look for images online or in design magazines and take note of designs or color combinations that resonate with you.
- Choose your color scheme: Next, choose your color scheme. Think about the mood or atmosphere you want to create with your sponge painting and choose colors that will achieve that effect. Consider using colors that complement each other or shades of the same color for a monochromatic look.
- Sketch out your design: Once you have your color scheme in mind, sketch out your design on paper. This will give you a clear idea of what your finished project will look like and help you make adjustments before you start painting.
- Plan your technique: Decide on your sponge painting technique and plan out how you will apply the paint. Will you use a light touch for an airy, subtle effect or a heavy hand for a bold, textured look? Make sure you know what you’re going for before you begin.
By having a plan in place before beginning your sponge painting project, you can save time and avoid mistakes. Remember to be open to making changes if necessary but having a clear plan will help you stay focused and produce a finished project that you love.
Be Patient
One of the key tips for success when sponge painting is to be patient. This technique takes time and effort to get right, so it’s important to stay calm and not rush the process. With sponge painting, it’s all about building up layers gradually, and this can take some time.
Patiently apply one layer at a time, waiting for each layer to dry before adding the next one. Rushing the process can result in smudging, streaking or blotching. Trust the process and give it the time it needs to work.
It’s also important to be patient with yourself. If at first, the technique doesn’t look quite the way you want it to, don’t worry. Sponge painting is a skill that takes practice to perfect. Keep at it and remember that mistakes can be corrected.
Keeping a calm and patient attitude throughout the process will not only lead to better and more even results but also make it a more enjoyable experience. Remember, sponge painting is a fun and creative way to decorate your home, so take your time and enjoy the process.
| Do: | Don’t: |
| Take your time. | Rush the process. |
| Apply one layer at a time. | Overload the sponge. |
| Trust the process. | Press too hard. |
| Remember that mistakes can be corrected. | Use too much paint. |
| Enjoy the process. | Overdo it. |
Clean Up Carefully
After completing your sponge painting project, it’s important to clean up carefully to maintain the longevity of your tools and keep the work area tidy. Here are some tips to ensure proper clean-up:
- Wipe the sponge: After using the sponge, squeeze out any excess paint and wipe it down with a clean, damp cloth. This will prevent the paint from drying and clogging the sponge.
- Clean the brushes: If you used brushes to touch up certain areas, clean them thoroughly with warm water and soap. Make sure to remove all paint residue and reshape the bristles before allowing them to dry.
- Protect the work surface: Once you remove all the tools from the work surface, clean up the surrounding areas. Use a damp cloth or wet wipes to remove any paint smudges or splatters. Protecting your work surface will prevent accidental paint drips from ruining your furniture, carpet or flooring.
- Dispose of waste properly: During a painting project, it’s important to have a garbage bag or container ready to collect all disposable items. This includes paint cans, brushes, mixing palettes and sponges. Properly disposing of waste will keep your workspace clean and safe for future projects.
- Store materials: Once everything has been cleaned and disposed of, store your painting materials properly in a cool, dry place. Store your sponges in a sealable plastic bag to prevent them from accumulating dust or moisture. Keeping your materials organized will make it easier to find them for future projects.
By cleaning up carefully, you are not only extending the life of your tools, but also ensuring that your next project starts off on the right foot. A clean workspace allows for more creativity and less stress, making your painting experience more enjoyable overall.
Seal the Finish
Once you have completed your sponge painting project, it is important to seal the finish to protect it from damage and ensure it lasts for a long time.
One of the best options for sealing your sponge painting is to use a clear, water-based sealer. This will provide a durable finish that is resistant to water and UV rays, which can cause fading over time. Additionally, it will help to keep your sponge painting looking fresh and vibrant for years to come.
To apply the sealer, start by cleaning the surface of any dust or debris that may have collected during the painting process. Then, use a clean and dry brush or roller to apply the sealer in a thin and even coat. Be sure to follow the manufacturer’s instructions for application and drying times.
After the first coat has dried, you may opt to apply a second or even third coat if necessary. This will provide extra durability and protection to your sponge painting. Be sure to allow enough time for each coat to dry completely before applying the next.
Once all coats have been applied and dried, you can enjoy your newly sealed sponge painting for years to come. Regular maintenance and cleaning will help to ensure its longevity and keep it looking its best.
Conclusion
In conclusion, sponge painting is a great DIY technique for beginners looking to add some texture and dimension to their walls. By following the dos and don’ts outlined in this article, you can achieve professional-looking results in no time.
Remember to choose the right sponge for the job and use the right paint consistency. Practice the technique before you start, and blend your colors carefully for a seamless finish. Don’t overload your sponge or press too hard, and avoid using too much paint or overdoing it.
If you want to experiment with different textures, go ahead and have some fun with it. Create a focal point or accent wall to really make a statement in the room.
Before you start, make sure to prepare the room and test the technique on a small area first. Have a plan and be patient throughout the process. Clean up carefully after you’re finished, and seal the finish for long-lasting results.
Overall, with a little bit of practice and some patience, anyone can master the art of sponge painting. So why not give it a try and add some personality and visual interest to your walls today?
Frequently Asked Questions
What types of sponges can I use for sponge painting?
You can use natural sea sponges or synthetic sponges with different textures.
Do I need special paint for sponge painting?
No, you can use any type of paint for sponge painting, but it’s recommended to use an eggshell or satin finish for better results.
Can I sponge paint on any surface?
Yes, you can sponge paint on any surface, but it’s important to prepare the surface by cleaning and priming it first.
How do I create a focal point with sponge painting?
You can create a focal point by using a different color or texture in a specific area of the painting.
Do I need to blend the colors when sponge painting?
Yes, blending the colors will make the painting more natural and visually appealing.
How do I avoid overloading the sponge?
You can avoid overloading the sponge by dabbing it on a paper towel before applying it to the surface.
Can I use different sized sponges for sponge painting?
Yes, using different sized sponges can create different textures and patterns in the painting.
How long does it take for sponge painting to dry?
Drying time depends on the type of paint used, but it can take several hours or overnight to fully dry.
Can I sponge paint with multiple colors at once?
Yes, using multiple colors can create a more dynamic and interesting painting.
Do I need to seal my sponge painting?
Yes, sealing the painting with a clear coat will protect it from wear and tear.