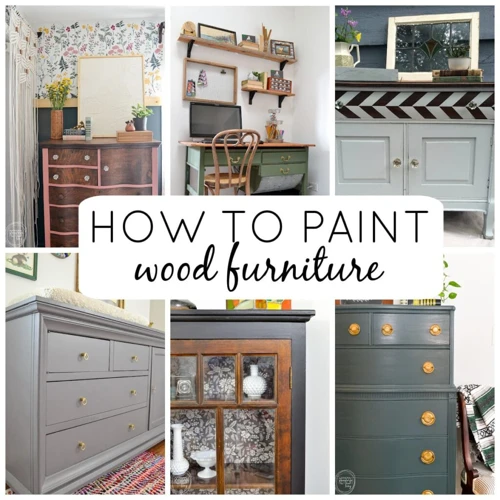
Have you ever looked at a piece of furniture and thought it could use a bit of a facelift? Have you considered sponge painting? It may seem intimidating if you’ve never tried it before, but with the right tools and techniques, you can transform your old furniture into a beautiful work of art. In this guide, we’ll walk you through the steps of sponge painting furniture, from choosing the right sponge and furniture to applying the base coat, using sponge painting techniques, and adding the finishing touches. So, let’s dive in and bring some life back to your furniture!
Choosing the Right Furniture and Sponge
When it comes to sponge painting furniture, choosing the right pieces and tools is crucial for achieving a beautiful finish. From determining if a furniture piece is suitable for sponge painting to choosing the right sponge, these factors will greatly affect the outcome of your project. By taking the time to carefully consider these elements, you can ensure that your furniture piece will turn out just as you envisioned it. So, let’s dive into some tips on choosing the right furniture and sponge for your sponge painting project. If you want to learn more about sponge painting techniques and ideas, we recommend checking out this guide.
1.1 Determine if the Furniture Is Right for Sponge Painting
When deciding on sponge painting furniture, it is crucial to determine whether or not the piece is appropriate for this technique. Not all furniture types or styles work well with sponge painting. Smooth and plain furniture surfaces are the best options for sponge painting.
Pieces that are already heavily textured, such as carved or intricate designs, won’t showcase the sponge painting technique effectively. The texture of the furniture will overpower the sponge paint, which results in an unattractive finish. Pieces that have already been painted or varnished may not absorb the sponge paint effectively or end up with an uneven finish. The ideal type of furniture for sponge painting is unfinished wood with a smooth surface.
It’s important to note that sponge painting furniture is different from sponge painting walls or ceilings. While furniture has a distinct shape and texture, walls and ceilings are flat surfaces. So, it’s essential to remember to select the right technique for each. If you’re interested in learning more about sponge painting walls, check out our sponge paint wall guide. Additionally, if you want to compare sponge painting versus rag rolling, head over to our sponge painting vs. rag rolling article. For more ideas and inspiration on creating texture with sponge painting, check out our article on sponge painting ideas and inspiration. Before you get started, be sure to review our sponge painting tips for success.
1.1 Choose the Right Sponge
When it comes to sponge painting furniture, choosing the right sponge is crucial to achieving the desired texture and finish. There are a few different types of sponges that can be used for sponge painting furniture.
1. Natural Sea Sponges: These sponges are the most popular type for sponge painting. They are soft and absorbent, allowing for a smooth and even application of paint. They also create a more natural and organic texture than synthetic sponges.
2. Synthetic Sponges: These sponges are made from man-made materials and come in a variety of shapes and textures. They are less absorbent than natural sea sponges, which means they will create a more textured finish.
3. Painting Sponges: These sponges are specifically designed for painting and can be found at most craft stores. They come in a variety of shapes and sizes and are ideal for creating precise lines and edges.
4. Household Sponges: These sponges can be used for sponge painting in a pinch, but they are not recommended for larger projects as they tend to break down quickly.
It’s important to choose a sponge that is the right size and texture for the furniture being painted. A large sponge is ideal for larger areas, while a smaller sponge is better for edges and details. Additionally, some sponges have a more open texture than others, which will affect the final look of the painted surface.
For more information on sponge painting, check out our article on sponge painting ceilings and its pros and cons.
Preparing the Furniture and Workspace
Before you begin the sponge painting process, it is crucial to prepare both the furniture and workspace. This step ensures that the paint adheres properly and provides a smooth finish. Neglecting to prepare adequately can lead to a messy and uneven result. So, before you dive in, take the time to follow these essential steps.
2.1 Clean and Sand the Furniture
Properly cleaning and sanding the furniture is a critical step in achieving a flawless sponge-painted finish. Here are some tips to follow:
| Step | Description |
|---|---|
| Step 1: | Remove any existing finish from the furniture with sandpaper. |
| Step 2: | Scrub the furniture with warm, soapy water and a sponge to remove dirt, dust, and any other debris. |
| Step 3: | Rinse the furniture with clean water and allow it to dry completely. |
| Step 4: | Sand the furniture’s surface gently with a fine-grit sandpaper to create a smooth surface for the sponge painting. |
| Step 5: | Clean the surface with a clean, damp cloth to remove any dust left from the sanding process. |
By properly cleaning and sanding the furniture, you will ensure that the sponge paint adheres evenly to the surface, creating a beautiful and long-lasting finish. Take your time during this step to ensure that you achieve the best results possible.
2.2 Cover the Area with Protective Sheets
When starting any painting project, it’s important to protect the surrounding area from any potential spills or splatters. Covering the area with protective sheets is a crucial step in preparing the workspace. Here are some tips to keep in mind:
- Use a Drop Cloth: Lay down a drop cloth or plastic sheeting to cover the floor or work surface. This will protect against any paint drips and make clean up much easier.
- Protect Surfaces: If you’re painting a piece of furniture that has drawers or other removable features, remove them and protect them separately. Cover any parts of the furniture that you don’t want to paint with painter’s tape.
- Cover Outlets and Handles: Use painter’s tape to cover any outlets, light switches, or handles in the workspace. This will keep them clean and protected from accidental paint splatters.
- Wear Protective Clothing: Protect your own clothing by wearing old clothes or an apron. Paint can easily splatter and ruin clothing.
By taking the time to properly prepare the workspace, you can ensure a clean and organized area to work in. This will make the painting process much more enjoyable and stress-free.
Applying the Base Coat
Now that you have prepared your furniture and workspace, it’s time to start adding some color! Before you begin sponge painting your furniture, you’ll need to apply a base coat to ensure that the paint adheres properly and looks its best. In this stage, we’ll discuss some important tips and tricks for choosing the right paint and primer, as well as techniques for applying the base coat evenly. So, roll up your sleeves and let’s get started on transforming your furniture into a work of art!
3.1 Choose the Right Paint and Add Primer
When it comes to sponge painting furniture, choosing the right paint and primer is crucial to achieving a beautiful and long-lasting finish. Here’s what you should consider when selecting your materials:
- Type of paint: Look for a paint that is specifically labeled as suitable for sponge painting. This will usually be an eggshell or satin finish, which will provide the right amount of sheen and durability for furniture.
- Quality: Using a high-quality paint will not only produce better results, but will also be more resistant to chipping and peeling over time. Don’t cut corners when it comes to the quality of your paint.
- Primer: Applying a primer is essential to creating a smooth and even base coat for your sponge painting technique. Look for a product that is compatible with your chosen paint, and make sure to follow the manufacturer’s instructions for application.
- Color: Finally, consider the color you want to use for your base coat. This will influence what other colors you can successfully sponge onto the furniture, so think carefully about what shades will complement each other and the overall style of your room.
By taking these factors into consideration, you can select the right paint and primer to provide the ideal foundation for your sponge painting project.
3.2 Apply the Base Coat
Before you start with the base coat application, make sure that the workspace is clean and free of debris. Here are the steps to apply the base coat:
- Stir the Paint: Start by stirring the paint thoroughly to ensure that the color is evenly distributed in the can. Use a stir stick or a paint mixing tool for this purpose.
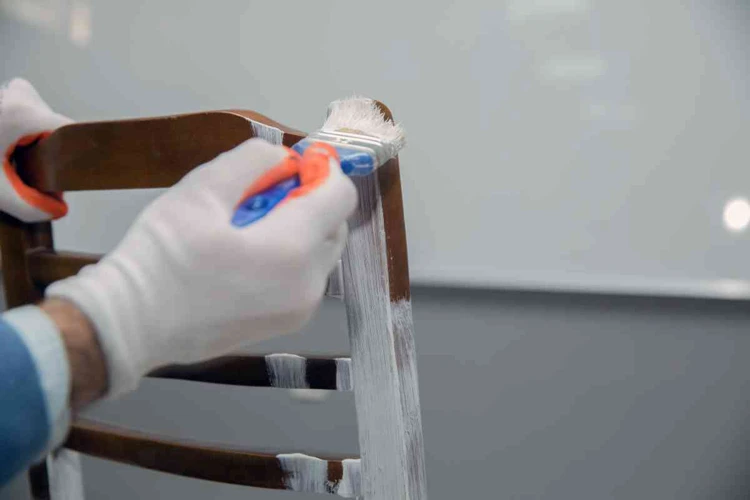
- Use a Brush: A brush with dense bristles is best for this job. Dip the brush into the paint and gently tap it on the side of the tray to remove excess paint. Make long strokes and work your way from one side of the furniture to the other.
- Avoid Overloading the Brush: You don’t want to overload the brush with paint, as this can result in a drippy, uneven finish. Remember to use light, even strokes and ensure that the paint is distributed evenly.
- Leave it to Dry: Once the base coat is applied, allow it to dry completely before moving on to the next step. This will usually take a few hours, depending on the humidity and temperature.
Following these steps will help you achieve a smooth, even base coat that is essential for a perfect sponge painting finish. Be sure to take your time and work patiently, as rushing through this step can result in an unsatisfactory finish.
3.3 Let the Base Coat Dry
After applying the base coat, it is important to give it enough time to fully dry. This will usually take around 24 hours, but may vary depending on the type of paint and the humidity of your workspace.
During this time, it is important to keep the furniture in a well-ventilated area, away from any pets or children that may accidentally touch it. Avoid touching the base coat yourself, as this may cause smudges or imprints.
To ensure proper drying, it is recommended to check the paint label for specific instructions. Some paints may require a certain temperature or humidity level for optimal drying. You may also want to set up fans or open windows to promote air flow and speed up the drying process.
Remember, rushing the drying process or applying additional layers of paint before the base coat is dry can result in a poor finish. Take your time and allow the base coat to fully dry before moving on to the sponge painting techniques.
Sponge Painting Techniques
Once you’ve prepared your workspace and applied the base coat, it’s time to start sponge painting your furniture. While it may seem daunting at first, sponge painting is actually quite simple and can create stunning results. Here are some tips and tricks for mastering the technique and achieving a beautiful finish.
4.1 Dip the Sponge in the Paint
The first step in sponge painting furniture is dipping the sponge in paint. This may seem simple, but there are a few things to consider to achieve the best results. Here are some tips:
| Tip | Description |
| 1 | Choose the right amount of paint |
| 2 | Use a palette or paper plate to hold the paint |
| 3 | Don’t overload the sponge with paint |
| 4 | Tap the sponge lightly on the surface of the paint to avoid excess paint |
| 5 | Use a separate sponge for each color to avoid muddying the colors |
By following these tips, you can ensure that you have the right amount of paint on your sponge, and that your colors stay bright and distinct. Keep these tips in mind as you move onto the next steps of sponge painting your furniture.
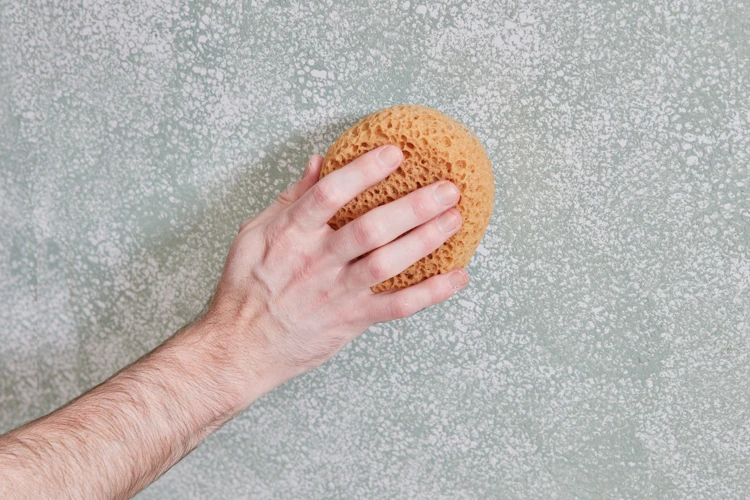
4.2 Dab the Sponge on the Furniture
Once you have your sponge ready and your paint mixed to the desired color, it’s time to start sponge painting your furniture. To begin, dip the sponge into the paint and make sure it is coated evenly. It’s best to use a small amount of paint at a time to avoid dripping and to achieve a more controlled result.
Next, dab the sponge on the furniture in a random pattern. Be sure to vary the pressure and angle of the sponge to create dimension and depth to the painted surface. You can cover the whole piece or just highlight certain areas with the sponge.
Remember to work in small sections at a time and to blend each section into the next to avoid harsh lines and edges. It’s also important to use a light touch, so the paint does not become too thick and gloppy.
If you want to create a more textured look, you can layer the paint with different sponges of varying sizes and shapes. This will create a more intricate and interesting design.
To achieve a more natural look, try blending the colors together by overlapping them and using a dry sponge to soften the edges. You can also experiment with different patterns and textures to achieve the desired effect.
Remember that sponge painting is a forgiving technique. Don’t be afraid to make mistakes and try things out until you achieve the desired look.
4.3 Layer the Paint with Different Sponges
To create a multi-dimensional look with your sponge painted furniture, don’t be afraid to layer the paint with different sponges. This technique involves using different types of sponges, such as large pore or small pore, to apply layers of paint on top of each other. It can add depth and texture to your piece, making it look more visually interesting.
Here are the steps for layering paint with different sponges:
- Start with a base coat that has dried completely.
- Choose a second color of paint that complements the base coat.
- Dampen a different sponge than the one you used for the base coat in the second color of paint.
- Lightly dab, streak, or pounce the dampened sponge onto the furniture in random areas, overlapping some areas from the base coat and leaving some areas with just the base coat.
- Continue layering the sponge with the second paint color until you achieve the desired look. You may want to layer more in some areas for a more textured look, while lightly layering in other areas for a more subtle effect.
- For even more depth and dimension, you can repeat these steps with a third or fourth color, using a different type of sponge for each layer.
Remember to let each layer of paint dry completely before applying the next layer. This will ensure that colors don’t mix and blend together too much, and it will also prevent the paint from becoming too thick and gloopy. With a little patience and experimentation, you can create a beautiful sponge painted piece of furniture that is uniquely your own.
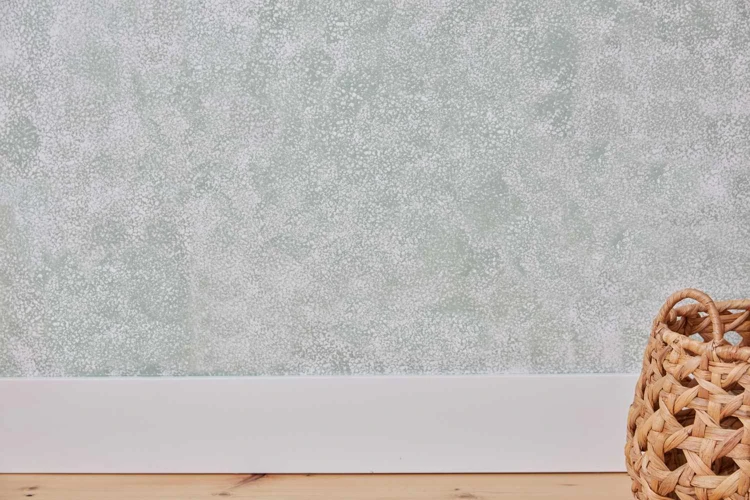
4.4 Blend the Colors for a Natural Look
Using a sponge for painting furniture allows for a unique and textured finish. To enhance this textured effect and achieve a natural look, the colors must be blended well. Here are some tips for blending colors when sponge painting furniture:
- Overlap the Colors: Overlapping the colors creates a natural and gradual transition from one color to another.
- Blend While the Paint is Wet: Blending works best when the paint is still wet, as it allows the colors to merge together more easily.
- Use a Clean Sponge: To prevent accidentally mixing or muddying the colors, use a clean sponge for each color.
- Practice on a Sample Board: Before proceeding to paint the furniture, it’s a good idea to practice blending the colors on a sample board. This will help you determine the amount of pressure and blending required to achieve the desired effect.
- Step Away for a Fresh Perspective: Blending can be a subtle effect that can be hard to see up close. To get a better idea of what the colors look like from an appropriate distance, step away from the furniture and view it from different angles.
By following these tips and taking your time, you will create a naturally blended look that will give your furniture a professional and polished finish.
4.5 Try Different Patterns and Textures
When sponge painting furniture, experimentation with different patterns and textures can lead to stunning and unique results. You can create a variety of designs and effects with just a few different sponges and some paint. Here are some ideas to get you started:
- Stripes: Use a rectangular sponge to create clean stripes. Dip the sponge into the paint and then stamp it straight onto the furniture. Mix and match colors to create contrasting stripes.
- Floral designs: Use a round sponge to create flowers. Dip the sponge into the paint and then press it onto the furniture, forming a circle. Add a contrasting color to the center of the circle to complete the flower.
- Faux marble: Use a large, round sponge to create a faux marble finish. After base coating the furniture, use the sponge to dab on different colors of paint. Use a feathering technique to blend the colors together, creating the look of marble.
- Ombré: Use a rectangular sponge to create an ombré effect. Dip the sponge into the paint and then stamp it onto the furniture in a horizontal line. Blend the color outwards with a different sponge, creating a smooth transition from one color to another.
- Splatter paint: Use a small, round sponge to create a splatter effect. Dip the sponge into the paint and then tap it with a paintbrush, splattering the paint onto the furniture.
With just a little creativity, the possibilities for patterns and textures with sponge painting furniture are endless. Don’t be afraid to experiment and try new things to create a unique piece of furniture.
Finishing Touches
As we near the end of the sponge painting process, it’s important not to rush through the finishing touches. Taking the time to properly seal and clean the furniture can make all the difference in achieving a flawless finish. In this section, we’ll explore some essential tips and tricks for ensuring that your sponge painted furniture looks its best. So grab your materials and let’s put the final touches on your masterpiece.
5.1 Apply a Sealant
After finishing the sponge painting on your furniture, it is important to apply a sealant to protect the paint from chipping or rubbing off. Here are some steps to follow when applying a sealant:
- Choose the right sealant: There are different types of sealants available in the market, such as polyurethane, wax, or varnish. Choose a sealant that complements your furniture’s finish and the type of paint used. Read the instructions on the sealant container carefully to determine its application method.
- Prepare the workspace: Ensure that the workspace is clean and free of dust or debris. Protect the surrounding area with drop cloths or newspapers.
- Apply the sealant: Using a paintbrush or a foam roller, apply the sealant evenly over the surface of the furniture. Start from one end and work your way towards the other, overlapping the strokes slightly to avoid any uneven application. Ensure that the sealant covers all the painted areas, including the corners and edges.
- Let the sealant dry: Leave the furniture to dry according to the sealant’s instructions. Avoid touching or using the furniture during this time to prevent any smudging or damage to the sealant. If a second coat is required, wait until the first coat has dried completely before applying it.
- Buff the surface: Once the sealant has dried, gently buff the surface with a soft cloth to remove any brush strokes or roller marks. This will give the furniture a smooth and shiny finish.
- Cure the sealant: Leave the furniture to cure according to the sealant’s instructions. This will ensure that the sealant has fully dried and hardened to protect the painted surface. Avoid using the furniture for a few days until the sealant has cured completely.
By following these steps, you can ensure that your sponge painted furniture has a beautiful and long-lasting finish that will stay protected for years to come.
5.2 Remove any Smudges or Mistakes
While sponge painting furniture can be a fun and creative process, it’s not always perfect. To ensure the best outcome, it’s important to take extra care to remove any smudges or mistakes that may occur. Here are some tips and tricks to do just that:
- Use a damp cloth: Dip a cloth in water and gently rub the smudged area until it fades away. Make sure not to apply too much pressure, as it can remove the paint underneath.
- Scrape off mistakes: If there’s a particularly stubborn mistake that won’t come off with a cloth, try using a scraper tool. Be careful not to scratch the surface of the furniture.
- Touch up with a brush: If you accidentally paint outside of the desired area, grab a small paintbrush and touch up the area with the base coat color.
- Let it dry: Sometimes mistakes can be easier to remove once the paint has fully dried. Wait until the paint has completely dried and then try removing the smudge with a damp cloth or scraper tool.
- Consider sanding: If the mistake is particularly noticeable, you may need to sand down the area and apply a fresh coat of paint.
Don’t worry if mistakes happen – they’re just a part of the process. With a little bit of patience and care, you can easily remove any smudges or mistakes without damaging your beautiful sponge-painted furniture.
Tips and Tricks

As with any DIY project, there are always tips and tricks that can help make the process smoother and the end result more beautiful. By following some simple guidelines, you can achieve a professional-looking sponge-painted finish on your furniture. Here are some valuable pieces of advice to help you achieve the perfect look:
6.1 Practice on a Sample Board First
Before starting your sponge painting project, it’s a good idea to practice on a sample board first. This will allow you to get a feel for the sponge and the paint, and to experiment with different colors and techniques to achieve the desired look.
Here are some tips for practicing on a sample board:
- Use the same type of wood as the furniture you plan to paint to mimic the texture and absorbency of the surface.
- Apply a base coat to the board as you would the furniture.
- Experiment with different sponges and techniques to see what works best for you.
- Try out different color combinations to see which ones complement each other and achieve the desired effect.
- Allow the paint to dry completely before evaluating the result.
By practicing on a sample board, you can avoid mistakes and unexpected results on your furniture. This step helps you get comfortable with the sponge and the paint, refine your technique and find the right color combination before applying paint to your furniture.
6.2 Work in Thin Layers
When sponge painting furniture, it’s important to work in thin layers to avoid clumps and streaks. Thick layers of paint can also cause the piece to dry unevenly, creating an unappealing finish. Here are some tips for working in thin layers:
- Use a light touch: Don’t press too hard with the sponge when applying the paint. This will help prevent excess paint from building up in one spot.
- Allow each layer to dry before applying the next: It’s important to let each layer dry completely before adding another. This will help ensure that each layer dries evenly and prevent the colors from becoming muddy or blending together too much.
- Apply multiple thin layers: It’s better to apply several thin layers of paint rather than one thick layer. This will help you control the amount of paint on the sponge and ensure an even application.
- Build up the color gradually: Instead of trying to achieve the desired color in one go, build up the color gradually over several layers. This will help you create a more natural and textured look.
Remember, sponge painting is all about creating a unique and textured finish. By working in thin layers, you’ll be able to create depth and dimension to your finish that will give your furniture a distinctive and eye-catching look.
6.3 Choose Colors that Complement Each Other
When it comes to sponge painting furniture, selecting the right colors is vital for achieving a visually-pleasing final product. Here are some tips for choosing colors that complement each other:
- Consider the room: Take a look at the space where the furniture will be placed. Are there dominant colors in the room? Choosing colors that fit into the room’s color scheme can make the furniture look like it belongs there.
- Use a color wheel: A color wheel can be an excellent resource for selecting colors that complement each other. Colors that are opposite each other on the wheel, like blue and orange or red and green, are complementary because they create a high contrast and make each other pop.
- Think about texture: When selecting colors to sponge paint, consider the texture of the furniture. If the furniture has a lot of texture, using more muted or monochromatic colors can help highlight the object’s texture.
- Stick to a color family: An easy way to ensure that colors complement each other is to stick within the same color family. For example, using different shades of blue can help create a cohesive look without being too matchy-matchy.
- Consider the mood: The colors you choose can help set the tone or mood of the room. For a calm and soothing atmosphere, use cool colors like blue and green. Warm colors like red and orange can add energy and excitement to a room.
By keeping these tips in mind and experimenting with different color combinations, you can create a stunning piece of sponge-painted furniture that will complement your home’s decor.
Conclusion
In conclusion, sponge painting furniture can be a fun and creative way to update the look of your home decor. With the right tools and techniques, you can achieve a beautiful finish that adds character and charm to any piece of furniture. Remember to choose the right furniture and sponge, and properly prepare your workspace for the project.
When it comes to applying the paint, be sure to work in thin layers and experiment with different techniques to achieve your desired look. Don’t be afraid to blend colors and try out different patterns and textures.
After your sponge painting is complete, apply a sealant to protect the finish and remove any smudges or mistakes. It’s also a good idea to practice on a sample board first and choose colors that complement each other for the best results.
Overall, sponge painting furniture is a creative and cost-effective way to transform your home decor. Whether you’re a beginner or an experienced DIY enthusiast, these tips and tricks will help you achieve a beautiful and unique finish for your furniture projects.
Frequently Asked Questions
Can any furniture be sponge painted?
No, not all furniture is suitable for sponge painting. It’s best to choose furniture with a flat surface and not too many intricate details.
What kind of sponge is best for sponge painting?
A natural sea sponge is the best option for sponge painting as it creates a more textured and natural effect.
Do I need to sand the furniture before sponge painting?
Yes, it’s important to sand the furniture to create a smooth surface for painting and help the paint adhere to the surface properly.
What kind of primer should I use for sponge painting?
Use a primer that’s specifically designed for the type of paint you’ll be using on the furniture.
How many coats of base paint should I apply before sponge painting?
You should apply at least two coats of base paint before sponge painting.
How long should I let the base coat dry before sponge painting?
Let the base coat dry completely, which usually takes 24 hours or more.
Can I sponge paint with just one color?
Yes, you can also sponge paint with just one color, but it may not create as much depth and texture as using multiple colors.
What’s the best way to remove smudges or mistakes?
Use a damp sponge or cloth to gently wipe away any mistakes before the paint dries completely.
How do I choose colors that complement each other?
Look for colors that are opposite each other on the color wheel, such as blue and orange, or choose shades of the same color for a monochromatic look.
Can I sponge paint over a previously painted piece of furniture?
Yes, you can sponge paint over a previously painted piece of furniture, but you may need to sand it down first to create an even surface.