Have you ever painstakingly painted a room or a piece of furniture, only to be left with an unsightly finish due to small holes and cracks? It’s frustrating when you put in so much effort to make something look beautiful, only to have imperfections ruin the entire project. The truth is, filling holes and cracks before painting is a crucial step that many people overlook. In this article, we’ll discuss why filling these imperfections is so important and provide a step-by-step guide on how to do so effectively. With some careful preparation and attention to detail, you can achieve a flawless paint finish that will last for years to come.
Preparation is Key
Proper preparation is essential to achieving a flawless and long-lasting paint job. Before applying any paint, it’s crucial to ensure that the surface is clean, smooth, and free from any damage or imperfections that could affect the final result. In this article, we will discuss the steps needed to prepare your walls before painting, including cleaning the surface, repairing any damage, and filling any holes or cracks. By taking the time to properly prepare your surface, not only will your paint job look better, but it will also last much longer. So, let’s get started! For further guidance on types of fillers for holes and cracks, please see here.
Clean the Surface
Before starting any painting project, it is essential to clean the surface properly. This step is often overlooked, but it is crucial to ensure that the paint adheres properly. Dirt, debris, and dust can prevent the paint from adhering and can also cause an uneven finish, which is especially noticeable if you have any holes or cracks in the surface.
Here are some tips for cleaning the surface:
- Remove any loose dirt and debris with a broom, brush, or vacuum cleaner. This step will prevent the dirt from getting mixed up with the filler or paint.
- Wash the surface with soap and water to remove any dirt, grease, or grime. Use a scrub brush or a sponge to scrub the surface thoroughly.
- Rinse the surface with clean water and let it dry completely before moving on to the next step.
It is also essential to check if the surface is smooth and even, as any bumps or rough spots will be noticeable once you apply the paint. Use your hand to run over the surface and feel for any rough patches, bumps, or unevenness.
If you have any leftover paint or adhesive residue, you can remove them with a scraper or sandpaper. For larger or more stubborn residue, you can use a chemical solvent. Be sure to follow the manufacturer’s instructions and wear protective gloves and a face mask.
Properly cleaning the surface may take some time and effort, but it is worth it to ensure that your paint job looks smooth and professional. For more information on hole and crack preparation, check out our article on cleaning and repairing surfaces. If you need tips on applying filler, check out our article on applying filler. And if you’re wondering when to use spackle versus joint compound, take a look at our guide on choosing the right filler for the job.
Repair Any Damage
When it comes to painting any surface, one of the most crucial steps in the preparation process is repairing any damage. Whether it’s chips, cracks, or holes, filling in the damage before painting is essential for achieving a smooth and professional finish. In this section, we’ll cover the necessary steps to repair any damage on the surface you plan to paint.
Assess the Damage
Before repairing any damage, it’s important to assess the extent of the damage. If the damage is minor, you might only need to fill in a small area. However, if the damage is more significant or widespread, you may need to consider more extensive repair options.
Gather Your Materials
Once you’ve assessed the damage, gather the necessary materials to repair it. You’ll need spackle or wood filler, a putty knife, sandpaper or sanding block, and painters tape to mask off any areas you don’t want to get paint on.
Clean the Area
Before you begin filling in any damage, it’s crucial to clean the area thoroughly. Use a cleaning solution and a cloth to remove any debris or dirt from the surface. This will ensure that the filler adheres properly and effectively fills in the damaged area.
Apply the Filler
Using the putty knife, apply the spackle or wood filler to the damaged area. Be sure to smooth the filler out evenly, using the knife to remove any excess material.
Let the Filler Dry
Allow the filler time to dry according to the manufacturer’s instructions. This typically takes a few hours. Be sure not to rush this process, as applying paint to wet filler can result in a poor finish.
Sand the Filler
Once the filler is dry, use sandpaper or a sanding block to sand the surface down until it is smooth and even with the surrounding area. Be sure to use a fine grit sandpaper for the best results.
Repeat as Necessary
If the damage was significant, you may need to repeat the application of the filler and sanding process multiple times until the surface is smooth to the touch.
Paint as Usual
After the damage has been filled and sanded, you can proceed with painting the surface as you normally would. Be sure to take care and follow standard painting procedures to achieve the best results.
By following these simple steps, you can ensure that any damage on the surface you plan to paint is repaired correctly, resulting in a smooth and professional finish.
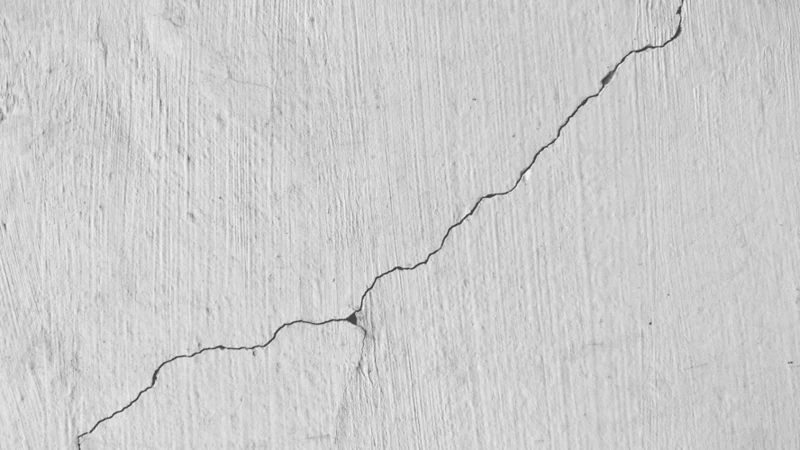
Fill Any Holes or Cracks
Filling in any holes or cracks is an essential step in prepping your surface for painting. Failure to do so can result in a noticeable and unappealing finish. Cracks and holes in the surface of your walls or ceiling can be caused by a variety of factors such as settling, moisture, or even normal wear and tear over time. It is important to address these imperfections before painting, as they can continue to worsen and cause bigger problems down the line.
| Step 1: | Inspect the Surface |
| Details: | Thoroughly inspect the surface for any holes, cracks or other imperfections. Use a flashlight to help spot any hard to see areas. Take note of any areas that will require additional attention. |
| Step 2: | Select the Appropriate Filler |
| Details: | Choose the right type of filler for your project. A spackle or wood filler is typically used for small holes, while larger areas of damage may require a joint compound. Make sure you read the manufacturer’s instructions before applying. |
| Step 3: | Apply the Filler |
| Details: | Using a putty knife or caulking gun, apply the filler in a thin layer over the hole or crack. Make sure the filler is pushed deep into the gap to fill it completely. Use a putty knife to smooth the surface of the filler so it’s level with the surrounding area. |
| Step 4: | Let the Filler Dry Completely |
| Details: | Allow the filler to dry completely before moving on to the next step. Drying times will vary depending on the type and amount of filler used. |
| Step 5: | Sand and Repeat if Necessary |
| Details: | After the filler has dried, use sandpaper or a sanding block to smooth the surface of the filler until it’s level with the surrounding area. Repeat the process if necessary, adding additional layers of filler until the surface is completely smooth and level. |
Remember: Taking the time to fill in any holes or cracks before painting will ensure a smooth and professional-looking finish that will last longer. It’s an important step that should never be skipped.
The Importance of Filling Holes and Cracks
Ensuring a flawless paint job is not just about the color and quality of paint you use. To achieve a professional and polished finish, it is crucial to pay attention to the preparation and repair of the surface you are painting on. In particular, filling any holes and cracks on the surface should be a top priority. This step plays a crucial role in ensuring that you achieve not only a beautiful and attractive finish, but also a long-lasting one. In this section, we will discuss the reasons why this step is so important and what you stand to gain from it.
Avoid Unsightly Finishes
Achieving a flawless finish when painting is every homeowner’s goal. However, small imperfections can ruin the overall appearance of the project. By filling holes and cracks before painting, you avoid unsightly finishes that can make a room look unprofessional and incomplete.
Unfilled holes or cracks can cause bumps and ridges, disrupting the smoothness of the painted surface. When light reflects off the uneven surface, it can create shadows that highlight the imperfections. These shadows can make even a newly painted room look dingy and poorly maintained.
Without filling holes and cracks in walls or woodwork, your paint job may look amateurish and amateurish painting job can significantly decrease the value of your home if you decide to sell in the future. A simple step like filling small blemishes can go a long way in delivering a professional-looking finish.
Unfilled holes and cracks in wooden surfaces can lead to moisture accumulation and subsequent rotting or warping of the wood. This can ultimately compromise the structural integrity of your home or furniture. By taking the time to fill these imperfections before painting, you ensure the longevity and durability of your wooden surfaces.
In conclusion, filling holes and cracks before painting is a crucial step in achieving a professional-looking paint job. It prevents bumps and ridges, eliminates shadows, and increases the longevity of painted surfaces. Always make sure to thoroughly inspect the surface and fill any imperfections to create a uniform, sleek finish.
| Pros of filling holes and cracks before painting | Cons of not filling holes and cracks before painting |
|---|---|
| Easier to achieve a flawless finish | Unsightly bumps and ridges disrupting the smooth appearance |
| Creates a professional and polished appearance | Can make the surface look unprofessional or incomplete |
| Increases the longevity of painted surfaces | Can compromise structural integrity of wooden surfaces |
Achieve Professional Results
Achieving professional results is essential when it comes to painting both the interior and exterior of your home. One of the key steps in achieving a professional-looking paint job is properly filling in all holes and cracks before painting. Using spackle or wood filler, a putty knife or caulk gun, sandpaper or a sanding block, and painter’s tape, you can achieve a flawless finish that will make your home look brand new.
Spackle or Wood Filler: Spackle or wood filler is a necessary material for filling in holes and cracks. Spackle is perfect for smaller holes and cracks, while wood filler should be used for larger or deeper holes. Make sure to choose the right material for the job and follow the manufacturer’s instructions for best results.
Putty Knife or Caulk Gun: Depending on the size and scope of the holes or cracks, you will need either a putty knife or a caulk gun. A putty knife is best for smaller holes and cracks, while a caulk gun is better suited for larger or deeper holes. Use the tool that is appropriate for the job to ensure easy application and optimal results.
Sandpaper or Sanding Block: Once you have applied the spackle or wood filler, you will need to sand it down using either sandpaper or a sanding block. This step is crucial in achieving a smooth and even surface for painting. Start with coarse grit sandpaper or a sanding block and work your way up to a finer grit for a polished finish.
Painter’s Tape: Painter’s tape is a helpful tool for protecting surrounding surfaces from accidental paint splatters or drips. Use it to tape off areas that are adjacent to the holes or cracks you are filling, such as baseboards or trim.
By taking the time to properly fill in all holes and cracks in your walls, you can achieve professional-looking results that will make your home look its best.
Ensure Long-Lasting Paint Jobs
Ensuring that any holes and cracks are filled before painting is essential for the longevity of your paint job. Leaving holes and cracks unfilled can lead to the paint peeling and cracking over time, eventually causing the need for costly repairs or a full repaint.
Once the holes and cracks are filled, it provides a solid, smooth surface for the paint to adhere to, resulting in a more durable finish that can withstand wear and tear. This is especially important for high-traffic areas or surfaces exposed to harsh elements such as sunlight or moisture.
By taking the time to properly fill any holes and cracks before painting, you are investing in the longevity of your home or project. A long-lasting paint job not only saves you time and money, but also maintains the overall aesthetic appeal of your space.
Here’s a table summarizing the benefits of filling holes and cracks before painting:
| Benefits of Filling Holes and Cracks Before Painting |
|---|
| Prevents paint from peeling and cracking over time |
| Results in a more durable finish |
| Maintains the overall aesthetic appeal of your space |
| Invests in the longevity of your home or project |
As you can see, filling holes and cracks before painting is a crucial step for not only achieving a smooth and flawless finish, but also for ensuring the longevity of your investment. So don’t skip this important step in your painting process.
Materials Needed
To successfully fill holes and cracks before painting, it’s important to have the right tools and materials on hand. Here is a list of the essential items you will need to achieve a smooth and professional finish on your painted surface. From spackle to sandpaper, each item plays a crucial role in preparing the surface for painting. Make sure to gather all the materials before beginning to ensure a seamless and stress-free process.
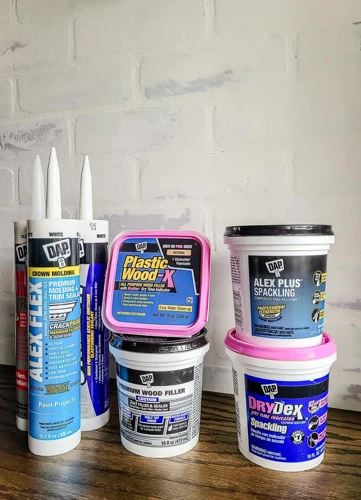
Spackle or Wood Filler
When it comes to filling holes and cracks before painting, having the right materials is essential for achieving a seamless finish. Two common options for filling holes and small cracks are spackle and wood filler.
| Spackle | Wood Filler |
|---|---|
| Spackle is a type of paste that can be used to fill small holes and cracks in drywall, plaster, and other surfaces. | Wood filler is a putty-like substance that is specifically designed to fill gaps and holes in wood, such as those caused by nail holes, cracks, and gouges. |
| Spackle is usually made from a mixture of gypsum powder, glue, and water, and comes in various forms, such as pre-mixed paste or powder that can be mixed with water. | Wood filler is typically made from a combination of wood fibers, binders, and fillers, and comes in both solvent-based and water-based formulas. |
| Spackle is easy to apply with a putty knife or spatula and dries relatively quickly, usually within a few hours. | Wood filler can also be applied with a putty knife or spatula, and typically takes longer to dry, depending on the formula and the depth of the repair. |
| Spackle is ideal for filling small holes and cracks in walls, ceilings, and other surfaces that will be painted, but may not be the best choice for repairing larger holes or gaps. | Wood filler is great for repairing larger holes and gaps in wood, and can also be used to repair minor surface damage or imperfections, such as dings, dents, and scratches. |
Ultimately, the choice between spackle and wood filler will depend on the nature and size of the repair needed. It’s important to choose the right material for the job in order to achieve a smooth, professional-looking finish.
Putty Knife or Caulk Gun
When it comes to filling holes and cracks before painting, a putty knife or caulk gun is an essential tool. Both are used to apply the filler to the damaged area.
A putty knife is a flat blade made of metal or plastic that is used to apply spackle or wood filler. It typically has a pointed end for getting into tight spaces and a handle for easy gripping. Putty knives come in a variety of widths, so be sure to choose one that matches the size of the hole or crack you are filling.
On the other hand, a caulk gun is used to apply caulk or sealant. It has a trigger that controls the flow of the caulk, allowing for a precise application. While a putty knife is more versatile and can be used for both spackle and wood filler, a caulk gun is specifically designed for applying caulk.
Both tools can be found at your local hardware store and are relatively inexpensive. When choosing which one to use, consider the type of filler you will be applying and the size of the damaged area. Using the right tool will ensure a smoother and more efficient application process.
Sandpaper or Sanding Block
When it comes to filling holes and cracks before painting, sandpaper or a sanding block is an essential tool in achieving a smooth and even surface. Sandpaper is a sheet of paper or cloth with abrasive material glued to one side, while a sanding block is a tool used to hold the sandpaper and provide a flat surface for sanding.
Sandpaper Types
There are several types of sandpaper available, each with its own specific use. The grit number determines the coarseness of the sandpaper. The higher the grit number, the finer the sandpaper. Here are some common types of sandpaper:
| Grit Number | Coarseness | Common Use |
|---|---|---|
| 60-80 | Coarse | Quick removal of material, shaping wood |
| 100-150 | Medium | Removing minor imperfections, preparing surfaces for painting |
| 220-400 | Fine | Smoothing surfaces, preparing for finishing coats |
Sanding Blocks
Sanding blocks come in different shapes and sizes, but their basic function is to hold the sandpaper in place while providing a flat surface for sanding. Sanding blocks can be made of different materials such as foam, rubber, or hard plastic.
Using a sanding block provides better control, especially when sanding flat surfaces. It also reduces the risk of sanding through the material, resulting in a smoother and more even finish.
Before sanding, it’s important to make sure the sanding block is clean and free from debris. Choose a sanding block that feels comfortable in your hand and suits the shape of the surface you’re working on.
Handling Sandpaper
When using sandpaper, it’s essential to wear gloves to protect your hands. Cut the sandpaper to a size that fits either the sanding block or your hand. Hold the sandpaper firmly, but not too tightly, and sand in a circular or back-and-forth motion.
Make sure to keep the sandpaper or sanding block in constant motion, applying even pressure as you work. Don’t sand too aggressively or for too long in one spot, as this can damage the surface or create uneven spots.
Understanding the different types of sandpaper and using a sanding block is key to achieving a smooth and even surface when filling holes and cracks before painting. Take your time, follow the recommended steps, and always wear protective gloves when handling sandpaper.
Painters Tape
Painter’s tape is an important tool to have on hand when filling holes and cracks before painting. It is a type of masking tape that is specifically designed for use with paint. Unlike other types of tape, painter’s tape is easily removable and will not leave behind any residue.
Using painter’s tape can help you achieve professional-looking results when filling holes and cracks. It can also help you to protect areas of your surface that you do not want to be filled or painted.
Here are some tips for using painter’s tape when filling holes and cracks before painting:
- Choose the right kind of painter’s tape: There are many different types of painter’s tape available, and it’s important to choose the right one for your project. Look for tape that is labeled as “medium adhesion” so that it will stick to your surface but will still come off easily.
- Apply the tape carefully: When you’re applying painter’s tape, be sure to press it down firmly so that it sticks well to your surface. Make sure that the edges of the tape are aligned exactly where you want your edge to be.
- Remove the tape carefully: Once you have finished filling your holes and cracks and are ready to paint, it’s time to remove the painter’s tape. Take care to remove the tape slowly and gently, pulling it back at a 45-degree angle. This will help to prevent the paint from bleeding under the tape and ruining your finish.
By using painter’s tape in conjunction with spackle or wood filler, you can achieve a smooth and seamless surface that will be ready for painting in no time. Just be sure to take your time and follow these simple tips, and you’ll be amazed at the professional-looking results you can achieve.
Step-by-Step Guide
Now that you understand the importance of filling holes and cracks before painting, it’s time to learn how to do it. Don’t worry if you’ve never done it before because with the right materials and techniques, you can achieve professional results. In this step-by-step guide, we will walk you through the process of prepping and repairing your surface so you can achieve a flawless finish. Get ready to turn your dull and damaged walls into a stunning canvas with our easy-to-follow guide.
Step 1: Prepare the Surface
To begin, it’s important to thoroughly prepare the surface before applying any filler. This will ensure that the filler adheres properly and provides a smooth finish. Here are the steps to follow:
| Step | Description |
|---|---|
| 1 | Clean the surface using a clean, damp cloth or sponge. This will remove any dirt, dust, or debris that may be present on the surface. Allow the surface to dry completely before proceeding. |
| 2 | Inspect the area for any damage or imperfections. Make note of any holes or cracks that need to be filled. It’s important to address these issues before applying any filler. |
| 3 | Protect surrounding surfaces by using painter’s tape to cover any areas that you do not want to be painted or filled. This will help to prevent any accidental spills or drips. |
By following these steps, you’ll be able to prepare the surface for filling and achieve the best possible results. Remember to take your time and be as thorough as possible in this stage, as it will directly impact the quality of your finished product.
Step 2: Apply the Filler
After preparing the surface, it’s time to apply the filler. The filler you use will depend on the material you’re filling. For small holes and cracks in walls, you can use spackle, while wood filler is recommended for larger gaps in wood.
Here are the steps to follow when applying the filler:
- Start by putting a small amount of filler onto your putty knife or caulk gun, and spread it evenly over the hole or crack. Remember to use the putty knife for spackle and caulk gun for wood filler.
- Apply the filler in thin layers, building it up until it’s slightly higher than the surface of the surrounding area.
- Make sure the filler is pushed firmly into the hole to avoid air pockets, which can cause it to shrink and crack over time.
- If you’re using wood filler, ensure you work it well into the gap and use a putty knife to remove any excess, smoothing it off so that it’s flush with the surrounding wood.
Remember to work quickly, as the filler will start to dry out fast. It’s also important to only fill one area at a time to avoid the filler drying before you have a chance to work on it.
Step 3: Let the Filler Dry
Once you have applied the filler, it is crucial to give it ample time to dry before continuing with the painting process. Rushing this step can result in an uneven and bumpy finish. To ensure that the filler is completely dry, follow these steps:
- Check the Drying Time: The drying time for filler can vary depending on the product and the depth of the hole or crack. Check the product packaging for specific drying times.
- Avoid Touching the Filler: Touching the filler premature can cause it to become uneven, which will make the sanding process more difficult later on.
- Inspect the Filler: Once the initial drying time has passed, inspect the filler for any noticeable shrinking or cracking. If this occurs, you may need to reapply more filler and repeat the drying process.
- Wait for Complete Drying: To ensure that the filler is completely dry, it is best to wait at least 24 hours before sanding or painting over it. This will help ensure a smooth and even finish.
By taking the time to allow the filler to fully dry, you can avoid any potential issues with the final paint job.
Step 4: Sand the Filler
Once the filler has fully dried, it’s time to sand it down to a smooth finish. Here’s how to do it:
- Gather your sandpaper: Depending on the roughness of the area you’re sanding, you’ll need to select the appropriate grit of sandpaper. For example, if the hole or crack is very rough, you may want to start with a coarse grit and progress to finer grits as you go along.
- Begin sanding: Use your sandpaper to gently sand the surface of the filler until it’s smooth and even with the surrounding area. Be careful not to apply too much pressure, or you may accidentally remove too much filler and create a dip in the surface. Instead, use a light touch and let the sandpaper do the work.
- Check your progress: After a few passes with the sandpaper, stop and check your progress. Run your hand over the sanded area to see if it feels smooth and even. If not, continue sanding until it does.
- Switch to finer grits: Once the filler is mostly smooth, switch to a finer grit of sandpaper and continue sanding until the surface is completely smooth and even.
- Wipe away dust: Use a clean, dry cloth to wipe away any dust or debris that has accumulated from sanding.
Sanding the filler is an important step in achieving a smooth, polished finish. Don’t rush this step, take your time and make sure to check your progress frequently to avoid over-sanding or leaving uneven surfaces.
Step 5: Repeat as Necessary
After sanding down the filler, check to see if there are any remaining holes or cracks. If there are, repeat steps 2-4 until the surface is completely smooth and even. It may take several rounds of applying filler, letting it dry, and sanding it down to achieve the desired result.
Here are some tips to keep in mind:
- Apply the filler in thin layers to avoid creating uneven surfaces
- Allow each layer to dry completely before adding more filler
- Be patient and take your time – rushing the process can result in a less-than-perfect finish
- Use a light touch when sanding, as you don’t want to remove too much filler or damage the surrounding areas
- Regularly inspect the surface to ensure all holes and cracks have been filled and sanded down
By repeating the process as necessary, you’ll be able to achieve a smooth and even surface that’s ready for painting. Remember, taking the time to properly fill and repair any damage before painting will ensure a professional-looking finish that lasts.
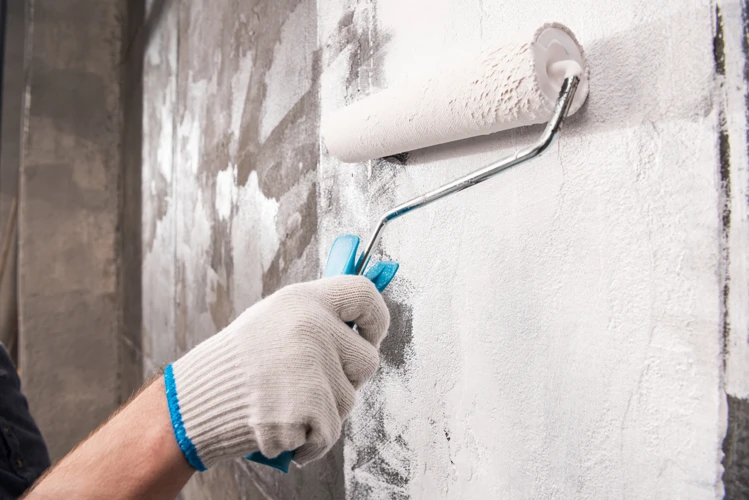
Step 6: Paint as Usual
After you’ve filled in all of the holes and cracks, it’s time to paint the surface as usual, but with a much smoother and even finish. Here are some important things to keep in mind when painting over filled surfaces:
| Tip | Description |
|---|---|
| Use a high-quality paintbrush or roller | The better the quality of your painting tools, the better the finished result will be. Use a paintbrush or roller that’s appropriate for your surface and the type of paint you’re using. |
| Apply the paint in thin, even coats | Don’t overload your brush or roller with too much paint, as this can lead to drips and an uneven finish. Instead, apply thin, even coats and allow each coat to dry completely before applying the next one. |
| Use painter’s tape to protect surrounding surfaces | If you’re painting near windows, door frames, or other surfaces that you don’t want to get paint on, use painter’s tape to protect them. Apply the tape carefully so that it’s flush with the surface, and remove it as soon as the paint is dry to the touch. |
| Allow the paint to dry completely before touching or using the surface | Most paints will dry to the touch within a few hours, but it’s best to wait at least 24 hours before using the surface. This will ensure that the paint has hardened completely and won’t be damaged or marred by contact. |
By following these tips and painting carefully, you’ll be able to create a beautiful, smooth finish on your surface that will last for years to come. Remember that the key to a successful paint job is in the preparation, so take the time to fill in any holes and cracks before you start painting, and you’ll be rewarded with a professional-looking finish that you can be proud of.
Conclusion
In conclusion, filling holes and cracks before painting is a crucial step that should never be skipped. A well-prepared surface will ensure a smoother and more polished finish, and increase the lifespan of your paint job. Taking the time to properly repair any damage and fill any imperfections in the surface will not only enhance the visual appeal of your space, but also prevent potential future problems.
By using simple materials like spackle or wood filler, a putty knife or caulk gun, sandpaper or a sanding block, and painter’s tape, you can easily fill any holes or cracks in your wall or woodwork. Follow the step-by-step guide to achieve professional results and avoid unsightly finishes.
Remember, preparation is key when it comes to painting. Taking the time to clean, repair, and fill any imperfections may require extra effort initially, but it will save you time and money in the long run. The finished product will not only look beautiful, but also last longer, making it a worthwhile investment. So, next time you’re planning to paint a room or piece of furniture, make sure to fill any holes and cracks first, and enjoy the benefits for years to come.
Frequently Asked Questions
Can I skip filling holes and cracks before painting?
No, it is not recommended to skip filling holes and cracks before painting as it can result in an unsightly finish and may not last as long.
Do I need to repair minor damages on the surface?
Yes, it is important to repair any minor damages on the surface before painting to ensure a smooth and professional finish.
What kind of filler should I use for holes and cracks in wood surfaces?
You should use wood filler for holes and cracks in wood surfaces as it is specially formulated to bond with the material and provide a sturdy base for painting.
Can I use spackle to fill holes in drywall?
Yes, you can use spackle to fill holes in drywall as it dries quickly and is easy to sand down to a smooth finish.
Do I need to sand the filler after it dries?
Yes, it is important to sand the filler after it dries to ensure a smooth and even surface for painting.
Can I use a caulk gun instead of a putty knife?
Yes, you can use a caulk gun to apply filler, but it may not be precise enough for small areas and may result in more waste of the filler.
How long do I need to wait for the filler to dry before sanding?
The drying time may vary depending on the type of filler you are using, but it’s best to wait at least 24 hours before sanding to ensure it is fully dry.
What type of sandpaper should I use for the filler?
You should use a fine-grit sandpaper (around 220 grit) to sand the dried filler and achieve a smooth finish.
Do I need to use painter’s tape when filling holes and cracks?
Using painter’s tape can help protect the areas around the holes and cracks from getting covered in filler, but it is not necessary if you are working on a small area.
Should I fill every small hole or just the larger ones?
It’s best to fill every small hole and crack to ensure a smooth and even finish. Even small imperfections can be noticeable after painting.