Importance of Wood Preparation for Painting
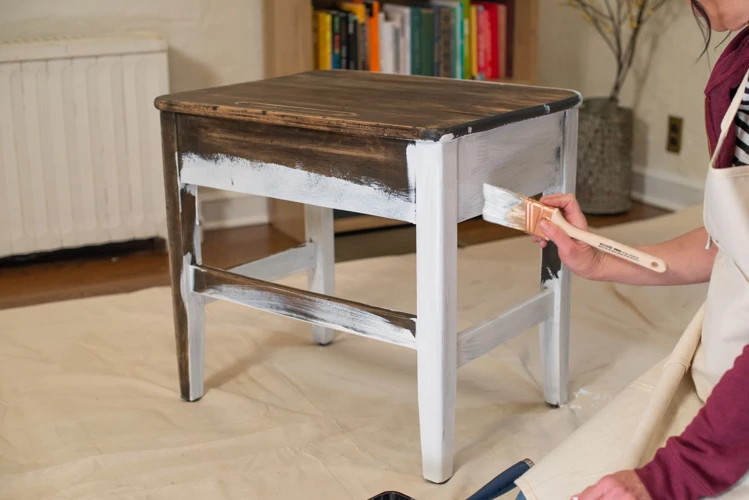
Embarking on a painting project begins with a critical step: wood preparation for painting. This stage is pivotal as it ensures that the paint adheres properly and lasts longer. By meticulously preparing the surface, you’re laying the groundwork for a superior finish. Skipping this step can lead to peeling or chipping paint, which undermines the aesthetic and protection that a good paint job should offer.
The Role of Surface Preparation in Achieving a Smooth Finish
Surface preparation is the cornerstone of a professional-looking paint job. It involves cleaning, repairing, and flattening the wood surface to create an ideal base for painting. A well-prepared surface accepts paint better, minimizing imperfections and enhancing the paint’s durability. It’s the attention to detail during this phase that culminates in a smooth finish painting.
Pre-Painting Wood Treatment Essentials
When Is Sanding Necessary Before Painting?
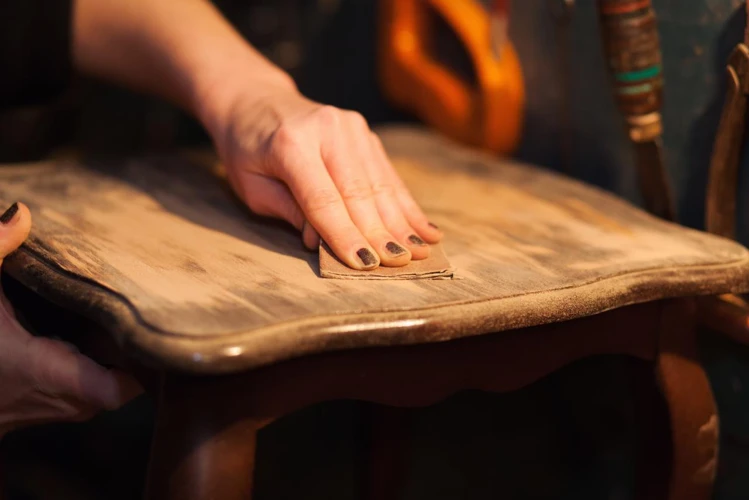
Sanding wood before painting is not always mandatory, but it is essential when dealing with rough surfaces, previous paint layers, or imperfections. It’s necessary to assess the project at hand; for instance, new, untreated wood typically requires sanding to open up the grain for better paint absorption.
Assessing the Wood Condition for Sanding
Before you grab your sandpaper, take time to assess the wood’s condition. Look for signs of damage, old paint, or varnish. These indicators will help you determine the extent of sanding required. If the wood is in good condition, a light sanding might suffice. However, more significant imperfections or layers of old paint may necessitate a more aggressive approach.
Sanding Techniques for Optimal Results
Choosing the Best Sandpaper for Wood
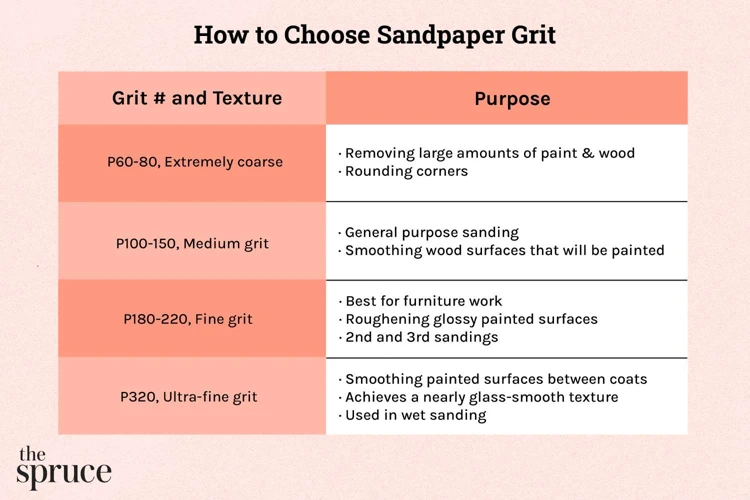
Selecting the best sandpaper for wood is a decision that can significantly impact your project. The grit of the sandpaper determines its abrasiveness – lower numbers are coarser, suitable for removing old paint, while higher numbers are finer, ideal for achieving a smooth surface. Matching the correct grit to the task at hand is crucial.
Hand Sanding vs. Using Power Tools
When contemplating sanding techniques, one must decide between hand sanding and using power tools. Hand sanding gives you control and is preferable for delicate surfaces or intricate details. Power tools, on the other hand, save time and effort on larger, flat areas.
How to Sand Wood for a Superior Finish
To achieve a superior finish, understanding how to sand wood is key. Start with a coarse grit and progress to finer grits. Always sand in the direction of the wood grain to avoid scratches, and don’t apply excessive pressure. Check your progress regularly, ensuring an even, smooth surface is being created.
Sanding Tips for Wood: Best Practices
Step-by-Step Guide to Sanding Wood Before Painting
- Inspect the wood surface and repair any imperfections.
- Start with a coarse grit sandpaper to remove the rough outer layer.
- Gradually move to finer grits to refine the surface.
- Sand evenly, following the grain of the wood.
- Wipe the surface clean between each sanding to check for consistency.
Avoiding Common Sanding Mistakes
One of the cardinal sanding tips for wood is to avoid common pitfalls. Don’t rush the process; sanding too quickly can create heat and damage the wood. Also, ensure you don’t skip grits, as this can leave behind scratches that will show through the paint. Always take your time for the best outcome.
Painting Preparation Tips
Cleaning and Dust Removal After Sanding
Once the sanding is complete, don’t underestimate the importance of cleaning and dust removal. Any remaining dust can interfere with the paint’s adhesion. Use a vacuum followed by a tack cloth to ensure a dust-free surface, which is critical for a smooth finish painting.
Applying Primer for an Even Painting Surface
Applying a primer is one of the essential painting preparation tips. A primer seals the wood, provides a uniform base, and ensures that the paint sticks properly. It can also help to reveal any areas that may require additional sanding before the final paint application.
Achieving a Smooth Finish Painting
Final Sanding Before the Paint Application
Even after priming, a final sanding can be beneficial. This last pass with fine-grit sandpaper will remove any primer imperfections and create the ultimate smooth surface for painting. It’s a step that sets the stage for the final act: applying the paint.
Techniques for a Professional-Looking Finish
Techniques for a professional-looking finish transcend just the act of painting. It’s about patience, precision, and meticulousness throughout the entire process. Use even strokes and maintain a wet edge to avoid marks. If necessary, lightly sand between coats for an ultra-smooth final appearance.
FAQs on Sanding and Preparing Wood for Painting
Can You Sand Furniture Indoors Without a Mess?
Yes, indoor sanding can be done cleanly by using dust collection tools and drop cloths. Always ensure proper ventilation and consider using a sanding block or sponge that can minimize dust spread.
How Much Sanding Is Enough Before Painting?
The amount of sanding needed varies by project. The goal is to create a smooth, even surface without gloss or imperfections. Once you’ve achieved this, you’ve sanded enough.
What Grit Sandpaper Should You Use for Different Wood Surfaces?
Different wood surfaces demand different grits. Start with a lower grit for rough surfaces or removing paint (around 60-80) and move up to 120-150 for general sanding. Finish with a fine grit, such as 220, for a smooth surface ready for painting.
If you’re planning to give your woodwork a fresh coat of paint, proper preparation is key to achieving a flawless finish. While sanding is an essential step, there are other considerations to ensure the best results. For a comprehensive guide, take a look at our tips on choosing the right paintbrush for your project. Additionally, you might want to read about using glue around nails when painting to avoid any mess and ensure a clean, professional look. And if you’re feeling adventurous with your design, our article on preparing walls for color blocking can help you master this trendy painting technique.
Conclusion: Perfecting the Art of Sanding Wood Before Painting
Perfecting the art of sanding wood before painting is a journey of patience and precision. Every step, from the initial assessment to the final brush stroke, contributes to the end result. By following these guidelines and tips, you’ll be well on your way to achieving a flawless, smooth finish that not only looks professional but also stands the test of time.