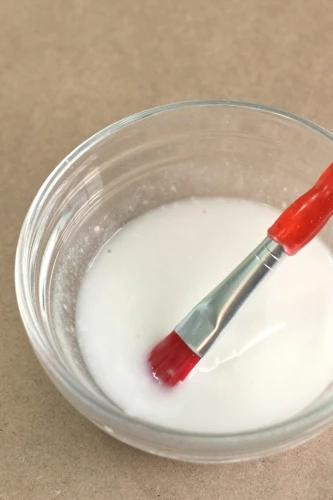
Embarking on a creative project often comes with the need for binding materials. While store-bought adhesives are convenient, they can be costly and contain harsh chemicals. This is where the art of making glue at home comes into play. Crafting your own DIY sticky glue not only saves money but also allows you to control the ingredients, ensuring a safer and more personalized experience. In this comprehensive guide, we’ll explore the simple yet satisfying process of concocting your very own homemade adhesive.
Understanding the Basics of Homemade Adhesive
The science behind homemade adhesive is rooted in creating a substance that is viscous enough to bind materials together. This stickiness can be achieved through a variety of natural substances that react to create a tacky texture. By understanding the properties of these substances, you can produce an effective and reliable natural glue recipe. Let’s delve into the world of adhesives and uncover the secrets of crafting a sticky solution.
Ingredients for Your Natural Glue Recipe
Primary Glue-Making Ingredients
- Water is the universal solvent and forms the base of your mixture.
- Flour provides the starchy consistency required for viscosity.
- Sugar helps to increase the tackiness and strength of your adhesive.
Optional Additives for Enhanced Stickiness
Beyond the basics, certain additives can enhance the performance of your glue-making ingredients. Vinegar acts as a preservative, while corn syrup can improve the glue’s tackiness. Adding these to your concoction will yield an easy stick glue that’s more durable.
Step-by-Step Guide to Making Glue at Home
Preparing Your Work Area
Before beginning, ensure your workspace is clean and organized. Gather all the necessary materials and cover the surface with newspaper or a cloth to protect it from spills.
Mixing the Ingredients
Start by combining the primary ingredients in a bowl. Gradually stir in water to achieve a smooth consistency, ensuring there are no lumps in the mixture.
Cooking Your Easy Stick Glue
Transfer the mixture to a pot and heat it on a low flame. Stir continuously until the mixture thickens. If you’ve opted for additives, now is the time to incorporate them.
Cooling and Finalizing Your Craft Glue
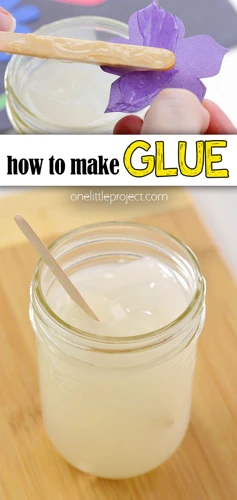
Once your adhesive has reached the desired thickness, remove it from the heat. Allow it to cool before transferring it to a container for storage.
Tutorial for Strong Bond Glue
Advanced Recipe for a Stronger Bond
For tasks requiring a more robust hold, a strong bond glue is necessary. By adding additional sugar and reducing water content, you can create a more concentrated adhesive suitable for heavier materials.
Testing the Strength of Your Homemade Glue
After your strong bond glue has cooled, put it to the test. Apply it to a variety of materials to assess its holding power and adjust your recipe as needed for future batches.
Creating Non-Toxic Glue for Safe Crafting
Benefits of Non-Toxic Adhesives
One of the main advantages of non-toxic glue is its safety, especially for children and pets. Using natural ingredients reduces the risk of harm from accidental ingestion or skin contact.
Ensuring Your Glue is Safe for All Ages
To guarantee your adhesive is non-toxic, only use food-grade ingredients. This ensures that your craft glue tutorial results in a product that’s safe for users of all ages.
How to Apply Your Homemade Adhesive
Best Practices for Glue Application
For optimal results, apply a thin layer of glue to one surface. Press the two objects together firmly to create a bond. Clean any excess glue before it dries for a neat finish.
Tips for a Smooth and Even Spread
Utilize tools such as a brush or spatula for even distribution of the adhesive. This method helps in achieving a smooth finish without any clumping.
Preservation and Storage of Your DIY Glue
Recommended Storage Solutions
Storing your DIY sticky glue properly is essential for maintaining its shelf life. Use an airtight container and keep it in a cool, dry place, away from direct sunlight.
Shelf Life of Your Homemade Glue
Typically, your homemade adhesive will last for several weeks when stored correctly. However, if you notice any changes in smell or texture, it’s best to discard it and make a fresh batch.
Conclusion and Additional Craft Glue Tutorials
Recap of the Glue-Making Process
In this tutorial, we’ve covered the ins and outs of how to make glue, from selecting the right ingredients to applying the final product. Remember, practice makes perfect, and each batch can be an opportunity to refine your recipe.
For all the DIY enthusiasts and crafters out there, understanding how to make your own adhesives can be both fun and useful. Whether you’re looking to create a strong bond for various materials or just experimenting with homemade recipes, we’ve got you covered. For a quick-setting and versatile option, check out our guide on how to make hot glue. If you’re working with pottery or sculptures, you might be interested in our article about how to make clay glue. And for those who love to add a bit of texture to their projects, our instructions on how to make fluffy glue will surely inspire your next creation. Each type of glue has unique properties and uses, so be sure to explore these resources to make your projects stick!
Further Reading and Resources
For those eager to expand their adhesive-making skills, plenty of resources are available. Books, online forums, and craft glue tutorial videos can provide additional insights and techniques for perfecting your homemade glue.
