Introduction
When it comes to creating stunning nail art designs, using nail glue is often a crucial step to ensure that the decorations stay in place. However, sometimes you may find yourself without any nail glue on hand and in need of alternatives. Don’t worry – there are several natural ingredients, adhesive tapes, and DIY recipes you can use as substitutes. Additionally, depending on the specific nail art technique you are using, there are other alternatives available as well. Let’s take a closer look at these alternatives together.
The importance of nail glue in nail art
| Nail glue is an essential component of nail art |
| Without nail glue, it would be impossible to create intricate nail designs or attach artificial nails. Nail glue is specially formulated to bond quickly and securely to nail surfaces, allowing you to experiment with different nail art designs and styles. |
| Helpful tips to keep in mind: |
|
| If you’re out of nail glue or prefer not to use it, there are many alternatives to choose from. For instance, you can use natural ingredients such as aloe vera gel, coconut oil and honey mixture, or flaxseed oil and egg white mixture. You can also use adhesive tapes such as double-sided tape, clear tape, or medical tape. |
If you’re interested in making your own DIY nail glue, check out our guide How to Make DIY Nail Glue. If you want to learn more about the type of glue that nail techs use, you can check out this guide on What Glue Do Nail Techs Use?
Natural Ingredients
If you’re an avid nail art fan, then you know how important nail glue is when it comes to keeping your nails I place. However, some people may find that traditional nail glue doesn’t work for them due to allergies or sensitivities. That’s where natural ingredients come in! There are several natural alternatives to traditional nail glue that you can try. In this section, we’ll explore a few options that you may already have in your kitchen.
Coconut oil and honey mixture
Coconut oil and honey mixture is an excellent alternative to nail glue for nail art. Both coconut oil and honey have antimicrobial properties that protect your nails from fungus and bacteria. Additionally, Coconut oil is an excellent moisturizer that strengthens and hydrates the nails, making them flexible and less prone to breakage. Honey, on the other hand, is a natural adhesive that helps hold nail art in place.
To make this mixture, you will need equal parts of coconut oil and honey. Mix the two ingredients in a small bowl until they form a smooth paste. Then, take a small amount of the mixture and apply it to your nails. The mixture can be applied directly to your nails to hold nail art in place, or you can use it on press-on nails or nail stickers.
Here is a table showing the benefits of Coconut oil and honey mixture:
| Benefits | Coconut oil and honey mixture |
|---|---|
| Moisturizes nails | Yes |
| Strengthens nails | Yes |
| Antimicrobial properties | Yes |
| Hold nail art in place | Yes |
Using this mixture can keep your nails healthy and flexible while still allowing you to create beautiful nail art. If you want to learn more about reusing glue on nails, check out our article on how to reuse glue on nails. Alternatively, if you are looking for the best kiss nail glue, you can find out where to get nail glue near you by checking out our article on where to get nail glue near me.
Aloe vera gel
Aloe vera gel is a popular natural ingredient that can be used as an alternative to nail glue in nail art. It is known for its adhesive properties and is a great option for those who are looking for a natural and gentle alternative.
To use aloe vera gel as a nail glue alternative, you will need to extract the gel from the aloe vera plant and apply it to your nails. Aloe vera gel can be easily harvested from the aloe vera plant by cutting off a leaf and squeezing out the gel. You can also purchase aloe vera gel at your local health food store or online.
One of the benefits of using aloe vera gel is that it is gentle on the nails and skin. It is also moisturizing and can help to strengthen the nails. Aloe vera gel is also easy to apply and dries quickly.
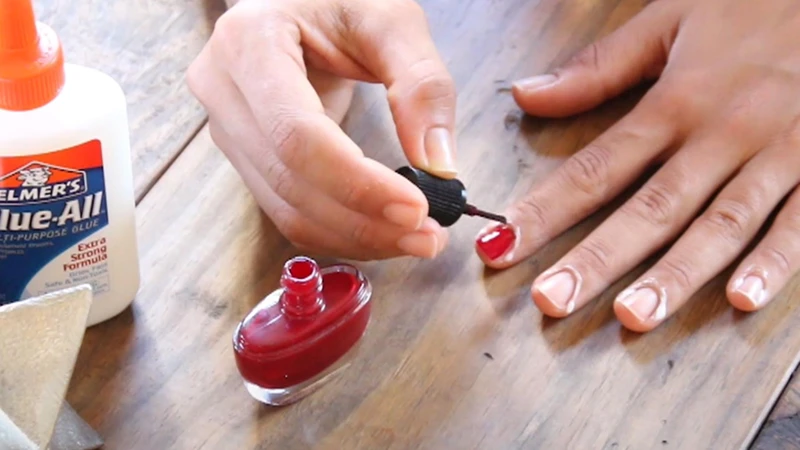
Here is a step-by-step guide on how to use aloe vera gel as a nail glue alternative:
| Materials: | Instructions: |
|---|---|
| Aloe vera gel | Start by washing your hands and drying them thoroughly. |
| Small brush or toothpick | Take a small brush or toothpick and dip it into the aloe vera gel. |
| Nail polish | Apply a thin layer of the aloe vera gel to your nail, where you want to attach the nail art. |
| Nail art | Apply the nail art to your nail and press down firmly to ensure it sticks well. |
| Allow the aloe vera gel to dry completely before moving your nails or using your hands. |
Using aloe vera gel as a nail glue alternative is a great option for those who are looking for a natural and gentle way to attach their nail art. It is also a good alternative for those who are allergic to traditional nail glue or want to avoid using chemical-based products.
If you’re interested in learning more about other nail glue alternatives, you can check out our article on what can I use instead of nail glue or tape.
Flaxseed oil and egg white mixture
Flaxseed oil and egg white mixture is another alternative to nail glue that you can use for nail art. Both ingredients contain beneficial properties for your nails, making them stronger and healthier.
How to make Flaxseed oil and egg white mixture nail glue:
| Ingredients | Measurements |
|---|---|
| Flaxseed oil | 1 tablespoon |
| Egg white | 1 |
Note: You can adjust the measurements according to the amount of mixture you need.
Steps:
1. Crack open an egg, separate the egg white, and discard the yolk.
2. Beat the egg white in a mixing bowl until it becomes frothy.
3. Add one tablespoon of flaxseed oil to the egg white and mix until it becomes a thick consistency.
4. Apply the mixture onto your nails using a brush or a cotton swab.
5. Let it dry for a few minutes.
6. Repeat the process until you have achieved the desired thickness.
Flaxseed oil is rich in omega-3 fatty acids which can help prevent nail breakage and brittleness, while egg white contains protein that can strengthen your nails. This mixture is a great natural alternative to chemical-laden nail glue and is safe to use even for those with sensitive skin.
If you’re interested in learning more about how to make other types of homemade nail glue, check out our article on how to make super glue for fake nails or how to make nail glue stronger for additional DIY options.
It’s important to note that if you are allergic to nail glue, you should avoid using these alternatives and seek advice from a medical professional. You can learn more about alternatives for those allergic to nail glue in our article on what you can use if you are allergic to nail glue.
Adhesive Tapes
Finding a perfect adhesive for your stunning nail art can be challenging sometimes. If you are in a hurry or don’t wish to spend much time and effort applying nail glue, you may want to consider adhesive tapes. Although tapes may not provide the same long-term hold as nail glue, they are a great alternative for those who prefer a temporary method. In this section, we will explore the different types of tapes you can use for nail art and how they can make your life easier.
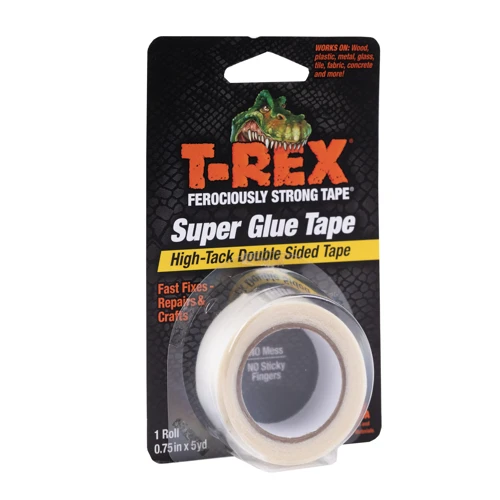
Double-sided tape
Double-sided tape is another great alternative to nail glue that you can use to secure your nail art. This method is ideal if you need to do a quick fix or when you don’t have access to nail glue. Double-sided tape can be found at any stationery or craft store and can be cut into any size and shape you need. It also comes in different colors, but it’s best to stick with clear tape to avoid any noticeable residue.
To use double-sided tape for your nail art, start by cleaning and drying your nails. Cut small squares of tape that can fit the size of your nails and stick them onto your nails, making sure to press down firmly. Then, carefully stick your nail art onto the tape and press down firmly again. Make sure that your nail art is centered and aligned.
Keep in mind that double-sided tape may not hold up as well as nail glue and may loosen up throughout the day. If you are looking for a more long-lasting solution, it’s best to use one of the other alternatives mentioned in this article.
Another thing to keep in mind is that double-sided tape can be difficult to remove from your nails without damaging them. You can use acetone or nail polish remover to dissolve the adhesive and carefully peel off the tape. Make sure to moisturize and care for your nails after removing the tape to prevent any damage or dryness.
Double-sided tape is a quick and easy alternative to nail glue for your nail art needs. However, it’s best to use it as a temporary solution and not for long-term wear.
| Pros | Cons |
|---|---|
| Quick and easy to use | May not hold up well throughout the day |
| Can be found at any stationary or craft store | Difficult to remove without damaging nails |
| Comes in different shapes and sizes | Not recommended for long-term wear |
If you’re looking for more nail glue options, check out what is the best Kiss nail glue? Or if you’re curious about why your nail glue turns white, read why does nail glue turn white?
Clear tape
Clear tape is another great alternative to nail glue that is readily available anywhere. It is one of the most versatile and easy-to-use options for nail art. All you need to do is cut the tape according to the size and shape you want and apply it on your nails. It is best utilized for small designs or accents on your nails.
Advantages of using clear tape for nail art
– Easy to find and inexpensive.
– Can be cut into any shape or design.
– Removes easily without damaging nails.
– Perfect for intricate or detailed designs.
How to use clear tape for nail art
1. Start by prepping your nails, making sure they are clean and dry.
2. Cut a small piece of clear tape to the desired size and shape using scissors.
3. Place the tape on your nails, ensuring that they adhere well to the surface of your nails.
4. Apply your desired polish or nail art design, making sure to fill in the spaces between the tape.
5. Let the polish dry for about 30 seconds, and then carefully remove the tape.
6. Apply a clear topcoat to seal your design.
Tips to remember when using clear tape for nail art
– Make sure your nails are completely dry and clean before you apply the tape.
– Trim the tape to fit your nail size and shape.
– Use a clean pair of scissors to prevent any debris or dust from sticking to the tape.
– To achieve crisper lines, apply a thin layer of clear polish over the tape, let it dry, and then apply your desired nail polish or design.
– Avoid using tape on nails that have recently been buffed or have ridges, as it will not stick well.
Using clear tape for nail art is perfect for anyone who wants to craft intricate designs easily. Whether you’re looking to create geometric shapes or stripes, clear tape offers great results with minimal effort. So, grab your favorite nail polish and try out this simple and affordable technique for yourself!
Medical tape
One alternative to using nail glue for nail art is medical tape, which is a thin and flexible tape that is designed to be gentle to the skin. It is an especially good option for those with sensitive skin or who experience irritation from traditional nail glues. Medical tape is also very easy to find and relatively inexpensive.
To use medical tape for nail art, you will need to cut small pieces of tape to fit the size and shape of your nail. It’s important to make sure the tape is cut to the correct size so that it doesn’t stick out or peel off easily. Press the tape firmly onto your nails, smoothing out any wrinkles or air bubbles to ensure that it adheres properly.
Once the tape is in place, you can paint over it with your desired nail polish or add other nail decorations on top. If you are using rhinestones or other 3D nail art, make sure to press them firmly onto the tape so that they stay in place. When you are ready to remove the tape, simply peel it off gently from the corner of your nail.
While medical tape is a great alternative to nail glue for nail art, it does have its limitations. It may not hold up as well as traditional glue, especially if you are using heavy or bulky nail decorations. Additionally, if you have extremely small or oddly shaped nails, you may have difficulty finding tape that fits properly. Nonetheless, it can be a valuable tool to have in your nail art arsenal and can come in handy in a pinch.
DIY Nail Glue Recipes
Are you tired of constantly buying nail glue for your nail art? Or perhaps you’re looking for a more natural alternative to traditional nail glue? Look no further than these DIY nail glue recipes that you can easily make at home with common household ingredients. Not only are these options cost-effective, but they also allow you to control the ingredients used in your nail products. Keep reading to discover some simple and creative recipes for making your own nail glue.
Gelatin and hot water mixture
Are you looking for an effective and affordable alternative to traditional nail glue that can be made at home? Look no further than this gelatin and hot water mixture. This simple DIY nail glue recipe can be made with just two ingredients and a few minutes of your time.
Ingredients:
| Gelatin powder | 1 tablespoon |
| Hot water | 1 tablespoon |
Instructions:
- Combine the gelatin powder and hot water in a small bowl.
- Stir the mixture until the gelatin dissolves completely.
- Using a small brush or toothpick, apply the gelatin mixture to your nails.
- Apply your desired nail art, such as rhinestones or glitter, onto the gelatin mixture while it is still wet.
- Allow the gelatin mixture to dry completely before moving your hands.
One of the benefits of this gelatin and hot water nail glue alternative is that it is completely natural and contains no harmful chemicals. Additionally, it can be easily removed with warm water and soap, making it a great option for those with sensitive skin. However, it should be noted that this homemade nail glue may not be as strong as traditional nail glue, so it may not be suitable for more heavy-duty nail art applications.
This gelatin and hot water mixture is a great option for those looking to experiment with new nail art techniques without breaking the bank. Give it a try and see for yourself how effective and easy it can be!
Toothpaste and flour paste
You might be surprised to learn that toothpaste and flour can be combined to create a homemade nail glue for your nail art. This simple DIY recipe is extremely easy to make and it can be used as an alternative to commercial nail glue.
To make this paste, you’ll need to gather these items:
- Toothpaste
- Flour
- Small bowl
- Measuring spoon
Once you have all the materials, you can start making your homemade nail glue. Here are the steps to follow:
- Measure out the ingredients: Take two teaspoons of flour and mix it with enough toothpaste to create a paste-like consistency.
- Mix thoroughly: Mix the flour and toothpaste together until it forms a thick paste. You want to make sure there aren’t any lumps or bumps in the mixture.
- Apply the glue: Apply a small amount of the paste onto the back of your artificial nail, and press it into place onto your natural nail. Hold it firmly for approximately 10 seconds to ensure it is secure.
This DIY nail glue is perfect for those who are looking for a natural, toxin-free option for their nail art. The flour helps to thicken the toothpaste, giving it a paste-like consistency, and the toothpaste helps to create a strong adhesive.
However, it’s important to remember that this homemade glue may not be as strong or long-lasting as commercial nail glues. Additionally, it may not work well for those with particularly oily nails.
Toothpaste and flour paste is an interesting alternative to traditional nail glue, and it’s definitely worth giving it a try if you’re feeling adventurous.
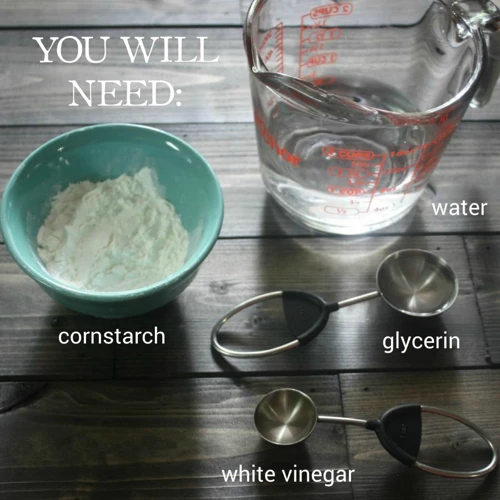
Baking soda and white vinegar mixture
One alternative to using nail glue for nail art is to make your own DIY mixture using baking soda and white vinegar. This mixture creates a temporary adhesive that can be used for attaching nail embellishments or even false nails.
To make this mixture, you will need equal parts of baking soda and white vinegar. Mix the two ingredients together until they form a thick paste. Apply the paste to your nails and press your chosen embellishments or false nails onto the paste. Hold them in place for a few seconds to allow the mixture to dry and harden.
Note: This mixture may not last for a long period of time and could require reapplication after a few hours. It is also important to note that baking soda can be abrasive to the nails if used frequently, so it is recommended to use this mixture sparingly.
Other alternatives to nail glue for nail art include natural ingredients such as coconut oil and honey mixture, aloe vera gel, and flaxseed oil and egg white mixture. These natural ingredients can be used as a base coat before applying nail embellishments or as a replacement for nail glue altogether.
Adhesive tapes such as double-sided tape, clear tape, and medical tape can also be used as alternatives to nail glue. These tapes are best for attaching nail embellishments that are small in size and can be easily attached using adhesive tape.
Finally, there are alternative nail art techniques such as press-on nails, nail stickers, and nail wraps. These techniques allow for easy application of nail embellishments without the need for any adhesive at all.
There are many alternatives to nail glue for nail art that can be used to create beautiful and unique nail designs. Experiment with different techniques and find the one that works best for you.
Alternatives to Nail Glue for Specific Nail Art Techniques
When it comes to specific nail art techniques, alternative options to traditional nail glue may be preferred. Whether it’s for press-on nails, nail stickers, or nail wraps, there are a multitude of options available. Discover how you can achieve your desired nail look without using traditional nail glue.
Press-on nails
Press-on nails are a popular alternative to traditional nail art, especially when a quick and easy solution is needed. These nails come in various shapes, sizes, colors, and designs, making them a versatile choice for many occasions.
How do they work?
Press-on nails are pre-designed and pre-glued nails that can easily be attached to your natural nails. They are made from materials like acrylic or plastic that mimic the look and feel of real nails.
How to apply press-on nails?
Here is a step-by-step guide on how to apply press-on nails:
- Start with clean and dry natural nails
- Select the right size of press-on nails for your natural nails and lay them out in order
- Apply a small amount of adhesive glue to the back of the press-on nail
- Press the nail onto your natural nail and hold it for a few seconds to ensure it sticks
- Repeat the process for all the nails
- File or trim the press-on nails to your desired shape
Benefits of press-on nails
Press-on nails have become increasingly popular due to their numerous benefits. They are a great alternative for those who do not have the time or resources to visit a nail salon regularly. They are also a more affordable option and can be easily removed when needed without damaging the natural nails.
Drawbacks of press-on nails
While press-on nails have their benefits, they also come with a few drawbacks. The adhesive glue used to attach the press-on nails can cause an allergic reaction to some people. These nails may also pop off easily if not applied correctly or if you engage in activities that require the use of your hands.
Conclusion
Press-on nails are an excellent alternative to nail glue for quick and easy nail art solutions. They are affordable, easy to apply, and come in various designs. However, they may not be suitable for everyone due to their drawbacks such as possible allergic reactions and ease of detachment.
Nail stickers
Nail stickers are a great alternative to nail glue, especially for those who prefer quick and easy nail art. These stickers come in various designs, colors, and patterns, making them a versatile option for all nail art lovers out there. They are easy to use and don’t involve any messy application processes like nail glue does.
One of the advantages of using nail stickers is that they are easily and widely accessible. You can get them at your local drugstore, beauty store, or online. All you need to do is select the design you want and apply them to your nails. There are even nail stickers that glow in the dark or change their color in response to heat, adding a fun twist to your nail art.
To use nail stickers, start by cleaning your nails and ensuring that they are dry. Then, select the sticker design you want and carefully peel it off from the sheet using tweezers or your fingers. Next, place the sticker on your nail and press down firmly to ensure it sticks properly. Trim any excess sticker with a nail file or scissors.
Note: It’s important to match the size and shape of the sticker to your nail for a seamless application.
Another advantage of using nail stickers is that they are easy to remove. Simply peel them off gently without damaging your nails. However, it’s important to note that nail stickers are not a long-lasting option like nail glue, as they tend to come off after a few days or if exposed to water. However, they are perfect for special events, holidays or just for a fun and quick nail art fix.
Summary: Nail stickers are easily accessible and come in a variety of designs, colors, and patterns. They offer a quick and easy way to achieve nail art without the mess of nail glue. It’s important to match the sticker size and shape to your nail and note that they are not a long-term solution.
Nail wraps
Nail wraps or nail decals are another alternative to nail glue for creating nail art designs. Nail wraps come in various sizes, shapes, and designs, making it easier to create intricate and detailed nail art without the hassle of using nail glue. Nail wraps are essentially stickers that are applied to the nail bed, creating the look of a professional nail art design.
One advantage of nail wraps is that they are easy to use and require no special skills. They come with instructions on how to apply them, and they can be easily removed without damaging the natural nail. They are also relatively inexpensive, making them an affordable alternative to nail glue.
When using nail wraps, it is important to ensure that the nails are clean and free from any oils or residue. This can be achieved by using a nail polish remover or rubbing alcohol and allowing the nails to dry completely before applying the wraps. Once the nails are ready, the wrap can be peeled off the backing sheet and placed on the nail.
Tip: To make sure that the wrap applies smoothly and without any wrinkles, it is important to apply it slowly and firmly, starting from the center of the nail and working outwards towards the sides. To ensure that the wrap stays in place, it is recommended to apply a clear topcoat over the wrap once it is applied.
Nail wraps can be used to create a variety of designs, including floral patterns, abstract designs, stripes, and more. They can be used alone or in combination with other nail art techniques such as stamping or stenciling to create unique and personalized designs.
Benefits of nail wraps:
- Easy to use
- Require no special skills
- Relatively inexpensive
- Come in various sizes, shapes, and designs
- Can be easily removed without damaging the natural nail
- Can be used alone or in combination with other nail art techniques
Nail wraps are an excellent alternative to nail glue for creating nail art. They are easy to use, affordable, and come in a wide variety of designs, making it easier for anyone to create professional-looking nail art designs at home.
Conclusion
In conclusion, there are several alternatives to nail glue that can be explored for those who are looking for a more natural or cost-effective solution. Natural ingredients like coconut oil and honey, aloe vera gel, and flaxseed oil and egg white mixture can help keep your nail art in place without exposing your nails to harmful chemicals. Adhesive tapes like double-sided tape, clear tape, and medical tape can also be a quick and easy solution.
For those who enjoy DIY projects, there are several nail glue recipes that can be made at home using ingredients that are readily available. Gelatin and hot water mixture, toothpaste and flour paste, and baking soda and white vinegar mixture are all easy to make and can provide a strong hold for your nail art.
Finally, for those who prefer specific nail art techniques like press-on nails, nail stickers, and nail wraps, there are alternatives to traditional nail glue that are designed specifically for these purposes.
Overall, there are many alternatives to nail glue that can be used to create beautiful nail art without the use of harsh chemicals or high costs. Whether you prefer natural ingredients, adhesive tapes, or DIY nail glue recipes, there is a solution that can work for you. So, give these alternatives a try and see which one works best for you.
Frequently Asked Questions
1. What can I use instead of nail glue for nail art?
You can use natural ingredients like coconut oil and honey mixture, aloe vera gel, and flaxseed oil and egg white mixture. Adhesive tapes like double-sided tape, clear tape, and medical tape can also be used as an alternative. You can also make DIY nail glue using gelatin and hot water mixture, toothpaste and flour paste, or baking soda and white vinegar mixture.
2. How do I make my own DIY nail glue?
You can make DIY nail glue using gelatin and hot water mixture, toothpaste and flour paste, or baking soda and white vinegar mixture. It’s important to follow the correct recipe and keep in mind that these remedies are not as strong as nail glue.
3. What is the difference between gel nail polish and regular nail polish?
Gel nail polish is a type of polish that is cured under a UV or LED light which makes it more durable than regular nail polish. Regular nail polish is air-dry and may chip or peel off more easily.
4. How long does nail art last when using tape?
Nail art using tape can last up to a week or longer depending on the type of tape used and the application technique. It’s important to make sure that the tape is secured properly and that the nail is completely dry before applying.
5. Can I use regular glue for nail art?
No. Regular glue is not meant for use on skin or nails and can cause damage or irritation. It’s important to use products specifically designed for nail art.
6. How do I remove press-on nails?
You can remove press-on nails by soaking them in warm, soapy water for a few minutes. Gently lift the edges of the nail and use a cotton ball soaked in acetone to remove any remaining glue.
7. How do I apply nail stickers?
Make sure your nails are clean and dry before applying the sticker. Peel the sticker from its backing and place it on your nail, smoothing out any bubbles or creases.
8. Are nail wraps easy to apply?
Nail wraps can be a bit tricky to apply at first, but with practice, it can become easier. Make sure to follow the instructions carefully and take your time applying the wrap to each nail.
9. Can aloe vera help strengthen my nails?
Yes, aloe vera contains vitamins and minerals that can help strengthen and nourish the nails. Apply a small amount of aloe vera gel to the nails and massage gently for a few minutes.
10. What is the benefit of using natural ingredients for nail art?
Natural ingredients can provide many benefits for nail art, such as nourishing and strengthening the nails. They are also safer to use than traditional nail products which may contain harmful chemicals.