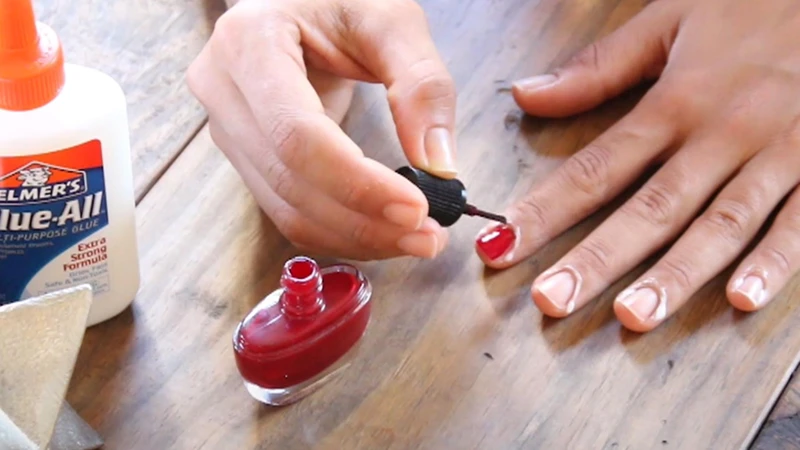
You’ve just finished a manicure and you’re about to apply your favorite nail gems, but suddenly you realize – you’re out of nail glue! Before you start to panic, did you know you can make your own nail glue at home? That’s right, with just a few simple ingredients and tools, you can create a budget-friendly, customizable, and eco-friendly nail glue that’s just as effective as store-bought ones. In this DIY guide, we’ll show you how to make nail glue step-by-step and provide you with some useful tips and precautions to ensure your safety and success. So, let’s dive into the world of homemade beauty and create your own nail glue!
Why make your own nail glue?
Making your own nail glue is a great option for those who love to have beautiful, trendy nails but don’t want to break the bank or use potentially harmful chemicals on their hands. Here are some reasons why you might want to consider making your own nail glue rather than purchasing it from a store.
One of the primary benefits of making your own nail glue is that it’s budget-friendly. Purchasing glue-on nails from a store can get costly, and the cost can increase even more if you need to buy separate nail glue. Making your own nail glue can help you save money while still achieving the same great look.
Another reason to make your own nail glue is that it’s customizable. Store-bought nail glue can have a one-size-fits-all approach which might not work for everyone. Making your own nail glue gives you the freedom to tailor the recipe to your needs and preferences. For example, you can adjust the consistency of the glue or add essential oils for a nice scent.
Making your own nail glue is also eco-friendly. Some store-bought nail glues come in plastic packaging and are not recyclable, which can add to the waste on our planet. By making your own nail glue, you can reduce your plastic usage and packaging waste. Additionally, you have control over the ingredients you use, which means you can avoid harsh chemicals that aren’t environmentally friendly.
Making your own nail glue is a fantastic way to have beautiful nails while also ensuring that the products you use are safe, affordable, and eco-friendly. You can also check out other articles about nail glue, such as “What are Glue on Nails Called?” or “What is the Difference Between Super Glue and Nail Glue?” to learn more about nail care.
It’s budget-friendly.
For those who want to have stunning manicures without breaking the bank, making your own nail glue is a great solution. With just a few simple ingredients and tools, you can achieve a strong and long-lasting hold for a fraction of the cost of store-bought nail glue. Not only is it cost-effective, but it also gives you the flexibility to adjust the consistency to suit your needs. Let’s dive into the details on how to make your own nail glue.
It’s customizable.
Customization is one of the main benefits of making your own nail glue. You have the ability to adjust the consistency and thickness to your liking. Using a cyanoacrylate base, which is a fast-drying adhesive, allows you to create a glue that is perfect for your needs. The addition of silica powder also allows you to customize the glue’s texture and grip.
By altering the amount of silica powder in the mixture, you can achieve a thinner or thicker consistency. This is particularly useful if you have specific nail needs. For example, if you have weak or brittle nails, you may prefer a thinner glue that is gentler on your nails. On the other hand, if you have strong and healthy nails, you may want a thicker glue for better adhesion.
Another way to customize your nail glue is by adding nail polish or glitter to the mixture. This can add an extra element of fun and personalization to your nail routine. Just be sure to mix thoroughly and add slowly, as too much nail polish or glitter can alter the consistency of the glue.
Making your own nail glue gives you the ability to create a personalized product that works best for your individual needs and preferences. So why not give it a try? For more information on using nail glue, check out our article on how to use UV nail glue.
It’s eco-friendly.
Making your own nail glue is not only budget-friendly and customizable but also an eco-friendly option. Unlike store-bought nail glues which often come in plastic packaging and contain harmful chemicals, making your own allows you to have full control over the ingredients you use and reduces plastic waste. By making your own nail glue, you can avoid the carbon emissions that come with the shipping and production of store-bought products.
To make your DIY nail glue even more eco-friendly, consider using silica powder as a natural alternative to traditional thickening agents. Silica powder is a natural mineral that is often used in cosmetics and personal care products and is biodegradable, making it a sustainable option for DIY nail glue.
In addition to using eco-friendly ingredients, be sure to store your nail glue in a cool, dry place to extend its shelf life and reduce the need for frequent replacements. When you’re ready to dispose of your DIY nail glue, be sure to check your local recycling guidelines to see if it can be recycled.
By making your own nail glue, you can reduce your environmental impact and create a product that is not only safe and effective but sustainable as well. If you’re interested in learning more about other DIY nail techniques, check out our article on how to use beetle’s nail art foil glue for a fun and creative way to add some variation to your nail designs.
What you’ll need
Making your own nail glue is easier than you think. It only requires a few key ingredients and tools that are easy to find. You will need cyanoacrylate and silica powder as your main ingredients for this DIY project. Cyanoacrylate is a type of strong adhesive that is commonly used in nail glue, and silica powder helps to thicken the mixture and give it a smooth consistency.
Aside from the ingredients, you will also need a few basic tools to prepare the glue. A mixing bowl and a wooden stick are needed to mix the ingredients together. You will also need a disposable container to transfer the finished glue into.
It’s worth noting that the quality of the glue you make depends on the quality of the ingredients used. Make sure to purchase high-quality cyanoacrylate and silica powder to ensure that your glue is strong and durable.
In addition to the ingredients and tools, it’s important to work in a clean and organized workstation. This will allow you to measure the ingredients accurately and mix them thoroughly, resulting in a high-quality end product.
Before you start making your own nail glue, it’s important to know the risks involved and to take some precautions. Avoid skin and eye contact with the ingredients, and always work in a well-ventilated area to prevent inhaling harmful fumes. Once you have all the necessary supplies, you can get started on making your own nail glue right away.
Ingredients: cyanoacrylate, silica powder
When it comes to making homemade nail glue, two key ingredients are necessary: cyanoacrylate and silica powder. Cyanoacrylate is a fast-acting adhesive that is commonly found in commercial nail glues, while silica powder helps to thicken the glue and improve its setting time. While these two ingredients are the foundation of any DIY nail glue recipe, there are still several other tools and tips to consider. For instance, you’ll need a mixing bowl, a wooden stick, and a disposable container to hold your finished glue. Additionally, it’s important to measure your ingredients carefully and work in a well-ventilated area to avoid any potential hazards. To learn more about how to make nail glue at home, check out our step-by-step guide. And if you’re curious about other nail glue-related topics, browse our links to find useful information on everything from storage to application.
Tools: mixing bowl, wooden stick, disposable container
To make your own nail glue, you will need a few essential tools that you may already have lying around your house. It’s important to have everything you need before starting the process to avoid any interruptions or mistakes. Here are the tools required for making nail glue at home:
- Mixing Bowl: A medium-sized mixing bowl is necessary to hold all the ingredients.
- Wooden Stick: A wooden stick or a toothpick works as a stirrer to mix the cyanoacrylate and silica powder thoroughly.
- Disposable Container: After mixing the ingredients, transfer the glue to a disposable container for storage. It’s essential to use a disposable container to avoid contamination and prolong the life of the glue.
Having these three basic tools is enough to make your own nail glue and enjoy the benefits that come along with it. However, if you’re interested in learning more about glue-on nails or how to store nail glue, be sure to check out how to make glue-on nails and how to store nail glue respectively, which are also available on our website.
It’s essential to keep in mind the precautions while making nail glue since it involves the handling of chemicals. The tools mentioned above must be disposable or reserved solely for this purpose and labeled to avoid any mistakes. Following the tips and tricks mentioned in the article is also advised for making a smooth consistency glue.
How to make nail glue
To make your own nail glue, you’ll need cyanoacrylate and silica powder, as well as a few basic tools: a mixing bowl, wooden stick, and disposable container. Here are the steps:
Step 1: Add silica powder to the mixing bowl. The powder helps to create a thicker consistency for the glue.
Step 2: Add cyanoacrylate to the bowl and mix well. Cyanoacrylate is a type of strong adhesive that bonds quickly to surfaces. It’s the main ingredient in most types of nail glue.
Step 3: Transfer the mixture to a disposable container. This makes it easier to apply the glue to your nails.
When you’re mixing the ingredients, be sure to measure carefully to ensure the right consistency. You’ll want to mix thoroughly to make sure the glue is smooth and free of lumps.
It’s important to note that nail glue can be irritating to the skin and eyes, so it’s best to work in a well-ventilated area and avoid contact with your skin or eyes. Always store your nail glue in a cool, dry place.
If you’re looking for more information about nail glue, such as how to use solid nail glue gel or why nail glue might be sticky, check out our other articles. You can also find out what can replace nail glue, or how long Gorilla Glue lasts on nails.
Step 1: Add silica powder to the mixing bowl.
As you venture into making your own nail glue, the first step is to add silica powder to the mixing bowl. Silica powder serves as a thickening agent that will help create a durable and strong bonding glue. It’s important to add the right amount of silica powder to ensure the glue’s consistency is just right. Adding too much powder can make the glue too thick, and too little powder will make it too thin. Once you’ve added the powder, it’s time to move onto the next step. If you’re curious about how to use solid nail glue gel, check out our article for a step-by-step guide.
Step 2: Add cyanoacrylate to the bowl and mix well.
To make the nail glue, the next step after adding the required amount of silica powder is to add cyanoacrylate to the mixing bowl with the silica powder. Cyanoacrylate is the main ingredient for creating the glue’s adhesive properties. It’s important to choose the right type of cyanoacrylate for this project, commonly known as super glue. This type of glue is available at most hardware or craft stores.
It is essential to be very careful while working with cyanoacrylate, as it bonds quickly and can be difficult to remove from surfaces and skin. When adding it to the mixing bowl with silica powder, make sure to stir quickly and thoroughly to avoid clumps. You can use a wooden stick to mix the ingredients together until it forms a smooth and consistent mixture.
Remember that the working time of cyanoacrylate is very short, so you have to be focused and ready to work quickly. Do not let the glue set in the mixing bowl because it can ruin your utensils. Once mixed, the glue can quickly become thick and difficult to work with.
If the glue becomes too thick or hard to work with, you can add a few drops of acetone to thin it out and adjust to your desired consistency. It’s important to note that adding too much acetone can weaken the glue’s adhesive properties.
After thoroughly mixing the cyanoacrylate with the silica powder, you’re ready to transfer the mixture to a disposable container. At this point, you want to work quickly to prevent the mixture from drying out or becoming too thick. You can also refer to our article on “How long does Gorilla glue last on Nails?” for more information on common nail glue alternatives or “What Can Replace Nail Glue?” for DIY options.
Step 3: Transfer the mixture to a disposable container.
After mixing the silica powder and cyanoacrylate thoroughly, it is time to transfer the mixture to a disposable container. The container can either be made of plastic or glass and should be large enough to hold the mixture without overflowing. A small plastic container that can be sealed tightly with a lid is a good option.
When transferring the mixture, it’s essential to be careful not to spill or drip it on your skin or clothes. The glue can bond quickly, and if it comes in contact with your skin, it can cause skin irritation and discomfort. It’s best to wear gloves while handling the mixture, to avoid skin contact.
Once you have transferred the mixture to the disposable container, label it with the date and contents. This will help you keep track of how long the glue has been stored and when it is time to throw it away. Make sure to keep the container in a cool, dry place away from children and pets.
It is important to note that homemade nail glue may not have the same staying power as commercially available nail glue. However, in case you run out of store-bought nail glue and want to use your homemade nail glue, be sure to apply it to clean, dry nails and hold your nails together for a few moments to allow the glue to set.
Now that your DIY nail glue is ready, you can use it to bond your nails to your heart’s content! Be sure to check out our article on what can replace nail glue if you’re interested in non-glue alternatives or our article on how to use solid nail glue gel if you want to learn about other types of nail glues. However, in case you’re wondering about the longevity of nail glue, read our article on how long does Gorilla glue last on nails or why is my nail glue sticky article to learn more about it.
Tips and Tricks

To ensure that your DIY nail glue is of the highest quality and provides excellent results, there are a few tips and tricks to keep in mind during the manufacturing process.
Measure ingredients carefully. When making your own nail glue, precision is key. You want to make sure that you measure the cyanoacrylate and silica powder properly, as it will affect the consistency and texture of your nail glue. Too much or too little of either ingredient can lead to a subpar end product.
Mix thoroughly for a smooth consistency. It’s important to mix the ingredients well to ensure that there are no lumps or clumps in the glue. This will ensure a smooth, even application when you are ready to use it. Use a wooden stick to stir thoroughly until the mixture is uniform and consistent.
Store in a cool, dry place. Proper storage is key to ensure that your DIY nail glue remains effective and long-lasting. Store it in a dry, cool place, away from direct sunlight or heat. Exposure to moisture or heat can cause the glue to become thick and clumpy, making it difficult to use.
With these tips and tricks, you can make your own high-quality nail glue that rivals even the most expensive store-bought options. Not only will it save you money, but it will also give you a sense of satisfaction in knowing that you made it yourself.
Measure ingredients carefully.
The key to making successful DIY nail glue lies in precise measurement of the ingredients. A little too much of one component can result in a glue that’s too thick or too runny, rendering it useless. It’s important to pay close attention to the quantity of cyanoacrylate and silica powder before you start the mixing process. Even simple mistakes can lead to a product that’s unfit for use, so it’s best to approach the process with utmost care and attention to detail. Here are some tips to help you measure your ingredients accurately and achieve a perfect consistency every time:
Mix thoroughly for a smooth consistency.
When mixing the ingredients for your DIY nail glue, it is important to mix thoroughly to achieve a smooth consistency, which will help ensure a strong and lasting hold for your nails. To do this, you can follow the steps below:
| Step | Instructions |
|---|---|
| Step 1 | Use a mixing bowl that is large enough to hold the ingredients without spilling over the sides. |
| Step 2 | Add the silica powder to the mixing bowl before the cyanoacrylate. |
| Step 3 | To prevent clumping, use a wooden stick to stir the powder into the glue before adding more cyanoacrylate. |
| Step 4 | Add the cyanoacrylate to the mixing bowl. |
| Step 5 | Stir the mixture vigorously with the wooden stick until the ingredients are well combined. |
| Step 6 | Continue to mix the ingredients for at least one minute to ensure a smooth consistency. |
By taking the time to properly mix your ingredients, you can create a nail glue that is both effective and easy to apply. Keep in mind that the consistency may vary slightly depending on the brands of cyanoacrylate and silica powder that you use. If necessary, you can adjust the ratio of ingredients to achieve the desired consistency.
Store in a cool, dry place.
Proper storage is essential to ensure the longevity and usefulness of your homemade nail glue. To keep your nail glue in the best condition, store it in a cool, dry place. Here are some tips for storing your DIY nail glue that can help you achieve best results.
- Avoid direct sunlight: Sunlight, heat, and humidity can cause your nail glue to dry out or become lumpy. Keep it in a shaded area away from direct sunlight and other sources of heat such as stoves or heaters.
- Use an airtight container: An airtight container helps prevent moisture or air from getting inside the bottle and causing the glue to harden or dry out. After transferring the nail glue mixture to a disposable container, ensure to fasten the lid tightly to prevent air from getting in.
- Store in a cool temperature: Extremely high or low temperatures can damage the structure and performance of the glue. Store in a place with a consistent temperature between 60-78 degrees Fahrenheit to maintain its quality.
- Avoid moisture: Moisture can activate the adhesives present in the glue. Hence, it is important to keep it away from water or any moist area.
Following these simple tips for storing your homemade nail glue will help you keep it in the best possible condition for as long as possible and ensure you get the best possible results for all your nail art projects.
Precautions
When making nail glue using cyanoacrylate and silica powder, it’s important to take necessary precautions to ensure your safety. Here are some safety measures you should keep in mind while making and using homemade nail glue.
Avoid contact with skin and eyes: Cyanoacrylate can be highly irritant to skin and eyes, so always avoid direct contact. If the glue comes into contact with your skin, wash it off immediately with soap and water. If it gets into your eyes, rinse them with water for at least 15 minutes and seek medical attention if necessary.
Always work in a well-ventilated area: When using cyanoacrylate, there’s a possibility of inhaling the fumes, which can cause respiratory problems. It’s essential to work in a well-ventilated room or set up a fan to ensure proper air circulation.
Keep out of reach of children: Homemade nail glue made with cyanoacrylate and silica powder should always be kept away from children. This type of adhesive can be harmful if ingested, and children may mistake it for regular glue.
By taking these precautions, you can safely make and use homemade nail glue without any mishaps. However, if you have any doubts or concerns about your safety, it’s always a good idea to seek professional advice.
Avoid contact with skin and eyes.
When it comes to working with any kind of adhesive, it’s always important to take proper precautions to avoid any accidents or mishaps. This is especially true with DIY glue made from cyanoacrylate and silica powder. One of the most important safety measures to take is to avoid any contact with your skin or eyes while using the glue. This can prevent any potential burns or irritation that could occur. Let’s take a closer look at some helpful tips and tricks for staying safe while using DIY nail glue.
Always work in a well-ventilated area.
When working with nail glue, it is important to always work in a well-ventilated area. The fumes from the glue can be harmful if inhaled in large quantities. Here are some tips for ensuring proper ventilation:
- Work in an open-air environment: If possible, work outside where there is plenty of fresh air circulating. This will minimize your exposure to fumes.
- Use a fan: If you’re working indoors, position a fan near your work area to help disperse the fumes. Make sure the fan is facing away from you so it doesn’t blow the fumes in your direction.
- Open windows and doors: If you’re working indoors, open windows and doors to increase air flow. This will help reduce the concentration of fumes in the area.
- Wear a mask: As an extra layer of protection, consider wearing a mask that covers your mouth and nose. This will help filter out any fumes that may be present.
Remember that the key to working with nail glue safely is to minimize your exposure to fumes. By taking these precautions and always working in a well-ventilated area, you can protect yourself from any potential harm.
Keep out of reach of children.
It is important to ensure that your homemade nail glue is kept out of reach of children as it can be harmful if ingested or come into contact with the skin or eyes. Follow these safety precautions to prevent any accidents or injuries:
| Tip | Description |
|---|---|
| 1 | Store the nail glue in a secure location that is inaccessible to children, preferably in a locked cabinet or drawer. |
| 2 | Avoid leaving the nail glue unattended, especially when children are around. |
| 3 | Explain to children the dangers of handling nail glue and teach them to never touch or play with it. |
| 4 | If a child ingests nail glue, call the poison control center immediately and provide as much information as possible about the product. |
Remember, prevention is the best way to ensure the safety of your children and other family members. Keep your homemade nail glue out of reach and always follow the necessary precautions to prevent any accidents or injuries.
Conclusion
In conclusion, making your own nail glue can be a cost-effective, versatile, and environmentally-friendly option for those looking to enhance their nail art game. By using readily available ingredients such as cyanoacrylate and silica powder, you can create a glue that is tailored to your specific needs and preferences. However, it is important to take precautions when making and using the glue, including avoiding contact with skin and eyes, working in a well-ventilated area, and keeping it out of reach of children.
Remember to measure your ingredients carefully and mix thoroughly for the best consistency. Once you have created your nail glue, store it in a cool and dry place for longevity.
Overall, creating your own nail glue is a fun and rewarding DIY project that can also save you money in the long run. Give it a try and see the difference it can make in your next nail art design!
Frequently Asked Questions
Can I make nail glue without cyanoacrylate?
No, cyanoacrylate is the main ingredient that binds the silica powder together to make nail glue.
What type of silica powder should I use?
You should use a fine-grain silica powder, such as fumed silica, which is available at most hardware stores.
Can I add glitter or pigment to my DIY nail glue?
Yes, you can add glitter or pigment to customize your nail glue. Just add it in after mixing the cyanoacrylate and silica powder together.
Can I reuse my disposable container for future batches?
No, it is best to use a new disposable container for each batch to ensure that your nail glue stays fresh and hygienic.
How long will my homemade nail glue last?
Your homemade nail glue should last about 6 months if stored properly in a cool, dry place.
Can I use my DIY nail glue for nail art?
Yes, you can use your DIY nail glue for nail art, as long as you test it first to make sure it works effectively for your desired technique.
Will my homemade nail glue dry clear or cloudy?
Your homemade nail glue should dry clear and glossy.
Is it safe to make my own nail glue?
As long as you take proper precautions and follow safety guidelines, making your own nail glue can be safe and eco-friendly.
Can I add essential oils for fragrance to my nail glue?
No, it is not recommended to add essential oils for fragrance, as they can interfere with the adhesive properties of the glue.
Can I use my DIY nail glue for acrylic or gel nails?
No, DIY nail glue is not recommended for use with acrylic or gel nails. It is best to use specialized products designed for those types of nails.